Advertisement
Quick Links
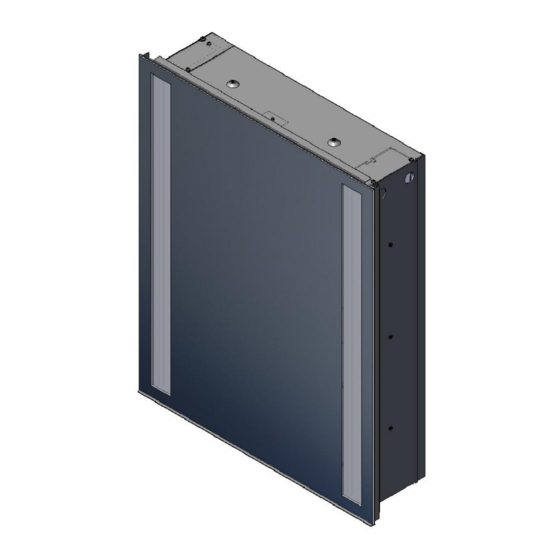
OPERATING INSTRUCTIONS
Mode d'emploi
SIDLER SideLight
Cabinet available in widths of:
Armoires de toilette disponibles dans les largeurs:
23 ¼", 31 ¼", 35 ¼", 47 ¼"
Please read instructions before proceeding
Lisez attentivement les instructions avant d'installer l'armoire de toilette
Save these instructions
Conservez ces instructions
V 1.4
1/16
Advertisement

Related Manuals for SIDLER SideLight

Summary of Contents for SIDLER SideLight
- Page 1 OPERATING INSTRUCTIONS Mode d’emploi SIDLER SideLight Cabinet available in widths of: Armoires de toilette disponibles dans les largeurs: 23 ¼”, 31 ¼”, 35 ¼”, 47 ¼” Please read instructions before proceeding Lisez attentivement les instructions avant d’installer l’armoire de toilette...
- Page 2 OPERATING INSTRUCTIONS Mode d’emploi IMPORTANT SAFETY INSTRUCTIONS – to reduce the risk of burns, fire, electric shock, or injury: • This product is for household use only • The maximum load is 1.5kg (3lbs) per glass shelve • WARNING – do not use outdoors •...
- Page 3 OPERATING INSTRUCTIONS Mode d’emploi List of all components to be installed Liste des pièces à installer Pos. 1 Pos. 2 Pos. 3 Pos. 4 Mirror Mounting bracket Glass shelf Screw Miroir Support de Etagère en verre montage Pos. 5 Pos. 6 Pos.
- Page 4 OPERATING INSTRUCTIONS Mode d’emploi Option 2 – Recessed Cabinet Option 2 - Armoire de toilette encastrée 1) The rough opening shall have the following dimensions according to the table. L’ouverture brute doit avoir les dimensions suivantes, selon le tableau en bas.
- Page 5 OPERATING INSTRUCTIONS Mode d’emploi 2) Remove the electrical cover. Enlever le couvercle de la pièce électrique. Electrical cover Couvercle électrique 3) Thread the wires through the side opening and connect them to the terminal block as shown in Step 3. Optional access is from the front, when removing the light cover and carefully taking off the LED strip.
-
Page 6: Pos. 4
OPERATING INSTRUCTIONS Mode d’emploi 6) To secure the cabinet, fasten the screws at the provided openings in the top and bottom profile. Serrez les vis dans les ouvertures prévues à cet effet. pos. 4 V 1.4 6/16... - Page 7 OPERATING INSTRUCTIONS Mode d’emploi Step 3 – Connect the Electric Cables 1) Connect all cables (live, phase, neutral and earth) in accordance with the diagram. neutral neutre L1 (Light) L2 (Outlet) Warning announcement: Installation must be performed by a qualified licensed electrician. Grounding instructions for a permanently connected product.
- Page 8 OPERATING INSTRUCTIONS Mode d’emploi 3ème étape – Brancher les câbles électriques 1) Brancher tous les câbles (live, phase, neutre et terre). neutre L1 (luminaire) L2 (prise) Avertissement: L’installation doit être effectuée par un électricien qualifié. Les instructions de mises à la terre pour un produit connecté en permanence.
- Page 9 OPERATING INSTRUCTIONS Mode d’emploi Dimmer switch wiring: Câblage du variateur: 1) To wire a dimmer switch 1-10V, please remove the device carrier to get access to the LED driver. Pour connecter un variateur 1-10V, veuillez enlever le support de l’appareil pour accéder à l’unité de contrôle LED. Device carrier Support d’appareil...
- Page 10 OPERATING INSTRUCTIONS Mode d’emploi Step 4 – Mount the mirror 4ème étape – montage du miroir 1) Carefully glide the mirror into the guidance. Introduire doucement le miroir dans sa conduite. Watch out for the overhanging belt attachement on the mirror, not to damage the cabinet frame lip.
- Page 11 OPERATING INSTRUCTIONS Mode d’emploi 2) When properly placed in guidance, glide the mirror up until it snaps into the assembly aid. Lorsqu’il est correctement place dans la guide, glissez le miroir jusqu’à ce qu’il s’enclenche dans l’aide à assemblage. Assembly aid Aide à...
- Page 12 OPERATING INSTRUCTIONS Mode d’emploi Step 5 – Add counter weight 5ème étape – ajouter un contrepoids 1) Place the counter weight in the holder and center it. Placer le contrepoids dans le support et centrer-le. 2) Once the counter weight is placed, the system will be in equilibrium and the mirror can be carefully released from its mounting aid.
-
Page 13: Pos. 10
OPERATING INSTRUCTIONS Mode d’emploi Step 7 – Final Assembly 7ème étape – assemblage final Carefully put the mirrored back wall back into the cabinet. The magnet will hold it in place once it has set in. Placez le panneau arrière en miroir soigneusement au fond de l'armoire. -
Page 14: Pos. 9
OPERATING INSTRUCTIONS Mode d’emploi Turn the rider (Pos. 9) 90° and position it at the desired height. Turn the rider (Pos. 9) once more 90° to set the position. Tournez le curseur (Pos. 9) de 90° et positionnez-le à la hauteur désirée. Tournez le coureur une fois de plus pour le fixer dans cette position. - Page 15 OPERATING INSTRUCTIONS Mode d’emploi Step 8 – Cleaning 8ème étape - Nettoyage 1) Do not use abrasive cleaners, scrapers, metal brushes, or any items or products that could scratch or dull the surface. 2) Do not allow the surface to come into contact with products such as acetone (nail polish remover), dry cleaning solution, lacquer thinner, gasoline, etc.
- Page 16 OPERATING INSTRUCTIONS Mode d’emploi LIMITED WARRANTY SIDLER will provide a two-year warranty in respect of defects associated with the Product, commencing from the date of delivery, subject to the following conditions: The Product must have been professionally mounted and installed by a certified licensed contractor in accordance with the Safety Standards Act, S.B.C.
Need help?
Do you have a question about the SideLight and is the answer not in the manual?
Questions and answers