
Subscribe to Our Youtube Channel
Related Manuals for Salora CRU628DAB


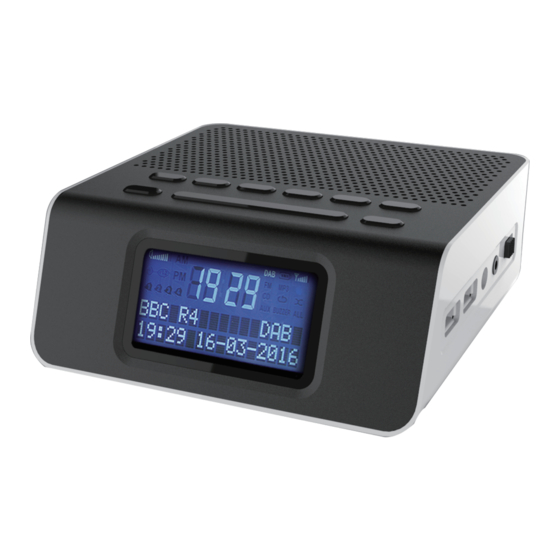
Summary of Contents for Salora CRU628DAB
- Page 1 DAB+/FM Alarm Clock Radio Instruction Manual CRU628DAB IMPORTANT: Please read all instructions carefully before use and keep for future reference...
- Page 2 Controls and Functions Instructions Guide 3 4 6 7 9 1. Standyby/ 4. Preset/Dimmer 8. Volume + Mode 5. Enter/Snooze 9. Next 2. Volume - 6. Info/Menu 10. USB Out 3. Scan 7. Previous 11. USB Out...
- Page 3 Instructions Guide Controls and Functions 3 4 6 7 9 13 14 13 14 13. DC In 14. Earphone Jack 15. Antenna 16. LCD Screen 13 14 17. Back Up Battery...
-
Page 4: Instructions Guide
Instructions Guide Please note all (Ref.) refer to the Controls and Functions mapping guide on Pages 1-2. Basic Operation Plug the power supply plug into the mains and the connector into the back of the system labelled DC IN (Ref.13). Power Supply ON/OFF at back of system (Ref.12). -
Page 5: Dab Radio
Instructions Guide Instructions Guide DAB Radio Press the ‘Standby/ Mode’ button (Ref.1) to switch to DAB Radio. Fully extend the antenna (Ref.15). To auto scan (if the unit hasn’t automatically done so, or shows no signal) press the ‘Scan’ button (Ref.3) and then release. This will start scanning up the frequency band and store all stations that have a good signal. - Page 6 Instructions Guide How to store a preset radio station Up to 10 preset stations can be set. To store a station that you are currently playing: Press and hold ‘Preset/Dimmer’ button (Ref.4). “Preset Empty Press ‘Prev’ (Ref.7) or ‘Next’ (Ref.9) button to change the “1” to the number you want to store the station as.
- Page 7 Instructions Guide FM Radio Press the ‘Mode’ button (Ref.1) to switch to FM. you do this FM frequency “87.5 MHz” will be displayed on the screen. Fully extend the antenna (Ref.15). To auto-scan press and release the ‘Scan’ button (Ref.3). This will then start scanning up the frequency band and play hold the ‘Next’...
- Page 8 Instructions Guide How to store a preset radio station Up to 10 preset stations can be set. To store a station that you are currently playing: Press and hold ‘Preset/Dimmer’ button (Ref.4). “Preset Empty Press ‘Prev’ (Ref.7) or ‘Next’ (Ref.9) button to change the “1” to the number you want to store the station as.
- Page 9 Instructions Guide FM Sensitivity This is a measurement of how well the tuner can pick up signals. The lower the number (it’s usually in the range of 9 to 11), the better. Press and hold the ‘Info/Menu’ button (Ref.6). To make your choice use the ‘Prev/Next’ buttons (Ref.7/9) to choose your option.
-
Page 10: Station Information For Dab And Fm Radio
Instructions Guide Station Information for DAB and FM Radio DAB Radio Press the ‘Info/Menu’ button (Ref.6) repeatedly to show the Bit Rate: Shows the data rate at which the signal is being transmitted. Bit Error Rate (BER): Provides details of the signal error rate. Channel and Frequency: Displays the station’s transmission channel number and frequency. - Page 11 Instructions Guide FM Radio Press the ‘Info/Menu’ button (Ref.6) repeatedly to show the Signal Strength: Displays a signal bar with the strength of the current station. Time and Date: Displays the time and the date. Frequency: Displays the station’s transmission frequency. Audio Type: Displays the audio type of the station you are listening to.
-
Page 12: Clock And Date Setting
Instructions Guide Clock and Date Setting Manually Setting the Date Ensure the unit is in working mode (i.e. listening to DAB/FM Radio). Press and hold the ‘Info/Menu’ button (Ref.6). Use the ‘Prev/Next’ buttons (Ref.7/9) to choose your option. Choose “SET TIME/DATE” and press the ‘Enter’ button (Ref.5). . -
Page 13: Manually Setting The Time
Instructions Guide Manually Setting the Time The time can be changed straight after changing the date. . Using the ‘Prev’ (Ref.7) or ‘Next’ (Ref.9) buttons, press until the required hour is displayed. (Ref.5) button. . Using the ‘Prev’ (Ref.7) or ‘Next’ (Ref.9) button press until the required minute is displayed. -
Page 14: Dual Alarm Setting
Instructions Guide Dual Alarm Setting Alarm 1/Alarm 2 Setting Ensure the radio is in working mode (i.e. listening to DAB or FM Radio and not in standby mode). Press and hold ‘Info/Menu’ button (Ref.6). Use the ‘Prev’ (Ref.7) or ‘Next’ button (Ref.9) to choose your option. Choose “SET ALARM1”... -
Page 15: Alarm Sound
Instructions Guide Alarm Sound, Snooze and Dual USB Ports Alarm Sound If the alarm is set to “DAB/FM” mode it will play DAB/FM Station. If there is no signal it will automatically revert to BEEPER. If two alarms are set, and ALARM 1 is sounding when ALARM 2 automatically. -
Page 16: Other Functions
Instructions Guide Other Functions Sleep Setting selection of set times up to 90 minutes from activation. In working mode, press and hold ‘Info/Menu’ button (Ref.6). Use the ‘Prev’ (Ref.7) or ‘Next’ (Ref.9) buttons to choose your option. Choose “SET SLEEP” and press the ‘Enter/Snooze’ button (Ref.5). Using the ‘Prev/Next’... -
Page 17: Display Brightness
Instructions Guide Display Brightness To change the display brightness, ensure the system is in standby. Press the ‘Dimmer/Preset’ button (Ref.4) to adjust the screen brightness. levels of brightness. System Reset Press and hold ‘Info/Menu’ button (Ref.6). Use the ‘Prev’ (Ref.7) or ‘Next’... - Page 18 Power Supply 100-240V AC INPUT 5V/2.5A DC OUTPUT Mode FM 87.5-108MHz DAB/DAB+ 174-240MHz Output Power Standby Mode Show Clock Black background white fonts, negative LCD...
-
Page 19: Important Safety Information
IMPORTANT SAFETY INFORMATION 1. Read these instructions. ADDITIONAL WARNINGS 2. Keep these instructions. The apparatus shall not be exposed to dripping or 3. Heed all Warnings. vases, shall be placed on apparatus. 4. Follow all instructions. Main plug is used to disconnect device and it 5. - Page 20 DAB+FM Wekkerradio GEBRUIKERSHANDLEIDING CRU628DAB BELANGRIJK: Lees deze instructies zorgvuldig door voordat u het apparaat gebruikt en bewaar deze voor toekomstige raadpleging ...
- Page 21 Productoverzicht en Functies 1. Stand-by/Modus 4. Preset/Dimmer Volume + 2. Volume- 5. Enter/Snooze Volgende 3. Scan 6. Info/menu 10. USB Uit 7. Vorige 11. USB Uit...
- Page 22 12. Aan/Uit 13. DC In 14. Ingang Hoofdtelefoon 15. Antenne 16. LCD Scherm 17. Back up batterij...
- Page 23 Instructiegids Let op: alle Referentie (Ref.) verwijzen naar de productoverzichten en Functies op pagina’s 1-2. Basis bediening Doe de stekker in het stopcontact en de adapter achter in het apparaat bij de ingang DC IN (ref.13). Zet de schakelaar “ON/OFF” (ref.12) aan de achterzijde van het apparaat aan. Trek de antenne (ref.15) volledig uit zodat deze kan draaien voor een optimaal FM ontvangst.
- Page 24 DAB Radio Druk op de“Stand-by/Modus” knop (Ref.1) om de radio om te zetten naar DAB Radio. Bij het eerste gebruik zullen alle beschikbare stations worden gezocht en opgeslagen. Trek de antenne (Ref.15) volledig uit Voor het zoeken (indien het apparaat dit nog niet automatisch heeft gedaan, of indien er geen signaal is) druk u op de “Scan”...
- Page 26 FM Radio Druk op de “Modus”knop (Ref.1) om de radio om te zetten naar FM. Indien u dit voor de eerste keer doet, zal de FM frequentie “87.5 MHz op het display verschijnen. Trek de antenne (Ref.15) volledig uit. Om een auto-scan te starten, drukt u op de “Scan”knop (Ref.13). Hierdoor zal de volledige frequentieband worden afgezocht en het eerst gevonden station met een sterk signaal weergeven.
- Page 27 Hoe moet u een voor ingesteld station opslaan U kunt tot 10 stations opslaan. Voor het opslaan van een station: Houd de “Preset/Dimmer”knop (Ref.4) ingedrukt. “Preset Empty 1”zal verschijnen op het scherm., het nummer zal knipperen. Druk op de “Vorige”en “Volgende” (Ref.7/9) om het nummer “1” te wijzigen naar het nummer waarin u het wilt wijzigen.
- Page 28 FM gevoeligheid Dit is een meetsysteem waardoor het beste een signaal kan worden gevonden. Hoe lager het nummer (normaliter van 9-11), hoe beter. Houd de “Info/Menu”knop (Ref.6). U kunt door middel van de “Vorige/Volgende”knoppen (Ref.7/9) uw keuze selecteren. Kies “FM SENSITIVITY”en druk op de “Enter”knop ( Ref.5). Om uw keuze te maken, drukt u op de “Vorige/Volgende”knoppen (Ref.7/9) om deze te laten oplichten, druk hierna op de “Enter/Snooze”knop.
- Page 29 Station Informatie van de DAB Radio en FM Radio DAB Radio Druk meerdere keren op de “Info/menu” knop (Ref.6) om de informatie te verkrijgen van de verschillende programma’s. Bit Rate: Geeft de snelheid weer waarmee data wordt verzonden. Bit Error Rate (BER): Geeft informatie met betrekking tot de BER waarden. Kanaal en Frequentie: Geeft het uitzendnummer van het station weer en de frequentie.
- Page 30 FM radio Druk meerdere keren op de “Info/menu” knop (Ref.6) om de informatie te verkrijgen van de verschillende programma’s. Signaal sterkte: De sterkte van het signaal van het huidige station wordt weergegeven op een signaal balk. Tijd en Datum: Toont de tijd en datum. Frequentie: Toont de frequentie van het huidige station.
- Page 31 Instellen Klok en Datum Handmatig instellen van de Datum Let op dat de radio aanstaat (bijv. luisteren naar DAB/FM Radio). Houd de “Info/Menu knop (Ref.6) ingedrukt. Door op de “Volgende”en “Vorige”knoppen (Ref.9/7) te drukken kunt u uw keuze selecteren. Kies “SET TIME/DATE”en druk op de “Enter”knop (Ref.5). Het jaartal zal knipperen op de display.
- Page 32 Handmatig instellen van de Tijd De tijd kan gelijk na het instellen van de datum worden ingesteld. Het uur zal knipperen op de display. Druk op de “Vorige”(Ref.7) of “Volgende”(Ref9) knop tot het juiste uur op de display verschijnt. Om te bevestigen, drukt u op de “Enter/Snooze” knop (Ref.5). De minuten zullen knipperen op de display.
- Page 33 Instellen dubbel alarm Instellen Alarm1/Alarm2 Let op dat de radio aanstaat (bijv. luisteren naar DAB/FM Radio). Houd de “Info/Menu knop (Ref.6) ingedrukt. Door op de “Volgende”en “Vorige”knoppen (Ref.9/7) te drukken kunt u uw keuze selecteren. Kies “SET ALARM1”en druk op de “Enter/Snooze” knop (Ref.5). Om het alarm aan te zetten, drukt u op de “Volgende”...
- Page 34 Geluid Alarm, Snooze en dubbele USB poort. Geluid Alarm Indien het alarm is ingesteld op “DAB/FM” modus, zal het een DAB of FM station weergeven. Indien er geen signaal is zal het automatisch de zoemer weergeven. Indien er twee alarmen zijn ingesteld, en ALARM 1 gaat af terwijl ALARM 2 ook afgaat, zal ALARM 1 automatisch worden uitgeschakeld.
- Page 35 Overige functies Sleep functie instellen Door middel van deze functie kunt u uw radio instellen om na een ingestelde tijd automatisch uit te schakelen, maximaal tot 90 minuten. Terwijl de radio aan staat, houdt u de “Info/Menu” knop (Ref.6) . Gebruik de “Vorige” (7) en “Volgende”...
- Page 36 Technische specificaties Stroomvoorziening 100-240V AC INPUT 5V/2.5A DC OUTPUT Frequentiebereik FM 87.5 – 108 MHz DAB/DAB+ 174-240 MHz Uitgang vermogen Stand-by modus Weergave klok Zwarte achtergrond witte karakters, Negatieve LCD Belangrijke veiligheid informatie 1. Lees deze instructies. 2. Bewaar deze instructies. 3.
- Page 37 Dit symbool betekent dat dit product bij het gewone huishoudelijk afval dient te worden weggegooid. Let op dat dit product op een verantwoorde manier kan worden gerecycled, informeer bij uw lokale BELANGRIJK; lees deze in zorgvuldig door en bewaar deze voor eventuele latere raadpleging. Risico op elektrische schok.
- Page 38 Radio Réveil DAB+/FM Manuel d’instructions CRU628DAB Important: Veuillez lire avant utilisation et conserver ces instructions de sécurité pour référence future ...
- Page 39 Commandes et fonctions 1. Veille/Mode Préréglage/Variateur Volume+ 2. Volume- Entrer/Répétition de l’alarme Suivant 3. Balayage Info/Menu 10. Sortie USB Précédent 11. Sortie USB...
- Page 40 Commandes et fonctions 12. Marche/Arrêt 13. Prise DC In 14. Prise Casques 15. Antenne 16. Écran LCD 17. Piles Alimentation de secours...
- Page 41 Instructions Veuillez noter que toutes les références (Ref.) font référence à la guide Commandes et Fonctions de pages 1-2. Fonctionnement de base Branchez la fiche dans la prise murale et insérez le connecteur à l’arrière de l’appareil indiqué DC IN (Ref.13) Mettez l’appareil sous tension à...
- Page 42 Radio DAB Appuyez sur le bouton Veille/Mode (Standby/Mode) (Ref.1) pour passer à Radio DAB. Pour la première utilisation la radio commence une recherche automatique de toutes les stations, les stations seront sauvegardées. Déployez complètement l’antenne (Ref.15). Recherche automatique ( si l’appareil ne commence pas la recherche automatique, ou s’il n’y a pas de signal) appuyez sur le bouton Balayage (Scan) (Ref.13) et relâchez-le.
- Page 43 Comment mémoriser une sta on préréglée ? C’est possible de programmer jusqu’à 10 Pour mémoriser le sta que vous écoutez maintenant : Appuyez et tenez enfoncé le bouton Préréglage/Variateur (Preset/Dimmer) (Ref.4). l’écran affiche « Preset Empty 1 », le numéro clignote. Appuyez sur le bouton «...
- Page 44 Radio FM Appuyez sur le bouton « Mode »(Ref.1) pour passer en mode FM. La première fois que vous utilisez la radio en mode FM, la fréquence « 87.5 MHz » s’affiche sur l’écran. Déployez l’antenne (Ref.5) complètement. Pour une balayage automatique appuyez et relâchez le bouton « Balayage »(Scan) Ref.3). La recherche automatique de la bande fréquence commence, vous écoutez la première station trouvée avec un signal fort.
- Page 45 Comment mémoriser une station préréglée ? C’est possible de programmer jusqu’à 10 stations. Pour mémoriser le station que vous écoutez maintenant : Appuyez et tenez enfoncé le bouton Préréglage/Variateur (Preset/Dimmer) (Ref.4). l’écran affiche « Preset Empty 1 », le numéro clignote. Appuyez sur le bouton «...
- Page 46 C’est un système de mesure de la capacité de l’appareil de capter les signaux. Plus le chiffre est faible (normalement les valeurs varient entre 9 et 11), plus le résultat est meilleur. Appuyez et tenez enfoncé le bouton « Info/Menu »(Ref.6). Pour onner votre choix, ez les boutons ‘Précédent/Suivant »(Prev/Next) (Ref.7/9).
- Page 47 Information de la station pour DAB et FM Radio DAB Appuyez sur le bouton « Info/Menu » (Ref.6) plusieurs fois pour l’affichage de l’information de divers programmes. Débit Binaire : Affiche le débit binaire du signal diffusé. Erreur de signal : Affiche l’erreur de signal capté par la radio. Canal et Fréquence : Affiche le numéro et la fréquence de la station.
- Page 48 Radio FM Appuyez sur le bouton « Info/Menu » (Ref.6) plusieurs fois pour l’affichage de l’information de divers programmes. Puissance du signal : Affiche une barre avec la puissance du signal de la station actuelle. Heure et Date : Affiche l’information de l’heure et le date. Fréquence : Affiche la fréquence de la radio diffusée.
- Page 49 Réglage Heure et Date Régler Date manuellement Assurez-vous que l’appareil est en opération (écoutez la radio DAB/FM). Appuyez sur le bouton « Info/Menu »(Ref.6) et tenez enfoncé. Utilisez les boutons « Précédent/Suivant »(Prev/Next) (Ref.7/9) pour sélectionner votre option désirée. Sélectionnez l’option « SET TIME/DATE »et appuyez sur le bouton « Entrer »(Enter) (Ref.5). L’an clignote sur l’écran.
- Page 50 Réglage de l’heure manuellement Vous pouvez changer l’heure jusqu’après la réglage de la date. L’Heure clignote sur l’écran. En utilisant les boutons « Précédent/Suivant »(Prev/Next) (Ref.7/9) appuyez jusqu’à ce que l’heure correcte s’affiche sur l’écran. Pour confirmer l’heure, appuyez sur le bouton « Entrer/Répétition de l’alarme »(Enter/Snooze) (Ref.5).
- Page 51 Réglage d’alarme double Réglage Alarme 1/Alarme 2 Assurez-vous que l’appareil est en opération (écoutez la radio DAB/FM). Appuyez sur le bouton « Info/Menu »(Ref.6) et tenez enfoncé. Utilisez les boutons « Précédent/Suivant »(Prev/Next) (Ref.7/9) pour sélectionner votre option désirée. Sélectionnez l’option « SET ALARM 1 »et appuyez sur le bouton « Entrer »(Enter) (Ref.5). Pour activer l’alarme, appuyez sur le bouton «...
- Page 52 Sonnerie Alarme, Répétition de l’alarme et Port USB Double Sonnerie Alarme Si l’alarme est réglée en mode « DAB/FM » la station DAB/FM sonnera. S’il n’y a pas de signal, l’appareil se place automatiquement en mode « SIGNAL SONORE ». Lorsque deux alarmes sont été...
- Page 53 Autres fonctions RÉGLAGE ET UTILISATION FONCTION SLEEP (ARRÊT AUTOMATIQUE) Cette fonction coupera la radio automatiquement après une durée prédéterminée jusqu’à 90 minutes. En mode opération, appuyez et tenez enfoncé le bouton « Info/Menu »(Ref.6). Utilisez les boutons « Précédent »(Prev) (Ref.7) ou « Suivant »(Next) (Ref.9) pour sélectionner votre option.
- Page 54 Spécifications Techniques Source d’alimentation 100-240V AC INPUT 5V/2.5A DC OUTPUT Gamme de Fréquence FM 87.5 – 108MHz DAB/DAB+ 174-240MHz Puissance Audio Mode Veille Affichage l’Horloge Écran LCD Fond noir écriture blanche, LCD négative Information de sécurité important 1. Lisez ces instructions. 2.
- Page 55 IMPORTANT : lisez ces instruc ons a e et tenez-les pour référence future . risque de choque électrique. N’ouvrir pas. lisez n vement tous les instruc avant usage et tenez-les pour référence future. pour l’entre en, ez exclusivement les pièces de rechange originaux iden ATTENTION RISQUE DE CHOC ÉLECTRIQUE NE PAS OUVRIR...
Need help?
Do you have a question about the CRU628DAB and is the answer not in the manual?
Questions and answers