Table of Contents
Advertisement
Quick Links
Advertisement
Table of Contents

Subscribe to Our Youtube Channel
Related Manuals for Cole Parmer 52411-09


Summary of Contents for Cole Parmer 52411-09
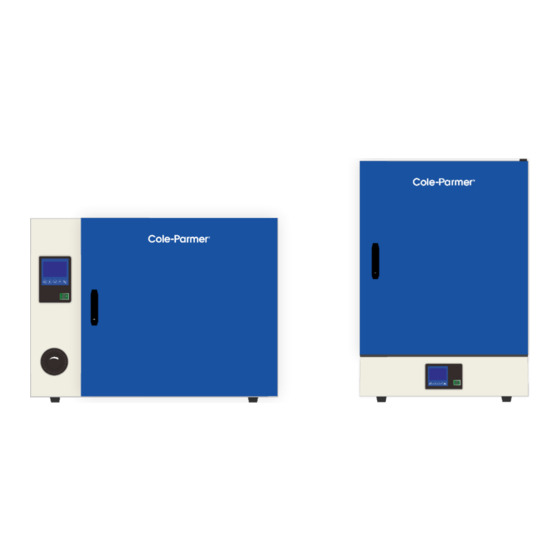
- Page 1 52411Dryingoven_ver_1.0 Forced Air Oven Natural Convection Oven User Manual...
-
Page 2: Warranty
52411Dryingoven_ver_1.0 1 Warranty Thank you for purchasing a Cole-Parmer instrument. In normal use conditions, the instrument is guaranteed for a period of 24 months started from the date of purchase. The warranty is valid only if the product is original. It does not apply to any product or parts of it that have been damaged due to incorrect installation, improper connections, improper use, accident or abnormal conditions of operation. -
Page 3: Electrical Installation
Before connection please ensure that the line supply corresponds to that shown on the rating plate located on the back of the unit. Power requirements Model Wattage Model Wattage Model Wattage 52411-09,10 600W 52411-17,18 2050W 52411-00,01 850W 52411-11,12 850W 52411-19... -
Page 4: Instruction For Safety
52411Dryingoven_ver_1.0 3.3 Instruction for Safety 3.3.1 Danger! (The improper use of this unit may cause property damage and/or personnel injury) 1. The product must be safely grounded (The Hot line or the Neutral line should not be the grounded before using the instrument). 2. -
Page 5: Product Introductions
52411Dryingoven_ver_1.0 3.3.3 Caution! (Abnormal operation may influence the product lifespan.) 1. The product should be placed on solid surface to keep it horizontal. 2. Aggressively opening or closing the door may cause damage to the door, oven or injury to users. -
Page 6: Display Introduction
52411Dryingoven_ver_1.0 4.2 Display and commands 4.2.1 Display introduction Timer Temperature Temperature Set Running Buzzer/MUTE status ALARM Fan Status www.coleparmer.com... - Page 7 52411Dryingoven_ver_1.0 4.2.2 COMMANDS and DESCRIPTION 1.The button permits the working parameters setting and to enter/escape from the programs (PRO version only). 2.The button permits to quickly change the digit (Program, units, tens, etc.) of the value of the parameter you are editing. In combination with the key allows access to menus with password.
-
Page 8: Specifications
52411Dryingoven_ver_1.0 4.3 Specifications Forced Air Drying Oven 52411-09 52411-11 52411-13 52411-15 Model 52411-10 52411-12 52411-14 52411-16 Electrical Requirement 120V 60Hz,220-240V 50-60Hz Temperature range RT+10~250℃ ℃ Temperature fluctuation Power consumed 600W 850W 1100W 1550W 120V – 16AWG, 120V – 14AWG, Cable Replacement 220V –... -
Page 9: Setting Of Parameters
52411Dryingoven_ver_1.0 Natural Convection Drying Oven 52411-00 52411-02 52411-04 52411-06 Model 52411-08 52411-01 52411-03 52411-05 52411-07 220-240V Electrical Requirement 120V 60Hz,220-240V 50-60Hz 50/60Hz Temperature range RT+10℃~200℃ ±0.5°C Temperature stability Power consumed 850W 1000W 1400W 2000W 2200W 120V – 16AWG 120V – 14AWG 120V –... -
Page 10: Temperature Setting
52411Dryingoven_ver_1.0 NOTE: the value “00:00” indicates the operating mode is "continuous", that means once you start operating cycle by the START / STOP button, the system will continues maintaining the set temperature until it is stopped manually. 3.If you set the timer, such as one hour, the instrument will reach the set temperature and maintain it for one hour. -
Page 11: Alarm / Faults
52411Dryingoven_ver_1.0 Delay of heating cycle start It’s possible to set a delay (hour and minutes) of heating cycle start. for few seconds until the time position shows “LK Simultaneously Press 0000” confirm the“0000” password pressing shortly one time On the top right part of display the parameter “dy” (delay) appears close to value 00:00. keys. -
Page 12: Probe Calibration
52411Dryingoven_ver_1.0 6.Calibration 6.1 Probe Calibration Follow the instructions below to adjust the temperature readout. These steps are only necessary in the event there is a discrepancy between the display and measurements taken with an alternate device. For example: a thermometer placed inside the oven with a different measurement than the controller. -
Page 13: Clean And Maintenance
52411Dryingoven_ver_1.0 7 Clean and maintenance 1. Make sure to take proper maintenance and cleaning of the instrument to guarantee its conditions. 2. The inner chamber of the instrument is made of stainless steel, so it can be cleaned with any detergent provided which is not aggressive and/or corrosive. -
Page 14: Troubleshooting Guide
52411Dryingoven_ver_1.0 8 Troubleshooting Guide Symptoms Possible causes Remedies Power socket is not energized or Repair socket plug is in poor contact. Chamber power line broken or Reinsert plug. plug is not inserted properly. Power switch is broken (or is not Have professional technician fix. - Page 15 52411Dryingoven_ver_1.0 9 Contacts United States – Cole-Parmer, 625 East Bunker Ct, Vernon Hills IL, 60061 T: 800-323-4340 E: sales@coleparmer.com W: coleparmer.com EU – Antylia Scientific GmbH, Futtererstr. 16, 97877 Wertheim, Deutschland T: +49 9377 9203-0 E: cde.sales@antylia.com W: coleparmer.de UK – Antylia Scientific, 9 Orion Court, Abuscade Road, Colmworth Business Park, St Neots PE19 8YX T: +44 (0) 1480 277339 E: uk.sales@antylia.com W: coleparmer.co.uk France –...
Need help?
Do you have a question about the 52411-09 and is the answer not in the manual?
Questions and answers