Table of Contents
Advertisement
Quick Links
Advertisement
Table of Contents

Related Manuals for thomann Startone MK-400


Summary of Contents for thomann Startone MK-400
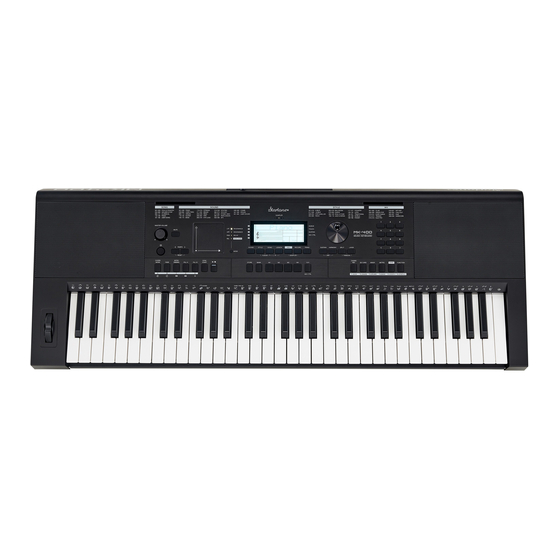
- Page 1 MK-400 keyboard user manual...
- Page 2 Musikhaus Thomann Thomann GmbH Hans-Thomann-Straße 1 96138 Burgebrach Germany Telephone: +49 (0) 9546 9223-0 E-mail: info@thomann.de Internet: www.thomann.de 14.07.2021, ID: 515755...
-
Page 3: Table Of Contents
Table of contents Table of contents General information......................5 1.1 Further information......................5 1.2 Notational conventions....................5 1.3 Symbols and signal words................... 6 Safety instructions......................... 7 Features............................8 Assembly instructions......................9 Connections and operating elements................ 11 Connection options......................19 Operating ..........................21 7.1 Turning the keyboard on / off.................. - Page 4 Table of contents 7.15.2 Changing the time signature................35 7.16 Albums........................... 35 7.17 Songs..........................36 7.17.1 Selecting, playing and stopping songs............36 7.17.2 Playback mode......................36 7.17.3 Volume........................37 7.17.4 Learning mode......................37 7.18 Mix pattern........................39 7.18.1 Mix sections....................... 39 7.18.2 Mix tracks........................
-
Page 5: General Information
1.1 Further information On our website (www.thomann.de) you will find lots of further information and details on the following points: Download This manual is also available as PDF file for you to download. -
Page 6: Symbols And Signal Words
General information Instructions The individual steps of an instruction are numbered consecutively. The result of a step is indented and highlighted by an arrow. Example: Switch on the device. Press [Auto]. ð Automatic operation is started. Switch off the device. Cross-references References to other locations in this manual are identified by an arrow and the speci‐... -
Page 7: Safety Instructions
Safety instructions Safety instructions Intended use This device is intended to be used for electronic sound generation using a piano key‐ board. Use the device only as described in this user manual. Any other use or use under other operating conditions is considered to be improper and may result in per‐ sonal injury or property damage. -
Page 8: Features
Features Features The keyboard is characterized by the following features: 61 keys with touch velocity LCD display Pitch bend and touchpad 64-voice polyphony 580 sounds + 5 sampling 180 styles 180 songs 3 demo songs 310 albums 30 mix patterns 24 performance memory locations Record and playback function Layer and Split mode... -
Page 9: Assembly Instructions
Assembly instructions Assembly instructions Unpack and check carefully there is no transportation damage before using the unit. Keep the equipment packaging. To fully protect the product against vibration, dust and moisture during transportation or storage use the original packaging or your own packaging material suitable for transport or storage, respectively. - Page 10 Assembly instructions The batteries do not have to be removed from the keyboard when using the power adapter. keyboard...
-
Page 11: Connections And Operating Elements
Connections and operating elements Connections and operating elements Overview 499-560 COMBI 567-580 DRUMS 581-585 USER SOUND SIDECHAIN Left control panel 499-560 COMBI 567-580 DRUMS 581-585 USER SOUND & SIDECHAIN ö < Main switch. Turns the device on and off. 2 [MASTER VOLUME] Rotary control to adjust the overall volume MK-400... - Page 12 Connections and operating elements 3 [MUTE] Button to mute the output signal 4 [TEMPO] / Buttons for adjusting the tempo. Press simultaneously to reset the Tempo to the default setting. 5 Touchpad After selecting the effect sets using [MODE], you can control the selected effects in real time using the touchpad. 6 [MODE] Press [MODE] repeatedly to select a group of effect sets.
- Page 13 Connections and operating elements 15 [STYLE] Button to call up the style mode Press [STYLE] and [SONG] simultaneously to call up the pre-programmed albums. 16 [SONG] Button to call up the song mode Press [SONG] and [STYLE] simultaneously to call up the pre-programmed albums. 17 [LESSON] While song playback is paused, press the button to enter or exit the practice mode.
- Page 14 Connections and operating elements Right control panel. > 28 Rotary control for setting and selecting values and data sets 29 [SUSTAIN] Button to activate / deactivate the Sustain function Press [SUSTAIN] and [HARMONY] simultaneously to activate / deactivate Arpeggio effects. 30 [HARMONY] Button to activate / deactivate the harmony mode 31 [SPLIT]...
- Page 15 Connections and operating elements 36 [METRO] Button to activate / deactivate the metronome. MIX mode: Press the button to mute or unmute the ‘T4.BASS’ bass track during playback. 37 [DEMO] Button to activate / deactivate the demo mode. MIX mode: Press the button to mute or unmute the ‘T5.SYNTH 1’ synth track during playback. 38 [FUNCTION] Button to call up the functions menu MIX mode: Press the button to mute or unmute the ‘T6.SYNTH 2’...
- Page 16 Connections and operating elements Display 40 LEDs [A]…[E] Light up depending on the selected section ‘A’ … ‘E’ in mix mode. 41 ‘SOUND / STYLE / DEMO / SONG / MIX’ Sound, Style, Demo, Song and Mix number display. 42 ‘AUDIO REC’ Recording display.
- Page 17 Connections and operating elements 53 Note display 54 ‘LESSON 123 / L/R’ Learning mode display for left and right hand 55 ‘TEMPO’ Tempo display 56 ‘MEMORY / LOCK Q.S.’ Memory location display 1 to 4 and Quick Settings 57 ‘LAYER / SPLIT / HARMONY / ARP / DSP’ Display of layer mode, split mode, harmony mode, arpeggio mode and DSP 58 LED [ALBUM] Lights up when an album is selected...
- Page 18 Connections and operating elements 66 [AUX IN] Input sockets for connecting external audio devices such as MP3 player, designed as 3.5 mm jack sockets, unbalanced 67 [MIC IN] Input socket for a microphone, designed as 1/4" jack socket, unbalanced. The signal of the connected microphone is reproduced via the built-in loudspeakers of the keyboard. 68 [12V] Connection socket for the 12 V plug-in power supply keyboard...
-
Page 19: Connection Options
Connection options Connection options Computer via USB-MIDI You can connect the keyboard to a PC for data exchange via the USB interface. NOTICE! To prevent damage to the speakers, turn the volume down to ‘Mini‐ mum’ before you connect other devices to the keyboard. Sustain pedal Use the connection socket [SUSTAIN] to connect a sustain pedal to the keyboard. - Page 20 Connection options Microphone Use the connection socket [MIC IN] to connect a microphone to the keyboard. Since the input does not provide phantom power for condenser micro‐ phones, the connection is only suitable for dynamic microphones. NOTICE! To prevent damage to the speakers, turn the volume down to ‘Mini‐ mum’...
-
Page 21: Operating
Operating Operating 7.1 Turning the keyboard on / off Press to turn the keyboard on. ð The display lights up. Press again to turn the keyboard off. To prevent damage to the speakers, turn the volume down to ‘Minimum’ before you switch the keyboard on. If the display keeps blank when you turn the keyboard on, check the power supply. -
Page 22: Demo Pieces
Operating 7.3 Demo pieces The keyboard offers a total of three demo songs. The demo songs show the sound and the pitch range of the keyboard. Press [DEMO] to activate the Demo mode. ð All demo songs are repeated continuously. The display shows the currently playing demo piece. -
Page 23: Pitch Bend Wheel
The sound list is available for download on the product page of our homepage www.thomann.de. 7.7 Layer mode With the layer mode you can set the "layering" of sounds. -
Page 24: Split Mode
The sound list is available for download on the product page of our homepage www.thomann.de. Press [SPLIT] again to disable the Split mode. When using Layer and Split mode, only the area to the right of the split point plays the layered sounds. -
Page 25: Twinova
Operating 7.10 TWINOVA In TWINOVA mode, the keyboard is divided into two areas with the same sound and the same pitch to enable 4-handed playing, for example in class. The default split point lies between piano keys [E4] and [F4]. You can change the preset split point in the function menu (see Ä... -
Page 26: Sampler
Operating Layer / split mode and TWINOVA mode cannot be used at the same time. 7.12 Sampler With the built-in microphone, you can record up to five user sounds and then play them back using the keyboard. The user sounds are saved at the end of the sound library. -
Page 27: Playing A Sample
Operating 7.12.2 Playing a sample After recording, the keyboard automatically returns to normal mode. ð The display shows the user sound that has just been recorded. Play the keyboard to instantly apply the user sound. Use the rotary control, the numeric keys or on the numeric keypad to select one of the five user sounds. -
Page 28: Arpeggio Mode
Operating 7.13.1.1 Harmony types Press [FUNCTION] to enter the function menu. Select the ‘HrmDuet’ menu with the rotary control and set the desired har‐ mony type with on the numeric keypad. The available harmony types can be found in the function menu (see Ä... -
Page 29: Starting Auto Accompaniment (Rhythm Track Only)
Operating The Style list is available for download on the product page of our homepage www.thomann.de. The Auto Accompaniment feature gives you a full backing band. To use it, you only need to play chords with your left hand while playing with your right hand. -
Page 30: Starting Auto Accompaniment (All Tracks)
Operating 7.14.2 Starting Auto Accompaniment (all tracks) Press [STYLE] to activate the Style mode. ð The display shows the currently selected style. Use the rotary control, of the numeric keypad or the numeric buttons to select the desired style. Press [CHORD MODE] to turn the chord detection mode on. The area defined for the left hand becomes the Auto Accompaniment area and chords played here are automatically recognized and used as a base for the Auto Accompani‐... -
Page 31: Chord Name
Operating 7.14.4 Chord name The chord name says everything about a chord: The root, gender of the chord (major or minor), is it an augmented or diminished chord, seventh chord, etc. The illustration shows that this is a C chord (1). The gender of the chord (2, here minor) is shown next to it. - Page 32 Operating Major seventh chord (C7) Play the root note of the chord and the next lower white key at the same time. Minor Seventh Chord (Cm7) Play the root note of the chord and the next lower white and black key at the same time.
-
Page 33: Fade
Operating 7.14.7 Fade FADE IN Press [FADE] while no Style is played. ð The display shows ‘FADE’ . When the style begins to play, the Style volume is increased slowly from 0 to normal volume. When the fade in is complete, the function turns off. FADE OUT Press [FADE] while a Style is played. -
Page 34: Quick Setting
Operating 7.14.9 Quick Setting If this function is activated, suitable right-hand sounds are automatically added to the selected styles. Press [Q.S.] to call up the quick setting function. ð The display shows ‘Q.S.’ . Press one of the [M1] … [M4] buttons to call up the panel settings (including sound and effects) that correspond to the current style. -
Page 35: Changing The Time Signature
The album list is available for download on the product page of our homepage www.thomann.de. ð The keyboard sets the best setting for the selected sound. Press [STYLE] and [SONG] simultaneously again to exit the album menu and deactivate the function. -
Page 36: Songs
Operating 7.17 Songs 7.17.1 Selecting, playing and stopping songs The keyboard offers a total of 180 songs. Each song can be practised in learning mode. Press [SONG] to activate the song mode. Use the rotary control or of the numeric keypad to select the desired song. -
Page 37: Volume
Operating 7.17.3 Volume Press [MIXER] to call up the mixer menu. Select the ‘MusicVol’ menu with the rotary control and set the desired volume with on the numeric keypad. Alternatively, hold down [MIXER] until the display shows ‘MusicVol’ and set the desired volume with on the numeric keypad. - Page 38 Operating Lesson 2 - hitting the right notes Press [LESSON] again to enter the learning mode 2. ð The display shows ‘LESSON 2’ . In this mode, it is only rated whether you hit the right notes, but not whether you play them at the right time. The prac‐ tising song continues only when you play the right note.
-
Page 39: Mix Pattern
Operating Rating The rating is based on the level you have achieved during practising: Level 1: Try it again. Level 2: OK. Level 3: Well done. Level 4: Outstanding. After the rating, the rehearsal song will be played again and you can go on prac‐ tising. -
Page 40: Mix Tracks
Operating 7.18.2 Mix tracks While the mix pattern is playing, press one of the [T1]…[T6] buttons to switch the corresponding track on or off (mute / unmute). ð The display shows the current track information. Press [MIX CTRL] to reset the primary functions of the [T1]…[T6] buttons to their default settings. -
Page 41: Song Recording
Operating The following table shows the detailed chord types in the chord reference: Note Root note Note Type Note Type 7(b9) C#/Db M(9) 7(9) 7(#9) Es/Dis 7(b13) 7(13) 7(#11) F#/Gb M(9) dim7 dimming Ab/G# M7(9) 7aug Bb/A# M7b5 7sus4 sus4 7.20 Song recording 7.20.1... -
Page 42: Audio Recording
Operating 7.20.1.2 Stopping MIDI recording Press [RECORD] while recording to stop recording. The recording will be saved to the selected location for the user song. – When all memory locations are occupied, the recording is stopped immediately and saved. – If you are recording with accompaniment, the recording will stop as soon as the end section of the accompaniment is over. - Page 43 Operating Saving in MP3 format is not supported. 7.20.2.1 Preparing audio recording Insert an SD card into the card slot provided on the back of the keyboard. ð The display shows as soon as the keyboard detects the SD card. Select an available memory location for the user song on the SD card.
-
Page 44: Inserting An Sd Card
Operating Do not disconnect the SD card from the keyboard while the audio recording is being saved and do not turn off the keyboard, as this may damage the file or the SD card. 7.21 Inserting an SD card The keyboard detects SD cards in FAT 32 format that are not partitioned. We recom‐ mend formatting the SD card before using the keyboard. -
Page 45: Loading Files
Operating 7.21.3 Loading files Press [SD CARD] to call up the SD card's playback menu. Use the rotary control to select the ‘Load’ menu. Press repeatedly to choose between the MIDI files from the root directory of the SD card. Use the rotary control to select a desired file and press to confirm the selec‐... -
Page 46: Formatting Sd Card
Operating 7.21.5 Formatting SD card Press [SD CARD] to call up the SD card's playback menu. Use the rotary control to select the ‘Format’ menu. Press to format the SD card. ð The display shows ‘Sure?’ . Press again to confirm the formatting of the SD card. Press to cancel the process and return to the previous display. -
Page 47: Selecting A Bank
Operating 7.22.3 Selecting a bank All of the settings you have made can be saved to a bank in the Performance Memory menu. Press [BANK] to call up the Performance Memory menu. ð The display shows the current bank number. Press repeatedly [BANK] to select a desired bank number. - Page 48 Operating The following table shows the adjustable options and parameters: Option Control range Description Rhythm sub. volume Rhythm_s:xxx 0 - 127 Percussion instrument 1 Rhythm master Rhythm_m:xxx 0 - 127 Percussion instrument 2 volume Bass volume Bass:xxx 0 - 127 Bass Chord 1 volume Chord1:xxx...
-
Page 49: Function Menu
Operating 7.24 Function menu This menu is used to set the various parameters offered by the keyboard. Press [FUNCTION] to enter the function menu. ð The display shows the current option. Select the desired parameter with the rotary control and select the desired set‐ ting with on the numeric keypad. -
Page 50: Midi Functions
Operating Option Control range Default value Harmony type ‘xxx Hrm*****’ 001 HrmDuet, 002 HrmTrio, 001 HrmDuet 003 Hrm1+5, 004 HrmOct, 005 HrmCtDut, 006 HrmBlock, 007 Hrm4Cls1, 008 Hrm4Cls2, 009 Hrm4Open Temperament ‘xxx Scale Sw’ OFF, ON Temperament type ‘xxx Scale***’ 001 ScalePyt, 002 ScaleMaj, 001 ScalePyt 003 ScaleMin, 004 ScaleMea,... -
Page 51: Usb Connection
Operating You can use the USB connection to exchange MIDI data with computers or other USB devices that support USB audio via USB cable. MIDI data from computers or other USB devices can be played back by the sound module of the keyboard. 7.25.2 USB connection System requirements... -
Page 52: Midi Implementation Chart
MIDI implementation chart MIDI implementation chart Function Sent Received Notes Basic Channel Default Changed 1-16 1-16 Mode Default Mode 3 Messages Altered *********** Note Number 0 – 127 0 – 127 True voice *********** 0 – 127 Velocity Note Note ON Yes, 9nH, Yes, 9nH, v = 1 - 127... - Page 53 MIDI implementation chart Function Sent Received Notes Program Change True Number *********** 0 - 127 System Exclusive System Common Song Position Song Select Tune Request System Real Time Clock Commands No *1 Aux Messages Local ON/OFF ALL Notes OFF Active Sensing System Reset * 1 When the accompaniment starts, an FAH message is sent.
-
Page 54: Troubleshooting
Troubleshooting Troubleshooting Problem Possible causes and solutions You hear a 'pop' sound from the speakers when switching the This is normal. No reason for concern. keyboard on and off. No sound can be heard when playing the piano. Make sure that the volume control is set appropriately. Interference occurs when using a cell phone. -
Page 55: Technical Specifications
Technical specifications Technical specifications Input connections Microphone 1 × 1/4" jack socket Sustain pedal 1 × 1/4" jack socket AUX IN 1 × 3.5 mm phone socket Voltage supply 1 × Input socket for the 12 V plug-in power supply Output connections Headphones 1 ×... - Page 56 Technical specifications Colour Black Ambient conditions Temperature range 0 °C…40 °C relative humidity 20 %…80 % (non-condensing) keyboard...
-
Page 57: Plug And Pin Assignments
Plug and pin assignments Plug and pin assignments Introduction This chapter will help you select the right cables and plugs to connect your valuable equipment in such a way that a perfect sound experience is ensured. Please note these advices, because especially in ‘Sound & Light’ caution is indicated: Even if a plug fits into the socket, an incorrect connection may result in a destroyed power amp, a short circuit or ‘just’... -
Page 58: Protecting The Environment
Protecting the environment Protecting the environment Disposal of the packaging material For the transport and protective packaging, environmentally friendly materials have been chosen that can be supplied to normal recycling. Ensure that plastic bags, packaging, etc. are properly disposed of. Do not just dispose these materials with your normal household waste, but make sure that they are fed to a recovery. - Page 60 Musikhaus Thomann · Hans-Thomann-Straße 1 · 96138 Burgebrach · Germany · www.thomann.de...
Need help?
Do you have a question about the Startone MK-400 and is the answer not in the manual?
Questions and answers