Table of Contents
Advertisement
Quick Links
Advertisement
Table of Contents

Related Manuals for tiki 1050-51


Summary of Contents for tiki 1050-51
- Page 1 start P/N: 1072-01 ENGLISH MANUAL www.tikisafety.com...
- Page 2 Tiki start, tell your network! If you are despite our effort, either All rights to Tiki start and this user not fully pleased or presume our Tiki manual are reserved to Tiki Safety AB. start holds points of improvement,...
-
Page 3: Table Of Contents
1.3.3 Glasses ........................6 1.4 Prepare the Tiki start ......................7 1.5 Training to hazardous mixtures ..................7 1.6 Filter limitations ........................7 1.7 Material of the Tiki start ...................... 8 1.7.1 Basic components ....................8 1.7.2 Batteries ........................8 1.8 At use ............................9 1.9 Risk situations ........................ - Page 4 4.3 Put the Tiki start on......................30 4.4 Calibrate the blower ......................31 4.5 Testing the mask during use ..................32 4.6 Take the Tiki start off ......................33 5. Maintenance procedures ................. 34 5.1 Cleaning the Tiki start mask .................... 35 5.2 Replace the inhalation filter (white) ................
-
Page 5: Safety
Third, contact Tiki Safety AB ■ 1.3 Before use The Tiki start itself does not raise awareness of the user in regards to health and safety requirements, under the conditions that: The Tiki start is used exactly as described in this user manual ■... -
Page 6: Facial Hair
Tiki Safety AB designed the Tiki start to industrial standards on ergonomics, yet a situation as a protruding nose can occur. To prevent the indicated risk, Tiki Safety AB advises to use – if possible – a mask of a bigger size. -
Page 7: Prepare The Tiki Start
– and protective measures to control exposure to hazardous mixtures. 1.6 Filter limitations Note that the P3 particle filter of the Tiki start has – as any other filter – limitations. Therefore, verify that the filter of the Tiki start is in line with the intended use and protects the user to the expected risks in the environment of use. -
Page 8: Material Of The Tiki Start
The Tiki start holds the basic components as described in paragraph: 2.1 Description on page 12. These basic components are manufactured in the materials as indicated above. None of these materials expose the user of the Tiki start to a health or a safety issue. 1.7.2 Batteries The blower with the internal battery and the external battery contain both lithium polymer (LiPo) batteries. -
Page 9: At Use
1.8 At use For safe use, it is imperative that the Tiki start forms a tight seal to the face of the user. If the Tiki start does not form a tight seal to the face of the user, the risk exists that: Through gaps between the Tiki start and the face of the user hazardous ■... -
Page 10: Risk Situations
Mark that if a gap occurs between the Tiki start and the face of the user, the energy use of the Tiki start is higher and hence the battery time lower. Therefore, obey to the instructions in relation to the use of the Tiki start at all times. -
Page 11: After Use
■ If the hazardous mixture is of such nature that either the inhalation filter of the Tiki start or in very extreme conditions the entire Tiki start is to be disposed after use, refer to: The MSDS of the hazardous mixture ■... -
Page 12: Design
■ The inhalation filter (white) is a filter that purifies the air that comes in to the enclosed air volume between the Tiki start and the face of the user. And thus provides filtered air to the user to inhale. - Page 13 The inhalation filter (white) is a P3 particle filter. ■ Mark that the Tiki start includes only particle filters and is therefore not to be used in areas that contain gaseous solvents and other hazardous airborne contagions that a P3 particle filter does not remove.
-
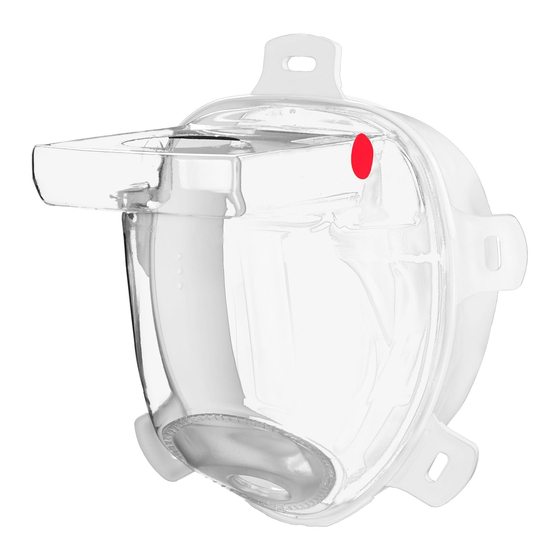
Page 14: Pressure Sensor
The Tiki start holds the following components as indicated on figure 1: The mask, that covers the entire face of the user The inhalation filter (white) The blower with internal battery The harness The battery charger The car charger, optional... -
Page 15: Buttons And Indicator Lights
The speed of the blower adapts automatically to create a positive pressure of 0.2 mbar. Therefore, it is important that the user calibrates the blower at every use of the Tiki start and as the user enters another space as for example: inside versus outside, floor, operating room etc. -
Page 16: Three (3) Indicator Lights
/ off button on the left. Yet, as the Tiki start is in use, the blower is above the eye-line of the user and hence the on / off button on the right! In the below description, the symbols for the three (3) lights are: The indicator light is off and thus emits no light. -
Page 17: Filter Warning Or Leak
3 from page 23 If a leak occurred to an unknown reason, refer to: ■ 1.3 Before use on page 5 If either the above is the reason for the alarm, contact Tiki Safety AB ■ ENGLISH – Tiki start... -
Page 18: Specifications
380 g ■ Note that the design of the Tiki start has an ergonomic shape with contact around the entire face and a harness that tightens the mask at the back of the head. This design distributes the weight over the entire head and leads to efficient and ergonomic comfort. -
Page 19: Operational Conditions
(-) 10 °C to 45 °C and a Relative Humidity (RH) of under 90%. Do not use the Tiki start in an environment with a RH of over 90%. Charge the batteries in an environment with a temperature between 5 °C to 30°C, in accordance to: 4.1 Charge the batter(y)(ies) on page 28. -
Page 20: Pictograms
2.5 Pictograms The following markings on the filter are to EN 12942, do not confuse to any other European standard or other standard. Mark that the Tiki start holds the following pictograms: The part-number of the parts, indicated with ‘P/N’ ■... -
Page 21: Intended Use
2.6 Intended use The Tiki start is designed as to the ‘PPE directive’ EU 2016 / 425, annex II, paragraph 3.10. And therefore offers protection against substances and mixtures which are hazardous to health and against harmful biological agents. The Tiki start offers: Respiratory protection ■... -
Page 22: Protection Against Skin And Ocular Contact
2.6.2 Protection against skin and ocular contact The Tiki start is intended to prevent that the face of the user gets in contact with substances and mixtures which are either hazardous to health or with harmful biological agents. The Tiki start prevents the penetration and permeation of such substances, mixtures and agents through the protective integument under the foreseeable conditions of use for which the Tiki start is intended. -
Page 23: Procedures Before Use
This lay-out is intended to enable that the end-user can produce quick reference cards for distribution in their internal organisation. Note that, at every time, every procedure is a part of this user manual as an integral part of it. ENGLISH – Tiki start... -
Page 24: Test Before Any Use That The Mask Is Tight
2. Verify that all parts are present as to paragraph: 2.1 Description on page 12. If any part is not present, contact Tiki Safety AB as to the contact coordinates on page 2. 3. Take the mask – and the mask only – with one hand. -
Page 25: Prepare The Mask For Use
Observe the direction to the face as indicated with the text and arrows: ‘This side to the face’. 6. Turn the inhalation filter (white) from the 30° to a 0° angle to attach the inhalation filter (white) to the blower, as to figure 7. 30° 30° ENGLISH – Tiki start... -
Page 26: Read The Qr Code
3.3 Read the QR code This procedure is not obligated for safe or practical use. Read the Quick Response (QR) code of the Tiki start to retrieve the serial number of the part of the mask. 1. Use a smartphone with an application to read a QR code. -
Page 27: Use Procedures
Note it is under the responsibility of either the user or the organisation that holds responsibility over the user, to elaborate either an applicable procedure or a work order to prevent this risk on contamination. Follow at all times this procedure and / or work order. ENGLISH – Tiki start... -
Page 28: Charge The Batter(Y)(Ies)
5. If the indicator light on the battery charger is green, the battery is fully charged, refer to figure 2. 6. If only the internal battery is used, the Tiki start is ready for use as the internal battery is charged. -
Page 29: Use With The External Battery
7. Note that the red tape or srew seal in step 4a is to be applied again if the Tiki start is to be used with the internal battery only again, refer to paragraph: 1.4 Prepare the Tiki start on page 7. -
Page 30: Put The Tiki Start On
3. Ensure that the mask is cleaned as to the procedure: 5.1 Cleaning the Tiki start on page 35. 4. Check the mask for mechanical integrity, if the Tiki start is not ok, either perform the procedure at: 5.3 on page 37 or dispose the mask as to: 6 Disposal on page 38. -
Page 31: Calibrate The Blower
3. If calibrated, the following occurs: › The red indicator lights flash, refer to 11d on figure 11 4. Test the seal of the mask as to the procedure: 4.5 Testing the mask during use on page 32. ENGLISH – Tiki start... -
Page 32: Testing The Mask During Use
2. This procedure is to be performed as the mask is on the head of the user, after the procedures: 4.4 Calibrate the blower on page 31, 4.3 Put the Tiki repiratory mask on, on page 30. -
Page 33: Take The Tiki Start Off
4. Pull with both hands the mask to its widest stretch. 5. Bring with both hands, the mask to a position above the head of the user. 30° 6. Clean the mask as to the procedure: 5.1 Clean the Tiki start on page 35. ENGLISH – Tiki start... -
Page 34: Maintenance Procedures
Mark it is under the responsibility of either the user or the organisation that holds responsibility over the user, to elaborate either an applicable procedure or a work order to prevent this risk on contamination. Follow at all times this procedure and / or work order. Tiki start – ENGLISH... -
Page 35: Cleaning The Tiki Start Mask
If automated machines to clean the mask(s) are in use, remove the filter, blower and as necessary the harness from the mask. 2. Prepare the following to clean the Tiki start: › A disinfectant agent in regard to the hazardous environment and / or biological agents ›... -
Page 36: Replace The Inhalation Filter (White)
Observe the direction to the face as indicated with the text and arrows: ‘This side to the face’. 7. Turn the inhalation filter (white) from the 30° to a 0° angle to attach the inhalation filter (white) to the blower as to figure 7. 30° 30° Tiki start – ENGLISH... -
Page 37: Storage
■ Humidity (RH) of under (<) 60% Note – The Tiki Blower & External Battery contain LiPo cells and like all LiPO batteries they must be maintenance charged a minimum once every six (6) months. Warning – Always supervise all battery charging and stop immediately should the battery swell, get hot or if it produces smoke or flames. -
Page 38: Disposal
If so, dispose in accordance to local laws: regional, state, federal and international (as for example EU regulation). The Tiki start without the blower and the filter is mainly composed of PET and TPE materials and is to be recycled in accordance to local ordinances. -
Page 39: Standards
Tiki Safety AB appointed the independent notified body British Standard Institute (BSI) for the examination on the Tiki start and the production line of the Tiki start in regard to the regulation standards under: 7.3 Regulation standards on page 40. -
Page 40: Regulation Standards
EN 12942:1998/A2:2008 ■ As the Tiki start applies fully to the above regulation standards, there are no other harmonised standards or descriptions of other technical specifications that have been applied in order to satisfy the applicable essential health and safety requirements. -
Page 41: Declaration Of Conformity
7.6 Declaration of conformity ENGLISH – Tiki start... -
Page 42: Warranty
Tiki Safety AB warrants this product against defects in material or workmanship as follows: Tiki Safety AB will replace at no charge for parts only or, at its option, replace any product or part of the product that proves defective due to improper workmanship and / or material, under normal use. - Page 43 3. Delivery of the product or the defective part, postage prepaid and carefully packed, insured and with transport-tracking. When Tiki Safety AB or its representative completed the warranty service, any repaired or replacement product or part will be returned to you postage prepaid.
-
Page 44: Copyright Notice And Disclaimer
Copyright Notice and Disclaimer Tiki Safety AB makes no representations or warranties with respect to the contents hereof. In addition, information contained herein are subject to change without notice. Every precaution has been taken in the preparation of this manual. Nevertheless, Tiki Safety AB assumes no responsibility for errors or omissions or any damages resulting from the use of the information contained in this publication. -
Page 45: Order Numbers Of Parts
9. Order numbers of parts The following packs or parts can be ordered to the below part numbers. A ‘starter pack’ contains all parts to compose one (1) complete Tiki start that are ready for use, this includes the following: Mask (visor) with attached seal collar and installed exhaust valve ■... - Page 46 Tiki start – ENGLISH...
- Page 47 30° 30° 30° 30° 30° ENGLISH – Tiki start...
- Page 48 General enquiries: info@tikisafety.com English Sales related questions: sales@tikisafety.com Convinced: order@tikisafety.com Manual +46 8 35 32 49 Tiki Safety AB Skällstavägen 9 SE-197 40 Bro, Sweden www.tikisafety.com The Tiki start is designed and manufactured in Sweden.
Need help?
Do you have a question about the 1050-51 and is the answer not in the manual?
Questions and answers