
Related Manuals for alphatronics UNii


Summary of Contents for alphatronics UNii
- Page 1 Quick start and installation guide English manual page 2 Nederlandse handleiding pagina 13...
-
Page 2: Table Of Contents
Table of contents Quick installation guide ................................ 3 Step 1: UNii manager ................................3 The login credentials for UNii manager ..........................3 Step 3.1: Connecting to the panel ............................3 Step 3.2: Programming the installer rights ........................4 Step 4: Connecting with the key ............................4 UNii mounting and installation ............................ -
Page 3: Quick Installation Guide
Step 3.1: Connecting to the panel The UNii manager tool starts up in the main screen. In the ‘Select device’ part you can connect to the UNii manually. By using the button ‘Search systems’ all UNii intruder panels on the network will be shown. -
Page 4: Step 3.2: Programming The Installer Rights
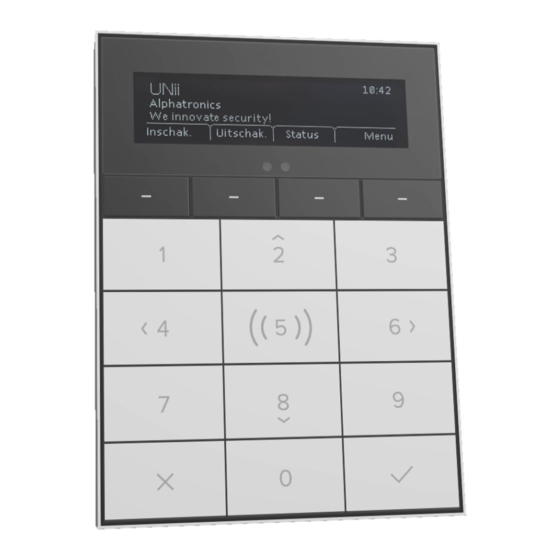
11. The installer now has access for the selected time. Step 4: Connecting with the “key” The connection between the UNii intruder panel and the UNii manager tool is secured by a key. The key can be displayed on the keypad. -
Page 5: Unii Mounting And Installation
UNii Mounting and installation The UNii control panel is the heart of the security system to which all other components are connected. The UNii control panel has an independent power and emergency power supply and is supplied in a metal housing suitable for applications up to and including Security Grade 3. -
Page 6: Connections
Connections Inputs Outputs – relay and o.c. Loudspeaker output Siren output LAN connection RS-485 bus connection Outgoing 12VDC power Battery connection Power connection Tamper switch connection LAN link and activity LED Firmware LED (ON = OK) RS-485 communication LEDs Output expander connector Input expander connector Generic expander 3 Generic expander 2... -
Page 7: Outputs
RS-485 bus The UNii uses an RS-485 data bus to connect different bus components. The maximum cable length of an RS- 485 bus is 1,200 m. This distance can only be achieved when using the prescribed FTP cable (FTP = foiled twisted pair, “shielded with twisted pairs”, data cable at least 2x2x0.5mm + shielding). -
Page 8: Power
For the total resistance, the resistance in the supply wires (+ and 0) must be added together. Based on standard Alphatronics RS-485 bus cable, the cable to a keypad can therefore be a maximum of 100m long. If a greater distance is desired, a cable with a lower resistance should be used. -
Page 9: Low Battery Voltage
Low battery voltage A low battery voltage is detected when the battery voltage drops below 11.0VDC (SD low voltage). 230V mains connection A mains fuse with a value of 315 mA is included in the terminal block. The installation must be equipped with a double-pole switch / disconnector in order to make the mains connection completely voltage-free. -
Page 10: General
Control panel cabinet must be installed within the protected area. The maximum depth (thickness) of the battery is 100 mm. Manufacturer: Alphatronics BV Security Grade: Grade 3, if a wireless expansion is used, Grade 2. Test institute: The testing in accordance with necessary standards was carried out by Kiwa /... -
Page 11: Fuses
315mA (glass fuse 5 x 20mm) Service The UNii keypad has no serviceable parts or adjustment points. In the event of established defects, the entire keypad must be replaced (in consultation with the support desk). The battery has an expected lifetime of 3-5 years and must be checked (and replaced if necessary) every year during maintenance. - Page 12 UNii Quick start ..................................13 Belangrijk voor de installatie .............................. 13 Stap 1: UNii manager ................................13 Stap 2: Het inloggen voor UNii manager ......................... 13 Stap 3: Het verbinden ................................13 Stap 3.1: Installeur rechten instellen ..........................14 Stap 4: Het verbinden met de sleutel ..........................14 Montage ....................................
-
Page 13: Unii Quick Start
Security Grade 3. BELANGRIJK VOOR DE INSTALLATIE: Gefeliciteerd met de aankoop van de UNii! Er zijn een paar stappen die er gevolgd moeten worden voor de juiste installatie en de verbinding Stap 1: UNii manager De programmering van de UNii gebeurt via de “UNii manager”... -
Page 14: Stap 3.1: Installeur Rechten Instellen
De installateurs account is nu actief voor de ingestelde tijd. Stap 4: Het verbinden met de sleutel De verbinding tussen de centrale en de UNii manager programmeertool wordt beveiligd met een sleutel. De sleutel wordt via het keypad getoond. Waar kunt u de sleutel vinden? Ga naar Menu ->... -
Page 15: Montage
Montage De kast dient met behulp van 3 schroeven (4,2 x 60mm) en passende pluggen degelijk bevestigd worden. Bij een andere achtergrond dan steen, dienen daartoe geschikte schroeven en eventueel pluggen gebruikt te worden. De schroefgaten bevinden zich links en rechtsonder in de kast en één slob gat midden boven in de kast. Zie onderstaande figuur. -
Page 16: Aansluitingen
Aansluitingen Ingangen Uitgangen – relais en o.c. Luidspreker uitgang Sirene uitgang LAN aansluiting RS-485 bus aansluiting Uitgaande 12VDC voeding Accu aansluiting Voedingsaansluiting Sabotage schakelaar aansluiting LAN link en activiteit LED Firmware LED (AAN = OK) RS-485 communicatie LEDs Output expander connector Input expander connector Generic expander 3 Generic expander 2... -
Page 17: Uitgangen
RS-485 databus optreden die het systeem negatief beïnvloeden. Bij een lange RS-485 bus (langer dan ca. 500m) is het niet toegestaan om stervormige verbindingen te maken tussen de UNii centrale en de overige componenten. Zorg ervoor dat alle componenten in één lijn worden aangesloten. De bus mag nooit langer dan 1200m zijn. -
Page 18: Voeding
Voor de totale weerstand moet de weerstand in de voedingsaders (+ en 0) bij elkaar opgeteld worden. Uitgaande van standaard Alphatronics bus kabel mag de kabel naar een keypad dus maximaal 100m lang zijn. Mocht een grotere afstand gewenst zijn dan dient een kabel gebruikt te worden met een lagere weerstand. -
Page 19: Beveiliging Tegen Diepontlading
Beveiliging tegen diepontlading Wanneer de netspanning te lang wegblijft en de accuspanning te laag wordt (beneden de 10,1VDC), dan schakelt de print zichzelf volledig uit. Herstarten en opladen van de accu kan alleen wanneer de netspanning hersteld wordt. De spanning van de geadviseerde Yuasa accu van 12Ah is bij diepontlading 9,7VDC. Lage batterijspanning Een lage accuspanning wordt gedetecteerd, wanneer de spanning van de batterij beneden de 11.0VDC daalt (SD- low voltage). -
Page 20: Specificaties
Metalen kast; 400mm x 250mm x 135mm (H x B x D). Gewicht: 5200gr exclusief accu. Centrale kast dient binnen het beveiligde gebied gemonteerd te worden. De maximale diepte (dikte) van de accu is 100mm Fabrikant: Alphatronics BV Security Grade: Grade 3, indien er gebruik gemaakt wordt van een draadloze uitbreiding Grade 2 Testinstituut:... -
Page 21: Service
315mA (glas zekering 5 x 20mm) Service De UNii kent geen ‘servicable parts’ of afregelpunten. Bij geconstateerde defecten dient (in overleg) de volledige print van de centrale en/of module(s) vervangen te worden. De accu dient na de verwachte levensduur (3-5 jaar) tijdens de jaarlijkse onderhoudsbeurt vervangen te worden. - Page 24 WEEE-declaration This Alphatronics product is manufactured with the most modern technology and consists of high-quality components. Most of the components used can be recycled. The symbol means that this product should be recycled separately and not put in the normal waste bin together with normal household waste.
Need help?
Do you have a question about the UNii and is the answer not in the manual?
Questions and answers