Advertisement
Quick Links
01865 767676
sales@unicol.com
www.unicol.com
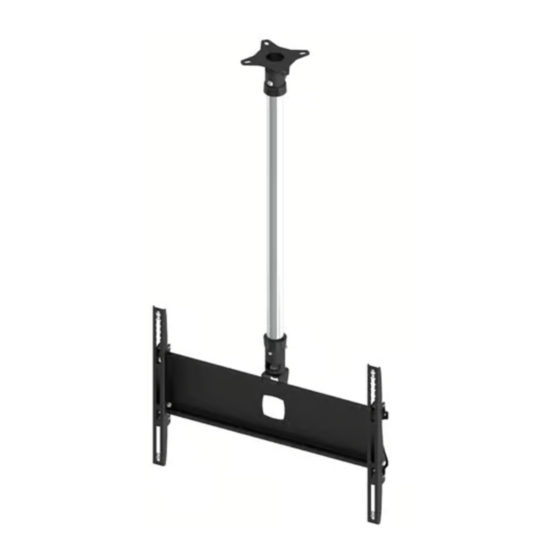
KP KITS
Screen Size: 33-70"
Guide Max. Weight: 45-60kg
Revised 15/12/20
*Please check model specific details before installing*
WARNING
Please carefully inspect the product before assembling. If you notice any apparent damage, call your
carrier claims agent and do not continue the installation until it has been reviewed. Please watch for
pinch points. Do not put your fingers between moveable parts. Do not tamper with or disassemble any
spring loaded parts. Before installing, make sure that the supporting surface will support five times the
combined load of the solution and the hardware. Never exceed the maximum load capacity. Please also
layout all components to ensure that you have all of the required parts before proceeding (see BOM list
on following page). Use of this product for anything other than its specified use may result in failure or
personal injury. This product is intended for indoor use only. We recommend using a qualified trades
person for installation. Use an assistant or lifting equipment to lift and position products.
For support, please call: +44 (0)1865 767676 or email: sales@unicol.com
Advertisement

Related Manuals for Unicol KP Kit


Summary of Contents for Unicol KP Kit
- Page 1 This product is intended for indoor use only. We recommend using a qualified trades person for installation. Use an assistant or lifting equipment to lift and position products. For support, please call: +44 (0)1865 767676 or email: sales@unicol.com...
- Page 2 01865 767676 sales@unicol.com www.unicol.com TOOLS REQUIRED INSTALLERS REQUIRED Pozi Head Screwdriver 3/16th Allen Key 13mm Spanner COMPONENTS DESCRIPTION Length of Column (1m, 2m or 3m) CP1 Standard Ceiling Plate Single Sided Suspension Mount Universal Tilting Mount Arms Alternative Suspension Mount...
- Page 3 01865 767676 sales@unicol.com www.unicol.com STEP 1 STEP 2 Using the 4 ceiling mounting slots, as shown Slide all cabling through the column and through above, determine where you want to install your the gap in the ceiling plate socket. Being mindful mount, mark it and fix into position.
- Page 4 01865 767676 sales@unicol.com www.unicol.com STEP 4 STEP 3 Using another team member, lift the screen up and Once centered, ensure the bottom screws are not gradually offer it up to the back plate. Gently tilting screwed tight and screw down the top screws to the screen forward, hook the arms over the lip of level the screen.
Need help?
Do you have a question about the KP Kit and is the answer not in the manual?
Questions and answers