Table of Contents
Advertisement
Advertisement
Table of Contents
Troubleshooting

Subscribe to Our Youtube Channel
Related Manuals for Crane BevMAX Refresh 4


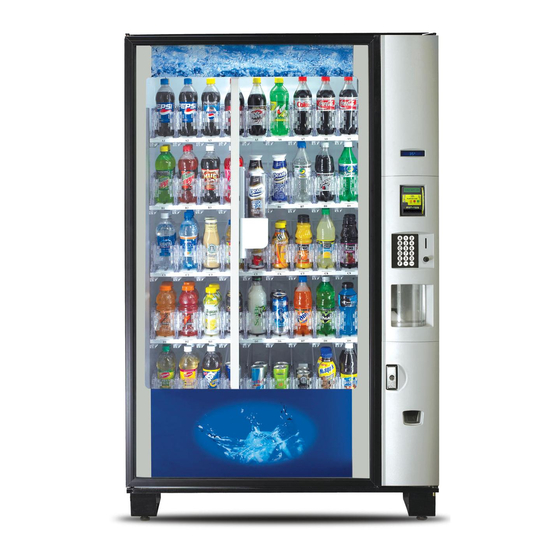
Summary of Contents for Crane BevMAX Refresh 4
- Page 2 Page 2 of 52...
-
Page 3: Table Of Contents
Table of Contents CAUTIONS & WARNINGS ..................... 5 GENERAL INFORMATION ....................6 Vender Safety Precautions ....................6 Product Identification ......................6 CE Mark & IIA Declaration ....................6 Physical Characteristics ....................... 6 INSTALLATION & SETUP ..................... 7 Receiving Inspection ......................7 Unpacking the Vender ...................... - Page 4 BevMax Refresh 4 Classic Door Electronics Diagram (Domestic & Export) ...... 47 BevMax Refresh 4 Classic AC Distribution Box Electronics Diagram (Domestic & Export)48 BevMax Refresh 4 Classic Port Assembly Electronics Diagram (Domestic & Export) ..49 BevMax Refresh 4 Classic XY Mechanism Electronics Diagram (Domestic & Export)..50 BevMax Refresh 4 Sequence of Operation.
-
Page 5: Cautions & Warnings
Cautions & Warnings High Voltage Warning / Electrical Warning Danger electricity, electric shock. A Generic Warning. Hazard Warning: Beware of moving machinery – Entanglement hazard. Keep hands, loose clothing, and long hair away from moving parts. Page 5 of 52... -
Page 6: General Information
Please read this manual in its entirety. This service information is intended for use by a qualified service technician who is familiar with proper and safe procedures to be followed when repairing, replacing or adjusting any Crane Merchandising Systems vendor components. All repairs should be performed by a qualified service technician who is equipped with the proper tools and replacement components, using genuine Crane Merchandising Systems factory parts. -
Page 7: Installation & Setup
Upon receipt, inspect the Vender for any shipping damage. If there is any damage, have the delivery driver note the damage on the bill of lading and notify Crane Merchandising Systems Customer Service. Although the terms of sale are FOB shipping point, which requires the consignee to originate shipping damage claims, Crane Merchandising Systems will gladly help if you must file a claim. -
Page 8: Electrical Requirements
GFCI device. IF THE GFCI DOES NOT PASS THE TEST, DO NOT USE THE MACHINE. Unplug the supply cord from the receptacle and call the Crane Merchandising Systems Technical Support Group for assistance at 1-803-266- 5001. It is recommended that the Machine be located so that the GFCI device will be accessible after the Machine is installed. -
Page 9: Manual T-Handle Lock
INJURY OR ELECTRICAL SHOCK WHICH CAN BE SERIOUS OR FATAL. PERIODICALLY INSPECT THE POWER SUPPLY CORD FOR DAMAGE. IF THE CORD BECOMES DAMAGED IT MUST BE REPLACED WITH THE SAME SIZE AND TYPE CORD. CONTACT CRANE MERCHANDISING SYSTEMS FOR ASSISTANCE. -
Page 10: Placing The Vender On Location
If the Machine will be subject to user misuse or vandalism, it is recommended that the Vender be secured to the floor or wall as described in Crane Merchandising Systems Technical Bulletin 344. Due to the large size and weight of the Vender, never attempt to move the Vender with a Hand Truck or Stair Climber. -
Page 11: Install Price Labels
The Vender can have an MDB Coin Changer installed and can have an MDB Bill Acceptor installed as well. Note: BevMax Refresh 4 Models 5800-4/3800-4 will work with an MDB Bill Acceptor only. If the MDB Coin Changer and other MDB accessories are not factory installed, refer to the instructions received from the manufacturer of the MDB Coin Changer and other MDB accessories for proper set-up and installation. -
Page 12: Loading The Vender
to the Vender and allow it to run for several hours with the glass door closed or until the minimum cabinet temperature is achieved. Then, using the method below, verify the temperature inside the Machine. With an electronic Encapsulated Temperature Sensor, use the Keypad on the Service Door to show cabinet temperature in Fahrenheit by pressing the F Key followed by the asterisk () Key or in Centigrade by pressing the C Key followed by the asterisk () Key. -
Page 13: Ac Distribution Box
AC DISTRIBUTION BOX The AC Distribution Box is located inside the service area, mounted to the back wall above the Power Supply. It is where the 120VAC or 230VAC input voltage is sent to the Refrigeration Unit & Condenser Fan, Evaporator Fan, and Power Supply which converts the AC voltage to the main operating voltages of the Vender (24VDC). -
Page 14: Keypad
This Keypad is different from the Keypad used in BevMax 4 Classic Venders prior to the BevMax Refresh 4 models. DIGITAL DISPLAY The Digital Display is located directly above the Keypad on the front of the Service Door. -
Page 15: Shelf / Tray Assembly
SHELF / TRAY ASSEMBLY Typically, there are 5 Shelf assemblies in every Vender; however, this may vary depending upon the configuration specified at the time of ordering. Each Can/Bottle Shelf consists of 9 or 7 columns as configured as of this publication. Each Shelf is capable of holding a variety of packages. -
Page 16: Axis (Horizontal)
X AXIS The X Axis runs horizontally or left to right. The X Axis assembly is Cabinet mounted to prevent any Cabinet torque and has one belt to synchronize the top and bottom when the XY Assembly moves left or right. A top channel is used to contain and hide the e-chain and wiring. -
Page 17: Refrigeration Deck Clamp Assembly
REFRIGERATION DECK CLAMP ASSEMBLY The Refrigeration Deck Clamp assembly is located on the left side of the Cabinet base plate. Its purpose is to secure the Refrigeration assembly tight against the vertical base plate for refrigerated air flow in to the Cabinet. A 7/16” wrench or socket is needed to adjust the bolt. The Refrigeration Unit also has a locating pin on the bottom of the Refrigeration Unit base plate to ensure alignment for Refrigeration gasket seal to the vertical base plate. -
Page 18: Programming
Vender back in service. This guide explains the initial programming of the vender. For detailed information of the complete service menus available refer to the BevMax Refresh 4 Programming Guide. EXTERNAL DISPLAY ITEMS (HOT KEYS) Allows the service technician to view several items via the Display without opening the Vender. - Page 19 the current year, month, date, and time setting currently in the system in following format: 2018 Apr 28 15:45 with the Year highlighted. Press the Keypad numbers to enter the current year. Month will then be highlighted. To change the month press the “A” Key to scroll forward through the months or the “B” Key to scroll backward through the months.
- Page 20 Display will change to show which selections are assigned to this block. Press “” Key and Display will show “Enter Selection”. Press the Keys of each selection you wish to disable followed by “” Key and Display will show “Disabled Continue? = Yes CLR = No”. Note: If you press a tray letter (i.e. A) followed by the “” Key that entire tray will be set to be disabled.
-
Page 21: Quick Reference Menu Items
BevMax Refresh 4 5800-4/3800-4 & 5800-E4/3800-E4 Board Programming Quick Reference Service Mode Test Mode Setup Mode 1 Setup Mode 2 A Step through below Step through below Step through below Step through below B Cash Box List Errors Enter Message... -
Page 22: Major Component Description
Major Component Description AC DISTRIBUTION BOX BevMax Refresh 4 5800-4/3800-4 120 VAC and 230VAC Machines Main Power Switch or Power Supply Cord (A) • Interrupts hot and neutral side of incoming AC Power to all components in Machine from the electrical outlet. -
Page 23: General Maintenance
GFCI device. IF THE GFCI DOES NOT PASS THE TEST, DO NOT USE THE MACHINE. Unplug the Power Supply Cord from the receptacle and call the Crane Merchandising Systems Technical Support Group for assistance at 1-803-266-5001. - Page 24 SLIDE/PUSHER ASSEMBLY All Slide/Pusher assemblies should be cleaned periodically using warm water and any mild general-purpose non-abrasive cleaner. After drying, the Slide Assembly needs to have a coat of approved Food Grade Silicone based Release Agent from ECO-Lab/Kay Chemicals applied. Care should be taken to ensure debris does not enter the gear box assemblies.
-
Page 25: Vmc Installation
VMC INSTALLATION Disconnect power to the Vender when replacing the VMC. Once all connectors are positioned on the new VMC apply power to the Vender. To Set Model Number. On power up the Display will show “Reset Model? Continue? = Yes CLR = No”. Press the “” Key and Display will show “No Model Set Save? A = ^ (scroll up) ... -
Page 26: Vmc Connections
2020 BevMax Refresh 4 VMC BevMax Refresh 4 Classic 5800-4/3800-4 BevMax Refresh 4 Classic 5800-E4/3800-E4 Part # 400069 2020 BevMax Refresh 4 Classic VMC (400069) Connections CONNECTION # of CONNECTION # of DESCRIPTION DESCRIPTION BevMax 4 Pins BevMax 4 Pins... -
Page 27: Bevmax Refresh 4 Troubleshooting
BEVMAX REFRESH 4 TROUBLESHOOTING TROUBLESHOOTING DIAGNOSTIC LIGHTS With the New Electronics Platform BevMax Refresh 4, troubleshooting is simpler, but it is important to know how to follow the clues the Vending Machine is presenting. Utilizing error codes while focusing on the Cabinet Peripheral Control Boards controlling each motor or main component will lead you to a conclusion quickly. -
Page 28: No Power To Vender
Peripheral Control Board first receives a message from the VMC. Once a message is received from the VMC the heartbeat will not be shown again. Note: on a BevMax Refresh 4 Classic Machine, the heartbeat is almost never actually seen because the VMC starts talking to the Cabinet Peripheral Control Boards within a few seconds of powering on. -
Page 29: No Vertical (Y) & No Horizontal (X) Movement
The AC Distribution Box Lighted On/Off switch is illuminated red. 2. Upon completing A through D, if the AC Distribution Box Lighted On/Off Switch is not illuminated red, check the outlet voltage for required AC voltage. a. If outlet voltage is good, change the AC Distribution Box. GFCI. - Page 30 d. If the Cup Picker is stuck in the out position, go to Position Test and press “0” to cycle it back to the home position. Once back at the home position ensure the VMC D5 Picker Home Switch Diagnostic Red Light is On. VMC Diagnostic Lights.
-
Page 31: No Vertical (Y) Movement
If the Port Door is not fully closing, check for an obstruction. g. If no obstruction, go to Port Test and try to open and close the Port Door. In Port Test, the Port Door should open and close quickly with no bounce back. h. - Page 32 4. Remove the Y Motor Board Cover and see if the Y Motor Board Green Status Light is rapidly flashing. a. If Green Status Light is rapidly flashing, the Y Motor Board is good. b. If the Green Status Light is On solid, check the other Cabinet Peripheral Control Boards, if their Green Status Light is also On check the harnesses.
-
Page 33: No Horizontal (X) Movement
No Horizontal (X) Movement 1. A Left Motor Power Interrupt Door Switch issue. a. Check wiring from the Left Door Switch to the Environmental Board. Replace wiring or Left Door Switch as necessary. b. If wiring is connected and not damaged Ohm the Left Door Switch. Replace as necessary. c. -
Page 34: Cup Picker/Plunger Will Not Cycle & Eject An Item From The Gate Assy
The Cup Picker/Plunger will not Cycle to Eject an Item from the Gate 1. A Left Motor Power Interrupt Door Switch issue. a. Check wiring from the Left Door Switch to the Environmental Board. Replace wiring as necessary. b. If wiring is connected and not damaged Ohm the Left Door Switch. Replace as necessary. c. -
Page 35: Port Door Will Not Open / Close
6. If the VMC Diagnostic Lights are correct, with the Left Motor Power Interrupt Door Switch activated stay in Position Test and see if the Picker will cycle and return to the Home position when pressing “0” Key on Keypad. a) If the Picker will not cycle in Position Test, check to see if the Motor is plugged in correctly. - Page 36 2. Before replacing any Cabinet Peripheral Control Boards: a. Check that P1 pin 4 of the Port Board is getting 5VDC from P7 pin 1 of the VMC. b. Ohm the Communication blue & white wires from P1 pins 2 & 3 of the Port Board to P8 pins 2 & 3 of the VMC.
-
Page 37: Port Door Stays Open, Display Says "Please Remove Product
The Port Door Stays Open, Display says “Please Remove Product” 1. Before replacing any Cabinet Peripheral Control Boards: a. Check that that P1 pin 4 of the Port Board is getting 5VDC from P7 pin 1 of the VMC. b. Ohm the Communication blue & white wires from P1 pins 2 & 3 of the Port Board to P8 pins 2 & 3 of the VMC. -
Page 38: Troubleshooting Tables
TROUBLESHOOTING TABLES COIN ACCEPTANCE ISSUES PROBLEM CAUSE Coin Jam in Mech. Clear Jam and Test. • • Flight Deck dirty. Clean Flight Deck. • • No Power to Mech. Check VMC D6 Yellow Diagnostic Light is On • • when Service Door is opened. Coins Returned to Check Harness from Mech to VMC. -
Page 39: Vending Machine Controller (Vmc) Issues
VMC ISSUES PROBLEM CAUSE Wall electrical outlet. Check AC Voltage at the wall outlet. • • Power Supply Cord. If Power Supply Cord has a GFCI, check it is • • not tripped. Check AC Voltage going in to the AC Distribution Box. -
Page 40: Troubleshooting Flow Charts
TROUBLESHOOTING FLOW CHARTS These charts are intended as a guide to help isolate and correct problems you may encounter. Should your Machine show ‘OUT OF SERVICE”, go to Programming TEST MODE and press “B” to List Errors. ALL COINS ARE REJECTED All Coins are rejected. -
Page 41: All Bills Rejected Flow Chart
ALL BILLS ARE REJECTED All Bills are rejected. Main Power Apply power. OFF/Disconnected. Check for cause, correct, Outlet Breaker reset Outlet Breaker. tripped. VMC D5 Red Should have a heartbeat on/off pattern. Diagnostic Light VMC D6 Yellow Should be On with Service Door Diagnostic Light Open. -
Page 42: Incorrect Change Dispensed Flow Chart
INCORRECT CHANGE DISPENSED Incorrect Change dispensed. Check Price & reset if Vend prices set necessary. incorrectly. Coins not lying Check Coin Tubes. Clear flat in tubes. & reload Coins. Defective Coin Replace Coin Mech. Mech. Defective VMC. Replace VMC. Page 42 of 52... -
Page 43: Selection Will Not Vend Flow Chart
SELECTION WILL NOT VEND Selection will not vend. Vend Price set Check Price, reset as needed. incorrectly. Check Price, ensure credit is = to or Insufficient greater than price set. credit. Product & Gate Check Gate & factory set up mismatch. -
Page 44: Refrigeration Troubleshooting Flow Charts
REFRIGERATION SYSTEM TROUBLESHOOTING FLOW CHARTS ICE / FROST ON EVAPORATOR Ice / frost on Evaporator. Clear Drain Tube from Molded Evaporator Box Condensate Drain to the Condensate Pan. Tube plugged. Check Product Door seal & Harness Air leak. openings in Cabinet. CONDENSATE ON OUTSIDE OF PRODUCT DOOR Condensate on outside of Product... -
Page 45: Compressor Will Not Start Flow Chart
COMPRESSOR WILL NOT START Compressor will not start. Service Door is Close Service Door. open. Compressor is Check Harness from Compressor unplugged. to AC Distribution Box. Defective Door Replace Service Door Switch. Switch. Check power source at outlet. Low voltage. Test in In Relay Toggle, test that the Programming... -
Page 46: Machine Not Cooling Flow Chart
MACHINE NOT COOLING Machine not cooling. Dirty or Clean Condenser. clogged Condenser. Defective Replace Encapsulated Temp. Sensor. Encapsulated Temp. Sensor. Clear Rear Screen of obstructions. Restricted Ensure rear of Cabinet is at least airflow. 4” (10cm) from wall. Machine in direct sunlight Move Machine. -
Page 47: Electrical Diagrams
BevMax Refresh 4 Classic Door Electronics Diagram (Domestic & Export) BevMax Refresh 4 Classic Door Electronics Diagram Pg. 1 of 4 400588 Page 47 of 52... -
Page 48: Bevmax Refresh 4 Classic Ac Distribution Box Electronics Diagram (Domestic & Export)48
BevMax Refresh 4 Classic AC Distribution Box Electronics Diagram (Domestic & Export) BevMax Refresh 4 Classic AC Distribution Box Electronics Diagram Pg. 2 of 4 Page 48 of 52 400588... -
Page 49: Bevmax Refresh 4 Classic Port Assembly Electronics Diagram (Domestic & Export)
BevMax Refresh 4 Classic Port Assembly Electronics Diagram (Domestic & Export) BevMax Refresh 4 Classic Port Assembly Electronics Diagram Pg. 3 of 4 400588 Page 49 of 52... -
Page 50: Bevmax Refresh 4 Classic Xy Mechanism Electronics Diagram (Domestic & Export)
BevMax Refresh 4 Classic XY Mechanism Electronics Diagram (Domestic & Export) BevMax Refresh 4 Classic XY Mechanism Electronics Diagram Pg. 4 of 4 400588 Page 50 of 52... -
Page 51: Bevmax Refresh 4 Sequence Of Operation
BEVMAX REFRESH 4 SEQUENCE OF OPERATION • Machine is sitting powered up and in an idle state (waiting on a consumer). • A credit is established by the consumer via coins, bill, or cashless device. • As the VMC recognizes the currency, it will instruct the display to show that amount and wait for activity on the keypad. -
Page 52: Notes
Notes: _______________________________________________________________________________________ _____________________________________________________________________________________________ _____________________________________________________________________________________________ _____________________________________________________________________________________________ _____________________________________________________________________________________________ _____________________________________________________________________________________________ _____________________________________________________________________________________________ _____________________________________________________________________________________________ _____________________________________________________________________________________________ _____________________________________________________________________________________________ _____________________________________________________________________________________________ _____________________________________________________________________________________________ _____________________________________________________________________________________________ _____________________________________________________________________________________________ _____________________________________________________________________________________________ _____________________________________________________________________________________________ _____________________________________________________________________________________________ _____________________________________________________________________________________________ _____________________________________________________________________________________________ _____________________________________________________________________________________________ _____________________________________________________________________________________________ _____________________________________________________________________________________________ _____________________________________________________________________________________________ _____________________________________________________________________________________________ _____________________________________________________________________________________________ _____________________________________________________________________________________________ _____________________________________________________________________________________________ _____________________________________________________________________________________________ _____________________________________________________________________________________________ _____________________________________________________________________________________________ _____________________________________________________________________________________________ _____________________________________________________________________________________________ _____________________________________________________________________________________________ _____________________________________________________________________________________________ _____________________________________________________________________________________________ _____________________________________________________________________________________________ _____________________________________________________________________________________________ _____________________________________________________________________________________________ _____________________________________________________________________________________________ Page 52 of 52...
Need help?
Do you have a question about the BevMAX Refresh 4 and is the answer not in the manual?
Questions and answers