panthera Bambino 3 Operating Instructions Manual
Hide thumbs
Also See for Bambino 3:
- Assembly instructions (4 pages) ,
- Assembly instruction (4 pages) ,
- Assembly instructions (2 pages)

Related Manuals for panthera Bambino 3


Summary of Contents for panthera Bambino 3
- Page 1 Operating instructions for wheelchair model: Bambino 3 Panthera AB, Gunnebogatan 26, SE-163 53 Spånga, +46 (0)8-761 50 40, www.panthera.se, panthera@panthera.se...
- Page 2 Congratulations on choosing a wheelchair from Panthera AB. We hope you will be satis- fied with your Panthera model and wish you many happy years together. All of Panthera AB’s products are designed and assembled in Spånga, outside Stockholm. Our models are constructed to be the very best on the market with regard to quality, manoeuvrability and low weight.
- Page 3 It is available in two versions, Bambino 3 and Bambino 3 Short. If required, the wheelchair can also be equipped with a range of accessories, such as an anti-tip device, push handles, arm rests or side guards.
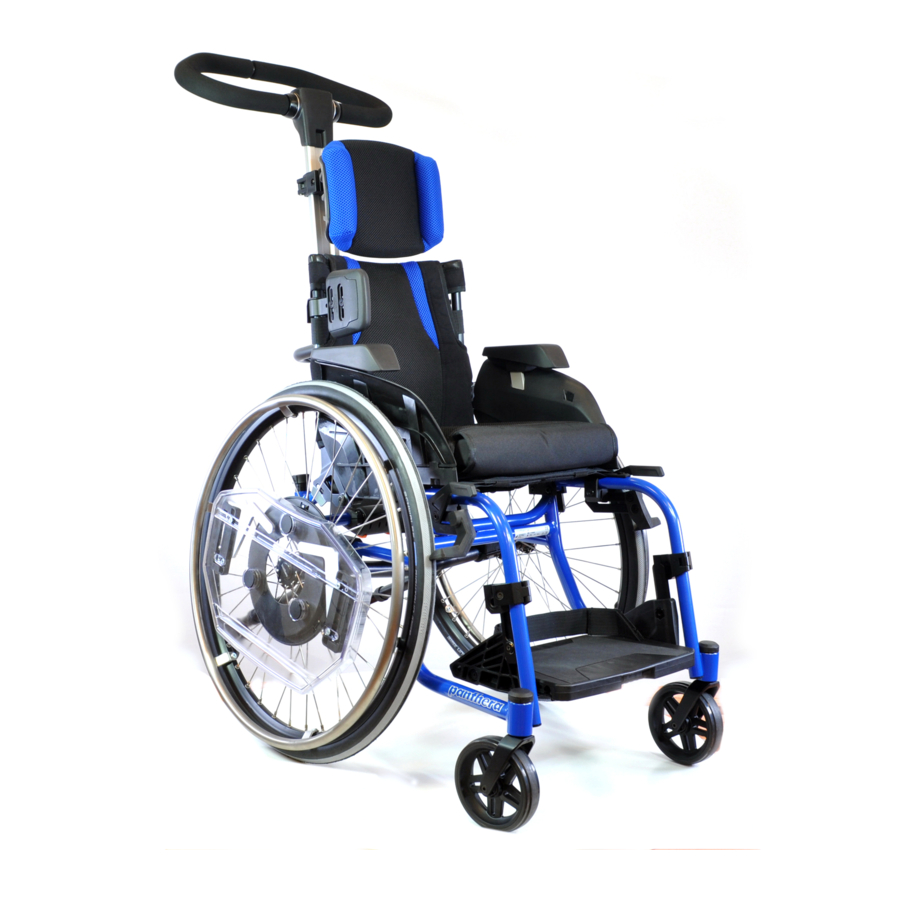
- Page 4 DESCRIPTION (Fig. 1, 2) The Panthera Bambino 3 models are dynamic wheelchairs designed to let you live life as actively as possible. Meticulous attention has been paid to their every detail. The low weight, combined with the stable, fixed frame and casters with a unique profile on the tread surface, make the wheelchair extremely easy to manoeuvre.
- Page 5 SAFETY REGULATIONS Current information Up-to-date information on safety and product updates can be found at Panthera’s website: www.panthera.se Verify that your wheelchair corresponds with your order: - Measure the seat width. - Measure the height of the backrest. - Ensure you have received the accessories you ordered.
- Page 6 If you have any questions on wheelchair technique, contact the person who prescribed the chair or your therapist. You are also welcome to get in touch with the team at Panthera AB. Brakes Your wheelchair is equipped with brakes for each drive wheel. The brakes are designed as parking brakes and not for braking while in motion.
- Page 7 SAFETY REGULATIONS Transfer into the chair Techniques for transfer must be practised extensively together with qualified staff. The methods described below are for advisory purposes only. Transferring into the chair sideways (Fig. 3) 1. Position the wheelchair as close to you as possible. 2.
- Page 8 SAFETY REGULATIONS Wheelchair technique – Ramps and sloping surfaces, curbs stairs Driving up ramps and sloping surfaces (Fig. 49) When you are going to drive up a ramp, you need to take a bit of a run-up, keep a steady speed and at the same time control your direction.
- Page 9 SAFETY REGULATIONS Wheelchair technique – Ramps and sloping surfaces, curbs stairs Driving up and down stairs (Fig. 53) You can negotiate stairs by taking one step at a time according to the instructions here: One assistant should stand behind the wheelchair and hold the backrest bow. The second assistant should hold on to one of the solid parts of the front frame to support the wheel- chair from the front.
- Page 10 SETTINGS When adjusting the chair to suit your sitting posture and provide the mobility you require, it is important that you make the adjustments in the correct order. Firstly, adjust the chair to enable the correct sitting posture. Only then can you adjust the balance of the wheelchair to provide the mobility you require.
- Page 11 SETTINGS 3. The footplate settings (Fig. 7, 8, 9, 10) Height Folding: (Fig. 7) (Fig. 8) 1. Loosen the screws (1) using Upwards a 4 mm Allen key. 1. Release the latches (1) from the stoppers 2. Adjust to the desired height. Make it (2) by pulling them backwards.
- Page 12 SETTINGS 3. The footplate settings (Fig. 11, 12, 13) 4. The tension of the heel band (Fig. 11) 1. Pull apart the Velcro straps. 2. Adjust to the desired length. 3. Reattach the Velcro straps. Footplate mounted extra high: (Fig. 12, 13, 54, 55) If there is a need to mount the foot plate extra high:(Fig.
- Page 13 SETTINGS 5. The height of the backrest (Fig. 14) The height of the backrest can be adjusted. 1. Fold away the upper part of the backrest’s upholstery (1). 2. Loosen the bolts (2) on both sides with a 4 mm Allen key. 3.
- Page 14 SETTINGS 6. The tension of the backrest upholstery (Fig. 16) You can adjust the backrest upholstery to suit the shape of your back using the straps located under the flap at the rear of the backrest. This provides good support to the small of the back.
- Page 15 SETTINGS 7. Adjusting the balance of the wheelchair (Fig. 17) 1. Remove the drive wheel by pressing the quick release button and pulling the wheel straight off. 2. Use a 4 mm Allen key in order to loosen the 4 lock screws (1). Repeat this process on the other side.
- Page 16 ACCESSORIES Anti-tip devices (Fig. 19, 20) The two anti-tip devices are extremely important accessories which must be folded out and correctly adjusted to provide adequate protection against the user tipping backwards. PLEASE NOTE! The anti-tip devices must not be used as a “tip assist” to lift the front wheel of the wheelchair to get over thresholds, curbs, etc.
- Page 17 ACCESSORIES Side guards (Fig. 21) The side guards prevent clothing and loose items from becoming jammed in the wheel- chair’s spokes and also stop dirt from the wheels getting onto the user’s clothing. The side guards can be removed, during transportation, for example, by pulling them up vertically to release them from their attachments.
- Page 18 ACCESSORIES Hip belt (Fig. 24, 25, 26) A hip belt (positioning belt) may be fitted without affecting conformity to the CE marking standard. Hip belts can be fitted around the frame’s tubing at one of the locations indicat- (Fig. 24) If the wheelchair is equipped with the belt mounts accessory, the hip belt is mounted through the slots in the mounts.
- Page 19 ACCESSORIES Torso support (Fig. 27, 28) For those who have poor torso stability, one or two torso supports can improve their sitting position. Installation (Fig. 27) 1. Loosen the screws (1) using a 4 mm Allen key. 2. Adjust the torso support cushion in terms of height and depth. 3.
- Page 20 ACCESSORIES Push bar Adjustable, removable push bar for transporting users in wheelchairs for longer distances. Mounting the push bar: (Fig. 29, 30) 1. Squeeze the handle together (1) to open the clamp (2) that should go around the lower frame tube. (3) 2.
- Page 21 ACCESSORIES Push bar Fig. 30 Fig. 29 Fig. 31 Fig. 32...
- Page 22 ACCESSORIES Headrest Mounting the headrest: (Fig. 33) The headrest is mounted to the push bar. 1. Release the bracket’s lock lever (1). 2. Thread the headrest’s mount into the clamp (2). 3. Tighten the lock lever (1). Adjusting the headrest. (Fig.
- Page 23 Now the tray table is attached to the drive wheel while driving the wheelchair. Permitted accessories The accessories that are permitted to be mounted on the wheelchair can be found on Panthera’s website: www.panthera.se Fig. 37 Fig. 36...
- Page 24 The Bambino 3 model is crash tested and approved for transportation in mobility service vehicles. When travelling in vehicles, users may remain in their wheelchairs provided ap- proved restraint systems and seatbelts are used, however, Panthera AB does not recom- mend this.
- Page 25 TRANSPORT Securing the wheelchair in a vehicle (Fig. 41 and 42) During transportation, the wheelchair must always be facing in the direction of travel while the user is sitting in the chair. An exception may be made if the vehicle is fitted with a device designed in accordance with Bus Directive 2001/85/EG, Appendix VII, Item 3.8.3.
- Page 26 TRANSPORT Securing the user (Fig. 43 and 44) If the user remains in the wheelchair during transportation, we recommend that the back- rest is level with or above the user’s shoulders. The user must be secured in the vehicle using a three-point seatbelt in order to minimise the risk of injury to the head or chest in conjunction with braking or potential collision.
- Page 27 For more information about seatbelts and restraint systems, contact the manufacturer, Handicare. Specification of wheelchair used for crash test The chair that Panthera has crash tested had the following design at the time of the test: Panthera Bambino 3 Full Bambino 3 chassis, width 30...
- Page 28 MAINTENANCE Your Panthera wheelchair is built to be almost maintenance-free. However, you need to regularly review a few parts. (You will of course have to clean and check the chair more often if you use it in more extreme environments, for example in sand and salt water.)
- Page 29 (Fig. 45 and 46) Wear parts such as tyres, inner tubes and casters can be obtained from the Assistance centre or ordered from Panthera against payment, and the work can be carried out at home for those able to do so.
- Page 30 AB’s written consent or deterioration attributable to repairs carried out on the purchaser’s own initiative. Reuse The Panthera Bambino 3 is suitable for reuse. Prior to being reused, the wheelchair must be cleaned, disinfected and dispatched to an authorised reseller for inspection. CONFORMITY (Fig.
- Page 31 TECHNICAL FACTS Bambino 3 Seat width (cm) Total width Total length Total height, 22” wheels 60-75 60-75 60-75 60-75 Seat Seat angle 4° 4° 4° 4° Seat high rear Seat high front, 22” wheels Depth of seat 25-30 25-30 25-30...
- Page 32 TECHNICAL FACTS Bambino 3 Short Seat width (cm) Total width Total length Total height, 22” wheels 60-75 67-75 Seat Seat angle 4° 4° Height of seat at rear Height of seat at front Depth of seat 20-25 20-25 Backrest Back height 20–28 or 27–35...
- Page 33 Panthera AB, Gunnebogatan 26, SE-163 53 Spånga +46 (0)8-761 50 40, www.panthera.se, panthera@panthera.se...
Need help?
Do you have a question about the Bambino 3 and is the answer not in the manual?
Questions and answers