UltimateAir RecoupAerator EURO 200DX Manual & Installation Manual
Hide thumbs
Also See for RecoupAerator EURO 200DX:
- User manual & installation manual (43 pages) ,
- Replacement instructions (3 pages) ,
- Installation recommendations (3 pages)

Related Manuals for UltimateAir RecoupAerator EURO 200DX


Summary of Contents for UltimateAir RecoupAerator EURO 200DX
- Page 1 ...
- Page 2 Variable blower speed Quiet operation Low/easy maintenance Exceeds ASHRAE 62.2 ventilation recommendations No drain required Filter service indicator Fully insulated 5-year Warranty The UltimateAir® RecoupAerator® 200DX Manual and Installation Guide, March 2014...
-
Page 3: Maintenance
Mounting in conditioned spaces such as attics, basements, and utility rooms. Collars (four) are 6” in diameter. Clean filters approximately every 6 months and replace Maintenance when necessary The UltimateAir® RecoupAerator® 200DX Manual and Installation Guide, March 2014... - Page 4 Programmed to regulate heat exchange automatically Frost Control to prevent frost build-up down to approximately 10˚ F. During this mode, the Wall Dials green light will flash. The UltimateAir® RecoupAerator® 200DX Manual and Installation Guide, March 2014...
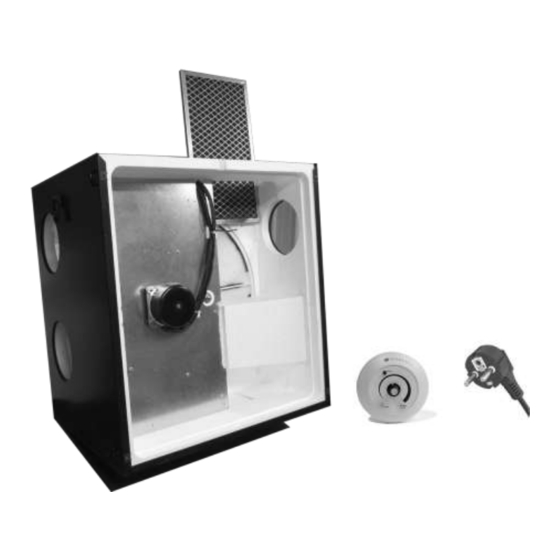
- Page 5 Unpack your RecoupAerator and check to make sure that the following are included and undamaged: UltimateAir RecoupAerator 200DX Energy Recovery Ventilator with four (4) starter collars packaged inside the RecoupAerator. Literature package with maintenance guide, parts list, registration card, and warranty.
- Page 6 A qualified electrician should do this work. Use proper circuit protection. If you have any doubts about the grounding in your building, contact a qualified electrician. The UltimateAir® RecoupAerator® 200DX Manual and Installation Guide, March 2014...
- Page 7 Vertical Installation Horizontal Installation BACK FRONT _______________________________________________________________________ Connect to the Inside Connect to the Outside The UltimateAir® RecoupAerator® 200DX Manual and Installation Guide, March 2014...
- Page 8 A simpler but somewhat less effective version of this system uses one exhaust and one or more delivery registers located strategically to encourage circulation throughout the house. The UltimateAir® RecoupAerator® 200DX Manual and Installation Guide, March 2014...
- Page 9 (e.g., the kitchen, bathroom, open stairwell). This method allows for independent control between the HVAC air handler and the RecoupAerator® (i.e., the air handler and the RecoupAerator® are not interlocked and run independent of each other). The UltimateAir® RecoupAerator® 200DX Manual and Installation Guide, March 2014...
- Page 10 RecoupAerator ducts. When using this method, your RecoupAerator® and your air handler must be wired to run simultaneously (i.e., they are interlocked). The UltimateAir® RecoupAerator® 200DX Manual and Installation Guide, March 2014...
- Page 11 Allow 24” on the front side of the unit for service and cleaning. The UltimateAir® RecoupAerator® 200DX Manual and Installation Guide, March 2014...
- Page 12 “D” rings located on the four corners. Allow adequate space (12”) between the ceiling and the unit to allow for servicing. Allow 24” below the unit for servicing. Allow 24” on the filter access side of the unit. The UltimateAir® RecoupAerator® 200DX Manual and Installation Guide, March 2014...
- Page 13 Duct connections inside each building will vary. The outside duct connections are the same for most installations and must be insulated.. The UltimateAir® RecoupAerator® 200DX Manual and Installation Guide, March 2014...
- Page 14 Final duct system should exhibit less than 0.6 in. wg total external static pressure at maximum airflow. Lowering the static pressure will lessen the electrical usage. The UltimateAir® RecoupAerator® 200DX Manual and Installation Guide, March 2014...
- Page 15 ½” per foot of spacing between supports. In no case will the hanger or saddle material supporting the flexible duct be less than 1½” wide. The UltimateAir® RecoupAerator® 200DX Manual and Installation Guide, March 2014...
- Page 16 Pull insulation and vapor Mechanically fasten the barrier jacket over core and snug against steel vapor barrier jacket with case to completely a draw band cover the duct fitting The UltimateAir® RecoupAerator® 200DX Manual and Installation Guide, March 2014...
- Page 17 3. Wire the RecoupAerator to run only with the furnace air handler. 4. Run at the lowest flow setting necessary for fresh air requirements. The UltimateAir® RecoupAerator® 200DX Manual and Installation Guide, March 2014...
- Page 18 Never place an air intake in a garage, for instance. 3. Make sure that the joints between the termination vents and the walls are sealed to prevent air and moisture penetration. The UltimateAir® RecoupAerator® 200DX Manual and Installation Guide, March 2014...
- Page 19 EconoCool. This unit comes with an economic ‘night’ flush feature. There is a small silver toggle switch mounted next to the Main Power switch to turn EconoCool ON and OFF. Please see the ‘econocool’ section in this manual for further detail. The UltimateAir® RecoupAerator® 200DX Manual and Installation Guide, March 2014...
- Page 20 Three-motor Main Control Board The UltimateAir® RecoupAerator® 200DX Manual and Installation Guide, March 2014...
- Page 21 0-10V DC may be used to control the RecoupAerator operation. When J3 is in 0-10V position, JMP1 MUST be in EU position for the 0-10V input to work. The UltimateAir® RecoupAerator® 200DX Manual and Installation Guide, March 2014...
- Page 22 Not connected. Empty socket. DP IN: Delta pressure control input, positive(+0) side. Not functional without Pressure Control Transmitter option. Standard Recoupaerator has air flow offset capabilities, see Airflow Offsets. The UltimateAir® RecoupAerator® 200DX Manual and Installation Guide, March 2014...
- Page 23 16 VA for optional accessories. When designing your control strategy, keep in mind that you cannot over draw the 20 VA. Below are accessories UltimateAir offers, along with their power usage. Boost Timer 1.4 VA sensing switch 3 VA Pressure Transmitter 3 VA ...
- Page 24 3. Be sure the RecoupAerator is switched OFF and unplugged. Using a flat screw driver or a 5/16 nut driver, remove the exterior electrical cover. 4. Un-wire the Wall Controller from the RecoupAerator, note the terminal labels. The UltimateAir® RecoupAerator® 200DX Manual and Installation Guide, March 2014...
- Page 25 6. If wiring to a furnace, you MUST REMOVE jumpers JP6 and JP7. If NOT wiring to a furnace, jumpers JP6 and JP7 MUST be in place. See furnace wiring for more detail in this manual. The UltimateAir® RecoupAerator® 200DX Manual and Installation Guide, March 2014...
- Page 26 Note that all Switch relays must be capable of switching LOW VOLTAGE (24vac). High Voltage Contact switches will often fail used with 24VAC because of the lack of required high voltage arcing to keep them clean and functional. The UltimateAir® RecoupAerator® 200DX Manual and Installation Guide, March 2014...
- Page 27 55° and 70° Fahrenheit. The EconoCool toggle switch must be ON for this function to work. The UltimateAir® RecoupAerator® 200DX Manual and Installation Guide, March 2014...
- Page 28 The UltimateAir® RecoupAerator® 200DX Manual and Installation Guide, March 2014...
- Page 29 3. Run two wires (20/22GA) from the furnace to the input terminals on the UltimateAir 200DX main control marked F1 (24 VAC Line) and F2 (24 VAC common). The UltimateAir 200DX will now run only when the furnace air handler is ON.
- Page 30 The UltimateAir® RecoupAerator® 200DX Manual and Installation Guide, March 2014...
- Page 31 The UltimateAir® RecoupAerator® 200DX Manual and Installation Guide, March 2014...
- Page 32 At lower air flow settings, the air streams will become proportionally closer together until they are equal at the minimum air flow. The UltimateAir® RecoupAerator® 200DX Manual and Installation Guide, March 2014...
- Page 33 The UltimateAir® RecoupAerator® 200DX Manual and Installation Guide, March 2014...
- Page 34 Boost, EconoCool™, air flow offsets, and furnace input functions are still operational when using the 0-10V input signals to control the unit. Review following graph for the input VDC versus airflow relationship to help program your control. The UltimateAir® RecoupAerator® 200DX Manual and Installation Guide, March 2014...
- Page 35 8.00 9.00 10.00 Vin (volts) Note: Curves are generated from actual test data but should only be used as general guidelines. Actual results may vary. The UltimateAir® RecoupAerator® 200DX Manual and Installation Guide, March 2014...
- Page 36 “W” and “Y” on the 3 Motor Main Control description. Jumper J7 must be in the I/O position for this relay to activate on unit start. Max contact rating: 1A@24VAC Minimum permissible load: 1mA@5VDC The UltimateAir® RecoupAerator® 200DX Manual and Installation Guide, March 2014...
- Page 37 OFF. The light will come on again after approximately 90 days. Check your pre-filters and energy wheel transfer/filtration material for cleanliness at this time. To order replacement filtration materials, visit us online at: www.ultimateair.com The UltimateAir® RecoupAerator® 200DX Manual and Installation Guide, March 2014...
- Page 38 5. Check the pre-filters for build-up. The pre-filters may be cleaned by soaking in warm soapy water, then rinse. If they are clogged a new set should be purchase from UltimateAir. Pre-filters should be mostly dry before reinstalling. 6. Replace the filter cover insert blocks and access cover 7.
- Page 39 The UltimateAir’s patented energy transfer wheel contains six removable filter pie wedges which periodically require replacement. These pies are also known as ’energy transfer/filtration material’ because they not only filter incoming air, they also transfer heat and moisture from one air stream to the other giving the machine the 96% Heat/Energy recovery rating.
- Page 40 2. Remove the filter access cover. 3. Remove the four hex head (5/16”) screws holding the ‘front’ metal cover then remove the white expanded foam board directly behind the metal cover. The UltimateAir® RecoupAerator® 200DX Manual and Installation Guide, March 2014...
- Page 41 5. Install white foam board then the metal front cover. 6. Operate unit with wheel visible through top door to verify rotation. Replace the filter access cover The UltimateAir® RecoupAerator® 200DX Manual and Installation Guide, March 2014...
- Page 42 10° F or Purchase an efficient 10° F to protect from frost pre-heater option from UltimateAir forming inside the for operation below 10° F. machine Temperature Probe Problem? The UltimateAir® RecoupAerator® 200DX Manual and Installation Guide, March 2014...
- Page 43 Cold air unconditioned air space unconditioned air spaces Heat recovery wheel not Check for broken or slipping wheel rotating or one of the two drive belt blowers is not running The UltimateAir® RecoupAerator® 200DX Manual and Installation Guide, March 2014...
- Page 44 The UltimateAir® RecoupAerator® 200DX Manual and Installation Guide, March 2014...
- Page 45 4100 Three Motor Controller 7000 Drive Roller / Motor Mount Assembly 7001 Front Motor Plate Assembly 7005 Back Motor Plate Assembly EUCONTR Wall Dial Controller Assembly 7012 Pre-Filter Set The UltimateAir® RecoupAerator® 200DX Manual and Installation Guide, March 2014...
- Page 46 Electronics Assemblies Part Part Description 2001 Electronics Plate 2006 Electronics Cover 1 2007 Electronics Cover 2 3013 Polypropylene Impeller 4104 Wheel Drive 4132 Transformer 230Vac 63VA 4103 Blower Motor The UltimateAir® RecoupAerator® 200DX Manual and Installation Guide, March 2014...
- Page 47 Drive Roller Pulley Assembly 3005 Driver Roller Belt 3021 Drive Roller Spring 4202 HRW Drive Motor 5001 M6 Metric Masher 5002 Metric Shoulder Screw 5003 Metric Locknut 5009 Flat Head Machine Screw The UltimateAir® RecoupAerator® 200DX Manual and Installation Guide, March 2014...
- Page 48 Assembly 7014 Part No. Part Description 3003 Bearings 3006 Energy Recovery Wheel 3010 Centering Cone 3016 Shaft 3017 7013 Energy Transfer/Filtration Material (set of 6 “pies”) The UltimateAir® RecoupAerator® 200DX Manual and Installation Guide, March 2014...
-
Page 49: Technical Data
1 Step Offset Maximum Offset 100% % Controller Input Note: Curves are generated from actual test data but should only be used as general guidelines. Actual results may vary. The UltimateAir® RecoupAerator® 200DX Manual and Installation Guide, March 2014... - Page 50 Power versus CFM CFM (L/s=n x 0.4719) Note: The power curve was generated using the average air flow rate over all four ducts. The UltimateAir® RecoupAerator® 200DX Manual and Installation Guide, March 2014...
- Page 51 145 CFM 70 CFM External Static Pressure (Max=0.7 in H Note: Curves are generated from actual test data and should only be used as general guidelines. Actual results may vary. The UltimateAir® RecoupAerator® 200DX Manual and Installation Guide, March 2014...
-
Page 52: General Warranty Information
(5) years from the date of purchase. See Warranty document (not part of this manual) for complete warranty information. If you have lost your warranty or have questions concerning your warranty protection, email us at info@ultimateair.com. The UltimateAir® RecoupAerator® 200DX Manual and Installation Guide, March 2014...
Need help?
Do you have a question about the RecoupAerator EURO 200DX and is the answer not in the manual?
Questions and answers