Advertisement
STEP
There will be two spots of hot
7 7
glue holding the LEDs in
place. Use a screw driver to
loosen the wires from the
spots of glue. Pull the LEDs
back towards the inside of the
shell to remove them.
Replace the LEDs with a new
set and use hot glue to put
the wires back in place. Plug
the wires back into the
connector under the interior.
When reassembling, the end
posts of the shell must pass
through the corresponding
holes in the interior.
LIMITED ONE YEAR WARRANTY
This item is warranted for one year from the date of purchase
against defects in material or workmanship. We will repair or
replace (at our option) the defective part without charge for parts
or labor, if the item is returned to the address below within one
year of the original date of purchase. This warranty does not
cover items that have been abused or damaged by careless
handling. Transportation costs incurred by the customer are not
covered under this warranty.
This warranty gives you specific legal rights and you may have
other rights which vary from state to state.
M.T.H. Electric T rains, Inc. • 7020 Columbia Gateway Drive • Columbia, MD 21046-1532
STEP
6 6
Unplug the red LED's
from underneath the
interior.
End posts
Wires should be
of the shell
tucked behind these
clips upon re-assembly
M.T.H.
ELECTRIC TRAINS, INC.
7020 Columbia Gateway Drive
Columbia, MD 21046-1532
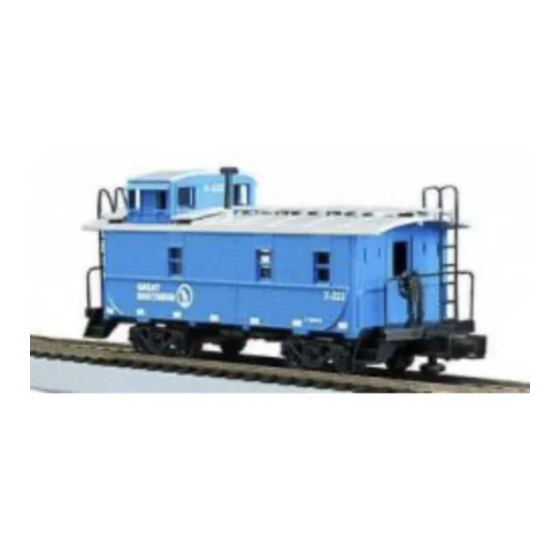
The Premier Steel Caboose offers a new level of
excitement and realism for your O Gauge
model railroad. Constructed from sturdy ABS
plastic, the Steel Caboose was created from
quality components and has been designed for
years of operation.
The Premier Steel Caboose comes fully
assembled, decorated and ready for use right
out of the box. The Steel Caboose features an
illuminated interior and exterior marker lights,
controlled from track power. Use and operation
is made easy by following the instructions on
the following pages.
Caboose
S t e e l
Advertisement
Table of Contents

Related Manuals for MTHTrains Premier 20-91219


Summary of Contents for MTHTrains Premier 20-91219
- Page 1 STEP M.T.H. Unplug the red LED's ELECTRIC TRAINS, INC. from underneath the interior. 7020 Columbia Gateway Drive Columbia, MD 21046-1532 STEP There will be two spots of hot End posts Wires should be of the shell glue holding the LEDs in tucked behind these place.
- Page 2 STEP To replace the interior light bulbs, follow these steps. 1) To remove the shell from the chassis, remove the four mounting NSTRUCTIONS STEP screws located underneath the trucks. 2) With the four screws removed, lower the chassis from the shell, take care not to STEP STEP pull the wires out.
Need help?
Do you have a question about the Premier 20-91219 and is the answer not in the manual?
Questions and answers