
Subscribe to Our Youtube Channel
Related Manuals for MTX X3-17-FS-U


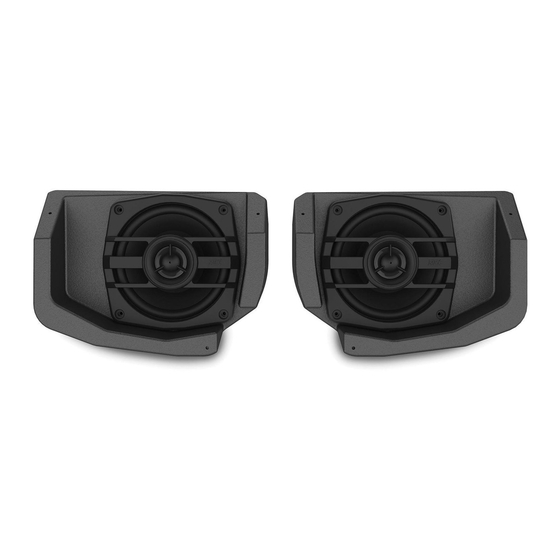
Summary of Contents for MTX X3-17-FS-U
- Page 1 X3-17-FS-U CAN-AM MAVERICK X3 FRONT UPPER SPEAKER PODS ® OWNER’S MANUAL M T X . C O M...
-
Page 2: We're Here To Help
THANK YOU Thank you for making the AWESOME decision to purchase our MTX Audio 4" weatherproof upper dash speakers for your Can-Am Maverick X3. With a few simple tools from your trusty toolbox ® you’ll have these installed in no time. The rotationally molded enclosures are built as a single piece, designed to take years of abuse without failure and they install quickly with only minor disassembly of the vehicle. -
Page 3: Specifications
X-MR Turbo RR / Max X-MR Turbo RR ....................2020 - 2021 X-MS Turbo RR ..............................2020 X-DS Turbo RR / Max X-DS Turbo RR ....................2020 - 2021 IN THE BOX • X3-17-FS-U Dash Speaker Pods (Left and Right Enclosures) • Mounting Hardware (4) T-20 Machine Screws (2) T-20 Coarse Thread Screws... -
Page 4: Installation
INSTALLATION Step 1 - On the driver side, locate and remove seven (7) T-30 Torx screws and two (2) pushpin rivets from the driver’s side upper dash panel. • Two (2) located to the left of the steering wheel. • Three (3) located at the front along the windshield line. M T X . - Page 5 • Two (2) located on either side of the steering wheel. • Two (2) pushpins located on the right side of the panel at top center tray. Step 2 - Disconnect the light switch harness from the back of the switch. Note: If any additional switches are mounted in this panel, disconnect at this time.
- Page 6 Step 3 - Release and push the steering wheel to its lowest position for proper clearance. Step 4 - Lift up on the dash panel releasing the harness clips from the bottom side as you do. Step 5 - Once the panel is loose, disconnect the computer harness from the computer module attached to the panel and remove the panel from the vehicle.
- Page 7 Step 6 - On the passenger side, locate and remove five (5) T-30 Torx screws, one with 10mm nut, and two (2) pushpin rivets from the passenger’s side upper dash panel. • Two (2) located on the right side upper dash, one has a 10mm nut located behind gas cap cover panel.
- Page 8 • Two (2) pushpins located on left side of the panel at top center tray. Step 7 - With hardware removed, lift up on the dash panel releasing the harness clips from the bottom side as you do. Step 8 - Once the panel is free, remove the panel from the vehicle. Step 9 - Prep the panels for installation by removing the speaker opening cover panel located on the bottom side of each panel.
- Page 9 Step 10 - Using side cutters or a razor knife, remove the four (4) mounting tabs on the bottom side of the panel around the speaker opening to provide proper clearance for the pod installation. Note: These DO NOT need to be perfectly flush with the back of the panel. Step 11 - Turn the panel over and locate the three (3) dimples around the molded speaker grill.
- Page 10 Step 13 - On the speaker pods, locate the single molded dimple at the bottom of the pod face. Step 14 - Using a ⁄ " drill bit, pre-drill the hole approximately ⁄ " deep to allow the mounting screw to be started by hand.
- Page 11 Step 17 - Tighten the machine screws securing the pod to the panel. Step 18 - Repeat this process on the other panel. Step 19 - With the panels back at the vehicle, route the pod speaker wire to its connection point. Note: If installing as part of a kit, the upper pod plug will connect to the pigtail located as part of the lower pod harness.
- Page 12 NOTES M T X . C O M...
- Page 13 NOTES M T X . C O M...
- Page 14 NOTES M T X . C O M...
-
Page 15: Warranty Period
WARRANTY PERIOD At MTX Audio we engineer products that will stand up to the test of time. We also realize that from time to time a problem may occur. That’s why our products carry a 2-year limited warranty that begins at the time of sale to the end user. - Page 16 Like, Follow, & Subscribe © 2021 MiTek Corporation. All rights reserved. MTX is a trademark of MiTek Corporation. All other trademarks are property of their respective owners. Designed and Engineered in the U.S.A. Due to continual product development, all specifications are subject to change without notice.
Need help?
Do you have a question about the X3-17-FS-U and is the answer not in the manual?
Questions and answers