Table of Contents
Advertisement
Read all the instructions in this manual carefully to familiarise yourself with the most
This manual is an integral part of the appliance and must always be kept in good condition
near the appliance. Read all the information contained in this manual carefully before
using the appliance. Installation must be performed by qualified technicians in accordance
with applicable regulations. This appliance is intended for professional use and complies
with the machinery directive 2006/42/EC, the international electrical and mechanical
safety standards (CEI-EN-IEC 60335-2-58/61770) and the electromagnetic compatibility
standard (CEI-IEC-EN 55014-1/-2, 61000-3;4, 50366).The appliance has been
manufactured to wash dishes (plates, cups, bowls, oven dishes, glasses, cutlery) and
similar items for the food and mass catering sectors; any other use is considered improper.
The manufacturer shall bear no liability for uses other than those stated above.
1 PRODUCT IDENTIFICATION AND SAFETY AND OPERATING WARNINGS
1.1. Brand and model (or type)
Professional dishwasher
Brand: Smeg
Model: SW260/262/264
Edition (revision) of user manual
1.2. Name and address of manufacturer/distributor
Smeg S.p.A.
Via Leonardo da Vinci 4, 42016 Guastalla (RE), Italy – Tel. +39 0522 8211 - Fax + 39 0522 821453
website:
www.smegfoodservice.com,
Info:
INFORMATION AND SUPPORT FOR SMEG PROFESSIONAL DISHWASHER PRODUCTS
Our Sales Department staff will be able to provide you with information about prices and special offers.
Our After-Sales Department will be able to provide you with guidance on keeping your appliance operating
correctly and put you in touch with your nearest authorised Service Centre. Our entire product range can be
viewed at the website above.
Translation of the original Instructions
SMEG thanks you for choosing one of
its products.
suitable conditions for proper use of your dishwasher.
19 390 5043 09
Manual Rev.
email : foodservice@smeg.it
19/11/2018
Date
1
Advertisement
Table of Contents

Related Manuals for Smeg SW260


Summary of Contents for Smeg SW260
- Page 1 Info: INFORMATION AND SUPPORT FOR SMEG PROFESSIONAL DISHWASHER PRODUCTS Our Sales Department staff will be able to provide you with information about prices and special offers. Our After-Sales Department will be able to provide you with guidance on keeping your appliance operating correctly and put you in touch with your nearest authorised Service Centre.
- Page 2 Decommission the appliance in compliance with local waste management regulations. For further information on the processing, disposal and recycling of this product, contact the local authority, domestic waste collection service or your Smeg reseller. The appliance must be earthed in compliance with electrical safety regulations...
-
Page 3: Product Specifications
3 PRODUCT SPECIFICATIONS 3.1 Application, general functions and intended use Dishwasher intended exclusively for professional use, must be used by authorised and trained staff. Designed for washing tableware (plates, cups, bowls, oven dishes and cutlery) and similar catering items, and complies with international electrical and mechanical safety standards. -
Page 4: Back Panel Connections
IMPORTANT Models equipped with condensers must be supplied with cold water within the specified temperature range if the condenser itself is to work properly; water hardness must be < 40°f (21°dh) BACK PANEL CONNECTIONS Description Hot water supply hose (red collar) Cold water supply hose (blue collar) Power supply cable Steam condenser drain hose (where applicable) -
Page 5: Technical Characteristics (Power, Plumbing)
protection device (e.g. MCB or fuses on each phase, rated for the electrical specifications given above). 3.3 Technical characteristics (power, plumbing) Electrical connections (see technical data plate) Abbreviations used for the electrical connections. Three phase/single phase version models: POWER CABLE SPECIFICATIONS POWER SUPPLY CIRCUIT BREAKER... -
Page 6: Drain Hose Connections
CAUTION – MAINS WATER HARDNESS Let check from a certified service technician the main water hardness. Only if the hardness of the mains water is known can the Smeg technician set the dishwasher's parameters for the integrated water softener. You should run regular checks (e.g. once or twice a year) of the mains water quality to ensure that the initial values are maintained and adjust the dishwasher's settings if necessary. - Page 7 Dimension “I” DRAIN TYPE AND DIMENSION “H” ABOVE Distance of drain from side of GROUND LEVEL [cm] No. DRAIN HOSES appliance [cm] Type Hmin Hmax Fig. 6 – Drain connection. Drain connections – 65 cm < H < 80 cm. Dimension “X”: use only original drain hoses and the supplied tube bend guides. The dimension “X”...
-
Page 8: Environmental Conditions (Storage And Operating)
For further information on the processing, disposal and recycling of this product, contact the local authority, domestic waste collection service, or your Smeg reseller. Do not use appliances which have been damaged during transport. If you have any doubts, contact your reseller. - Page 9 disabilities This dishwasher may only be used by adults. Use by persons with mental and/or physical is only permitted under the supervision of a person responsible for their safety. Keep children away from detergents and packaging materials (plastic bags, polystyrene, etc.), and never allow them to approach or play with the dishwasher, since it might contain detergent residues capable of causing permanent damage to the eyes, mouth and throat, and even leading to suffocation.
-
Page 10: Preparing The Appliance For Use
4 PREPARING THE APPLIANCE FOR USE 4.1 Removing the packaging and inspecting After removing the packaging (straps, cardboard, wooden base and PVC cover), check the condition of the appliance; the filling and drain hoses, power cable, and metal parts must all be securely fastened. 4.2 Disposing of the packaging material The packaging components (plastic bags, expanded polystyrene, nails, etc.) must not be left within reach of children and pets since they are potentially dangerous. -
Page 11: Precautions Before Use
The appliance may only be installed, serviced or repaired by a technician authorised by the Manufacturer. Repairs performed by unauthorised persons not only void the warranty but may be hazardous to the user. Only use original Smeg spare parts when replacing components. 4.6 Precautions before use First start-up The electrical protection system must undergo a functional test before the appliance is put into operation. -
Page 12: Operating Information And Instructions
– avoid contact with the skin due to the danger of scalding and irritation due to the toxicity of the chemical products. Never touch the heating elements in the wash chamber. Contact authorised Smeg technical staff in the event of a malfunction. -
Page 13: Using Detergent And Rinse Aid
Correct use of the peristaltic pumps – OPTIONAL WARNING The peristaltic pumps must be installed by a technician authorised by an authorised Smeg technician. After installation, they must be enabled (see SET-UP) In this case, do not use the door dispenser; the machine must be hooked up to the detergent (red hose) and rinse aid (transparent hose) containers. - Page 14 (there is a sensor connection for each peristaltic pump). This procedure must be done by an authorised Smeg technician. fig. 10 – Configuration with LEVEL SENSOR: Detergent intake nozzle with integrated level sensor. The intake nozzle is fitted with a filter; make sure this is always properly located to prevent lumps being drawn up.
-
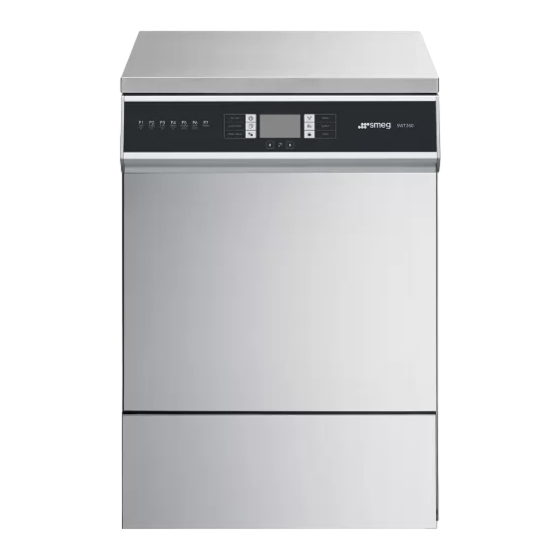
Page 15: Description Of Controls And Wash Programs
Check from time to time that the silicone hose is properly secured to the intake pipe, and that there are no leaks. Use suitable means (such as cable ties) to secure the silicone hose to the stainless steel pipe. 5.4 Description of controls and wash programs Controls All the dishwasher's controls are located on the front panel. -
Page 16: Buttons Description
Detailed description BUTTONS DESCRIPTION On/Off This button is enabled both with the door open and closed. It turns the interface on/off, thus allowing the dishwasher to be operated. Brief press: shows the remaining cycle time Hold the button down for 2 seconds to turn on or off. Once on, the dishwasher displays the program ID (e.g. - Page 17 BUTTONS DESCRIPTION The door opens automatically with an electric lock, and is only possible under certain conditions. Simply press the button; the door will open when it is released. Select Press the > button to move to the next program or < for the previous one; the selection cycles from last to first and vice-versa depending on direction;...
-
Page 18: Loading Tableware
If the dishwasher is stopped The value gives the nominal cycle duration. The time LED also turns on. The 1 : 16 duration is approximate, depending on load, intake water temperature and electrical connection. If the cycle is in progress: Remaining cycle time The selected cycle includes a final heat disinfection step –... -
Page 19: Height Adjustment Of The Upper Basket
5.7 Height adjustment of the upper basket Adjustment procedure The upper basket’s height can be adjusted so that larger dishware can be placed in the lower basket. 2) Open the retaining clip on both rails (see 1) Remove the basket. white circle). -
Page 20: Selecting The Washing Program
5.8 Selecting the washing program Selecting the washing program Select the program available, referring to the models and versions in the next point, depending on the type of soiling and the amount of tableware loaded into the baskets To run a program: 1. - Page 21 5.8.1 Models: SWT262 Panel: Powder detergent PROGRAM Type of soiling Thermal disinfection (when a detergent peristaltic pump is not installed) Lightly soiled dishes Medium temperature, short 20 grams Heavily soiled dishes Medium temperature, short 25 grams Lightly soiled dishes Medium temperature, long 20 grams Heavily soiled dishes Medium temperature, long...
- Page 22 5.8.2 Models: SWT260X Powder detergent PROGRAM Type of soiling (when a detergent peristaltic pump is not installed) Specifically for glasses 15 grams Lightly soiled dishes, washed immediately after use. 20 grams Normally soiled dishes, washed immediately after use. 20 grams Heavily soiled dishes 25 grams Normally soiled dishes, with final thermal disinfection...
- Page 23 5.8.3 Models: SWT260, SWT260M: Program sequence- SET 1 AUTO-OPEN REPEAT FUNCTION FUNCTION DISPLAYED CYCLE TIME * WASH FINAL RINSE AVAILABLE PROGRAM PREWASH INTERMEDIATE AVAILABLE (°C/time) (°C/time) RINSE AS AN ALTERNATIVE AS AN ALTERNATIVE WITH REPEAT STANDARD TO AUTO-OPEN TO REPEAT ACTIVE Pr 01 45°...
- Page 24 5.8.4 Modelli: SWT264X PROGRAM Powder detergent PROGRAM NAME Type of soiling (when a detergent peristaltic pump is not installed) Specifically for glasses 15 grams Glasses Beer glasses Beer glasses, cold final rinse 20 grams Normally soiled dishes, washed immediately after 20 grams Energy Universal...
-
Page 25: End Of Cycle
5.9 Drying cycle (where applicable) The drying cycle runs at the end of the wash program, see table of programs. If the current program includes drying, the corresponding indicator LED turns on. 5.10 Repeat (where applicable) The Repeat function speeds up operation by reusing the last rinse water for the next wash. 5.11 End of cycle Once the program has terminated, the display reads “End”... -
Page 26: Reset Procedure
5.12 nterrupting a running program A program may be interrupted while it is running by pressing the Start/Pause button. While the machine is paused, the display reads “S” followed by the program code. 5.12.1 Pausing a program A program may be paused while it is running by pressing the Start/Pause button. The response of the machine to such a command depends on the conditions in the wash chamber, for instance: ... -
Page 27: Setup Mode And Functions
6 SETUP MODE AND FUNCTIONS The dishwasher has a set-up mode for changing the operating parameters. The wash parameters are not password protected, but the configuration parameters are. 6.1 Entering set-up mode Entering the USER menu To enter the wash settings menu, hold down the DRAIN button until the control panel displays “unlo” and then flashes “Set”: release and press the button again immediately, this accesses the USER menu. - Page 28 POSSIBLE POSSIBLE DESCRIPTION TECHNICIAN PARAMETER USER ACTION ACTION Additive dispensing type setting - dd (detergent and rinse aid dispenser on door) - PP (peristaltic pumps) - dP (door dispenser and peristaltic pumps) 4 – Enabling the peristaltic pumps (PP) disables the powder dispenser (dd), while in "dP"...
-
Page 29: Cleaning And Routine Maintenance
Setting water hardness “SET 3“ SET 3 Parameters Value °f °d (default) 22.5 Coun menu The display reads Coun. This menu displays the total number of cycles run with the dishwasher. To display them, hold down . The value is displayed over two successive screens. The thousands value is followed by “t”, the units value by “u”. -
Page 30: Cleaning The Appliance And Its Parts
Once a year At the end of the warranty period and every year thereafter and whenever message tECH is displayed, contact the nearest Smeg authorised service centre for a complete check-up on the machine. Lengthy periods of disuse If the dishwasher is to be out of use for a fairly long period of time, the detergent and rinse aid... - Page 31 Fig. 13 – water intake filter A Cleaning the spray arms The spray arms are easily removed by undoing the knurled nut securing them to the rotary shaft, so that the nozzles can be cleaned to prevent blockages. Wash the spray arms and nozzles under clean running water and carefully reinstall them, checking that their rotation is in no way impeded.
- Page 32 External circular filter To remove this filter: Take hold of the conical filter's tabs and turn anticlockwise (box A). Without pressing the tabs, lift the assembly (box B). When cleaning this filter, the others should also be cleaned. How to install the filters: ...
- Page 33 1. Close the water supply taps. 2. Disconnect the machine from its power supply. 3. Check that the machine is properly hooked up (water and power) and that the initial installation conditions have not changed. 4. Contact Smeg technical service.
- Page 34 ALARM ID DESCRIPTION USER ACTION The water does not heat to User: run the DEFAULT PROCEDURE described above. If the AF:01 temperature in the set time. alarm does not reset, run the RESET PROCEDURE. Operating temperature sensor TL1 has generated an User: run the DEFAULT PROCEDURE described above.
- Page 35 ALARM ID DESCRIPTION USER ACTION Check the machine's water supply: 1. Supply pressure. During the cycle, the wash 2. Check that the connections are correct, as specified in this chamber water level exceeds manual. AF:30 the safety level. Water safety User: run the DEFAULT PROCEDURE described above.
- Page 36 ALARM ID DESCRIPTION USER ACTION Dryer motor cooling cycle fault. This cycle runs after drying to User: run the DEFAULT PROCEDURE described above. If the A:67 bring the dry load and heating alarm does not reset, run the RESET PROCEDURE. elements to a safe temperature.
- Page 37 Index PRODUCT IDENTIFICATION AND SAFETY AND OPERATING WARNINGS ..........1 1.1. Brand and model (or type) ........................1 1.2. Name and address of manufacturer/distributor ..................1 1.3. Declaration of conformity with product standards ................. 2 SYMBOLS ............................. 2 PRODUCT SPECIFICATIONS ........................3 Application, general functions and intended use ..................
- Page 38 Loading tableware ..........................18 Example loads ..............................18 Height adjustment of the upper basket ....................19 ................................... 19 Selecting the washing program ......................20 Selecting the washing program ......................... 20 5.8.1 Models: SWT262 ..........................21 5.8.2 Models: SWT260X .......................... 22 5.8.3 Models: SWT260, SWT260M: .......................
Need help?
Do you have a question about the SW260 and is the answer not in the manual?
Questions and answers