alcatraz Rock User Manual
Hide thumbs
Also See for Rock:
- Install manual (6 pages) ,
- Install manual (7 pages) ,
- Install manual (9 pages)
Table of Contents
Advertisement
Advertisement
Table of Contents

Related Manuals for alcatraz Rock


Summary of Contents for alcatraz Rock
- Page 1 Rock User Guide Ver. 1.01...
-
Page 2: Table Of Contents
On-Premise Pre-installation Requirements Add a Parameter - device.role Select the Operational Mode for the Rock Generate QR Code .......... - Page 3 The Rock can perform manual enrollment where the user profile is created in one shot. Mask Mask enforcement can be set in the Rock to ensure that a user must always wear a Enforcement mask when entering a space.
-
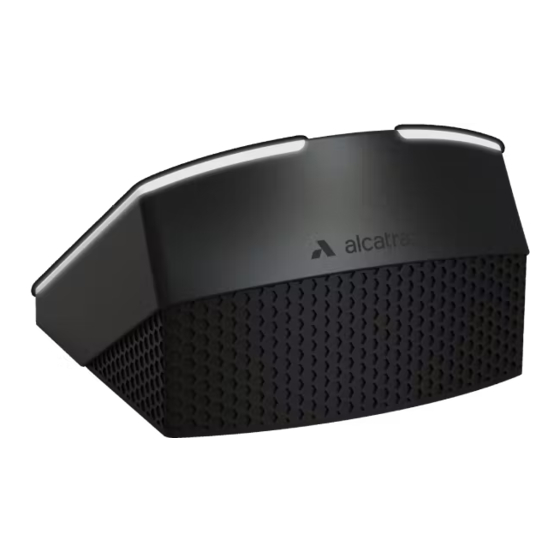
Page 4: Rock Overview
5 Explore the Rock’s Features page 5 – 1 Access Control page 5 – 2 Tailgating Intelligence page 5 – 3 Mask Intelligence page 5 – 4 Video Streaming (ONVIF) page 6 What is The Rock Compatible with? page 6... -
Page 5: Learn About The Rock
The Rock’s Mask intelligence provides the ability to authenticate and restrict access to users if a user Once a user has enrolled with the rock, there is no need to present a badge to gain access to an area. is not wearing a mask. When a user approaches the Rock to gain entry, if the user is not wearing a Subsequent request for entry only requires that the user approach the Rock for authentication. -
Page 6: Video Streaming (Onvif)
IP networks, and Profile T, for advanced video streaming, are both supported. The Rock supports sending events to the VMS to trigger camera call-up or recording via Profile T. These events include Authentication, Tailgating and Tamper. The Rock includes a 2-megapixel HDR color camera that can be connected to a VMS that is ONVIF compliant. -
Page 7: Pre-Installation Requirements
Pre-Installation Requirements Cloud-Hosted Pre-installation Requirements page 8 On-Premise Pre-installation Requirements page 9... -
Page 8: Cloud-Hosted Pre-Installation Requirements
If the network port is not PoE+ then a PoE+ injector must be provided (802.3at Type 2) ■ The Ethernet cable from the PoE+ network port to the Rock is cat5e or higher, must be in good ■ condition, and shorter than 100m. -
Page 9: On-Premise Pre-Installation Requirements
If the network port is not PoE+ then a PoE+ injector must be provided (802.3at Type 2) ■ The Ethernet cable from the PoE+ network port to the Rock is cat5e or higher, must be in ■ good condition, and shorter than 100m. -
Page 10: Generate Qr Code
Generate QR Code Overview page 11 QR Code Generator page 11... -
Page 11: Overview
Overview The Rock can accept an IP address dynamically via DHCP, or be assigned a static IP address. To configure the network settings of a Rock, we use the Rock like a QR code scanner. The Admin Portal has a QR Code Generator feature that encodes network settings;... - Page 12 For DHCP - Select Automatically if the Rock will acquire an IP address by DHCP, than click Next. For Static IP - select Manually and enter the required information, than click Next to continue. Ver. 1.01...
- Page 13 Server Location Select a Server Location and click Next. 1. For Cloud Hosted – select Hosted by Alcatraz 2. For On-Premise – select Local Server and enter the Server IP For On-Premise Rocks, a For Cloud Server Hostname / Hosted IP Address will be required Ver.
- Page 14 Click download QR Code to save to your computer, email or text. Download the QR Code and present to the Rock’s image sensor on a printout, on a laptop screen or on a mobile device. Note: The recommended method is to print out on a piece of paper (image minimum size 2x2 inches or 5 cm).
-
Page 15: Hardware Installation
Hardware Installation... - Page 16 Cloud-hosted and on-premise Rock installation follow the same steps. The Rock begins booting up once the PoE+ cable is attached and completes in Demo mode. Before beginning, write down the Device ID found on the box the Rock was packaged in or alternatively, on the back of the Rock.
-
Page 17: End-To-End Installation Test
End-to-End Installation Test OLED Display page 18 How is a successful install confirmed? page 18 Out of the Box Settings page 18 Pre-Requisites page 18 Step 1A – Auto-Enrollment (Badge-in #1) page 19 Step 1B – Auto-Enrollment (Badge-in #2) page 20 Step 2 –... -
Page 18: Oled Display
GREEN Access Granted How is a successful install confirmed? A successful installation of the Rock on the wall is confirmed by carrying out this quick test. A test pass confirms: Reader and ACS are correctly wired to the Rock ■... -
Page 19: Step 1A - Auto-Enrollment (Badge-In #1)
*LED is white *LED turns blue then green 1. Approach the Rock 2. The Rock will display a white dot for person in range and a grey badge icon 3. Present a badge to the tethered reader Test Pass: Reader illuminates green, ■... -
Page 20: Step 1B - Auto-Enrollment (Badge-In #2)
*LED is white *LED turns blue then green 1. Approach the Rock 2. The Rock will display a white dot for person in range and a grey badge icon 3. Present a badge to the tethered reader Test Pass: Reader illuminates green, ■... -
Page 21: Step 2 - Authentication (No Badge-In)
Approach the Rock a third time but do not present badge ■ Note: if icon remains grey, auto-enrollment must be repeated until you approach the Rock and it authenticates without badge. Poor lighting may be a cause if additional enrollments are required. The Rock needs to capture biometrics until it can bind to your profile. -
Page 22: Rock Configuration
Rock Configuration... - Page 23 Once the end-to-end installation test successfully completes, the physical installation of the Rock is finished. 1. The Rock is wired correctly to the Reader and ACS 2. Auto-enrollment has been confirmed 3. Authentication has been confirmed The next part of the process is to configure the Rock for normal operations.
-
Page 24: Configure Network Settings
Configure Network Settings... - Page 25 The steps to configure the Rock network settings for cloud-hosted and on-premise are the same. However, Step 2 – If the Rock status bar displays the following two icons and the info bar scrolls the correct IP the specific network IP addresses used to generate the QR code for cloud-hosted and on-premise will settings, the Rock can be onboarded.
- Page 26 Onboard a Rock Login to the Alcatraz Admin Portal page 27 Verify Existing Site or Create a New Site page 27 Enter the Device ID page 28 Select the Device to be Configured page 28 Authenticate the Device page 29...
-
Page 27: Login To The Alcatraz Admin Portal
Login to the Alcatraz Admin Portal Onboarding a Rock is carried out after the physical installation has been successfully verified and no status icons except Not Onboarded and QR Code Receptive remain. This process associates the Rock with the Customer Site for where the Rock is installed and operating. -
Page 28: Enter The Device Id
Enter the Device ID Enter the 6 digit Device ID (indicated by ID) in the search bar to locate the Rock for onboarding. The 6 digit Device ID can be found: 1. On the outside of the package the Rock was shipped in. -
Page 29: Authenticate The Device
Authenticate the Device In Devices list, the Rock will be in Status = Pending, State = Offline 1. Click on Authenticate 2. A window pops open, choose the Site and click Authenticate The Rock has been successfully onboarded when the Status = and State = Check that the Site is Correct. -
Page 30: Name The Device
Name the Device 1. Click on the three dots of the device ID and select Edit. Ver. 1.01... - Page 31 2. An Edit Device pane will open for editing. Enter a name for the Rock 3. Click Submit 644be8 Ver. 1.01...
- Page 32 4. View the updated Rock Name in the list of Devices Ver. 1.01...
-
Page 33: Configure Rock Mode
Configure Rock Mode Configuring Mode via Admin Portal page 34 Add a Parameter - device.role page 35 Select the Operational Mode for the Rock page 37 Device Mode Setting – Demo page 38 Device Mode Setting – 1FA page 39 Device Mode Setting –... -
Page 34: Configuring Mode Via Admin Portal
Configuring Mode via Admin Portal From the Device Management menu, select Devices. Click on the three dots next to the Device ID, select Edit to open the Edit Device pane. Ver. 1.01... -
Page 35: Add A Parameter - Device.role
Add a Parameter - device.role 1. Click on Add a parameter. 644be8 Ver. 1.01... - Page 36 2. Under Config Name drop-down menu, select device.role. 644be8 Ver. 1.01...
-
Page 37: Select The Operational Mode For The Rock
Select the Operational Mode for the Rock 1. Under Config Value field, select from the drop-down menu one of the following modes: demo ■ one-fa ■ one-fa-face-only ■ two-fa ■ enrollment ■ mask ■ 2. Click on the Save icon 3. -
Page 38: Device Mode Setting - Demo
In Demo mode, enrollment is completed by swiping a badge twice with a few seconds in between for the first two entries. On the third entry, the user will not be required to present their badge as the Rock will authenticate the face. -
Page 39: Device Mode Setting - 1Fa
This Rock is in 1FA mode or Single Factor Authentication. Auto-enrollment is on. A user will be enrolled once they have presented their badge and face to the rock at minimum 4 times separated by 5 minutes apart. Auto - Enrollment (perform minimum 4 times) -
Page 40: Device Mode Setting - 1Faf
*LED is white Device Mode Setting – 2FA This Rock is in 2FA mode or Two Factor Authentication. This mode requires that the user present their face and badge. Enrollment must be done at an enrollment station. User is an... -
Page 41: Device Mode Setting - Mask
Device Mode Setting – Mask This Rock is in Mask Enforcement mode. This mode requires that the user have a mask in place and present their badge before the Rock sends the user’s credentials to the ACS. User detected with no... -
Page 42: Device Mode Setting - Enrollment
Device Mode Setting – Enrollment This Rock has been assigned as an enrollment station with the main function of enrolling users. The user will approach the Rock and once within range, follow the Rock’s guiding icons on the OLED display. User needs to... - Page 43 Configure Card Format Configure Card Format page 44 Configure Pre-defined Card Format page 45 Configure Custom Card Type page 46...
- Page 44 Configure Card Format The Rock operates with any type of badge reader and badge. To display the badge number in the admin portal specific to the organization’s badge, the card format will need to be configured. 1. Card format can be configured by going to Accounts and clicking on View Account 2.
-
Page 45: Configure Pre-Defined Card Format
Configure Pre-defined Card Format 1. A selection of Pre-defined Card Formats can be configured by selecting from the drop down 2. Click Save and selection will be displayed in the list Ver. 1.01... -
Page 46: Configure Custom Card Type
Configure Custom Card Type 1. Custom card formats can be configured by selecting Custom 2. Enter Number of Bits to Change form and configure accordingly 3. Toggle bits as required to define badge number, facility number and parity 4. Click Save when finished Ver. -
Page 47: Hold, Tamper, Factory Reset
Hold, Tamper, Factory Reset Hold page 48 Tamper page 48 Factory Reset page 48... -
Page 48: Hold
Tamper detection from the badge reader or The Rock will send a Tamper signal to the ACS. On the back of the Rock is an Optical/IR sensor that will detect force removal from the wall. This detection triggers a signal to the ACS to alert that the device has been tampered with. -
Page 49: Resources
Resources Warranty page 50 Documentation page 50 Help Center page 50 Support Phone Line page 50 Troubleshooting page 51 Table of Icon Names page 52... -
Page 50: Warranty
Warranty Please review our warranty terms and conditions. Documentation Rock Install Guide Rock Technical Specification Sheet Rock End User Overview Help Center – support.alcatraz.ai Find answers to the most frequently asked questions ■ Raise a support ticket ■ Reference our How-To guides ■... -
Page 51: Troubleshooting
2. Printing the QR code on a piece of paper 3. Verifying no reflection is on the QR code The icon will disappear once the Rock is onboarded and status in Not Onboarded This icon appears in the status bar. -
Page 52: Table Of Icon Names
Table of Icon Names Icon Name OLED Icon Name OLED Person in Range Look Right Demo Mode Look Left Look Up Booting Look Down Tamper Detected Internal Comms Down Detected Enrollment Delay Ver. 1.01... - Page 53 Table of Icon Names Icon Name OLED Icon Name OLED Enrollment Failed 2FA Unknown Face & Badge Enrollment Successful 2FA Known Face & Unknown Badge 1FAF Unknown 2FA Unknown Face & Known Badge 1FAF Authenticated 2FA Known Face & Known Badge Mask Enforcement 1FA Unknown 1FA Authenticated...
- Page 54 583-0002-00-01 © 2021 Alcatraz AI Inc. All Rights Reserved...
Need help?
Do you have a question about the Rock and is the answer not in the manual?
Questions and answers