Table of Contents
Advertisement
Advertisement
Table of Contents

Related Manuals for Cambridge SoundWorks SoundWorks Radio 820HD


Summary of Contents for Cambridge SoundWorks SoundWorks Radio 820HD
-
Page 2: Important Safety Instructions
HD Radio™ Technology Manufactured Under License From iBiquity Digital Corporation. iBiquity Digital, the HD Radio logo, and the HD logo are registered trademarks of iBiquity Digital Corporation. HD RadioTM is a trademark of iBiquity Digital... -
Page 3: Table Of Contents
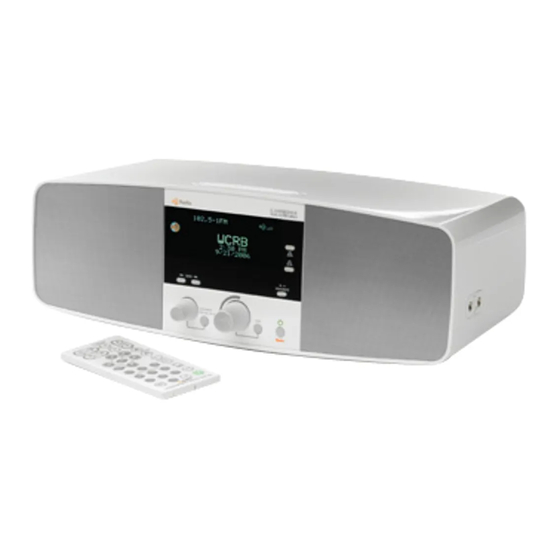
Page Index Product Carton Contents ..1 Initial Setup ... 2-3 Radio Operation ..4 Favorites Organizer Band Operation ..5 Technical Information ..6 Faceplate and Remote Control Quick Reference ... 8-9 Additional Information Audio Display, Jog Menus, Headphone/Aux Jacks ...10-11 Alarm Features ...11 Alarm Operation 1 - Wakeup Settings Adjustment ..12-15 Alarm Operation 2 - Alarm Activation ...16 Product Carton Contents 1) SoundWorks Radio 820HD 2) FM telescoping whip antenna (packed separately, shown attached to radio) 3) AM loop antenna 4) FM external wire antenna... -
Page 4: Initial Setup
Setup 1) Locate and remove the Antenna Pack and the Whip Antenna from the carton. Remove the Antenna Connection leaflet, the AM antenna, the FM wire antenna and the FM dipole antenna from the Antenna Pack. 2) Refer to the Antenna Connection leaflet. Choose and connect an FM Antenna. Position the FM antenna. Connect and position the AM antenna. 3) Insert the AC cord. Antenna Pack Whip Antenna FIRMLY push the AC cord connector into the back panel socket. - Page 5 4) Place the radio in its intended location. Connect the AC plug to a 120 VAC outlet. 5) Press the Power button. You can now set the date and time. 6) To reach the date and time adjustment screen: First press and hold the JOG button until you see "HD RADIO & ANALOG" on the display. Then briefly press the JOG button three more times to reach the "SET CLOCK" screen. Use the VOLUME control to make an adjustment, then press the JOG button again to reach the next Date and Time value. Repeat this process for each Date and Time values. After the last value is set, either wait for the screen to return to normal radio operation, or press the JOG button until you see the normal radio display.
-
Page 6: Radio Operation
Radio Operation 1) Select the FM or AM band by pressing the AM/FM/Aux button on the front panel or the remote control. 2) Tune stations using TUNE or SEEK (faceplate or remote). See page 8 for more information. Numeric Entry Tuning (remote control only) Press the NUMERIC ENTRY button, then enter the station frequency using the PRESET num- bered buttons. Preset Button Assignment 3) If desired, store ten radio stations (either AM or FM) for immediate recall. While tuned to the station, press and hold down a PRESET button on the remote control for at least two seconds. The display will confirm the sta- tion is stored. Favorite Assignment 4) Besides using the ten PRESET buttons on the remote control, you can assign an additional twenty stations to appear in the FAVORITE organizer band. See the next page for a description of its operation. SEEK TUNING FAVORITE FM AM AUX SEEK Tune &... -
Page 7: Favorite Organizer Band Operation
3) To remove Favorite status from a station, simply tune to that station, then press and hold the FAVORITE button for more than two seconds. The display confirms removal of Favorite assignment. 4) To use the Favorite band, select it using the AM/FM/Aux button. With the FAVORITE band selected, each click of SEEK or TUNE navigates among your favorite stations. The Favorite band expands or contracts as you add or remove a Preset or Favorite station. Second or Third streams of an HD Radio multicast can also be assigned Favorite status. Indicates the FAVORITE band is selected Indicates the fifth of twenty-two Favorite stations is selected. Confirmation of stored Favorite Selecting the FAVORITE Band... -
Page 8: Technical Information
Technical Information Receiving HD Radio™ broadcasts: A broadcast with an HD Radio™ digital signal does not immediately start to play when you tune to the station's frequency. The receiver builds up a reserve of digital infor- mation before it starts playing the audio. This digital signal reserve insures the audio program isn't affected by tempo- rary drops in the strength or quality of the received signal. Once the digital signal starts to play, the radio will also show whether the station is broadcasting more than one program, called a "multicast". The "-1" after the frequency shows this is the first program in a multicast. The "-2" after the frequency shows this is the second program in a multicast. -
Page 10: Faceplate And Remote Control Quick Reference
Favorite (broadcast or multicast stream). If the AM or FM band is selected, adjust this knob to tune the radio frequency or to the next stream within an HD Radio multicast. If the Favorite band is selected, adjust to... - Page 11 (SLEEP). JOG [see page 10 for complete menu listings] Press quickly to enter the adjustment mode for the primary radio settings. Press and hold to enter the adjustment mode of the secondary radio settings. Alternate between the Volume control and the JOG button for adjustments.
-
Page 12: Headphone Jack, Auxiliary Inputs
Additional Information Audio Display: This feature displays a radio broadcast's audio spectrum. It shows the intensity of the audio at ten different frequency bands. Once engaged, the Audio Display becomes the default screen. Any control action will replace the Audio Display until five seconds after the last control input. Use the INFO button on the remote or a "press and hold" of the JOG button on the radio faceplate to engage or disengage the Audio Display feature. Entering Standby also disengages the Audio Display. The Audio Display is only active on radio station audio. It does not show a spectrum of the AUX input signal. JOG menu After a brief press of the JOG button, the following choices can be made by further brief presses of the JOG button: Bass & Treble adjustment Display Text (Fixed, Scrolling, Station ID only, None) Favorites Mode (Enabled, Disabled, Clear All) Audio Display (Enabled, Disabled) After a press and hold of the JOG button, the following choices can be made by further brief presses of the JOG button: HD Radio And Analog, Analog Only Set Snooze (5 to 55 minutes) Loudness (On, Off ) Set Clock (and date) Contrast (-4 to +4) -10- AUDIO DISPLAY Headphone Jack, Auxiliary Inputs: The side-mount headphone jack phone with a 3.5 mm stereo miniplug. The side-mount auxiliary input stereo miniplug. Use it with all portable audio devices. This input takes precedence over the rear auxiliary input. -
Page 13: Rear Input Configuration
Additional Information Continued Rear Input Configuration: The rear auxiliary input accepts a 3.5 mm stereo miniplug. Use it with all portable audio devices. The 12 VDC OUT can be used with special accessories, like a Cambridge SoundWorks portable audio player dock. The OPT DIGITAL OUT provides a SPDIF-compliant audio signal of the tuner output. Alarm Features The SoundWorks Radio 820HD has two independent wakeup alarms. ACTIVATION Each alarm can be set to Wake To Music or Wake to Tone (a beep sound) using the Alarm 1 and Alarm 2 buttons. RESET Once either alarm activates, reset the alarm by pressing either the Alarm 1 button, the Alarm 2 button or Power. SNOOZE The Snooze bar silences the wakeup alarm for a user-de- termined interval. The wakeup alarm reactivates after the snooze interval. DAILY PATTERN Each alarm can be programmed to activate in a daily pat- tern. The four daily patterns are Once, Daily, Weekday (Mon- day through Friday) and Weekend (Saturday and Sunday). The first section of Alarm Operation explains how to adjust each alarm. The adjustments are wakeup time, radio band and frequency, music wakeup volume and daily pattern. The second section of Alarm Operation explains how to quickly choose the Alarm Activation mode (music wakeup, tone wakeup, or no wakeup) using the Alarm buttons. -
Page 14: Alarm Operation 1 - Wakeup Settings Adjustment
Alarm Operation 1 - Wakeup Settings Adjustment 1) Press and hold down either Alarm button for two seconds. The radio switches to the HOUR adjustment display. 2) Adjust VOLUME to select the desired hour. FAVORITE FM AM AUX 3) Tap the Alarm button again to move to the MINUTES adjustment display. -12- 2 sec HOUR adjustment HOUR change MINUTES adjustment... - Page 15 Adjust VOLUME to select the desired MINUTES setting. FAVORITE FM AM AUX Tap the Alarm button again to move to the BAND adjustment display. Adjust VOLUME to select the band of a wakeup station. FAVORITE FM AM AUX MINUTES change BAND adjustment BAND change -13-...
- Page 16 Tap the Alarm button again to move to the FREQUENCY adjustment display. Adjust VOLUME to select the frequency of a wakeup station. Tap the Alarm button again to move to the WAKEUP VOLUME adjustment display. Adjust VOLUME to select the desired wakeup volume. -14- FAVORITE FM AM AUX FAVORITE FM AM AUX FREQUENCY adjustment FREQUENCY change WAKEUP VOLUME adjustment WAKEUP VOLUME change...
- Page 17 Tap the Alarm button again to move to the DAILY PATTERN adjustment display. Adjust VOLUME to select the desired daily alarm repetition. Daily Alarm Options Daily: Alarm sounds every day. Weekdays: Alarm sounds every Mon, Tue, Wed, Thu, Fri. Weekend: Alarm sounds every Sat, Sun. Once: Alarm sounds once, then cancels after reset. Tap the Alarm button again to complete the alarm adjustment session. DAILY PATTERN adjustment DAILY FAVORITE FM AM AUX PATTERN change NORMAL DISPLAY -15-...
-
Page 18: Alarm Operation 2 - Alarm Activation
Alarm Operation 2 - Alarm Activation 1) Press and quickly release either the Alarm 1 or the Alarm 2 button ("tap" the button). The radio switches to the Alarm Activation display. 2) While the display is visible, continue to use the Alarm button to choose between Music Wakeup alarm, Tone Wakeup alarm and NO alarm. 3) Once you see the desired Alarm Activation mode on the display, wait five seconds. The radio will store your request and return the radio to normal operation. -16- first tap ALARM ACTIVATION display second tap TONE WAKEUP display third tap ALARM display WAIT five NORMAL operation seconds after your choice... - Page 19 RESET Once either alarm activates, reset the alarm by press- ing either the Alarm 1 button, the Alarm 2 button or Power. SNOOZE The Snooze bar silences the wakeup alarm for a user- determined interval. The wakeup alarm reactivates after the snooze interval. These buttons reset a Faceplate Wakeup Alarm Remote Control -17-...
- Page 20 Rev 1_8 English...
Need help?
Do you have a question about the SoundWorks Radio 820HD and is the answer not in the manual?
Questions and answers