Brother P-Touch 2300 User Manual
Brother p-touch user's guide
Hide thumbs
Also See for P-Touch 2300:
- User manual (133 pages) ,
- User manual (143 pages) ,
- User manual (20 pages)

Related Manuals for Brother P-Touch 2300


Summary of Contents for Brother P-Touch 2300
- Page 1 2300 USER’S GUIDE • Read this User’s Guide before you start using your P-touch. • Keep this User’s Guide in a handy place for future reference.
- Page 2 You no longer have to worry about urgent tasks that require professional printing. In the office, the factory, the lab and the home, the quality and performance of the P-touch 2300 makes it an extremely practical machine.
-
Page 3: Table Of Contents
Getting Started GENERAL DESCRIPTION ... 1 GENERAL PRECAUTIONS... 2 BATTERIES ... 3 OPTIONAL AC ADAPTOR ... 4 TAPE CASSETTE ... 5 CONNECTING THE P-TOUCH TO A COMPUTER ... 6 INSTALLING P-TOUCH EDITOR ... 7 STARTING P-TOUCH EDITOR... 16 ATTACHING LABELS ... 18 PRINT HEAD &... - Page 4 MIRROR PRINTING FUNCTION... 50 LENGTH FUNCTION ... 51 AUTO CUT FUNCTION... 53 PRINT KEY ... 54 FEED & CUT FUNCTION ... 54 NUMBERING FUNCTION ... 55 REPEAT PRINTING FUNCTION ... 56 MEMORY FUNCTIONS... 58 TROUBLESHOOTING... 62 ERROR MESSAGE LIST ... 63 SPECIFICATIONS ...
-
Page 5: Getting Started
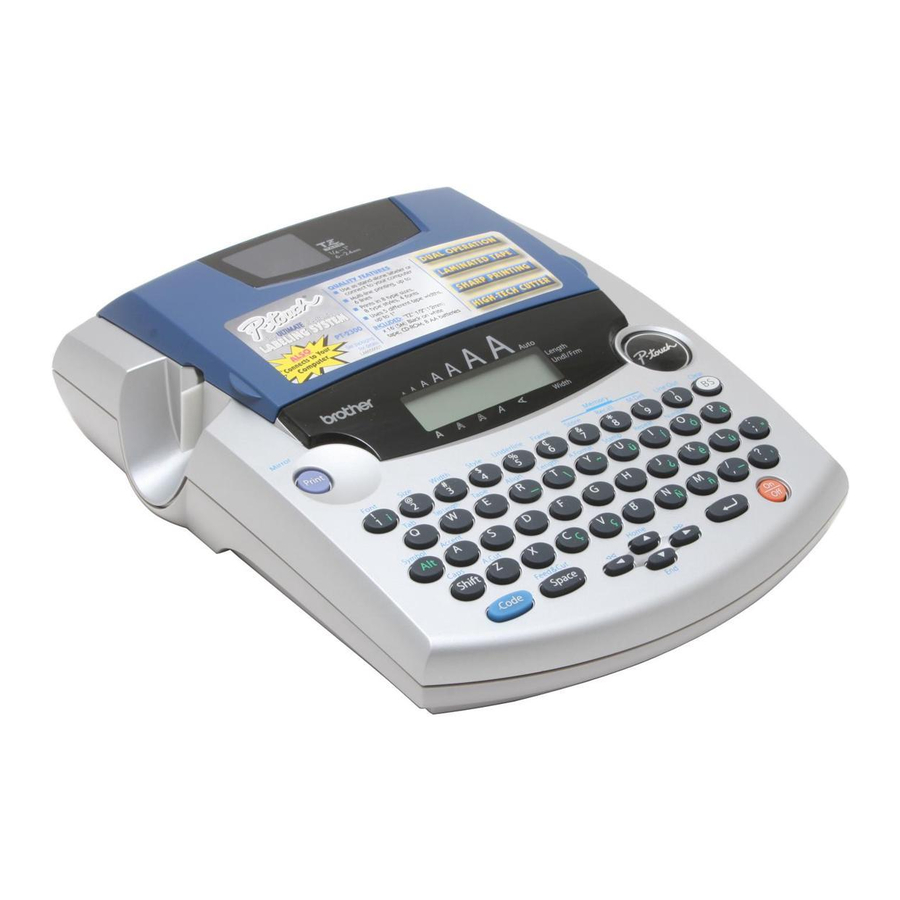
Getting Started GENERAL DESCRIPTION TOP VIEW Keyboard BOTTOM VIEW Tape compartment cover AC adaptor connector USB port LCD display Tape exit slot Battery compartment cover... -
Page 6: Keyboard & Lcd Display
KEYBOARD & LCD DISPLAY GENERAL PRECAUTIONS Use only Brother TZ tapes with this machine. Do not use tapes that do not have the mark. Do not pull on the tape being fed from the P-touch. This may damage the tape cassette. -
Page 7: Batteries
Do not expose the machine to high temperatures or high humidity. Never leave it on the dashboard or in the back of your car. Do not leave any rubber or vinyl on the machine for an extended period of time. Doing so may cause staining. -
Page 8: Optional Ac Adaptor
OPTIONAL AC ADAPTOR The AC adaptor (model AD-60) allows you to use this machine wherever there is an electrical outlet. To connect the optional AC adaptor: 1 Insert the plug on the adaptor cord into the connector marked DC IN 9.5V on the right side of the machine. -
Page 9: Tape Cassette
A single TZ tape cassette is supplied with this unit. However, since TZ tape cassettes are avail- able for this machine in a wide variety of colors and sizes, it is possible to make distinctive color-coded and stylized labels. In addition, this machine has been designed to allow you to change the tape cassettes quickly and easily. -
Page 10: Connecting The P-Touch To A Computer
PC-compatible or Macintosh computer, and print labels and stamps created using the P-touch Editor software. The P-touch Editor software and the printer driver must be installed before the P-touch is connected to the computer or turned on. Follow the installation procedure on pages 7 through 16 to install the P-touch Editor software and the printer driver, and connect the P-touch to the computer when you are instructed to do so. -
Page 11: Installing P-Touch Editor
INSTALLING P-TOUCH EDITOR The P-touch Editor software adds even more illustration and layout features to the label-mak- ing possibilities available with your PT-2300/2310. Do not connect the PT-2300/2310 to the computer before installing the P-touch Editor software, otherwise it may not be installed correctly. Be sure not to connect the PT- 2300/2310 until you are instructed to do so. - Page 12 Wizard for installing the P- touch Editor software starts up, and then the Welcome dialog box appears. To install just the printer driver, click the lower button (Printer driver). The first Driver Setup dialog box appears, informing you that the PT-2300/2310 printer driver will be installed.
- Page 13 6 Type the necessary information into the appropriate boxes (If the information has already been registered in Windows automatically appear.), and then click the Next button. A dialog box appears, asking for confirmation of the entered information. 7 Click the Yes button to register the entered information.
- Page 14 9 After P-touch Editor is installed, a dialog box appears, allowing you to select whether or not to install the printer driver. To install the printer driver, click the Yes but- ton. The first Driver Setup dialog box appears, informing you that the PT-2300/2310 printer driver will be installed.
- Page 15 USB interface cable as described on page 6, and then turn on the PT-2300/2310. A dialog box appears, showing that the printer driver has been installed. 3 Click the Finish button. A dialog box appears, showing that installation is finished.
- Page 16 2000 and changing to a PT-2300/2310 with a different serial number. If “Add Brother PT-2300/2310” is selected, a new printer driver is added. With a USB connection on Windows new printer. Select this option when connecting and using multiple PT-2300/2310s with the same computer.
- Page 17 6 If “Replace with new Brother PT-2300/ 2310” or “Add Brother PT-2300/2310” was selected: A dialog box appears, instructing you to connect the PT-2300/2310 to the computer. Connect the PT-2300/2310 to the computer using a USB interface cable as described on page 6, and then turn on the PT-2300/2310.
-
Page 18: On A Macintosh Computer
On a Macintosh Computer The Mac version of the software is for a Mac with an English operating system. If the software is installed on a Mac with an operating system in a different language, the software may not run properly. To install the P-touch Editor software: 1 Check that your system configuration meets the following requirements. - Page 19 • For a Custom installation Clicking the Custom Install button dis- plays a dialog box that allows you to select which options to install. Only the options with a check mark beside them are installed. Select the options that you wish to install, and then click the Install button.
-
Page 20: Starting P-Touch Editor
To delete P-touch Editor Version 3.1 and the printer driver: When deleting the printer driver, be sure that the P-touch is turned off and unplugged. 1 Drag the P-touch Editor Ver3.1 folder to the Trash icon. 2 In the System Folder, open the Extensions folder. - Page 21 • With the Start button: 1 Click the Start button in the taskbar to display the Start menu. 2 Select “Programs”. 3 Select “P-touch Editor 3.1”. 4 Click “P-touch Editor 3.1”. • With Windows Explorer: 1 Start up Windows Explorer. 2 Select the drive and directory where P-touch Editor is installed.
-
Page 22: Attaching Labels
Notes on Usage Barcodes Keep the following points in mind when using P-touch Editor Version 3.1 to print barcodes. • Barcodes should be printed on white tape. If other colors of tape are used, the barcode reader may not be able to read the barcode correctly. •... - Page 23 4 Peel off the label backing. NON-LAMINATED TAPE Labels printed on non-laminated tapes can be folded in half so that the inside edges of the two backing pieces come off the label, enabling the backing to easily be peeled off. INSTANT-LETTERING TAPE (RUB-ON TRANSFERS) Instant-lettering tape is used to transfer your text onto paper.
- Page 24 Hold the tape very firmly and do not move it while rubbing the tape. IRON-ON TRANSFER TAPE Iron-on transfer tape is used to transfer your text onto garments using an iron. 1 Insert an iron-on transfer tape cassette, press p to print the text, then push down on the tape cutter lever to cut off the label.
- Page 25 After the backing tape has been removed, the transferred label may appear glossy. In addition, some white spots may have appeared on the label if it was touched while the backing tape was peeled off. These can be removed by ironing over the label with a piece of cloth placed between the label and the iron.
-
Page 26: Print Head & Rollers
STAMP TAPE Refer to pages 38 through 40 for a detailed explanation on using the stamp tape to make stamps. PRINT HEAD & ROLLERS Occasionally, specks of dust or dirt become attached to the machine’s print head and rollers. This is particularly likely when you are using the unit outdoors or in a very dusty environment. If a section of the print head is covered with dust, a blank horizontal streak may appear through the label text. -
Page 27: For Your Information
For Your Information The power key ( o ) is located in the lower-right corner of the keyboard. If batteries have been installed or the machine has been plugged in using the optional AC adaptor, the previ- ous session’s information is displayed when the machine is turned on. This feature allows you to stop work on a label, turn off the machine, and return to it later without having to re-enter the text. -
Page 28: Code, Alt & Shift Keys
RIGHT CURSOR KEY To move the cursor one character to the right: Press w once. To move the cursor several characters to the right: Hold down w until the cursor moves to the desired position. To move the cursor to the end of the current line: Hold down c and press w. - Page 29 EXAMPLE To start the Symbol function: Hold down ALT KEY To type in characters printed in color on the right-hand side of the keys: Hold down a and press the key of the desired character written in color. The Alt indi- cator on the left side of the display comes on while a is held down.
- Page 30 SHIFT KEY To type in a capital letter or a symbol printed in the top left-hand corner of a key: Hold down s and press the key of the desired letter or symbol. EXAMPLE To type in “%”: Hold down The Caps mode is similar to holding down s.
-
Page 31: Space Key
The Space key ( _ ) lets you add blank spaces between characters in your text. It is differ- ent from the right cursor key ( w ), which just moves the cursor without adding blank spaces. To add a space: Press _. -
Page 32: Tab Function
Tape widths 1/4" (6 mm) 3/8" (9 mm) 1/2" (12 mm) 3/4" (18 mm) 1" (24 mm) Stamp 3/4" (18 mm) Stamp 1" (24 mm) The return key can also be used to select an item from a list (e.g., add a symbol or accented character to the text) or to apply a selected setting. - Page 33 To set the tab length: 1 Hold down c and press W once. The current tab length is displayed. 2 Press h or e until the desired length is displayed or use the number keys to type in the length. To change the units (inches or centimeters) used to display the tab lengths, press M until the desired units are displayed.
-
Page 34: Delete Key
Press until 1.0 is displayed. Press To add a tab: Hold down The delete key ( * ) allows you to remove characters to the left of the cursor’s current posi- tion. It differs from the left cursor key ( f ), which only moves the cursor without deleting any characters. -
Page 35: Line Out Function
To delete a sequence of characters: 1 Press f, w, h or e to position the cursor below the character immediately to the right of the last character that you wish to delete. 2 Hold down * until all of the characters that you wish to delete are deleted. To quit a function without changing your text: Press * to return to your text. -
Page 36: Clear Function
When clearing the display before entering new text, the Clear function can be used to choose whether all of the text is erased and all format functions (Font, Size, Width, Style, Underline, Frame, Tape margin, Alignment, Tab length, Mirror printing, and Length) are returned to their default settings, or whether just the text is erased. - Page 37 To delete just the text: 1 Hold down c and press *. 2 Press h or e until TEXT ONLY is selected (flashing). To return to the text without erasing anything, press *. 3 Press r. EXAMPLE To clear just the text: Hold down Press until TEXT ONLY is flashing.
-
Page 38: Accent Function
The Accent function can also be used to add accented characters to your text. Many of these characters can also be typed in using the Symbol function. The accented characters are grouped according to the capital or small letter that they are com- bined with. -
Page 39: Symbol Function
EXAMPLE To add the accented character “É”: Hold down Hold down Press until É appears in the frame. Press In addition to the letters, symbols and numerals on the key tops, there are 53 additional marks available with the Symbol function. The following symbols are available: and press and press... - Page 40 Group To type in a symbol: 1 Hold down c and press a. A row of symbols appear in the display. 2 Press h or e to display different rows of symbols and press f or w until the desired symbol appears enlarged within the frame in the middle of the display. 3 Press r.
-
Page 41: Auto Format Function
Press AUTO FORMAT FUNCTION With the Auto Format function, you can select from a variety of preset formats perfect for your specific need. This function automatically adjusts the label length, tape margins and horizon- tal alignment without changing the text or any other formats, allowing you to create labels faster and easier. -
Page 42: Stamp Function
To select a preset format: 1 Hold down c and press Y once. The currently selected setting appears in the dis- play. 2 Press h or e to select the desired setting. To return to default settings, press _. 3 Press r to apply the selected setting. The Length indicator comes on if any setting other than DEFAULT is selected. - Page 43 3 Press r. The text is automatically formatted for the installed stamp: centered within the preset message area with the tape length and margins automatically adjusted. 4 Press p to cut the text out of the stamp stencil film. 5 After the stamp stencil film is cut off, remove the backing paper from the stamp stencil film and affix it to the ink pad of a stamp film holder.
- Page 44 Hold the end of the stamp stencil film in place with your thumb, then pass the tape through the guides while pulling it tight. Fold the other end of the stamp stencil film over the other side of the stamp film holder and hold it in place with your finger.
-
Page 45: Font Function
With the Font function, you can choose one of four fonts for your text. The following font settings are available: The default font setting is FONT 1. To change the font setting: 1 While holding down c, press 1 once, and keep c held down to display the current font setting. -
Page 46: Size & Width Functions
SIZE & WIDTH FUNCTIONS The character size can be adjusted using both the Size and Width functions. Since the charac- ter size that can be used depends on the width of the tape, the following table shows the char- acter sizes that can be used with each tape width. The default size setting is AUTO and the default width setting is MEDIUM. - Page 47 To change the size setting: 1 While holding down c, press 2 once, and keep c held down to display the current size setting. 2 While still holding down c, continue pressing 2 until the desired size setting is displayed. The current size setting is shown by the size indicators at the top of the display.
-
Page 48: Style Function
To change the width setting: 1 While holding down c, press 3 once, and keep c held down to display the current width setting. While still holding down c, continue pressing 3 until the desired width setting is displayed. The Width indicator comes on when a setting other than MEDIUM is selected. 3 Release c to apply the selected width setting to the entire text. - Page 49 2 While still holding down c, continue pressing 4 until the desired style setting is displayed. The current style setting is shown by the style indicator at the bottom of the display. 3 Release c to apply the selected style setting to the entire text. EXAMPLE To select the I+SHAD style setting: While holding down...
-
Page 50: Underline Function
Font setting I+BOLD FONT 1 FONT 2 FONT 3 FONT 4 UNDERLINE FUNCTION You can emphasize your text by underlining it. The default underline setting is OFF. When the Underline function is set to UNDL ON, the Undl/Frm indicator on the right side of the display comes on. UNDL To turn on or off the Underline function: 1 While holding down c, press 5 once, and keep c held down to display the... -
Page 51: Frame Function
EXAMPLE To select the UNDL ON underline setting: While holding down and keep held down. While still holding down until UNDL ON is displayed. Release With the Frame function, you can choose from various frames and highlights to design a more decorative or emphasized label. -
Page 52: Tape Margin Function
2 While still holding down c, continue pressing 6 until the desired frame setting is displayed. The Undl/Frm indicator comes on when any setting other than FRAME OFF is selected. 3 Release c to apply the selected frame setting to the entire text. EXAMPLE To select the candy frame setting: While holding down... -
Page 53: Horizontal Alignment Function
To change the tape margin setting: 1 While holding down c, press E once, and keep c held down to display the current tape margin setting. 2 While still holding down c, continue pressing E until the desired tape margin set- ting is displayed. -
Page 54: Mirror Printing Function
To change the horizontal alignment setting: 1 While holding down c, press R once, and keep c held down to display the current horizontal alignment setting. 2 While still holding down c, continue pressing R until the desired horizontal align- ment setting is displayed. -
Page 55: Length Function
To turn on or off the mirror printing setting: 1 While holding down c, press p once, and keep c held down to display the current mirror printing setting. 2 While still holding down c, continue pressing p until the desired mirror printing setting is displayed. - Page 56 To turn on or off the Length function: 1 While holding down c, press T once, and keep c held down to display the current length of the label (the text and both margins) briefly, then display the current label length setting (ON or OFF). 2 While still holding down c, continue pressing T until the desired label length set- ting is displayed.
-
Page 57: Auto Cut Function
Press until 5.0inch is displayed. Press The Auto cut function allows you to set whether or not the machine will automatically cut off each label after it is printed. Turn on the Auto cut function before starting to print in order to cut off the labels automatically after printing them. -
Page 58: Print Key
While still holding down until ON is displayed. Release After you have entered your text and chosen the desired format settings, you are ready to print. If the Auto cut function is set to ON, the label will automatically be cut off after it is printed. -
Page 59: Numbering Function
NUMBERING FUNCTION This function can be used to print many copies of the same text while increasing a certain number in the text by 1 after each label is printed. To use the Numbering function: 1 Press f, w, h or e to position the cursor below the number that you wish to increase. -
Page 60: Repeat Printing Function
Press Press Caps Caps REPEAT PRINTING FUNCTION This function allows you to print up to 9 copies of the same text. To use the Repeat printing function: 1 Hold down c and press I. The message “COPIES” appears in the display with the current setting. - Page 61 3 Press p (or r ) to begin printing the labels. The number of each copy is displayed while it is being printed. If the Auto cut function is set to ON, each label is automatically cut off after it is printed.
-
Page 62: Memory Functions
You can use the memory to store your most frequently used text files. The text remains in the memory, along with its formatting, even after all characters are removed from the display using the Clear function (holding down c and pressing * ). When each file is stored, it is given a number to make recalling it easier. -
Page 63: Deleting A File
RECALLING TEXT To recall a text file: 1 Hold down c and press 8. The message “RECALL” appears on the display with the file number and beginning of the most recently stored or recalled text. To quit the Recall function without recalling text, hold down c and press 8 (or press just * ). - Page 64 EXAMPLE To store text under file number 4: Hold down Press Press To recall the text from file number 1: Hold down Press Press and press and press Caps Caps Caps Caps Caps Caps...
- Page 65 To delete the text stored under file number 4: Hold down and press Press Press Press Caps Caps Caps Caps...
-
Page 66: Troubleshooting
Problem 1. The display stays blank after you have turned on the machine. 2. The machine does not print or the printed characters are blurred. 3. The text files that you stored in the mem- ory are no longer there. 4. -
Page 67: Error Message List
Error Message 6 LINE This message appears if six lines already exist when you press r. LIMIT! BATTERIES This message appears when the WEAK! installed alkaline batteries become weak. BUFFER • This message appears if you hold EMPTY! down c and press T, but no text has been entered in the dis- play. - Page 68 Error Message CUTTER This message appears if the tape cut- ERROR! ter is closed when you try to print or feed the tape. EEPROM This message appears if a checksum ERROR! error occurred when the P-touch was turned on or if the keyword was dam- aged and it failed to initialize.
- Page 69 Error Message This message appears if you try to print TAPE! a label or feed the tape when no tape cassette is installed. REPLACE This message appears if the installed BATTERIES! alkaline batteries are about to run out. This message appears if there is a PROBLEM! problem with the machine’s read only memory.
-
Page 70: Specifications
HARDWARE Input Device: Keyboard - 51 keys 10 characters × 2 lines (semi-graphical) LCD: 20 indicators (including Alt and Caps) Print Tape: Pressure-sensitive, Adhesive-based 26’ 3” (8 m) long Five widths available: Power Supply: Eight AA alkaline batteries (AM3, LR6) or optional AC adaptor (model AD-60) Auto power-off if no key is pressed for 5 minutes Print Head:... -
Page 71: Accessories
Supplies Obtain tape cassettes from your nearest authorized dealer. Use only Brother TZ tapes with this machine. Brother cannot be held responsible for trouble caused by the use of unauthorized supplies. Do not use tapes that do not have the Stock No. - Page 72 Stock No. 1/2” (12mm)-wide laminated tapes TZ-131 Black characters on clear adhesive TZ-132 Red characters on clear adhesive TZ-133 Blue characters on clear adhesive TZ-135 White characters on clear adhesive TZ-231 Black characters on white adhesive TZ-232 Red characters on white adhesive TZ-233 Blue characters on white adhesive TZ-334...
- Page 73 Non-laminated tapes Stock No. 3/4” (18 mm) TZ-N641 Black characters on yellow adhesive TZ-N541 Black aharacters on blue adhesive TZ-NF41 Black characters on purple adhesive 1/2” (12 mm) TZ-N631 Black characters on yellow adhesive TZ-N531 Black characters on blue adhesive TZ-NF31 Black characters on purple adhesive Instant lettering tape...
- Page 74 Stamp lit/holder Stock No. 1” (24 mm) Stamp Area 13.5 × 65 mm SK-LB Stamp-making kit for Large stamp with black ink SH-LB Stamp-making kit for Medium stamp with black ink 3/4” (18 mm) Stamp Area 9 × 55 mm SK-MB Additional stamper for Large stamp with black ink SH-MB...
-
Page 75: Accessory Order Form
This order form is provided for your convenience should your retailer not stock the item(s) needed or if you prefer to order by telephone. To order by phone, please call Brother Interna- tional at 1-800-668-2768 and have your Visa or MasterCard available. - Page 76 This order form is provided for your convenience should your retailer not stock the item(s) needed or if you prefer to order by telephone. To order by phone, please call Brother Interna- tional at 1-800-668-2768 and have your Visa or MasterCard available.
- Page 77 Printed in China LA6059001...
Need help?
Do you have a question about the P-Touch 2300 and is the answer not in the manual?
Questions and answers