Table of Contents
Advertisement
Quick Links
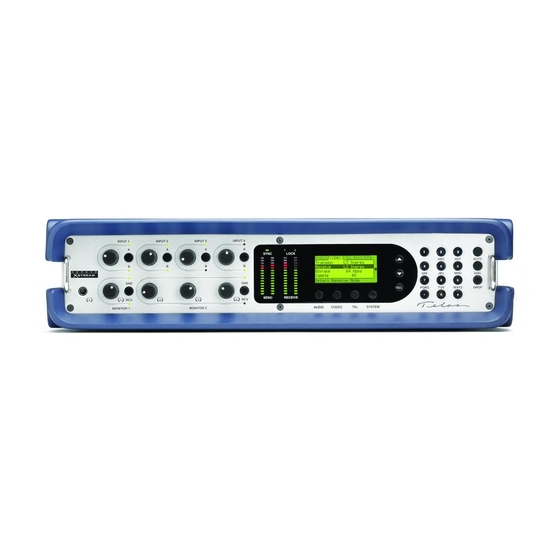
Telos Zephyr
file://localhost/Volumes/4_GB/QS/4_Telos%20Zephyr.mht
1. Connect ISDN line to "LINE DIRECT" jack on rear of Zephyr.
(Smaller jack)
2. Turn Zephyr on and allow to self-test.
3. Press 'UTIL' 5 times. Top line of display will read "SPID 1 & 2:".
4. Enter first SPID number using numeric key pad, press '+ YES' to
store.
5. Press '\/ SEL' once
6. Enter second SPID number uning numeric key pad, press '+ YES' to
store.
7. Press 'UTIL" twice. First line of display will read "Telco [ whatever ]
8. Enter your switchboard type by pressing '- NO' to scroll through
selections (Usually Natl I-1), press '+ YES' to store.
9. Press 'UTIL' button 4 times. Display will read "Store Setup [ 1 ] *
10. Press '\/ SEL' twice.
11. Enter the name of whom you will be calling using numeric keypad.
Press 'ABC 2' once to enter A, twice to enter B, etc. Press '+ YES' to
store the first letter, then enter the second letter, then '+ YES' to store,
etc. Push '+YES' twice after last letter to store the name.
12. Press '/\ SEL' once.
13. Press '+ YES' once. (Second line will read "Category NUM1"
14. Press '\/ SEL' once.
15. Enter the first ISDN number you will be calling using numeirc keypad
(use '- NO' to backspace and erase) Press '+ YES' to store.
16. Press '/\ SEL' once.
17. Press '+ YES' once. (Second line will read "Category NUM2"
18. Press '\/ SEL' once.
19. Enter the second ISDN number (using the numeric keypad as in step
7) Press '+ YES' to store.
20. Press 'AUTO DIAL' once. Press '- NO' or '+ YES' if you need to
change who you are calling from the directory. Press 'AUTO DIAL'
again to place the call.
Thank you,
Audio Rents
* Up to 50 different Setups (call destinations) may be stored by
pressing the '-NO' or '+YES' buttons to change the setup selection.
1
01/22/08 13:31:29
Advertisement
Table of Contents

Related Manuals for Telos Zephyr


Summary of Contents for Telos Zephyr
- Page 1 Telos Zephyr 1. Connect ISDN line to “LINE DIRECT” jack on rear of Zephyr. (Smaller jack) 2. Turn Zephyr on and allow to self-test. 3. Press ‘UTIL’ 5 times. Top line of display will read ”SPID 1 & 2:”. 4. Enter first SPID number using numeric key pad, press ‘+ YES’ to store.
- Page 2 Telos Zephyr Back to Quick Sheets Aural 3-D Black Boxes/FX CD/DAT Codec Consoles Converters Drives/Media Dubber/Hard Disk Recorder Equalizers Limiters-Compressors Links Microphones Microphone Pre-Amplification Noise Fighters Noise Reduction Systems Oddments Pro-Tools Quick Sheets Speakers Sync/Timecode DJ Gear Poweramps Microphone Accessories...
Need help?
Do you have a question about the Zephyr and is the answer not in the manual?
Questions and answers