Advertisement
Quick Links
550-0622-000
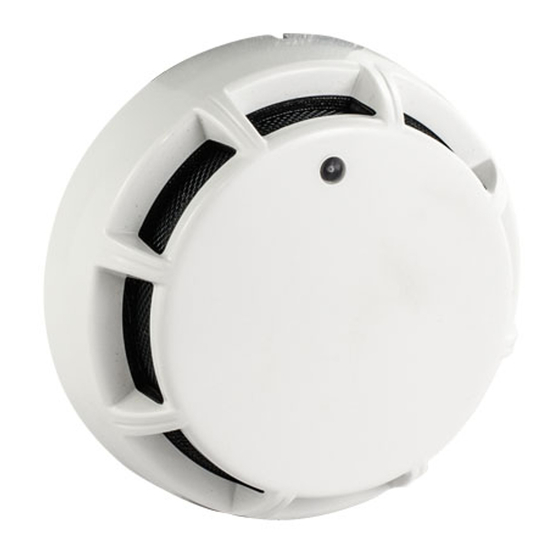
1. Description
This document provides instructions for mounting and wiring the Detector
Base PAD100-6DB and PAD100-4DB. The following detectors are compatible
with Detector Base PAD100-6DB and PAD100-4DB.
PAD200-PD & PAD100-PD:
PAD200-PHD & PAD100-PHD:
PAD200-PCD:
PAD200-PCHD:
PAD100-HD:
PAD100-CD:
2. Field Wiring Diagrams
Typical field wiring diagrams for the Signaling Line Circuit (SLC) (FIGURE 1).
The SLC supports NFPA wiring Class B, A and X.
To FACP
First Detector Base
Loop (SLC)
S-
Figure 1: Wiring (Style B)
Using PAD100-6DB or PAD100-4DB
Typical of NFPA Style B SLC (S+, S-) Wiring using either the PAD100-6DB or
PAD100-4DB base (FIGURE 1). In Style A arrangement two separate
conductors would return from the last detector base to a listed compatible
Fire Alarm Control Panel (FACP). In Style X, it is required to use PAD100-IB
(Addressable Isolator Bases) and typical field diagram is in the PAD100-IB
Installation Manual.
3. Wiring Instruction
To ensure proper installation of the detector head to the base, wires
shall be dressed properly at the time of installation
Using PAD100 Bases, observe the correct polarity of SLC wiring.
NOTICE:
THE WIRING TO BE USED SHALL BE IN ACCORDANCE WITH THE
PROVISIONS OF ARTICLE 300.3(B) OF THE NATIONAL ELECTRICAL
CODE, NFPA 70, AS WELL AS ARTICLE 210.
THIS EQUIPMENT SHOULD BE INSTALLED IN ACCORDANCE WITH
THE NATIONAL FIRE PROTECTION ASSOCIATION STANDARD 72.
CAUTION! Break wire runs to provide supervision for connections made to
each wire pair.
Detector Base Mounting
PAD100-6DB / PAD100-4DB should be mounted directly on the electrical box.
The PAD100-6DB mounting holes are configured for a single gang, double
gang, octagon or 4" square box. The PAD100-4DB mounting holes are
configured for a 3-1/2" octagon box. Use a box for each base and run the
power circuit to all base locations.
Use 12 to 22 AWG conductors to connect to terminals of bases. It is
recommended that the SLC conductors be color-coded to avoid wiring errors
and assist in system troubleshooting. Improper SLC connections may
prevent the system from operating normally. Disconnect power to the SLC
until the detectors are installed.
1. Wire the detector bases according to Field Wiring Diagrams.
2. Use the dip switches (SECTION 11) to set address(es) (1 - 127) for each
detector head.
Photoelectric Smoke Detector
Photoelectric Smoke / Heat Detector
Photoelectric Smoke / CO Detector
Photoelectric Smoke / CO Detector/ Heat Detector
Heat Detector
Carbon Monoxide Detector
S+
Last Detector Base
S-
Detector Bases:
PAD100-6DB & PAD100-4DB
Detectors:
PAD100-PD, PAD100-PHD, PAD200-PD, PAD200-PHD,
PAD200-PCD, PAD200-PCHD, PAD100-HD and PAD100-CD
NOTICE: THE DETECTORS AND THE PAD100 MODULES MUST HAVE
INDIVIDUAL ADDRESS(ES).
3. To install the detector head onto the base, match the detector heads
to the base using the alignment feature and twist clockwise until the
detector heads snap into place (FIGURE 2).
Alignment Features
S+
4. After all detector heads, addressable bases and modules have been
installed, apply power to the FACP.
5. Test the detectors as described in the Testing Section of this manual.
NOTICE: DO NOT INSTALL DETECTOR HEADS UNTIL AREA HAS BEEN
THOROUGHLY CLEANED TO REMOVE CONSTRUCTION DEBRIS, DUST,
ETC., AS REQUIRED BY NFPA 72.
4. Spacing Limitations
NOTICE: REFER TO NFPA 72 FOR SPECIFIC INFORMATION REGARDING
DETECTOR SPACING, MOUNTING LOCATION AND SPECIAL APPLICATIONS.
PAD100-PD, PAD200-PD, PAD200-PCD, PAD200-PCHD, PAD100-PHD and
PAD200-PHD: Photoelectric Smoke Detector
PAD100-PD, PAD200-PD, PAD200-PCD, PAD200-PCHD, PAD100-PHD and PAD200-
PHD are ANSI/UL listed on maximum 30ft spacing limitation with alarm set point
from 135
-174
O
regarding detector spacing, placement and special applications.
PAD100-HD: Heat Detector
The ANSI/UL listed spacing limitations of PAD100-HD smooth ceiling are
Alarm Set-Point
135
to 174
O
(57
to 79
O
175
to 185
O
(80
to 85
O
135
to 160
O
(57
to 71
O
dependent on alarm set point.
5. Testing
Testing shall be performed periodically to determine if each detector
operates properly. Detectors will offer maximum performance when tested
in compliance with NFPA 72.
NOTICE: REFER TO FIRE ALARM CONTROL PANEL (FACP) MANUAL FOR
OPERATION OF DIRTY VALUE READ / PRINT, ALARM
SIMULATION AND WALK TEST.
FIGURE 2: Assembly of Detector
F on smooth ceiling. Refer to NFPA 72 for specific information
O
Rate of Rise Spacing
F
O
Maximum 60 ft.
C)
O
F
O
Maximum 15 ft.
C)
O
F
O
Maximum 70 ft.
C)
O
550-0622-000
Fixed Temperature Spacing
Maximum 60 ft.
Maximum 15 ft.
Maximum 70 ft.
Manual Number: 550-0622
Advertisement

Related Manuals for Potter PAD100-6DB


Summary of Contents for Potter PAD100-6DB
- Page 1 NOTICE: REFER TO NFPA 72 FOR SPECIFIC INFORMATION REGARDING DETECTOR SPACING, MOUNTING LOCATION AND SPECIAL APPLICATIONS. Typical of NFPA Style B SLC (S+, S-) Wiring using either the PAD100-6DB or PAD100-PD, PAD200-PD, PAD200-PCD, PAD200-PCHD, PAD100-PHD and PAD100-4DB base (FIGURE 1). In Style A arrangement two separate...
- Page 2 Operational Testing Remove the two screws When PAD100-PD, PAD200-PD, PAD100-PHD, PAD200-PHD, PAD200-PCD, (T10) on back of detector to remove detector cover. PAD200-PCHD, PAD100-HD and PAD100-CD are under normal conditions in standby mode, the alarm indicator LEDs on the face of the detector will pulse NOTICE: DO NOT USE A approximately once every 4 seconds.
- Page 3 If the detector does not work properly, do not try and fix it yourself. This will void your warranty. For techincal assistance, contact Potter Electric Signal Company at 866-956-1211 for instructions to return a detector that does not operate properly.
- Page 4 Diameter 3.93 in. (100 mm) Approvals / Listings ANSI/UL 521 ANSI/UL 2075 Permitted Mounting Location(s) Ceiling, Wall 10c. Specifications / Ratings for Use with Detector Bases: PAD100-6DB, PAD100-4DB Item PAD100-6DB PAD100-4DB Installation Temperature Range to 150 F (0 to 66...
-
Page 5: Limited Warranty
Company, LLC, 1609 Park 370, Hazelwood MO 63042. You must prove to the satisfaction of Potter Electric Signal Company, LLC the date of purchase of your appliance. You must also enclose a return address. Warranty service may only be performed by Potter Electric Signal Company, LLC personnel at Potter Electric Signal Company, LLC’s facilities in Hazelwood, Missouri. You must also pack the appliance to minimize the risk of it being damaged in transit. If we receive an appliance in a damaged condition as the result of shipping, we will notify you and you must seek a claim with the shipper.
Need help?
Do you have a question about the PAD100-6DB and is the answer not in the manual?
Questions and answers