Table of Contents
Advertisement
Quick Links
106676 • 106677• 106678 • 106679 • 106680 • 106681 • 106682
Read all instructions carefully before proceeding.
Lire toutes les instructions attentivement avant de commencer
l'installation.
IMPORTANT
• Record the serial number
IMPORTANT
• Noter le numéro de série
1
2
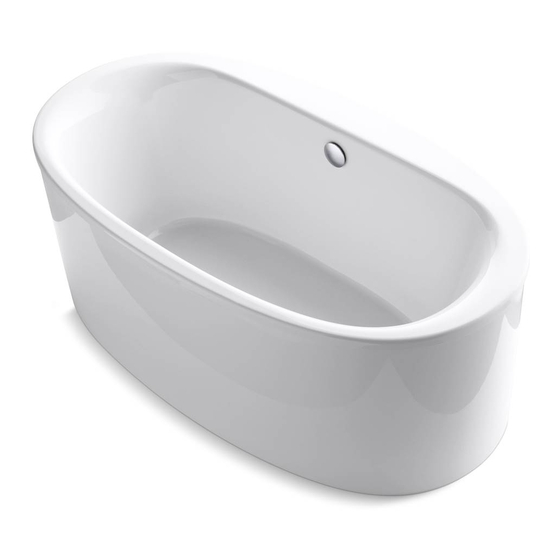
FREESTANDING BATHTUB
BAIGNOIRE AUTOPORTANTE
MODEL • MODÈLE
A two person installation is recommended.
Une installation par deux
personnes est recommandé.
SAVE THIS GUIDE FOR FUTURE REFERENCE.
CONSERVER POUR UN USAGE ULTÉRIEUR.
View F² Drain Video - Scan QR
code with a mobile device
Voir Vidéo de F² Drain - Balayer QR
code avec un dispositif mobile
Ver video de F² Drain - Escanear
código QR con un dispositivo mobil
1. F² Drain video (english)
2. Vidéo pour F² Drain (français)
INSTALLATION INSTRUCTIONS
GUIDE D'INSTALLATION
Serial number • Numéro de série
Advertisement
Table of Contents

Subscribe to Our Youtube Channel
Related Manuals for Aquatic 106676


Summary of Contents for Aquatic 106676
- Page 1 GUIDE D’INSTALLATION FREESTANDING BATHTUB BAIGNOIRE AUTOPORTANTE MODEL • MODÈLE 106676 • 106677• 106678 • 106679 • 106680 • 106681 • 106682 A two person installation is recommended. Une installation par deux personnes est recommandé. Read all instructions carefully before proceeding.
-
Page 2: Table Of Contents
Table of contents: Page Before you begin......................... 3 Tools and supplies.......................4 1. Unpacking the unit......................5 2. Leveling legs adjustment....................6 3. Bathtub skirt and drain positioning.................. 7 4. Faucets installation (not included)...................8 5. Bathtub preparation and installation................9 Troubleshooting and maintenance..................12 F² Drain Installation Guide ....................18 Indice: Page Avant de débuter......................... -
Page 3: Before You Begin
Aquatic’s responsibility for shipping damages ceases upon delivery of the product in good order to the carrier. All complaints regarding damage due to transport must be made directly to the carrier. -
Page 4: Tools And Supplies
TOOLS OUTILS REQUIRED REQUIS ⅛" -drill bit Mèche de ⅛ po. Level Pencil Electric drill Niveau Crayon Perceuse électrique Safety equipment Screwdriver 30" 2 x 4 studs Équipement de sécurité Tournevis montant 2 x 4 de 30 po Utility knife Couteau à... -
Page 5: Unpacking The Unit
Follow all instructions and check them off as you go. Suivre toutes les instructions et les cocher lorsqu'elles sont terminées. Unpacking the unit STEP Déballage de l'unité ÉTAPE Check me! Cut the cardboard box so as to keep one side to pro- Cochez-moi! tect the bathtub while is upside down. -
Page 6: Leveling Legs Adjustment
Leveling legs adjustment STEP Ajustement des pattes ajustables ÉTAPE ⅛" Check me! Place back the skirt in the inverted bathtub. Adjust the Cochez-moi! legs so that they exceed the top of the edge of the skirt by 1/8". You can use a 2x4 to take the measure as shown. -
Page 7: Bathtub Skirt And Drain Positioning
Bathtub skirt and drain positioning STEP Positionnement de la jupe de la baignoire et du drain ÉTAPE Check me! With the help of the bathtub apron or the optional Cochez-moi! template, mark the center of the drainage line in relation with the desired position of the bathtub. À... -
Page 8: Faucets Installation (Not Included)
Installing faucets (NOT INCLUDED) STEP Installation de la robinetterie (NON INCLUSE) ÉTAPE Check me! Cochez-moi! Faucet elements must be installed in the intended area. Before drilling, position the faucet base to make sure they line up with the predrilled holes. Mark the location of the faucets on the unit and drill 3/16"... -
Page 9: Bathtub Preparation And Installation
Bathtub preparation and installation STEP Preparation et installation de la baignoire ÉTAPE Install the waste and overflow and faucets according to the manufacturer's instruction manuals. Check me! Cochez-moi! Installer le trop plein et les robinets en suivant le guide d'installation du manufacturier. Install the valves and faucets at this stage. - Page 10 Bathtub preparation and installation (cont'd) STEP Preparation et installation de la baignoire (suite) ÉTAPE Top view / Vue de dessus Check me! Apply a silicone seal under the apron (optional). Cochez-moi! According to bathroom flooring, use proper screws (not included) to secure the skirt to the floor. Appliquer un joint de silicone sous la jupe (facultatif).
- Page 11 Bathtub preparation and installation (cont'd) STEP Preparation et installation de la baignoire (suite) ÉTAPE Remove the spacers. Make sure all the legs are in Check me! contact with the ground, so that the bathtub is not Cochez-moi! supported by the skirt (see cut view below). The bathtub must be tested before installation is complete.
-
Page 12: Troubleshooting And Maintenance
TOUBLESHOOTING Water accumulates around the drain and the bathtub does not completely empty. • Check that the installation is leveled and that the bathtub is well supported by the legs. With the help of level, place at the bottom of the bathtub, make sure to have a slight slope towards the drain. If necessary, adjust the legs under the bathtub. - Page 13 Guide d’installation DRAIN F² À UTILISER AVEC BAIGNOIRES MAAX ET AQUATIC AUTOPORTANTES 2-PIÈCES Guía de instalación F² DRAIN PARA USAR EN BAÑERAS MAAX Y AQUATIC AUTOPORTANTES DE 2 PIEZAS male end Slip joint (Female-female) Parts included / pièces incluses / Piezas incluidas: bout mâle...
- Page 14 step Ét ape et ap a a . Using the template or the bathtub skirt trace the inside rim of the skirt. Use this line as minimal limit for tile installation. a . à l'aide du gabarit ou tablier tracer l'intérieur du tablier. utiliser cette ligne comme limite minimale pour l'installation des tuiles.
- Page 15 step Holes in the apron t rous du tablier Ét ape Agujeros del delantal et ap a a . Place the apron in the desired position, by aligning and inserting the alignment pins of the installation flange in the holes in the apron. B.
- Page 16 Floor Vista de corte lateral Parte inferior del delantal patte plancher Pata Piso aquaticbath.com Technical Services / Service technique / Servicio técnico T. 1-800-465-1050 E. Aquatic.mts@americanbathgroup.com 10039949 printed in canada / imprimé au canada / impresso en canada 2019-07-09...
Need help?
Do you have a question about the 106676 and is the answer not in the manual?
Questions and answers