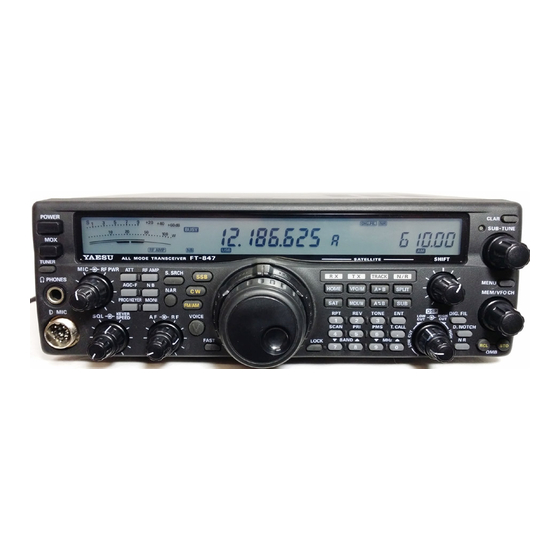
Yaesu FT-847 Modification Manual
For 70mhz band v 1.0
Hide thumbs
Also See for FT-847:
- Operating manual (108 pages) ,
- Technical supplement (55 pages) ,
- Technical supplement (54 pages)
Advertisement
Quick Links
Modification Yaesu FT-847 for 70MHz band
www.sp2dmb.cba.pl
The inspiration of this study was the FT847 mod project of Hellar ES1II /8.
The following description applies to modify the transceiver Yaesu FT -847
serving dramatically improved noise performance and sensitivity of the receiver,
as well as TX efficiency, increased power output and spectral purity in 4m band.
Particular emphasis was given on the purity of the signal emitted in the range of
4m and removing unwanted signals and LO mixing products below 4m band which are
present in the TX spectrum after simple unlocking FT847 to gain 70MHz band. In
addition, we believe that this modification protects the 54- 76MHz band pass filter
against L5022 self desoldering and SMD capacitors burn out.
Both RX and TX chain is modified in this case. As in original idea of Hellar
ES1II the solution is to replace the existing factory filters, in range 54- 76MHz – with
band-pass filters made in hybrid technology.
The original filter in the 847 has bandwith of 54-76 MHz, which should give
reasonable RX quality. But it's not. Receiver sensitivity varies from about 0.3 to 0.5uV
depending on the production model and Year of production. Probably it depends on
minor changes in component values used by Yaesu, and/or destination model.
In addition, broadband response of these filters are also less resistant on
intermodulation products caused by near 4m OIRT stations. Some on air test with two
different 847 on same antenna proved that unmodified radio even on quiet band
receiving more of broadcast harshes even on Meteor Scatter burst, than modified one
- needless to say that unmodified one was less sensitive. This could be another
advantage of limited bandwith of new filter. Of course we cannot expect that with this
dimensions of L, new filter response will be very sharp e.t.c, but limited filter bandwith
(as shown below in RX mod part) is doing good job.
After more than 1 year of using first full modified 847 we can confirm that doing
this mod will give You increased resistance to spurs modulation of OIRT, improved
sensitivity and at last will improve total RX NF.
After this mod use of built-in amplifier is not necessary and even not recommended.
v 1.0
Peter SP2DMB and Greg SP3RNZ
sp2dmb@gmail.com sp3rnz@wp.pl
Advertisement

Subscribe to Our Youtube Channel
Related Manuals for Yaesu FT-847


Summary of Contents for Yaesu FT-847
- Page 1 The inspiration of this study was the FT847 mod project of Hellar ES1II /8. The following description applies to modify the transceiver Yaesu FT -847 serving dramatically improved noise performance and sensitivity of the receiver, as well as TX efficiency, increased power output and spectral purity in 4m band.
- Page 2 This project is estabilished on the basis of initial modifications of FT847 by our colleagues in the Estonia - Hellar ES1II and Arvo ES1CW - mni TNX guys! Well done. At the moment, the original version of the modification includes more than 30 TRX across the EU and probably worldwide, which can assure that the solution is repeatable and effective.
- Page 3 1. Modifiyng TX chain Dual-circuit 70Mhz band-pass filter. Made on filters 7V1S. L2 and L3 coils are wound with wire CuAg 0.5 mm. Coupling coils L1 and L3 are wound with isolated Cu wire 0.5mm dia. FTP ethernet cable should be good idea to get this wire in good isolation.
- Page 4 If inspected against short circuit we can put the screens and solder terminals Final result can look like this: On the project stage I had made some measurements using NWT500: Please note the attenuation frequency 45MHz !
- Page 5 Close-up image: And this is the screen from measurement taken prior to filter modification – FT847 signal spectrum with 10W output power...
- Page 6 And more interesting below 70 MHz ;-) Visible 45.600MHz signal peak just 3dB below the main carrier on 70.100MHz below You can see 21 and 35 Mhz peaks, just above the marker more right of spectrum we can see big one at 49.035Mhz. It has peaking level of -2dBm. So without any doubt, having good power readings on reflectometer is unfortunately not enough.
- Page 7 At first glance, you can see a significant reduction in the base level of the transmitted 70MHz signal, as well as minimal increase in power output. Other spurious/unwanted frequencies seen before modification, including 45.6MHz and 49.035MHz and 21MHz almost completely gone, or are suppressed more than 50dB compared to the basic +39dBm signal on 70MHz.
- Page 8 2. Modifying RX Amplifier and bandpass filter 70MHz diagram: Amplifier circuit is a classic and needs no further explanation. The application includes possibility of adjustable gain by changing the bias voltage of the first gate G1 by small potentiometer, which may be replaced by a fixed resistor in some cases. Coupling coil consist of 3 turns of 0.5 mm insulated wire (one more than in the TX filter) to get proper filter response.
- Page 9 Measured response of amplifier with 30dB attenuator (NWT500 - not calibrated)
- Page 10 CHAIN" in the Service Menu of transceiver, as they may vary depending on the TRX age and production changes introduced by Yaesu. Here’s a pic of already mounted filter on the receive path FT-847: After few mods we can say that theses prototype filters are fully useful.
-
Page 11: Component List
Component list = 1 x 2,2p SMD 0805 C10,C11,C12, = 4 x 100n SMD 0805 C3,C5 = 2 x 47p SMD 0805 C7,C9 = 2 x 56p SMD 0805 L1,L3 = 2 x 2t. Cu 0,5mm with isolation L2,L4,L6,L8 = 4 x 6,5t CuAg 0,5mm L5,L7 = 2 x 3t. - Page 12 Theoretical aspect were described in previous part of the article about modifying Yaesu FT847 RX/TX filters to get all we can have from this nice radio. Because You probably read part first before ( if not – I insist You should!) I will focus on practical aspect of the mod.
- Page 13 You should end with similar result for version „b” mod. 2. Next step will be increasing efficiency of Power Amplifier in our 847 by applying mod described by Marc PA1O in his superb article about Yaesu 847 filters. I’m pretty sure few of You experienced already that unlocking gives You advantage to get into 4m band, but big power supply is a must.
- Page 14 To get the transmitter much more efficiently we must do another mod, described by Marc PA1O – removing one of the capacitor in PA board. This is exactly described in his article about FT847 filters, but will be presented also here more as “how-to”...
- Page 15 Marc PA1O concluded that Yaesu applied strong glue, Yep. In fact they used very strong one, and this can make capacitor removal bit tricky, as it can’t be just warmed and desoldered. The best idea is to suck the tin on each side (i.e using smart thing like “solderWick”...
- Page 16 Anyway if nothing wrong can be seen, just good idea will be to re solder the points, especially the coils legs. Nothing to lose, but (possibly) way to avoid further troubles. On the next pic You can see the points for examination. At the end of PA job, another good idea.
- Page 17 This operations will end our PA survey. You can mount PCB inside, just observe small ground spring near the main broadband transformer. It should be positioned in the way not to touch the nearest coil. 3. Receiver part mod. With radio in standard position facing us, we need to unscrew the filter board. Before lift up, be sure that You disconnected Red and Yellow mini coax connectors.
- Page 18 In effect, we will have clean place to mount new filter with LNA. After inserting and soldering filter module we need only to make two wire bridges from diode switch to make it working. It’s clearly shown below. Of course it’s good to check with any multi meter if no sudden short circuits accidentally were made.
- Page 19 Just below filter we Just modified we can see TX filter part. If Any trouble finding it, please refer to PA1O article. This should look somehow similar. Green SMD were omitted by Yaesu, those are the caps marked with an asterisk on schematic diagram.
- Page 20 After some cleaning, PCB will look like this. ( damned Japanese glue ) Next step after inserting and soldering the filter is to make two bridges similar as in RX chain:...
- Page 21 Assuming you did also small ground connection to near filter shield to make filter module straight and to ground it - this is the end of mod. So we ended up with filter board looking like below. You can mount the PCB in the chassis, connect all remaining cables and connectors and be happy with your FT847.
Need help?
Do you have a question about the FT-847 and is the answer not in the manual?
Questions and answers