
Related Manuals for Modena RF 2930 W


Summary of Contents for Modena RF 2930 W
- Page 1 RF 2930 W BUKU PETUNJUK PENGGUNAAN LEMARI PENDINGIN TANAM BUILT-IN REFRIGERATOR MANUAL 09/20 www.modena.com...
- Page 3 Bukuini sangat disarankan untuk mudah dijangkau oleh siapapun yang akan menggunakan lemari pendingin. Tersedia pula fasilitas layanan customer care bagi pengguna MODENA yang setia dan juga informasi-informasi penunjang lainnya di situs resmi www.modena.co.id. Silakan menghubungi kontak yang tersedia bila ada hal-hal lain yang ingin ditanyakan berkaitan dengan lemari pendingin.
- Page 4 NOMOR : I.13.MI9.04206.0719 DAFTAR ISI HLM. KATA PENGANTAR INSTRUKSI KESELAMATAN Bagian 1 : Nama-nama Bagian Bagian 2 : Instalasi Bagian 3 : Cara Penggunaan Bagian 4 : Pemeliharaan Bagian 5 : Penyelesaian Masalah Bagian 6 : Spesifikasi ...
- Page 5 INSTRUKSI KESELAMATAN Lambang Tipe Deskripsi Cedera serius atau dapat PERINGATAN menyebabkan kematian RISIKO SENGATAN Bahaya sengatan listrik LISTRIK Bahaya api atau material mudah BAHAYA API terbakar Cedera atau kerugian materil WASPADA Informasi penting dalam pengoperasian PENTING sistem Instruksi Keselamatan Umum BACALAH BUKU PETUNJUK PENGGUNAAN SECARA SEKSAMA! Pastikan ventilasi udara tetap terbuka bila perangkat diletakkan di dalam ruangan tertutup...
- Page 6 potensial lainnya yang dapat memercikkan bunga api. Untuk mengurangi resiko kebakaran, kejutan listrik, atau luka pada diri seseorang ketika menggunakanproduk, tindakan pencegahan keselamatan dasar harus diikuti. Bacalah semua petunjuk sebelum menggunakan peralatan ini. PERINGATAN! Jangan tempatkan soket portabel atau sumber daya portabel di belakang perangkat ...
- Page 7 stop kontak yang dimaksud, segera hubungi tenaga ahli untuk memasangnya di rumah anda Anak-anak usia 0-3 tahun tidak boleh menggunakan perangkat. Anak-anak usia 3-8 tahun diizinkan untuk menggunakan perangkat dalam pengawasan khusus. Anak-anak usia 8-14 tahun dapat menggunakan perangkat setelah diberikan pemahaman khusus tentang cara penggunaan dan bahaya-bahaya yang dapat timbul ...
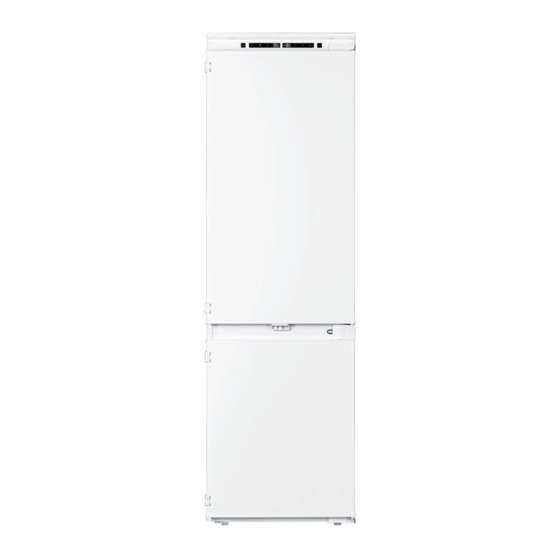
- Page 8 Bagian 1: Nama-nama Bagian 1. Panel kontrol 2. Rak kaca ruang pendingin 3. Laci Crisper 4. Laci ruang pembeku 5. Dak multi-aliran 6. Keranjang pintu 7. Saklar magnet pintu 8. Kaki yang dapat diatur 6 Bahasa Indonesia...
- Page 9 Bagian 2: Instalasi Bacalah bagian “LAMPIRAN: PETUNJUK INSTALASI TANAM” untuk mengetahui detail pemasangan perangkat ke ke kabinet dapur anda Keluarkan produk dari kemasan, lepaskan pita perekat yang menempel di dalam interior. Bekas perekat dapat dibersihkan dengan sabun cuci lembut. ...
- Page 10 Perangkat ini harus terhubung pada sumber listrik AC 220-240V 50 Hz. Steker harus tersambung sempurna, dan dilengkapi dengan sistem pembumi dengan sekring 10 A. Perangkat harus dibumikan (earthing/grounding). Pabrik tidak bertanggung jawab atas kerusakan atau cedera yang diakibatkan dari kegagalan untuk memenuhi syarat ini.
- Page 11 Bagian 3: Cara Penggunaan Sebelum Pemakaian Pertama Kali Anda harus membiarkan lemari pendingin selama 24 jam sebelum menyalakan daya Anda direkomendasikan untuk membersihkan bagian dalam perangkat sebelum pemakaian pertama kali. Gunakan cairan soda bikarbonat dan air hangat keringkan secara sempurna.
- Page 12 5. Yogurt dan lain-lain 6. Makanan siap makan dalam kemasan 7. Daging atau ikan segar 8. Buah-buahan dan sayuran Rak lemari pendingin dapat dipindahkan sesuai dengan kebutuhan penyimpanan. Untuk memindahkan rak, angkat bagian belakang dan tarik rak ke depan. Masukkan rak kembali ke posisi yang diinginkan. ...
- Page 13 Ruangan Pembeku Ruang pembeku hanya untuk menyimpan makanan beku. Jangan menyimpan makanan panas ke dalam ruangan pembeku. Makanan panas harus dibiarkan hingga temperatur ruangan sebelum dimasukkan ke dalam ruang pembeku. Ikuti instruksi penyimpanan yang terdapat pada kemasan makanan beku. Jika tidak ada instruksi penyimpanan, makanan tidak boleh disimpan selama lebih dari 3 bulan setelah tanggal pembelian.
- Page 14 Saran penggunaan: Gunakan Fresh Zone sebagai tempat penyimpanan ikan segar, daging segar, dan buah kering dalam kondisi -2°C~0°C. Simpan makanan beku di dalam Fresh Zone 4-5 jam sebelum digunakan. Hal ini dapat memudahkan anda dapat memotong makanan beku dan menikmati pengalaman memasak yang lebih modern, cepat, dan sehat.
- Page 15 Panel Kontrol Tombol Fungsi Pengaturan Temperatur Fresh Zone Tekan tombol ini untuk menampilkan temperatur Fresh Zone secara sementara, tekan kembali untuk mengatur temperatur. Temperatur dapat diatur dari -2°C hingga 3°C Fast Cooling Tekan tombol ini hingga lampu tombol menyala. Ketika Fast Cooling dinyalakan, seluruh perangkat akan bekerja secara otomatis dengan pengaturan: 2°C dan akan mati secara otomatis setelah 2.5 jam dan lampu akan mati...
- Page 16 Tombol Fungsi Fast Freezing Tekan tombol ini hingga lampu tombol menyala. Ketika Fast cooling dinyalakan, seluruh perangkat akan bekerja secara otomatis dengan pengaturan: -25°C dan akan mati secara otomatis setelah 6 jam dan lampu akan mati Power On/Off Tekan tombol ini selama 3 detik untuk menyalakan atau mematikan perangkat anda ...
- Page 17 Selalu pastikan steker daya sudah dicabut dari stop kontak sebelum membersihkan atau melakukan pemeliharaan. Ruang pendingin dan pembeku harus dibersihkan menggunakan cairan soda bikarbonat dan air hangat. Jangan menggunakan cairan abrasif atau deterjen. Setelah pembersihan, keringkan perangkat secara sempurna sebelum dipakai kembali.
- Page 18 Kemasan dan Lingkungan Kemasan melindungi produk anda dari kerusakan yang dapat terjadi selama transportasi. Material kemasan terbuat dari bahan yang ramah lingkungan dan dapat didaur ulang. Penggunaan material daur ulang mengurangi konsumsi bahan baku dan mengurangi limbah produksi Catatan: Bacalah buku petunjuk penggunaan secara seksama sebelum memasang dan menggunakan perangkat anda.
- Page 19 Bagian 5: Penyelesaian Masalah Jika anda memiliki masalah pada lemari pendingin anda, silahkan periksa beberapa masalah di bawah sebelum menghubungi pusat layanan: Masalah Kemungkinan Penyebab Perangkat kelebihan beban Tidak bekerja dengan baik Pintu tidak tertutup rapat Ada debu atau kotoran pada kondenser ...
- Page 20 Perangkat kelebihan beban Tidak bekerja dengan baik Pintu tidak tertutup rapat Ada debu atau kotoran pada kondenser Tidak ada jarak yang cukup antara perangkat dengan dinding sekitar Pintu tidak tertutup rapat. Alarm akan berbunyi jika Bunyi bip pintu tidak tertutup selama 60 detik ...
- Page 21 Bagian 6: Spesifikasi Model RF 2930 W Tipe Tanam/Built-in Panel Kontrol Elektronik Jumlah pintu Tempered glass Material rak Multi-aliran Pencairan bunga es Otomatis Pembuat es batu Lampu interior Ya (LED) Kapasitas Total (L) Daya Masukan (Watt) Daya Masukan Pemanas (Watt)
- Page 22 LAMPIRAN: Petunjuk Instalasi Tanam Mengenai petunjuk pemasangan Baca dan ikutilah petunjuk pemasangan ini dengan seksama Pabrikan tidak bertanggung jawab jika anda tidak mengikuti petunjuk dan peringatan yang ada di dalam petunjuk pemasangan Pemasangan hanya boleh dilakukan oleh pabrikan atau tenaga profesional yang kompeten ...
- Page 23 Dimensi Potongan Tanam Bahasa Indonesia 21...
- Page 24 Arah Buka Pintu 1. Lepaskan tutup baut dari depan 2. Dengan posisi pintu tertutup, produk lepaskan baut dari engsel atas dan bawah yang menempel pada pintu produk. Lepaskan baut dari engsel atas terlebih dahulu 22 Bahasa Indonesia...
- Page 25 3. Pegang bagian bawah pintu dan 6. Putar engsel 180° dan pasang pada buka engsel dari produk. Angkat bagian produk yang sebaliknya. pintu dari produk secara hati-hati, Pasang kembali pintu ke engsel pastikan anda tidak merusak engsel atau pintunya 7. Pasang pintu dengan benar. 4.
- Page 26 Ventilasi Pertimbangan utama ketika memasang unit pendingin ke dalam dapur tanam adalah ventilasi. Panas yang dilepas dari unit pendingin harus bisa dialirkan ke udara bebas. Ventilasi yang tidak benar dapat menyebabkan kegagalan prematur pada kompresor, pemborosan energy, kegagalan sistem total, dan dapat menghanguskan garansi Buatlah ventilasi atas seluas 200 cm².
- Page 27 Pemasangan 1. Tempatkan produk di depan kabinet dan pasang steker daya 2. Dengan bantuan orang lain, masukkan produk ke dalam kabinet 3. Dorong produk setengah masuk ke dalam kabinet, pasang penuntup pada engsel bagian samping 4. Gunakan kunci untuk mengatur ketinggian kaki produk agar posisinya datar 5.
- Page 28 Pastikan bibir pengatur jarak dalam posisi datar dengan bibir cabinet. Semakin banyak udara yang masuk dan keluar, semakin baik dan efisien performa produk anda. 26 Bahasa Indonesia...
- Page 29 6. Setelah menyesuaikan penutup putih dan pengatur jarak, pasang baut pada plat bawah dan pasang penutup putih Bahasa Indonesia 27...
- Page 30 7. Pasang baut pada plat atas seperti pada gambar 8. Pasang engsel pada plat samping kabinet 9. Gunakan strip yang disediakan untuk menutup celah yang terdapat antara samping produk dan kabinet 28 Bahasa Indonesia...
- Page 31 Memasang Pintu Fasia Lepaskan penutup dekorasi warna Gambar 1 putih (Gambar dengan cara mengangkatnya ke atas Dapatkan pengukuran sebagai Gambar 2 berikut: Dimensi B: Ukur dari bagian bawah kabinet atas hingga ke bawah braket Dimensi C: Ukur dari bawah kabinet atas hingga bagian atas pintu kabinet di sebelahnya Lepaskan baut, mur, dan ring dari...
- Page 32 Meluruskan Posisi Pintu Gambar 5 Tutup pintu dan periksa kelurusannya dengan pintu kabinet lainnya. Atur posisi pintu dengan cara memutar baut pengatur untuk pengaturan vertikal (10) dan dengan bantuan slot braket untuk arah lainnya. Ketika pintu sudah lurus, kunci putaran baut dengan cara mengencangkan mur (8) seperti pada Gambar 5 Memasang Dasar Pintu...
- Page 34 CONGRATULATIONS ON CHOOSING MODENA REFRGERATOR Thank you for your trust and decision to buy MODENA product and make it a part of your modern family's needs and lifestyle. The stylish and advanced design in each product is an elegant combination for your daily household activities.
-
Page 35: Table Of Contents
TABLE OF CONTENTS PAGE INTRODUCTION SAFETY INSTRUCTIONS Part 1 : Name of Parts Part 2 : Installation Part 3 : How to Use Part 4 : Maintenance Part 5 : Troubleshooting Part 6 : Specification ... -
Page 36: Safety Instructions
SAFETY INSTRUCTIONS Symbol Type Definition Serious injury or death risk WARNING RISK OF ELECTRIC Dangerous voltage risk SHOCK Risk of fire or flammable material FIRE HAZARD Injury or property damage risk CAUTION Important information on product IMPORTANT operations General Safety Warnings READ THIS MANUAL CAREFULLY! Keep ventilation openings, in the appliance enclosure or in the built-in structure, clear of obstruction. - Page 37 To reduce fire risk, electric shock risk, or injuries when using the product, follow the safety instructions carefully. Read the instructions before using the product WARNING! Do not locate multiple portable socket-outlets or portable power supplies at the rear of the appliance ...
- Page 38 Children are not expected to perform cleaning or user maintenance of the appliance, very young children (0-3 years old) are not expected to use appliances, young children (3-8 years old) are not expected to use appliances safely unless continuous supervision is given, older children (8-14 years old) and vulnerable people can use appliances safely after they have been given appropriate supervision or instruction concerning use of the appliance.
- Page 39 Part 1: Name of Parts 1. Control panel 2. Refrigerator glass shelves& Wine Rack 3. Crisper drawers 4. Freezer drawers 5. Multiflow air duct 6. Door Baskets 7. Magnetic door switch 8. Adjustable feet English 37...
-
Page 40: Part 2: Installation
Part 2: Installation Please read “APPENDIX : BUILT-IN INSTALLATION INSTRUCTION” to learn about the detail on how to install the device to your kitchen cabinet Take the product out of the package, remove the scotch tape protecting the door and the equipment. - Page 41 In some models the handle is put into the appliance, You should screw it with your own screwdriver. This appliance should be connected to AC 220-240V 50Hz supply socket. The socket must be fitted properly, and must be supplied with an earthing conduit and a 10 A fuse.
-
Page 42: Part 3: How To Use
Part 3: How to Use Before First Use You must allow the fridge to settle for at least twenty four hours prior to switching the power on. It is recommended that you clean the interior of the appliance prior to first use, using a solution of bicarbonate of soda and warm water and then thoroughly drying the interior. - Page 43 5. Yogurts, preserves etc. 6. 75cl bottles or ready meals etc. 7. Fresh meat and fish 8. Fruit and vegetables The fridge shelves can be moved according to the storage requirements within the fridge section. To move the shelf, lift up the rear section and then pull it outwards. To replace, slide the shelf back into the slot, and then lower the rear section.
- Page 44 Follow the instructions on the food packaging for storage of frozen food. If no information is provided, foods should not be stored for more than three months after the purchase date. Store food in small packages (ideally less than 1kg). This reduces the freezing time and improves the quality of the food after thawing.
- Page 45 It is recommended to store vegetables and fruits in condition of 0°C~3°C. Note: If you want to put easy-drying ingredients such as meat into the zero temperature zone for more than 4 hours, you should use plastic wrap to wrap the ingredients to avoid excessive moisture loss and affect the taste.
- Page 46 Control Panel Button Function Fresh Zone Temperature Adjustment Press this button to temporarily turn on the display section corresponding to the fresh zone, press the button again to adjust the temperature, ranging from -2°C to 3°C Fast Cooling Press this button until light of button illuminates. When Fast cooling is turned on, the whole appliance starts to work automatically at settings: 2°C and quits after 2.5 hours and the light will turn off Holiday Mode...
-
Page 47: Part 4: Maintenance
When turning the appliance on for the first time or after power failure, the appliance will always works at settings: 5°C for fridge, 0°C for Fresh zone and - 18°C for freezer. If you want to adjust the temperature or functions manually, press the adjustment button on the control panel ... - Page 48 Old and Out-of-order Refrigerators If your old fridge or freezer has a lock, break or remove the lock before discarding it, because children may get trapped inside it and may cause an accident. Old fridges and freezers contain isolation material and refrigerants. Therefore, take care not to harm environment when you are discarding your old fridges Disposal of your old appliance The symbol on the product or on its packaging indicates that this product...
- Page 49 Part 5: Troubleshooting If you have any problems with your appliance, you should check the troubleshooting prior to calling Customer Care. Problem Possible Causes Power plug installed Blown fuse Incorrect temperature setting Does not operate/start Faulty socket. Check by plugging other appliance in the same socket ...
- Page 50 Problem Possible Causes Blowing air noise: During normal operation of the system due to the circulation of air. Doors are not closed properly. An alarm will sound Beeping noise after 60 seconds of a door being open. It is normal for some ice droplets to form on the back wall of the fridge.
-
Page 51: Part 6: Specification
Part 6: Specification Model RF 2930 W Type Built-in Temperature control Electronic No. of doors Shelf material Tempered glass Multi-flow Defrosting Automatic Ice Tray Interior Lamp Yes (LED) Total Gross capacity (L) Power Input (Watt) Defrost Power Input (Watt) CFC Free compressor... - Page 52 APPENDIX: Built-in Installation Instruction About these instructions Read and follow the operating and installation instructions carefully The manufacturer is not liable if you disregard the instructions and warnings in the operating and installation instructions The appliance should be installed by technicians or a professionally qualified person.
- Page 53 Built-in Cutout Dimension English 51...
- Page 54 Door Opening Direction 6. Remove the screw caps on the front 7. With the door closed remove the of the product. screws from the top and bottom hinges that hold the appliance door to the hinges. Remove the screws from the top hinge first. 52 English...
- Page 55 8. Support the door at the bottom and 8. Flip over the top hinge (by 180°) and open the hinges away from the fix it in place on the diagonally appliance door. Carefully lift the opposite corner of the appliance appliance door away, ensuring you cabinet.
- Page 56 Ventilation The main consideration when installing any refrigeration unit into a fitted kitchen is ventilation. The heat removed from the cooling compartment needs to be dissipated into the atmosphere. Incorrect ventilation can lead to premature compressor failure, excessive power consumption, total system failure and may invalidate the warranty provided with the appliance.
- Page 57 Installation 10. Place the product in front of the cabinet and connect the power cord 11. With the help of another person, insert the product into the cabinet 12. Push the product half way into the cabinet and install the shims onto the hinges 13.
- Page 58 Ensure that the lips of the spacers are level with the lip of the cabinet base. The more air that can get in and out of the product, the better and more efficient the product performance will be. 56 English...
- Page 59 15. After fitting the white cover and spacers, fix the lower plate with screws and install the white covers English 57...
- Page 60 16. Fix the upper plate and install the screw cover as follows 17. Fix the hinges onto the cabinet side plates 18. Use the strip to fill up the space between the cabinet and side of the product 58 English...
- Page 61 Mounting the Fascia Doors Remove the white decorative cover Fig.1 (Fig. 1) by lifting it upwards. Obtain the below measurements: Fig. 2 Dimension B: Measure from the underside surface of kitchen unit to the bottom of the fixing bracket Dimension C: Measure from the underside surface of kitchen unit to the top of next unit door.
- Page 62 Aligning the decor door Fig. 5 Close door check alignment with the other unit doors. Adjust the decor door by screwing or unscrewing the adjustment bolts for vertical adjustment (10) and by the help of the slots on the fixing bracket for other directions.
- Page 64 PT MODENA INDONESIA Jl. INDUSTRI RAYA I BLOK D-8, JATIUWUNG, TANGERANG 15135 28 English...
Need help?
Do you have a question about the RF 2930 W and is the answer not in the manual?
Questions and answers