Table of Contents
Advertisement
Advertisement
Table of Contents

Related Manuals for PowerTec PT2200i


Summary of Contents for PowerTec PT2200i
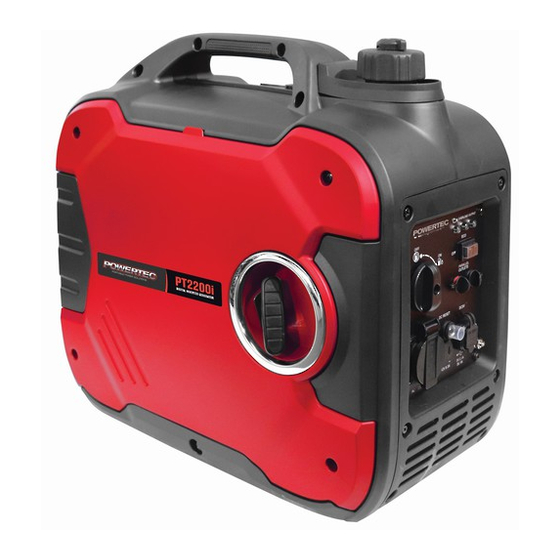
- Page 1 PT2200i DIGITAL INVERTER GENERATOR 2000W INSTRUCTION MANUAL INSTRUCTION MANUAL...
- Page 2 This Operating Manual has been designed to instruct you on the correct use and operation of your Powertec product. Your satisfaction with this product and its safe operation is our ultimate concern.
-
Page 3: Table Of Contents
Generator Controls & Features ..........10 Control Panel .................10 Specifications.................11 Control Functions ..............12 Getting Started ..............14 Wattage Reference Guide .............16 Calculating Your Power Needs ..........17 Operation ................17 Electrical Connection..............19 Maintenance .................21 Storage .................26 Troubleshooting ..............28 Wiring Diagram..............29 Notes..................30 Warranty................. 31 www.powertec.net.nz... -
Page 4: Symbol Usage
WARNING! The exhaust contains poisonous car- bon monoxide gas that can cause loss of consciousness and may lead to death. www.powertec.net.nz... - Page 5 Do worn, discoloured, or corroded. Keep ter- not operate the generator with known leaks minals clean and tight. in the fuel system. • Insulate all connections and disconnected • Excessive build-up of unburned fuel gases wires. www.powertec.net.nz...
- Page 6 If it still does not fit, contact a qualified electrician to install a polarized outlet. Do not change the plug in any way. Double insulation elim- inates the need for the three-wire earthed power cord and earthed power supply sys- tem. www.powertec.net.nz...
- Page 7 Do not use the generator if the power tant information. If unreadable or missing, switch does not turn it on or off. Any gen- contact your Powertec agent immediately erator that cannot be controlled with the for a replacement. power switch is dangerous and must be repaired.
- Page 8 Pipes and silencer should not use • Keep hands, arms, long hair, loose cloth- any flammable materials, nor should they ing, and jewellery away from moving parts. be installed near the same. Generator ex- www.powertec.net.nz...
- Page 9 If swal- lowed, seek medical treatment immedi- ately. Do not induce vomiting if fuel is swal- lowed. For skin contact, immediately wash with soap and water. For eye contact, im- mediately flush eyes with clean water and seek medical attention. www.powertec.net.nz...
-
Page 10: Generator Controls & Features
5. 3-in-1 switch knob (Start/stop switch, fuel valve and choke) 6. AC receptacle 7. AC Reset (Cut Out Switch) 8. DC receptacle 9. DC Reset (Cut Out Switch) 10. Parallel Operation Outlets 11. Double USB Port 12. Ground (Earth) Terminal www.powertec.net.nz... -
Page 11: Specifications
Run Time: 6hrs Receptacles (qty.): (1) 15A 230V AC; (1) 12V 8A DC Net Weight: 22kg Fuel Type: Unleaded gasoline Fuel Capacity: Oil Type: SAE 10W-30 Start Type: Recoil L x W x H: 498 x 298 x 459 www.powertec.net.nz... -
Page 12: Control Functions
The engine will such as a compressor, pump, or refrigerator. not restart until oil is added to the unit to bring This is normal behaviour it is not a malfunc- it up to the appropriate level. tion. www.powertec.net.nz... - Page 13 The Earth terminal is used to earth the generator when earthed ESC Throttle (Engine Smart Control) electrical devices are being used. When the ESC switch is in the “ON” position Consult an electrician for local the smart throttle controls the engine speed earthing regulations. www.powertec.net.nz...
-
Page 14: Getting Started
DO NOT start the The parallel connection is a feature that al- engine before adding engine oil. lows two PT2200i machines to be connected together almost doubling the output of one Place generator on a level surface. DO NOT unit. - Page 15 (C) Using the funnel fill with 0.4L of SAE 10W-30 oil. (D) Fill to required oil level. Replace oil filler cap and secure side panel with screws. NOTE: Check fuel and oil level each time before use. www.powertec.net.nz...
-
Page 16: Wattage Reference Guide
+/- 10% voltage variation, and +/- 3 Hz frequency vari- Total Running Watts + Highest Starting Watts ation from the generator specification = Generator Power Needs ratings. www.powertec.net.nz... -
Page 17: Calculating Your Power Needs
The output of the generator is reduced when the temperature, the humidity and the altitude are higher than standard atmospheric condi- tions. Additionally, the load must be reduced when using in confined areas, as generator cooling is affected. www.powertec.net.nz... - Page 18 3 minutes to warm up the engine. 3. Turn the 3 in 1 switch to “CHOKE” . • The ESC unit operates normally after the above time period, while the ESC is “ON”. NOTE: The choke is not required to start a warm engine. www.powertec.net.nz...
-
Page 19: Electrical Connection
4 Turn the fuel tank cap air vent knob to first. “OFF” after the engine has completely 3. Allow the engine to stabilize. cooled down. 5. Plug in and turn on the next item. 6. Allow the engine to stabilize. www.powertec.net.nz... - Page 20 5. The DC Circuit Breaker will turn “OFF” automatically if the current exceeds rated output. 6. To restart charging the battery, turn the DC protector on by pressing its button to “ON” www.powertec.net.nz...
-
Page 21: Maintenance
Clean Up Carb Piston - On * >225cc - Every 250hrs * Items should be maintained and repaired by an Authorized Powertec Service Supplier. WARNING! NOTE: If the generator engine works frequently Stop the engine before servicing. Place under high temperature or heavy load, change engine on a level surface and remove the oil every 25 hours. - Page 22 Spark Plug Torque: 12.5 N·m (1.25kgf·m, 9Ibf·ft) Carburetor Adjustment The carburetor is a vital part of the engine. Adjusting should be left to an Authorized Powertec Service Pro- vider who has the professional knowledge, special- ized data, and equipment to do so properly.
- Page 23 6. (B) Add engine oil to the upper level as seen in the diagram (1). Recommended engine oil: • SAE10W-30 Recommended engine oil grade: API Service SE type or higher Engine oil quantity: 0.4 Litre 7. Install oil filler cap, cover, and screws. www.powertec.net.nz...
- Page 24 6. Insert the foam element into the air filter case. Be sure the foam element sealing surface matches the air filter so there is no air leak. CAUTION! The engine should never run without the foam element. 7. Install air filter case cover, cover, and screws. www.powertec.net.nz...
- Page 25 4. Check the muffler screen and spark arrester replace them if damaged. 5. Install the spark arrester. 6. Install the muffler cap. 7. Install the cover and tighten the screws. www.powertec.net.nz...
-
Page 26: Storage
CAUTION: WARNING! Immediately wipe off any spilled fuel GASOLINE IS FLAMMABLE. DO NOT with a clean, dry, soft cloth as fuel may perform this maintenance while smok- deteriorate painted surfaces or plastic ing or near an open flame. parts. www.powertec.net.nz... - Page 27 Pull the recoil starter until you feel com- pression. Then stop pulling (this prevents the cylinder and valves from rusting). Clean exterior of the generator and apply a rust inhibitor. Store the generator in a dry, well-ventilat- ed place, with the cover placed over it. www.powertec.net.nz...
-
Page 28: Troubleshooting
Gap: 0.6 - 0.7mm the problem persists, (0.024 - 0.028”) See pg 22 for contact your local more information Powertec Authorised Service Facility 5. Check fuel filter - See pg 26. Carburettor - See pg 22. Air filter - See pg 24. -
Page 29: Wiring Diagram
PT2000i DIGITAL INVERTER GENERATOR Wiring Diagram www.powertec.net.nz... -
Page 30: Notes
PT2000i DIGITAL INVERTER GENERATOR Notes www.powertec.net.nz... -
Page 31: Warranty
The decision that an issue with a product qualifies Registered warranty period for the PT2200i as a warranty claim is made at the sole jurisdiction Commercial Use: 12 Months of Euroquip. - Page 32 Congratulations on your new POWERTEC product. We are proud to have you as our customer and will strive to provide you with the best service and reliability in the industry. This product is backed by our extensive warranty and service network. Please contact your local agent or submit a service...
Need help?
Do you have a question about the PT2200i and is the answer not in the manual?
Questions and answers