
Related Manuals for Asko HID144MC


Summary of Contents for Asko HID144MC
- Page 1 INSTRUCTIONS FOR USE HID144/654/754/865MC HID925/945/956MC Induction hob HID352/654/754GC EN (GB) (IE) HID824/956/965GC HID144/754/865MFC HID925/956MFC...
-
Page 2: Table Of Contents
Contents Introduction ..........Control panel ..........Dear customer! ..........Indications on the display ......Safety precautions ........Operation ............ General safety instruction ......Switching the hob on/off ......Danger of fire! ..........Child lock ............. Households with children and people with Cooking ............ -
Page 3: Introduction
Introduction Dear customer! Welcome to our growing ASKO family! We are proud of our appliances. We hope that this appliance will be an appreciated and dependable aid for many years to come. Please read the operating instructions before use. They include general tips, information about the settings and adjustments you can make, and the best way to take care of your appliance. - Page 4 Introduction Carefully read the instructions for use before using the appliance. The following symbols are used throughout the manual and they have the following meanings: INFORMATION! Information, advice, tip, or recommendation WARNING! Warning – general danger ELECTRIC SHOCK! Warning – danger of electric shock HOT SURFACE! Warning –...
-
Page 5: Safety Precautions
Safety precautions General safety instruction The appliance is not intended to be controlled with external timers or special control systems. If the supply cord is damaged, it must be replaced by the manufacturer, its service agent or similarly qualified persons in order to avoid a hazard (only for appliances supplied with connection cord). -
Page 6: Risk Of Electric Shock
Safety precautions WARNING! WARNING: The appliance and its accessible parts become hot during use. Care should be taken to avoid touching heating elements. Children younger than 8 years of age shall be kept away unless continuously supervised. WARNING: Accessible parts may become hot during use. Young children should be kept away. -
Page 7: Important Information
2402.0MHz - 2480.0MHz Carrier Output: <10dBm Emission type: Hereby, ASKO and ATAG declare that the radio equipment mentioned above is in compliance with Directive 2014/53/EU. The full text of the EU declaration of conformity is available at the following internet address: www.celsiuscooking.com/DoC. -
Page 8: Installation
Installation Installing a built-in hob Use of solid wood corner trims on worktops behind the cooking zone is only allowed if the clearance between the trim and the cooking hob is no smaller than indicated on the installation plans. a (mm) b (mm) c (mm) d (mm) -
Page 9: Air Vents In The Lower Kitchen Cabinet
Installation A (mm) B (=>mm) C (mm) D (=>mm) E (=>mm) 38 cm 350-352 490-492 64/72 cm 560-562 490-492 80 cm 750-752 490-492 80 cm - 5 zones 770-772 490-492 90 cm 860-862 490-492 111 cm 1070-1072 385-387 Air vents in the lower kitchen cabinet •... -
Page 10: Flush-Mount Installation Into The Worktop
Installation Lower cabinet with an oven • Installing an oven under the induction hob is possible for ovens with a cooling fan. Before installing the oven, the kitchen cabinet rear wall has to be removed in the area of the opening for installation. In addition, there should be an opening of at least 6 mm in the front side, along the entire width of the cabinet. - Page 11 Installation 1. Silicone sealant 2. Sealing tape WARNING! Pay particular attention to built-in dimensions with (natural) stone countertops. When choosing the silicone sealant, observe the countertop material and consult the countertop manufacturer. Use of inappropriate silicone sealants can result in permanent discolouration of some parts. Removing the built-in appliance Disconnect the appliance from the power mains.
- Page 12 Installation Installation into the worktop - flush mount (depending on the model) A (mm) B (mm) C (mm) D (mm) 72 cm 80 cm 90 cm 111 cm 1110 A (mm) B (mm) D (mm) G (mm) (=>mm) (=>mm) (=>mm) 72 cm 724-725 560-562...
-
Page 13: Fitting The Foam Gasket
Installation Fitting the foam gasket INFORMATION! Some appliances come with the gasket already fitted! Before installing the appliance into a kitchen worktop, attach the foam gasket supplied with the appliance to the bottom side of the glass ceramic hob. • Remove the protective film from the gasket. -
Page 14: Connecting
Connecting Connecting the cooking hob to the power mains • Power mains protection must conform to the relevant regulations. • Before connecting the appliance, make sure the voltage indicated on the rating plate conforms to the voltage in your power mains. •... - Page 15 Connecting 1 phase, 1 neutral conductor (220–240 V~, 50/60 Hz) L = black/brown N = blue = yellow-green For appliance types: BI1CA…, BI6CA…, BI6CB…, BI7CA…, BI8CA…, BI8CB…, BI9CE… Voltage between line and neutral conductor must be 220–240 V~. Voltage between lines must be 380–415 V~.
- Page 16 Connecting 2 phases, 1 neutral conductor (380–415 V 2N~, 50-60 Hz) To reach the rated maximum power two fuses of 16A are needed. Install a jumper between terminals 4 and 5. (only for NL) 2 phases, 2 neutral conductors (220–240 V 2-2N~, 50-60 Hz) To reach the rated maximum power two fuses of 16A are needed.
-
Page 17: Current Limiter
Connecting The following connections are possible. 1 phase, 1 neutral conductor (220–240 V~, 50-60 Hz). To reach the rated maximum power a fuse of 48A is needed. Install a jumper between terminals 1 and 2, between terminals 2 and 3 and between terminals 4 and 5. -
Page 18: Your Hob
Your hob Induction hob (depending on the model) Since the appliances for which these instructions were drawn up may have different features, some functions or equipment may be described in the manual that may not be present in your appliance. 1. -
Page 19: Safety
Safety WARNING! Before use, read the separate safety instructions first! Temperature safety A sensor continuously measures the temperature of certain parts of the hob. Every cooking zone is equipped with a sensor that measures the temperature of the glass-ceramic cooking zone to avoid any risk of overheating when a pan boils dry. -
Page 20: Use
Using the touch controls • The touch controls may take some getting used to if you are used to other (rotary) controls. Place the tip of your finger flat on the control to achieve the best results. You do not have to apply any pressure. -
Page 21: How Does Induction Work
How does induction work A magnetic field is generated in the appliance. By placing a pan with an iron base on a cooking zone, a current is induced in the pan base. This induced current generates heat in the base of the pan. Easy The electronic controls are accurate and easy to set. -
Page 22: Pans
Pans Pans for induction cooking Induction cooking requires a particular quality of pan. WARNING! Pans that have already been used for cooking on a gas hob are no longer suitable for use on an induction hob. Only use pans that are suitable for induction cooking with a thick base (minimum 2.25 mm) and a flat base. -
Page 23: Induction Noises
WARNING! Never use pans with a misshapen base. A hollow or rounded base can interfere with the operation of the overheating protection, so that the appliance becomes too hot. This may lead to the glass top cracking and the pan base melting. Damage arising from the use of unsuitable pans or from boiling dry is excluded from the guarantee. -
Page 24: Power Level Settings
Power level settings Because the settings depend on the quantity and composition of the contents of the pan, the table below is intended as a guideline only. Level Purpose • simmer bouillon, Use settings 1 - 5 to: • stew meats, •... -
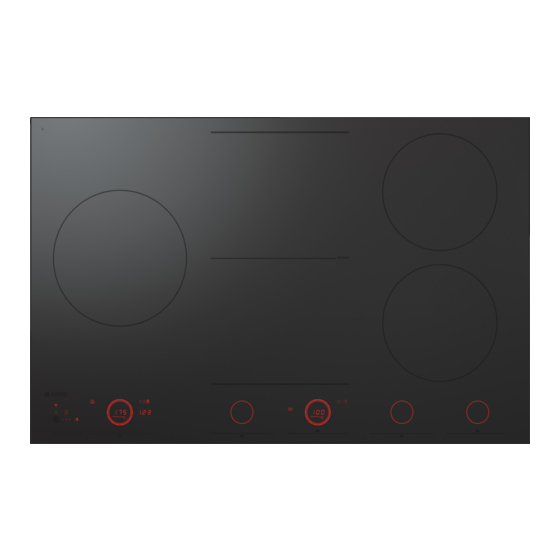
Page 25: Control Panel
Control panel (lay-out of user interface depends on model) 1. Wi-Fi Connectivity 2. Pause • Key lock for cleaning • Pause and resume cooking 3. On/Off • Child lock 4. Hood control • Minus • • Plus • Lighting • Display 5. -
Page 26: Indications On The Display
Indications on the display In display Status Power level ‘0’ for a cooking zone Power level that is set for a cooking zone; 1 = low / 12 = high boost Boost function active Locking function is activated; the control panel is locked Residual heat indicator;... -
Page 27: Operation
Operation Switching the hob on/off Touch the on/off key to switch on the hob. A short beep will be emitted. Rings on all sliders will light up, then slider will gradually fade out. Slider will only remain lit on the selected cooking zones on which you have the pans placed. -
Page 28: Cooking
Operation Cooking Three cooking modes are available: 1. Standard cooking with Power levels 2. Cooking with the PLUS menu 3. HestanCue cooking by measuring cookware temperature Standard cooking Place the pan on a certain cooking zone. Set the power level as desired. Power level can be set by sliding in circular motion or by directly touching an area or position on the slider. -
Page 29: Move Function
Operation INFORMATION! To avoid overheating, the electronic control system may automatically deactivate boost prematurely and decrease the power level to 12. If there is no suitable pan on the cooking zone, the set level of temperature will flash. After one minute, the cooking zone will be switched off. -
Page 30: Chef Mode
Operation Chef mode (only on some models) In this mode, all cooking zones are switched on simultaneously and the cooking hob is divided into three zones. • On all left-hand side cooking zones, power level 12 is automatically activated. • On all middle cooking zones, power level 7 is automatically activated. -
Page 31: Recall Function
Operation Recall function This feature allows you to recall all the settings of the cooking zones if the hob was accidentally switched off. Within 6 seconds the hob must be switched back on. Pressing anywhere on the slider within 6 seconds recalls all the settings from before the appliance was last switched off. -
Page 32: Hot Cooking Zone
Operation Deactivating the count-down timer Press the icon for the selected cooking zone and hold it for 3 seconds. The timer will be switched off. Deactivating the count-down timer alarm. • When the set time expires, alarm will be sounded, the key for the relevant cooking zone will flash, and 0:00 will flash on the count-down timer display unit. -
Page 33: Cooking With The Plus Menu
Grill This function is exclusively for bridged cooking zones, that are combined to a larger cooking zone. Grilling is optimized for ASKO induction accessories grill plate and teppanyaki. But it will also work with different cookware, but perhaps less accurate. - Page 34 Operation INFORMATION! Up to value 94 °C the programs allow the hob to reach and maintain automatically the set temperature by measuring the glass surface temperature. This will avoid liquids overflowing and burning on the bottom of the pan. INFORMATION! From 100 °C and higher temperatures the programs will heat up cookware with different timed power steps.
-
Page 35: Cooking With Celsius°Cooking
With these items and the Hestan Cue app, the Celsius°Cooking is complete. Link them together and let the connected sensors and ingeniously-controlled settings and programs steer you towards truly delicious meals. Find out more, and see the system in action, at www.celsiuscooking.com, www.asko.com. -
Page 36: Cooking With Celsius°Cooking Cookware
Operation Cooking with Celsius°Cooking cookware and Hestan Cue programs This option involves cooking using either the Celsius°Cooking (frying pan or pot’s) that continuously measures the temperature inside the cookware or the Celsius°Cooking temperature probe. All use Bluetooth connection to send information about the temperature to the cooking hob. Preparing the system Before you start cooking, please make sure you complete all the preparation steps. - Page 37 Operation 1. Slide the suspension bracket over the pan edge. 2. Slide the Probe pin from the top into the suspension bracket. Refer to the table for proper Probe placement depending on the pan used. 3. The tip of the probe should be 1 cm or > from the pan bottom. NOTE! Leave a minimum distance of 1 cm between the pan base and the measuring point of the probe! Celsius°Cooking™...
- Page 38 Operation Assigning the cookware to the cooking zone Switch the hob on and wait till the end of the the start up animation. Place the Celsius°Cooking cookware or a regular pot fitted with the Celsius°Cooking probe on a desired cooking zone. After it has been detected, quickly tap twice with your fingertip on the handle cap sensor or the probe housing to activate it.
- Page 39 Operation Getting started with the Hestan Cue App You can download the Hestan Cue App from the Apple App Store or Google Play Store. When paired, the app can be used to control your Celsius°Cooking Probe or Pan. Filled with inspiring recipes and chef-tested techniques, the app will provide you with step-by-step instructions and how-to videos.
- Page 40 Operation About the Hestan Cue App: • The Hestan Cue app is going to help you cook better food more often by acting as your GPS in the kitchen. You'll learn new techniques, novel combinations, and gain a sense of confidence in what you're cooking.
-
Page 41: Wi-Fi Connectivity/Connectlife
Operation Wi-Fi Connectivity/ConnectLife The cooking hob is fitted with a Wi-Fi module that allows the appliance to connect to a mobile device such as smart phone or tablet. It offers to monitor the cooking hob status and enables to update the firmware of the cooking hob (see chapter "Firmware Update"). - Page 42 Operation INFORMATION! As a quick troubleshooting: In many cases it helps to disable the Wi-Fi module and enable it again. You may also find more help in the “Troubleshooting Wi-Fi” chapter. Activate Wi-Fi: • The hob must be switched off. •...
- Page 43 Operation Pairing additional user: - is displayed on the main module display. After briefly pressing on the Wi-Fi symbol , the appliance is in "Pairing Mode" for 180 seconds. The Wi-Fi symbol will flash, and the signs will be switched off. This option requires, that the cooking hob is already successfully connected to the cloud (Wi-Fi symbol is constantly full lit).
-
Page 44: Hood Control
Operation Mobile app: The ConnectLife app is available on the Apple App Store and Google Play Store. After being paired with the cooking hob, the app can be used to monitor the status of the cooking hob. You can find direct links for the different stores to the ConnectLife-app under www.connectlife.io/getstarted and more information about the system, support, available functionalities, and additional options under www.connectlife.io. - Page 45 Operation Switching the light on and off • Press the light key . The light switches on at maximum strength. • To turn off the light, press the key again. • Press and hold the light key to set the lighting intensity. Changing the colour lighting temperature You can adjust the lighting temperature.
-
Page 46: Firmware Update
Firmware Update The cooking hob, equipped with a Wi-Fi module, can receive updates of the appliance firmware (for example improved function updates or safety relevant updates). This requires, that the cooking hob is connected to the cloud and ConnectLife-app with a registered user account. If this is not yet established, please proceed with the chapter for Wi-Fi connectivity. -
Page 47: Settings
Settings You can tailor the behaviour of this induction hob to suit your cooking style! There are various settings available for adjustment. While there are no pans on any zone, touch any ring with two fingers and keep it pressed for 3 seconds. - Page 48 Settings hth - Hob-to-hood pairing (RF) If you own a compatible hood with RF connectivity, you can pair it to your induction hob! To do so, set this parameter to on. Hood control icons will start blinking. You now have 5 minutes to activate the pairing on your RF hood.
- Page 49 Settings Con - Current limiter If your electrical wiring or circuit breakers do not meet the specified current draw on the rating (connection to power grid) plate, the current limiter can be activated by reducing the value of this setting. Doing so may cause a reduced performance of the induction hob.
-
Page 50: Maintenance
Maintenance Cleaning INFORMATION! Set the locking function before you start cleaning the hob. We recommend that you clean the appliance after each use. This prevents that over cooked food can damage the glass surface. Daily cleaning 1. Use a damp cloth and a mild cleaning agent (washing-up liquid) to clean the appliance. 2. -
Page 51: Troubleshooting
Troubleshooting General If you notice a crack in the glass top (however small), switch the hob off immediately, unplug the hob, turn off the (automatic) fuse switch(es) in the meter cupboard or, in the event of a permanent connection, set the switch in the power supply lead to zero. Contact the service department. Troubleshooting table If the appliance does not work properly, this does not always mean that it is defective. - Page 52 Troubleshooting Symptom Possible cause Solution Hestan Cue key is blinking, Celsius°Cooking cookware Replace battery - check the status together with E66 was not found (empty with the Hestan App when unsure. battery, out of range, etc.). Hestan Cue key is blinking, Celsius°Cooking cookware If handle cap is mounted correctly;...
-
Page 53: Troubleshooting Wi-Fi
Troubleshooting Troubleshooting Wi-Fi Symptom Possible cause Solution Wi-Fi icon not shown Wi-Fi disabled The hob must be switched off, then touch the on/off key hold it for 5 seconds. Wi-Fi setup failed Home network issues. Check that your home network signal is strong and internet connection is working. -
Page 54: Environmental Aspects
Environmental aspects Disposal of packaging and appliance In the manufacturing of this appliance durable materials were used. Make sure to dispose of this equipment responsibly at the end of its lifecycle. Ask the authorities for more information regarding this. The appliance packaging is recyclable. The following may have been used: •... - Page 55 ASKO APPLIANCES AB • SOCKERBRUKSGATAN 3, SE-531 40 LIDKÖPING, SWEDEN • WWW.ASKO.COM 830370 -a19...
Need help?
Do you have a question about the HID144MC and is the answer not in the manual?
Questions and answers