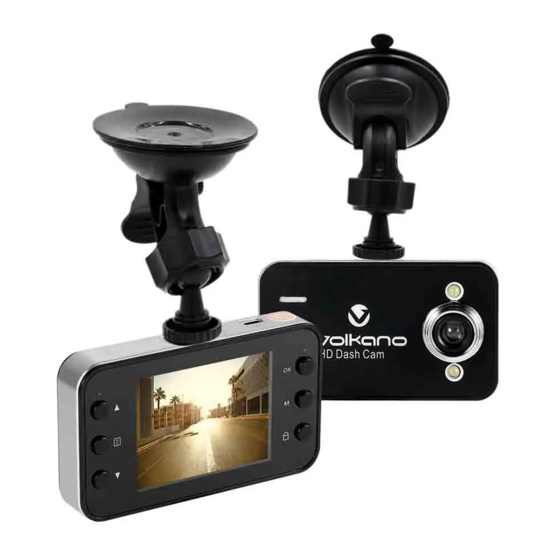
Summary of Contents for volkano Street Series
- Page 1 Street Series USER MANUAL Please read and retain these instructions for future reference.
-
Page 2: Specifications
THE HIGHLIGHTS: - Vehicle Windscreen mounted camera for recording video and sound while driving. - Still Photo camera using the rechargeable battery. - Voice recording using the rechargeable battery. - Can be used as a web camera with a computer. - Video, Sound and Photographs can be transferred to a computer for later use. -
Page 3: Description Of Parts
DESCRIPTION OF PARTS: 1. Menu UP button 2. MENU Select button – Enters MENU mode 3. Menu DOWN button 4. OK button – Accepts a selection 5. MODE button – Select Video / Still Photo or Playback Mode 6. LOCK button – Lock the current video segment 7. - Page 4 We recommend the use of a high speed (Class 6 or higher) Memory Card for best results. Your Volkano Dash Cam will operate with memory cards up to 32GB in size. To insert the memory card, ensure the Dash Cam is...
- Page 5 FITTING YOUR VOLKANO DASH CAM Attach the windscreen mount to the top of the Dash Cam by screwing it in a clockwise direction and then tightening the locking nut. Do not over-tighten the nut or angle adjusting mechanism. To attach the suction...
-
Page 6: Operating Your Dash Cam
OPERATING YOUR DASH CAM: 1. Charging: A. Using the built-in rechargeable lithium battery: Charging options: 1. Connect it to the vehicle 12V outlet using the supplied charger. 2. Connect it to a 5V USB charger or a computer or power bank. - To indicate the unit is charging, the indicator light on the top left of the Dash Cam will light up red. - Page 7 2. Functions This Dash Cam has four Modes: - Video Recording - Still Photo - Audio Recording - Playback To switch between modes, simply press the MODE button A. Video Recording Mode: After turning on, the Dash Cam enters video mode automatically.
- Page 8 D. Playback Mode: After the Dash Cam is switched on, press the MODE button 3 times to enter into Preview mode. You can scroll through previews by pressing the UP and DOWN buttons. The recording name will display at the top of the screen. Files can be identified as follows: Video files are type .AVI, Still Photos are type .JPG, Audio files are type.WAV.
-
Page 9: Video Settings Menu
VIDEO SETTINGS MENU: There are 2 Main menus which you can access by pressing the MENU button either once or twice. Menu 1 1. Video Size: This option selects the resolution of video recording. The higher resolution will record more detail, while the lower resolution will record for longer on your Memory Card. - Page 10 Menu 2. 1. Format: This will completely erase your Memory card. Options are: Cancel / Execute. PLEASE NOTE: Take care with this function as deleted recordings cannot be recovered. 2. Language: This changes the menu interface language. There are numerous options. 3.
- Page 11 to a computer to transfer Video, Still Photo or Audio recordings to the computer, please select the Disk Drive option. Options are: PC Cam / Disk Drive. Still Photo Menu: When in Still Photo mode, you can press the MENU button to access the Still Photo Menu.
-
Page 12: Additional Notes
transferred to a computer or you no longer need to keep it safe. Options are: Cancel / Execute. NOTE: You may also press the Lock button on the back of the Dash Cam at any time to instantly lock the current video recording segment. -
Page 13: Safety Precautions
- We recommend that you not leave your Dash Cam attached to your windscreen if you are leaving your vehicle unattended, especially on a hot day if your vehicle is exposed to direct sunlight. - Any foreign material or dirt on the front of the lens will affect recording quality. -
Page 14: Additional Warnings
damage caused when using the appliance for any other purpose than that for which it is intended. - This appliance is not intended for use by persons (including children) with reduced physical, sensory or mental capabilities, or lack of experience and knowledge, unless they have been given supervision or instruction concerning use of the appliance by a person responsible for their safety. -
Page 15: Environmentally-Friendly Disposal
- Do not use abrasive or harsh chemicals on the lens or display of the device. Doing so may damage your display and or lens. ENVIRONMENTALLY FRIENDLY DISPOSAL Do not dispose of electrical appliances as unsorted municipal waste, use separate collection facilities. Contact your local government for information regarding the collection systems available.


Need help?
Do you have a question about the Street Series and is the answer not in the manual?
Questions and answers