Welbilt CLEVELAND SteamCraft 24CGA10 Operation Installation Maintenance Manual
Gas convection steamer
Hide thumbs
Also See for CLEVELAND SteamCraft 24CGA10:
- Operation installation maintenance manual (37 pages)
Table of Contents
Advertisement
Quick Links
Visit www.clevelandrange.com to locate a
service or sales representative in your area.
SteamCraft
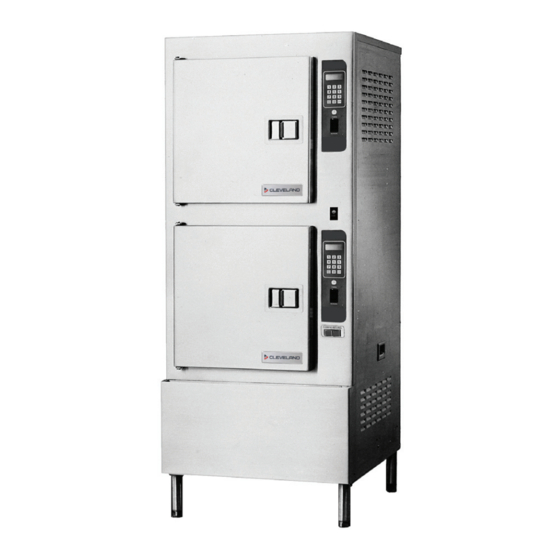
Gas Convection Steamer
Operation, Installation & Maintenance Manual
This manual is updated as new information and models are released. Visit our website for the latest manual.
MO EL:
24CGA10
Read the manual thoroughly.
!
Improper installation, operation or
maintenance can cause property
damage, injury or death.
For your future reference.
Model # ______________________________________
Serial # ___________ ____________________________
Part # - KE004036-2 D
November 2019
Advertisement
Table of Contents

Related Manuals for Welbilt CLEVELAND SteamCraft 24CGA10

Summary of Contents for Welbilt CLEVELAND SteamCraft 24CGA10
- Page 1 Visit www.clevelandrange.com to locate a service or sales representative in your area. SteamCraft Gas Convection Steamer Operation, Installation & Maintenance Manual This manual is updated as new information and models are released. Visit our website for the latest manual. MO EL: For your future reference.
- Page 2 STATEMENT OF RESPONSIBILITIES / DÉCLARATION DES RESPONSABILITÉS / DECLARACIÓN DE RESPONSABILIDADES This document is for use by experienced Ce document est destiné à l’usage des Este documento está destinado para el uso and trained Qualified Cleveland Range, Représentants de Service qualifiés et de los Representantes de Servicio LLC Authorized Service Representatives autorisés de Cleveland Range, LLC qui...
- Page 3 FOR YOUR SAFETY / POUR VOTRE SÉCURITÉ / PARA SU SEGURIDAD FOR YOUR SAFETY POUR VOTRE SÉCURITÉ PARA SU SEGURIDAD Do not store or use Ne pas entreposer ou No guarde ni use gasolina gasoline or any other utiliser d'essence ou o cualesquiera otros flammable liquids and d'autres liquides ou...
- Page 4 WARNING / AVERTISSEMENT / ADVERTENCIA Improper installation, operation, adjustment, alteration, Heavy / Lourd / Pesado service or maintenance can cause property damage, Team or mechanical lift. / Équipe ou remontée injury or death. Read the installation and operating mécanique. / Equipo o elevador mecánico. instructions thoroughly before installing, operating or servicing this equipment.
-
Page 5: Table Of Contents
OPERATION, INSTALLATION & MAINTENANCE MANUAL SteamCraft 24CGA10 Table of Contents Chapter ........................Page 1 General Safety ......................1 A. Laws, Codes, and Regulations ......................1 B. Gas Leak Instructions ......................... 1 C. Operational Safety..........................1 2 Product Information ....................3 A. - Page 6 8 Startup Procedure ....................20 A. Lighting Instructions......................... 20 B. Shutdown Instructions ........................21 9 Operating Tests ......................22 A. Startup Procedure with the Appliance De-Energized ..............22 B. Steam Generator Drain and Rinse Cycle Inspection ..............23 C. Operating Test Procedures ......................23 D.
-
Page 7: General Safety
CHAPTER 1 GENERAL SAFETY A. Laws, Codes, and Regulations 1. The installation of this appliance must conform with: a. The National Fuel Gas Code, ANSI Z223.1 / NFPA 54 (latest edition), or the Natural Gas and Propane Installation Code CSA B149.1, or local codes, as applicable. b. - Page 8 DO NOT TRY TO LIGHT BURNERS WITH A FLAME. This appliance has an electronic ignition system, which automatically lights burners, senses flame, and controls gas flow. Burners cannot be lit with a flame. DEATH, INJURY, OR EQUIPMENT DAMAGE may result. DEATH, INJURY OR EQUIPMENT DAMAGE may result from an improperly adjusted gas control and ignition system.
-
Page 9: Product Information
CHAPTER 2 PRODUCT INFORMATION A. PRODUCT INFORMATION This manual covers the operation of Cleveland Range model 24CGA10 (Ultra 10) and the standard features and options available on this appliance. • Other than the selection of options, there are presently no significant design, parts, or operating differences among appliances with this model numbers. -
Page 10: Before Each Use
CHAPTER 3 BEFORE EACH USE A. INSPECTING THE COOKING COMPARTMENTS 1. Before every steaming operation, inspect the cooking compartments and remove any food scraps or debris. See Chapter 5. 2. Inspect and clean the drains and drain screens before each use. See Figure 3-1. 3. -
Page 11: Cooking
CHAPTER 4 COOKING Press switches and keys with fingertips only. Injury and equipment damage can result from pressing switches and keys with anything else. A. QUICK REFERENCE LIGHTING AND SHUTDOWN SUMMARY INSTRUCTIONS • The following START-UP and SHUTDOWN SUMMARY is for quick reference ONLY. •... -
Page 12: Control Panel Switches
B. CONTROL PANEL SWITCHES 1. POWER ON and GENERATOR FILL Switch with Power On Indicator Light • This is the ON/OFF switch. • Turn this switch ON to power the control panel and fill the steam generator. Figure 4-1... -
Page 13: Operating And Cooking Procedure
OPERATING AND COOKING PROCEDURE Some foods drip juices. Use a solid catch pan under perforated pans when steaming food that may drip juices. Failure to use a catch pan can cause clogged drain screens and drains. 1. Inspect and clean the drain and the cooking compartment as required. See Chapter 3. 2. -
Page 14: Dial Timer Control Panel
F. DIAL TIMER CONTROL PANEL 1. TIMER • The Dial Timer sets the operating time from 0 to 60 minutes. • Turn the knob clockwise until it points to the required time. • When the Timer reaches 0, a buzzer sounds for 3 seconds. -
Page 15: Keypad Timer Control Panel
G. KEYPAD TIMER CONTROL PANEL 1. TIMER Display • This four-digit display shows the minutes and seconds remaining in the countdown. • The display reads from zero (00:00) to 99 minutes and 99 seconds (99:99). • Pause (PAUS) appears when the count down is stopped by the START/STOP key or by the temperature compensating circuit. -
Page 16: Cleaning
CHAPTER 5 CLEANING A. STEAM GENERATOR BLOWDOWN 1. Power Off • When the appliance is turned OFF at the ON/OFF switch, blowdown starts automatically. The generator is drained, and the drain valve is rinsed with fresh water to help prevent scale. 2. - Page 17 6. Clean the interior of the compartment thoroughly. • Do NOT use abrasive cleaning compounds or steel wool. 7. Rinse the inside of the cooking compartments with clean water. 8. Clean the door gasket assemblies: a. Remove the door gasket assembly (see Figure 5-1) by holding the gasket assembly at the sides and lifting and away from the door.
-
Page 18: General Installation Information
CHAPTER 6 GENERAL INSTALLATION INFORMATION A. Inspect for Shipping Damage • If the appliance is damaged or damage is suspected: Submit a Damage Claim to the Shipper immediately. Inform your dealer at once. Inform Cleveland Range in writing within three (3) days. Operating this appliance out of level can cause DEATH, INJURY, and EQUIPMENT DAMAGE. -
Page 19: Exhaust Hood Requirements
Allow for sufficient extra distance if a "high heat source," e.g. a broiler, is located next to this appliance. Contact Cleveland Range at 216-481-4900 or 1-800-338-2204 for recommendations. k. Do NOT install this appliance directly over a drain. Steam rising up out of the drain will adversely affect operation, hamper cooling air circulation, and damage electrical and electronic components. -
Page 20: Gas Supply
E. Gas Supply Post instructions to be followed if the user smells gas. Display the instructions in a prominent location. Obtain the instructions from the local gas supplier. 1. Gas Supply Requirements • Gas supply type MUST match the type of gas shown on the rating plate. •... -
Page 21: Water Supply
d. Check all lines and connections for leaks, both inside and outside this appliance, with soap and water solution. e. All leaks must be corrected before attempting to operate this appliance. 4. Pressure Test Gas Supply Lines If pressure testing is required, this appliance must be disconnected or isolated from the gas supply piping system during pressure testing as follows: •... - Page 22 b. If the static pressure is above 60 psi, a pressure regulator must be used and set at approximately 50 psi. Pressure above 60 psi can damage solenoid valves. See Figures 3-3 and 3-4. c. If the supply water meets the requirements shown in the Warranty, then the Single Water Supply Arrangement shown in Figure 3-3 may be used.
-
Page 23: Electric Power Supply
1) Test Water Supply Lines a. Check all connections for proper tightness. b. Remove the side panels to inspect the water connections inside the appliance. c. Open the water supply valves. d. Check all lines and connections for leaks, both inside and outside the appliance. G. -
Page 24: Free Air Vented Drain Line
H. Free Air Vented Drain Line DEATH, INJURY, EQUIPMENT and PROPERTY DAMAGE will result from improper installation of drain outlet lines. Install free air vented drain lines as described in this manual. NOTICE: Furnishing and installing drain lines and drainpipe is the responsibility of the Installer/Owner. The following restrictions and requirements are critical to the safety of personnel and equipment, and must not be violated under any circumstances: 1. -
Page 25: Installation Checklist
I. Installation Checklist Installation Check List TASK REFERENCE COMPLETED Chapter Number (Initial and Date) Preparation Check Operating Location Clearances See spec sheet & Ch.7 Test Supply Water Quality Warranty, Ch.7 Water Supply Requirements Met Ch.7 Electric Power Requirements Met Rating Plate, Ch.7 Gas Supply Requirements Met Rating Plate, Ch.7 Exhaust Hood Requirements Met... -
Page 26: Startup Procedure
CHAPTER 8 STARTUP PROCEDURE DO NOT TRY TO LIGHT BURNERS WITH A FLAME. This appliance has an electronic ignition system, which automatically lights burners, senses flame, and controls gas flow. Burners cannot be lit with a flame. DEATH, INJURY, OR EQUIPMENT DAMAGE may result from trying to light burners with a flame. BURN and SCALD HAZARD Exposure to steam, condensate, and hot surfaces can cause death, burns, and scalds. -
Page 27: Shutdown Instructions
a. The red indicator in the ON/OFF switch lights. b. The steam generator fills with water. c. The burner does NOT light. 6. Turn ON the ON/OFF switch. a. The igniter initiates a spark and gas is supplied to the pilot for 90 seconds. b. -
Page 28: Operating Tests
CHAPTER 9 OPERATING TESTS Startup Test Procedure for the 24CGA10 This procedure evaluates the function of the operating controls of this appliance. • This appliance will have one of three control panels: manual dial timer, electronic with a keypad timer control, or ON/OFF. -
Page 29: Steam Generator Drain And Rinse Cycle Inspection
B. Generator Drain and Rinse Cycle Inspection (3-minute Blowdown Cycle) 1. Turn OFF the Main External Power Switch. 2. Turn OFF the ON/OFF switch. 3. Turn ON the Main External Power Switch start the 3-Minute Blowdown Cycle. a. Watch for plumbing leaks: b. -
Page 30: Timer Test For Dial Timer Control Panel
g. Check for steam leaks around the door gasket. h. Leave the ON/OFF switch in the ON position. Set the controls to stop steaming: • TIMER MODELS: Set the Timer to 0 (zero) minutes. If the control panel does not have a timer, complete Step l. •... -
Page 31: Timer Test For Keypad Control Panel
(3) Turn ON the Main External Power Switch. E. Timer Test for Keypad Control Panel 1. Set the TIMED/MANUAL switch to MANUAL and let the appliance continue steaming. 2. Zero the timer: Press and hold the CLEAR key until the timer reads 00:00 3. -
Page 32: Function Test For The Compartment Door Optional Steam Cut Off Switch
• If a cooking compartment is opened and the other left closed, the closed cooking compartment continues to steam as normal. BURN and SCALD HAZARD Residual steam in the system may take up to a minute to clear from the steam lines and the cooking compartment. -
Page 33: Daily Maintenance
• Copies of purchase order(s) and invoice(s) for repair parts and service, maintenance, or repair. Include part numbers, if applicable. • The name and signature of the person performing the service, maintenance, or repair. C. Daily Maintenance 1. Blowdown • Blowdown the steam generator. - Page 34 – If inhaled, remove to fresh air and if burning persists, call a physician. – If swallowed, drink 1 or 2 glasses of water and call a physician. • Spill or Leak Procedures – Rinse with plenty of water to dilute. –...
- Page 35 • General precautions: wear rubber gloves, splash goggles and other protective clothing and equipment as necessary. Refer to Dissolve® container labels and Material Safety Data Sheets for information regarding eyewash, first aid, medical treatment, and spill control. 4. Descaling Procedure 1) Turn steamer OFF and open door(s) •...
-
Page 36: Yearly Maintenance
17) Descaling is complete, resume normal startup, cooking, and shutdown procedures F. Yearly Maintenance 1. Clean the Water Line Strainer • Clean the water line strainer at least once a year. • When first installed, check the strainer more frequently to find out how often it must be cleaned. -
Page 37: Troubleshooting Guide
CHAPTER 11 TROUBLESHOOTING GUIDE The Troubleshooting Guide is a list of symptoms of problems that may occur during routine operation. • “Problem” (left column) lists common operating problems. • “Possible Cause” (center column) lists causes of problems in the order they should be checked. •... - Page 38 Inoperative or improperly adjusted See Note 1 controls (Continued On Next Page) Trouble Shooting Guide (Continued) PROBLEM POSSIBLE CAUSE REMEDY/REFERENCE Water leaking from Broken or loose plumbing inside Turn OFF electricity at main external bottom of cabinet steamer cabinet power switch and close water supply valve(s) See Note 1 Steam and / or water A small amount of water...
- Page 39 Trouble Shooting Guide (Continued) PROBLEM POSSIBLE CAUSE REMEDY/REFERENCE Food takes too long to Food is frozen Increase cooking times for frozen food cook (continued) Suggested cooking times are Extend cooking times for altitudes usually listed for cooking at sea above 2000 feet To verify steamer’s level proper operation see...
- Page 40 EGG SIZE CHART Egg Size SteamCraft Steamer Medium 10 minutes Large 12 minutes Extra Large 12 minutes 3) When time is complete, carefully remove the egg and place it in a container 4) Run cold water over the egg for 5 minutes 5) After cooling, crack the eggshell and peel the egg 6) The result is a perfect hard-boiled egg –...
- Page 41 To learn how Welbilt Foodservice and its leading brands can equip you, visit our global web site at www.welbilt.com, then discover the regional or local resources available to you. ©2016 Welbilt Foodservice except where explicitly stated otherwise. All rights reserved. Con nuing product improvement may necessitate change of specifia ons without no ce.
Need help?
Do you have a question about the CLEVELAND SteamCraft 24CGA10 and is the answer not in the manual?
Questions and answers