Table of Contents
Advertisement
Quick Links
Advertisement
Table of Contents

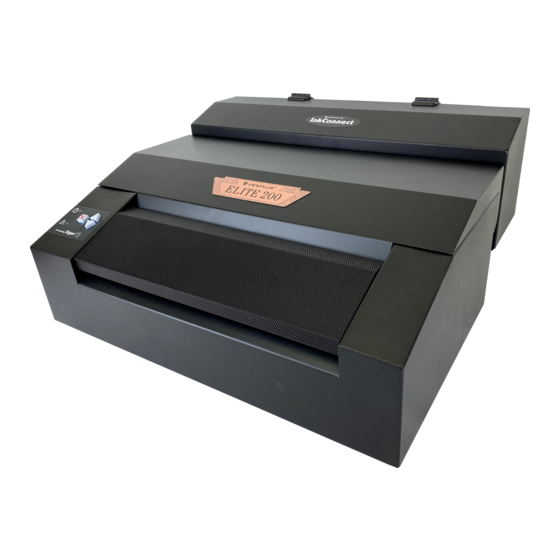
Summary of Contents for ViewPlus VP Elite
- Page 1 VP Elite and Premier Embosser User Manual Revision: 20160613...
-
Page 2: Table Of Contents
VI. Paper Handling ............................26 A. Paper Loading ............................. 26 B. Paper Jams ............................26 VII. Braille, Translation and Printing ......................27 A. ViewPlus Tiger Software Suite ......................27 B. Fonts ..............................27 C. Printing ..............................28 VIII. Software Packages ..........................28 IX. - Page 3 C. Support ............................... 30 D. Warranty ............................. 30...
-
Page 4: Introduction
Powered by Tiger Owner's Manual Congratulations on purchasing a VP Elite or Premier Braille and tactile graphics embosser! This manual will introduce you to basic information regarding your new embosser. Patented roller-die technology means ViewPlus embossers print at a 20 dots-per-inch graphic resolution and automatically convert colors and gray scale into variable dot heights. -
Page 5: Fcc Compliance Statement
B. FCC Compliance Statement FCC Compliance Statement (USA) This equipment has been tested and found to comply with the limits for a Class B digital device, pursuant to Part 15 of the FCC Rules. Operation is subject to the following two conditions: (1) this device may not cause harmful interference, and (2) this device must accept any interference received, including interference that may cause undesired operation. - Page 6 Compliance Statement (Europe) Warning: This product meets the interference requirements of EN55022. In a domestic environment, this product may cause radio interference in which case, the user may be required to take adequate measures. Compliance Statement (Korea) This apparatus complies with CISPR22 requirements. International Compliance EN55022 ClassB:1998 Emissions series...
-
Page 7: Safety Instructions
C. Safety Instructions Read all of these safety instructions before using the embossing printer. In addition, follow all warnings and instructions marked on the embossing printer itself. Do not place embossing printer on an unstable surface. Do not place embossing printer near a radiator or heat source. ... -
Page 8: General Information
II. General Information A. Specifications VP Elite and Premier Embossers Character Sets DotsPlus Braille - free programmable character sets Paper Feed Method Front-load tractor feed Paper Width 4 to 12 inches (100 to 305 mm) Paper Weight Adjustable from very thin (copier type) paper to heavy... -
Page 9: Printer Setup
Shows the power module in the back of the embosser Insert the power cable plug into the VP Elite or Premier power connector and the other end of the power cable into a grounded outlet or a surge protector (recommended). - Page 10 LAN cable. To use this connection method, attach one end of a LAN cable to the top connection port on the back of the ViewPlus Elite or Premier and attach the other end to a network data port.
-
Page 11: Alignment
It is possible to bend the body of the embosser and cause the ViewPlus embosser to be out of alignment. After a paper jam, it is also possible for the embosser to be incorrectly aligned if you simply continue to print. Start a new print job, allow the VP Elite or Premier to automatically align, and check the new document to see if the alignment is good. -
Page 12: Printer Properties
Windows control panel for devices and printers. Select the VP Elite or VP Premier in the list of printers and get to the printer properties through the context menu. The printer properties contain general device settings such as for connectivity, sharing, and security, but also ViewPlus specific settings for legacy mode operation and service procedures on the ViewPlus embosser. - Page 13 Shows Device Settings Tab Form To Tray Assignment Tractor Feed – The first section of the Device Settings tab controls the Elite or Premier's "tray assignment", allowing you to set what paper size is loaded into the embosser. Legacy Settings The second section of the Device Settings controls the embosser's legacy settings.
- Page 14 Paper Source – Select the source for the paper. Braille Table… – The VP Elite or Premier can store up to six Braille tables. Click on 'Properties' to open a dialog which allows you to load the tables to the Elite or Premier internal memory.
- Page 15 Service tab The Service tab of the printer properties dialog window provides information about the connected VP Elite or Premier at the bottom left. When contacting ViewPlus Support, please have the driver version, printer serial number, and firmware version available.
- Page 16 Enter this number in the Figure box. Ink Skew Alignment – This button is only available if a ViewPlus InkConnect is attached to the Elite or Premier. This function allows the user to adjust the skew of the ink cartridges so that perfectly straight vertical ink lines may be printed.
-
Page 17: Printing Preferences
This button prints a test page from the embosser. Printer Usage Check Ink Cartridge Level – This button is only available if a ViewPlus InkConnect is attached to the Elite or Premier. It brings up a dialog that lists approximately how much ink is left in each of the black ink cartridges in the InkConnect. - Page 18 Shows Layout Tab Output Single Sided – Select this option if you do not want the back sides of the pages printed. Double Sided (Interpoint) – Select this option if you want the back sides of the pages printed. If Double Sided (Interpoint) is selected, the following option also becomes available: o Insert an empty page to the front or back of a graphics page - Select whether to insert a blank page on the back side of pages that contain graphics.
- Page 19 Preview – If this option is checked, a preview of how the document will print and emboss will be shown in Tiger Viewer instead of printing. Advanced This button brings up a dialog containing additional options only needed by advanced users. These options are: o Rotate Landscape –...
- Page 20 Shows Paper/Media Tab Paper and Media Select the options that apply to your media. Paper size – Select the paper size you are using from the list, or leave the setting at 'Automatic Select' to allow the application you are printing from to choose the correct paper size for you. Media Type –...
- Page 21 Shows Advanced options in Paper/Media settings o Media Type Add – Choosing this button will allow you to define a new custom media type. The 'Print Media Type Test Pattern' button will print a selection of punch forces from which you can choose to set the highest and lowest punch force values that work for your media.
- Page 22 Delete Form – If the selected form from the list is a custom size, this button will remove the selected form. Tiger tab The Tiger tab contains controls for Braille and print output options as follows. Shows Tiger Tab How to Print Select the print and braille options appropriate for your document.
- Page 23 Select the advanced printing options appropriate for your document. 2 in 1 – This option is only available if a ViewPlus InkConnect is attached to the Elite or Premier. When this option is checked, the printer will generate embossed output from every odd page of the electronic document, and print output from every even page of the electronic document.
- Page 24 Shows the More Options dialog window o Images Select the desired image options. These settings apply only to the embossed output. Invert Colors – When checked, this option embosses light colors as high dots and dark colors as low dots. Contrast –...
-
Page 25: Operator Panel
Thin Line Intensity – If lines in graphics are too thin to emboss correctly, slide the indicator to the right. o Defaults The 'Defaults...' button will restore all settings on the Advanced dialog to their default values. Defaults The 'Defaults...' button will restore all settings on the Tiger tab to their default values. V. -
Page 26: Status Lights
Alignment error / Emboss head stalled – (High-High-Low) Press cancel to clear the error status warning. Try printing again. If the problem persists, contact ViewPlus Support. Print data error – (Low-High) Press cancel to clear the error status warning and send the print... -
Page 27: Paper Handling
Service tab. VI. Paper Handling A. Paper Loading Your ViewPlus Elite or Premier comes with a front-loading tractor feeder that takes media from four to twelve inches wide. Follow the instructions below to load tractor feed paper: ... -
Page 28: Braille, Translation And Printing
ViewPlus Tiger Software Suite solutions, including the TSS user manual. B. Fonts Braille and Tiger screen fonts are braille fonts that install with the installation of the ViewPlus embosser driver. They can be chosen from any Windows program that includes Windows font selection. -
Page 29: Printing
Open the program's File menu and choose Print. On the Print dialog, make sure the VP Elite or Premier is selected. Click on the printer properties button and ensure that the correct paper size and Tiger printing options are selected. -
Page 30: Training, Warranty, Maintenance And Support
2) Live on-line training sessions with a ViewPlus Support Specialist. B. Maintenance It is important to choose a suitable location for the ViewPlus embossing printer. The cable length between the embossing printer and the host computer should not exceed ten feet (three meters). - Page 31 Contact your ViewPlus embosser sales representative if you did not purchase directly from ViewPlus Technologies E-mail to support@viewplus.com, or Call the ViewPlus Technologies office at +1 541 754 4002 (Pacific Standard Time Zone), or the European office at +49 5404 9596 414 (Central European Time Zone). D. Warranty...
Need help?
Do you have a question about the VP Elite and is the answer not in the manual?
Questions and answers