Table of Contents
Advertisement
Available languages
Available languages
Quick Links
Advertisement
Table of Contents

Related Manuals for Maximus M-22PL-840-R14-WFL


Summary of Contents for Maximus M-22PL-840-R14-WFL
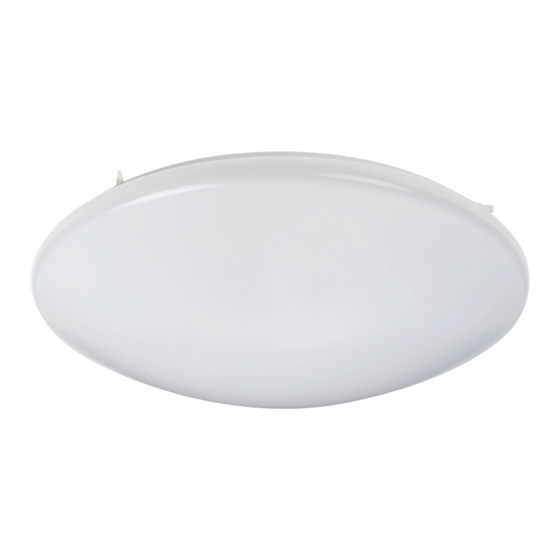
- Page 1 M-22PL-840-R14-WFL INSTRUCTION MANUAL LED CEILING FIXTURE Questions, problems, or missing parts? Before returning to the store, call customer service at 1-866-897-2098, Monday-Friday, 9:30am−6:30pm EST, or visit www.maximuslighting.com.
-
Page 2: Package Contents
PACKAGE CONTENTS Part Description Quantity Fixture Wire nut Screw SAFETY INFORMATION WARNING • Disconnect power at fuse or circuit breaker before installing or servicing. • No user serviceable parts inside. To avoid electrical shock, do not disassemble product. • This product is not intended for use in emergency light fixtures or exit signs. Not for use where exposed directly to the weather or water. -
Page 3: Installation
INSTALLATION 1. Rotate the lampshade counterclockwise to loosen and remove the lampshade from the base. 2. Insert the screws into the junction box about 0.2” deep. Connect the black and white wires from junction box with two wire nuts. Connect the ground wire from fixture to the ground wire from junction box with the other wire nut. -
Page 4: Warranty
WARRANTY If this product fails due to a defect in material or workmanship within five (5) years from the date of purchase, return it along with proof of purchase to the store and it will be replaced with the same or comparable model, free of charge. This warranty gives you specific legal rights and you may have other rights that vary from state to state. - Page 5 M-22PL-840-R14-WFL MANUAL DE INSTRUCCIONES ACCESORIO DEL TECHO ¿Preguntas, problemas o piezas faltantes? Antes de volver a la tienda, llama a servicio a 1-866- 897-2098, lunes a viernes de 9:30am–6:30pm EST o visite www.maximuslighting.com...
-
Page 6: Contenido Del Paquete
CONTENIDO DEL PAQUETE Part Description Quantity Accesorio Tuerca de cable Tornillo INFORMACIÓN DE SEGURIDAD ADVERTENCIA • Desconecta la energía en el fusible o en el interruptor antes de instalar o dar mantenimiento. • No hay piezas que el usuario puede reparar. Para evitar una descarga eléctrica, no desmontes el producto. -
Page 7: Instalación
PREPARACIÓN • Herramientas necesarias: un destornillador Phillips, guantes, una escalera y un par de gafas • Antes de empezar a ensamblar este producto, asegúrate de que todas las piezas estén presentes. Compara las piezas con la lista de contenido del paquete. Si alguna pieza falta o está dañada, no intentes ensamblar este producto. - Page 8 GARANTÍA Si este producto falla debido a un defecto del material o fabricación durante los primeros cinco (5) años a partir de la fecha de compra, devuélvelo junto con el comprobante de compra a la tienda y será reemplazado por el mismo modelo o por uno de características y precio similares, de manera gratuita.
- Page 9 M-22PL-840-R14-WFL MODE D’EMPLOI PLAFONNIER À DEL Pour commander une pièce de remplacement ou pour toute autre question, appelez notre service à la clientèle au 1-866-897-2098, du lundi au vendredi, entre 9 h 30 et 18 h 30 (HNE).
-
Page 10: Contenu De L'emballage
CONTENU DE L’EMBALLAGE Pièce Description Quantité Plafonnier Capuchon de connexion INFORMATIONS RELATIVES À LA SÉCURITÉ AVERTISSEMENT • Débranchez l’alimentation au niveau du fusible ou du disjoncteur avant de procéder à l’installation ou à l’entretien. • L’intérieur du produit ne contient aucune pièce réparable par l’utilisateur. Pour éviter les risques de décharge électrique, ne démontez pas le produit. - Page 11 INSTALACIÓN 1. Faites pivoter l’abat-jour dans le sens antihoraire afin de le desserrer et de le retirer de la base. 2. Insérez les vis dans la boîte de jonction jusqu’à environ 0,2 po de profondeur. À l’aide de deux capuchons de connexion, raccordez les fils noir et blanc de la boîte de jonction.
-
Page 12: Garantie
GARANTIE Si, dans un délai de cinq (5) ans à compter de la date d’achat, ce produit connaît une quelconque défaillance due à un défaut de matériau ou de fabrication, retournez-le au magasin avec une preuve d’achat et il sera remplacé par le même modèle ou un modèle comparable, et ce, gratuitement.
Need help?
Do you have a question about the M-22PL-840-R14-WFL and is the answer not in the manual?
Questions and answers