Table of Contents
Advertisement
Quick Links
Advertisement
Table of Contents

Related Manuals for WESTERSTRAND Sportstimer


Summary of Contents for WESTERSTRAND Sportstimer
- Page 1 Document: 4116en05.doc Bruksanvisning Sportstimer LED Author: CF Date: 2012-08-27 Westerstrand Sport System Page: 1 of 12 Manual Sportstimer WESTERSTRAND URFABRIK AB Box 133 Tel +46 506 48 000 Internet: www.westerstrand.se SE-545 23 TÖREBODA Fax +46 506 48 051 E-mail: info@westerstrand.se...
-
Page 2: List Of Contents
Information in this document is subject to change without any notice and does not represent a commitment on part of Westerstrand Urfabrik AB. Westerstrand Urfabrik AB provides this document “as is,” without any warranty of any kind, expressed or implied, including, but not limited to, its particular purpose. Westerstrand Urfabrik AB reserves the right to make improvements and/or changes to this manual, or to the products and/or the programs described in this manual, at any time. -
Page 3: Table Of Contents
Document: 4116en05.doc Bruksanvisning Sportstimer LED Author: CF Date: 2012-08-27 Westerstrand Sport System Page: 3 of 12 List of contents LIST OF CONTENTS ..............................2 TECHNICAL DATA ..............................4 INTRODUCTION ..............................5 INSTALLATION ..............................5 ............................5 LECTRICAL CONNECTION ........................6 ONNECTION OF SEPARATE FUNCTIONS ................................7 TARTUP OPERATION ................................7... -
Page 4: Technical Data
Document: 4116en05.doc Bruksanvisning Sportstimer LED Author: CF Date: 2012-08-27 Westerstrand Sport System Page: 4 of 12 Technical data Part number: 119240-10, 119240-36, 119240-37, 119240-56, 119240-76 Connection voltage: 100-240VAC 50/60Hz alt. 10,8-14,4VDC Ambient temperature: -20° C to +55° C Relative humidity:... -
Page 5: Introduction
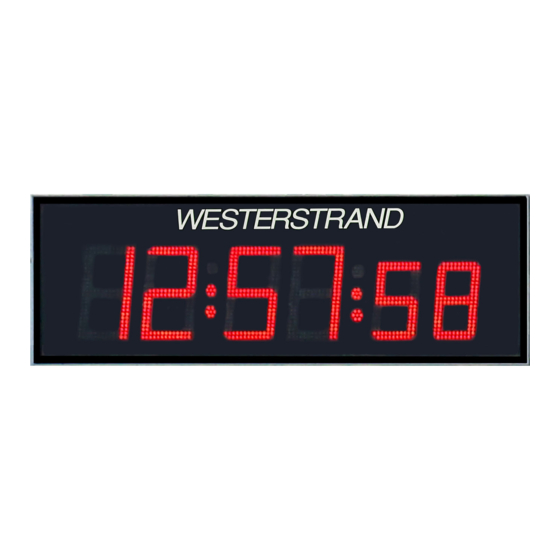
This manual contains instructions for installation and use of the Westerstrand Sportstimer. The Sportstimer can be used as a real time clock or as a chronometer counting up or down. Lap times can be stored and there is a function to count down to repeated starts. There are two remote controls, one radio remote and one wirebound. -
Page 6: Connection Of Separate Functions
Connection of separate functions Warning! Make sure that the power is disconnected before opening the Sportstimer. The Sportstimer has connections for RS485 communications and other functions, such as a starting gun, see the picture below. Control display with remote control (Default setting) -
Page 7: Startup
(colons and/or point). The wired remote control shows the same information as the Sportstimer and can now be used to control it. The radio remote control is ready for use as soon as the Sportstimer has been started. Operation To control the Sportstimer there are two alternatives: A wired, 20-button control with an LCD display and a cordless radio control with 7 buttons. -
Page 8: Functions In Clock Mode
Page: 8 of 12 Functions in clock mode When the Sportstimer is in the real time mode the following buttons on the wired remote control can be used. – Moves the cursor one step back during data entry or aborts the entry altogether and returns to the previous mode. - Page 9 Enter interval: Enter stop time: Confirm the times by pressing Start. On the Sportstimer an “S” will now be shown as well as the countdown for the next start signal. See the picture below. To abort, first press Stop and confirm with Yes.
-
Page 10: Functions In Chronometer Mode
Page: 10 of 12 Functions in chronometer mode The following buttons on the wired remote control can be used when the Sportstimer is in chronometer mode: No – Moves the cursor one step back during data entry or aborts the entry altogether and returns to the previous mode. - Page 11 Stop – Stops the chronometer. Press button Start to resume. Display int. – Changes the brightness of the Sportstimer. Press the button repeatedly to change setting and accept with Yes. Setting “A” means that the light sensor is used to set the optimal brightness.
-
Page 12: The Radio Remote Control
Document: 4116en05.doc Bruksanvisning Sportstimer LED Author: CF Date: 2012-08-27 Westerstrand Sport System Page: 12 of 12 The radio remote control In the chronometer mode, the following buttons on the radio remote control can be used: Start up – Starts the chronometer (counting up).
Need help?
Do you have a question about the Sportstimer and is the answer not in the manual?
Questions and answers