Advertisement
6 RAIL, FOLDABLE LED FIXTURE - 120-277 Volt
INSTALLATION AND OPERATING INSTRUCTIONS
1.
INTRODUCTION:
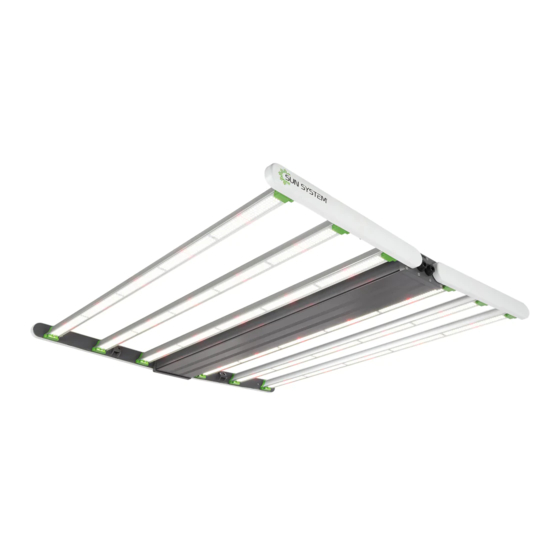
The Sun System Rail System (RS) 1850 LED is a 6 rail, foldable LED producing 1850 µmol/s with an efficiency of 2.5 µmol/j. This fixture is DLC
listed, IP65 wet-rated and comes complete with a manual digital dimming button and an internal embedded smart controller that is compatible with
the Gavita
e-Series Controller. Together, these features give you the ability to control up to 500 fixtures (e-Series Controller required, sold
®
separately). The Sun System RS 1850 utilizes top-bin Sun System-brand diodes to produce a full-spectrum light source. The RS 1850 operates at
120-277 volt. The power cord is sold separately. 5 year limited warranty.
1.1
ACCESSORIES (SOLD SEPARATELY):
HGC906147/Gavita 8 ft Power Cord 120 Volt for LED
HGC906148/Gavita 8 ft Power Cord 240 Volt for LED
HGC906458/Gavita 8 ft Power Cord 277-400 Volt for Gavita LED
HGC906120/Gavita Master Controller EL1 - Gen 2
HGC906121/Gavita Master Controller EL2 - Gen 2
USED SYMBOLS:
Warning! A warning indicates severe damage to the user and/or product may occur when a procedure is not carried out as described.
Caution! A caution sign indicates problems may occur if a procedure is not carried out as described. It may also serve as a reminder to the user.
Note: A note gives additional information, e.g. for a procedure.
This symbol is an internationally recognized symbol used to designate recyclable materials.
This symbol is an authorization mark employed on electronic products manufactured or sold in the United States, which demonstrates that the
electromagnetic emissions from the devise is under limits approved by the Federal Communications Commission.
This symbol shows that a product has been independently tested and certified to meet recognized standards of safety.
This symbol on material, accessories or packaging indicates that this product may not be discarded as household waste. By properly disposing
the equipment, you will be helping to prevent possible risks to the environment and public health, which might otherwise be caused by improper
handling of the discarded equipment. Recycling of materials contributes to the conservation of natural resources. Therefore, please do not
dispose of old electronics and electrical appliances via household waste.
This symbol indicates the minimum distance (B) between the LED fixture (A) and the lit surface.
RS 1850 LED
Advertisement
Table of Contents

Related Manuals for Sun System RS 1850 LED


Summary of Contents for Sun System RS 1850 LED
- Page 1 RS 1850 LED 6 RAIL, FOLDABLE LED FIXTURE - 120-277 Volt INSTALLATION AND OPERATING INSTRUCTIONS INTRODUCTION: The Sun System Rail System (RS) 1850 LED is a 6 rail, foldable LED producing 1850 µmol/s with an efficiency of 2.5 µmol/j. This fixture is DLC listed, IP65 wet-rated and comes complete with a manual digital dimming button and an internal embedded smart controller that is compatible with the Gavita e-Series Controller. Together, these features give you the ability to control up to 500 fixtures (e-Series Controller required, sold...
-
Page 2: Product Description
PRODUCT DESCRIPTION: The Sun System RS 1850 LED is an electronic horticultural LED fixture. It drives six LED rails. The Sun System RS 1850 LED is intended to be used ® in greenhouses or in climate rooms. In this manual, the Sun System RS 1850 LED will be referred to as: “the LED fixture”. PRODUCT INFORMATION AND SPECIFICATIONS: INPUT VOLTAGE : 120 - 277 V INPUT POWER: 720 W INPUT CURRENT : 2.62 A @ 277 V6.2 A @ 120 V HEAT LOAD : 2,450 btu/hr FREQUENCY : 50/60 Hz POWER FACTOR : > 0.95 AMBIENT TEMP : 131° F / 55° C ENVIRONMENT RATING : IP65 MOUNTING : Hanger and safety wire WEIGHT : 24.45 lb (12 kg) DIMENSIONS : 1100 mm x 1000 mm 70 mm CERTIFICATIONS : UL 1598, ANSI/CAN/UL 8800, and CSA C22.2 No. 250.0 WARRANTY :... - Page 3 RECOMMANDATIONS EN MATIÈRE DE SÉCURITÉ ET AVERTISSEMENTS : AVERTISSEMENT! Veuillez lire attentivement les avertissements ci-dessous avant de travailler avec le produit ou l’utiliser! Vous conformer en tout temps à la réglementation locale lors de l’installation ou de l’utilisation du dispositif à DEL. Ne pas ouvrir ou démonter le dispositif à DEL; aucune pièce n’est réparable à l’intérieur. Ouvrir ou modifier le dispositif à DEL peut être dangereux et entraînera l’annulation de la garantie. Ce produit peut causer des interférences avec l’équipement radio et il ne doit pas être installé près d’équipement de communication de sécurité maritime ou d’autres équipements de navigation essentiel ou de communication fonctionnant entre 0,45 et 30 MHz. Ne pas utiliser le dispositif à DEL lorsqu’il est endommagé ou que son cordon d’alimentation est endommagé. Remplacez le cordon d’alimentation uniquement avec un cordon original et certifié. Des modifications aux cordons peuvent entraîner des effets électromagnétiques non désirés rendant le produit non conforme aux exigences légales. Ne pas exposer le dispositif à DEL : - aux températures (ambiantes) au-delà de la plage spécifiée; - à la poussière et à la contamination; - à la lumière directe du soleil pendant l’utilisation ou à la lumière à DHI qui pourrait faire chauffer le dispositif. Toujours débrancher le dispositif à DEL du conducteur principal avant d’effectuer tout entretien. Toujours prévoir une période de refroidissement d’au moins 30 minutes avant de toucher le dispositif à DEL. Toucher le dispositif à DEL lorsqu’il est allumé ou immédiatement après l’avoir éteint peut entraîner des brûlures graves! Ne pas utiliser le dispositif à DEL près de substances inflammables, explosives ou réactives. Ne pas utiliser de pulvérisateurs de soufre. L’installation et l’utilisation du dispositif à DEL sont la responsabilité de l’utilisateur final. Une mauvaise utilisation ou installation peut entraîner une défaillance et endommager le dispositif à DEL. Des dommages au dispositif à DEL et aux circuits électroniques résultant d’une mauvaise installation et utilisation annulent la garantie. La distance minimum d’équipement d’éclairage adjacent doit être de 30,5 cm (12 po). La distance à maintenir entre l’équipement d’éclairage et les matières combustibles est de 30,5 cm (12 po).
-
Page 4: Installation
INSTALLATION: Warning! Mounting and installation of the LED fixture may only be executed by certified service personnel, in accordance with the applicable local laws and regulations! Warning! The installer is responsible for correct and safe installation. Warning! Ensure the local cabling can support the voltage and current requirements of the LED fixture. Warning! Avoid coiled cords and keep mains leads separated. This prevents electromagnetic interference. Warning! Do not connect or disconnect the LED fixture under load. CAUTION - PROPRIETARY WIRING SYSTEM Use Hawthorne cord set model (HGC906147/Gavita 8 ft Power Cord 120 Volt for LED, HGC906148/Gavita 8 ft Power Cord 240 Volt for LED, HGC906458/Gavita 8 ft Power Cord 277-400 Volt for Gavita LED) only for connection from the luminaire power inlet to a standard junction box for power connection. INSTALLATION : Avertissement! Le montage et l’installation du dispositif à DEL ne peuvent être effectués que par un personnel de service certifié conformément aux lois et règlements locaux. Avertissement! L’installateur est responsable d’une installation adéquate et sécuritaire. Avertissement! Assurez-vous que le câblage local peut soutenir la tension et les exigences actuelles du dispositif à DEL. Avertissement! Évitez que les cordons ne s’enroulent et gardez les câbles conducteurs principaux séparés. Cela permet de prévenir les interférences électromagnétiques. Avertissement! Ne pas brancher ou débrancher le dispositif à DEL sous tension. ATTENTION - SYSTÈME DE CÂBLAGE PROPRIÉTAIRE Utilisez le jeu de cordons Hawthorne modèle (HGC906147/Gavita 8 ft Power Cord 120 Volt for LED, HGC906148/Gavita 8 ft Power Cord 240 Volt for LED, HGC906458/Gavita 8 ft Power Cord 277-400 Volt for Gavita LED) uniquement pour la connexion de l’entrée d’alimentation du luminaire à une boîte de jonction standard pour la connexion électrique. - Page 5 fig.1 fig.2 fig.3 PHOTOBIOLOGICAL SAFETY Photobiological Safety Assessment: Risk Group 2 CAUTION: Possible hazardous optical radiation emitted from this product. Évaluation de la Sécurité Photobiologique: Groupe de Risque 2 ATTENTION : Rayonnement optique potentiellement dangereux émis par ce produit. These photobiological safety markings are based on testing of the light output characteristic of a single horticultural luminaire. Increased exposure risk to facility personnel may be present depending upon the number of horticulture luminaires and their placement and/or positioning within the plant growth facility. It is the responsibility of the plant growth facility to address these risks at the facility level and to ensure that people entering the plant growth areas while the lights are on, are aware of the risks and that appropriate safeguards are in place.
- Page 6 CONTROLLING THE FIXTURE: METHODS OF CONTROL: LED FIXTURE CONTROL MODES: MODE I: MANUAL MODE (Digital Dimming Button Operated) 1. Scenario: The LED has input voltage, but no input control signal, i.e, no external control source or dummy plug. A. If the digital dimming knob is pressed and the LED fixture has power, the fixture will turn on at 100% and the button will be illuminated green. B. Levels of Control: 100%, 75%, 50%, and OFF. C. To turn off the fixture, the operator must press the digital dimming button until the unit turns off (fig. 5). fig.5 MODE II: EXTERNAL CONTROL (External Controller || Dummy Plug Operated) 1. Scenario: External control signal or dummy plug is inserted in the RJ45 “IN” port (fig. 6). A. External control signal or dummy plug overrides the digital dimming button. The external controller or dummy plug will have full control of the fixture.
- Page 7 CONTROLLING WITH GAVITA MASTER CONTROLLER GEN 2: Part No.: HGC906121 DESCRIPTION: Gavita Master Controller EL2 - Gen 2 ® I. Remove the cable gland assembly on the LED fixture. II. Remove the dummy plug from the RJ45 “IN” port. (Save for future use.) III. Refer to section 9.3 for instructions on attaching the watertight cable gland to the input cable on the first fixture of the continuous chain. IV. For instructions on connecting LED fixtures in parallel or series, refer to section 9.1 on daisy chaining with interconnect cables. CONTROLLING UP TO 1,000 FIXTURES I. Remove the dummy plug from the RJ45 “IN” port on all LED fixtures. II. Use the controller cable (RJ45 - RJ9) to connect the primary channel of the controller to the RJ45 “IN” port of the first LED controller. III. Use the interconnect cable (RJ45 - RJ45) to connect the RJ45 “OUT” port of the first LED fixture to the RJ45 “IN” port of the second LED fixture. IV. Repeat these steps to connect up to 1,000 LED fixtures in series. Warning! Power cord and interconnect cables must not touch the LED rails. Avertissement! Le cordon d’alimentation et les câbles de liaison ne doivent pas toucher aux traverses du dispositif à DEL. UTILIZING A 3RD PARTY CONTROLLER I. Follow the sample steps in section 8.3 (Editor Note: EL2 Controller Section) II. For configuration of interconnect cables, see section 9.4. (Editor Note: Custom Cables Section)
- Page 8 Always use a double pole contactor suitable for switching a capacitive load. Never use household timers to switch the fixture! Switch off main power. Connect the power cable to the mains. The Sun System RS 1850 LED 120-240 V power cables connect to a NEMA Receptacle. The Sun System RS 1850 LED 277 V uses an open-end cable. Cable Description Sun System RS 1850 LED 277 V WIRE 277 V White Neutral (N)
-
Page 9: Inspection, Maintenance And Repair
fig.15 Connect the Wieland RST16i5 female connector on the power cable to the Wieland RST16i5 male connector on the LED fixture. (fig. 15) If a controller is used, ensure the controller is connected to the fixture. Switch on main power. Warning! Do not connect or disconnect the power cable to the LED fixture when under load. Avertissement! Ne pas brancher ou débrancher le câble d’alimentation lié au dispositif à DEL lorsque ce dernier est sous tension. PRECAUTIONS WHEN USING THE LED FIXTURE Warning! Always wait 20-30 minutes for the LED rails to cool down! INSPECTION, MAINTENANCE AND REPAIR Warning! Disconnect the LED fixture from mains before performing any maintenance or repairs. Warning! Do not connect or disconnect the LED fixture under load. Warning! Do not open or disassemble the LED fixture; there are no serviceable parts inside. Opening the LED fixture can be dangerous and will void the warranty. Warning! Always allow for a cool-down period of at least 30 minutes before touching the LED. Caution! Do not clean the LED fixture with detergents, abrasives or other aggressive substances. Regularly check the LED fixture for dust or dirt buildup. Clean if necessary. Contamination may cause overheating and decreased performance. Clean the outside of the LED fixture using a dry or damp cloth. Regularly check the cables of the LED fixture to ensure they are undamaged. Avertissement! Débranchez le dispositif à DEL du conducteur principal avant d’effectuer tout entretien ou toute réparation. Avertissement! Ne pas brancher ou débrancher le dispositif à DEL lorsqu’il est sous tension. Avertissement! Ne pas ouvrir ou démonter le dispositif à DEL; aucune pièce n’est réparable à l’intérieur. Ouvrir le dispositif à DEL peut être dangereux et entraînera l’annulation de la garantie. - Page 10 PLANNING...
- Page 11 NOTES...
-
Page 12: Storage And Disposal
STORAGE AND DISPOSAL Store the LED fixture in a dry and clean environment, with an ambient temperature of -4 to 185° F / -20 to 85° C. The product must not be discarded as unsorted municipal waste, but must be collected separately for the purpose of treatment, recovery and environmentally sound disposal. WARRANTY SERVICE Hawthorne Hydroponics LLC warrants the mechanical and electronic components of their product to be free of defects in material and workmanship if used under normal operating conditions for a period of five (5) years from the original date of purchase. If the product shows any defects within this period and that defect is not due to user error or improper use, Hawthorne Hydroponics LLC shall, at its discretion, either replace or repair the product using suitable new or reconditioned products or parts. In case Hawthorne Hydroponics LLC decides to replace the entire product, this limited warranty shall apply to the replacement product for the remaining initial warranty period, i.e. five (5) years from the date of purchase of the original product. For service, return the Sun System RS 1850 LED fixture to your shop with the original sales receipt. PLEASE NOTE: More than 15% of the diodes must be non-functional before the unit can be considered defective. LIMITED WARRANTY When purchased from an authorized Hawthorne dealer, this product is covered by a LIMITED WARRANTY, available at hawthornegc.com/warranties. You can also obtain the Terms of Sale and Limited Warranty by calling Hawthorne toll-free at: 1-888-478-6544 or writing Hawthorne at: Hawthorne Hydroponics LLC, 3204 NW 38th Circle, Vancouver, WA 98660., Attn: Customer Service. - Page 13 Hawthorne Design Lori McMinn OBF / TCPI CHINA HGC906145_SunSystem_RS-1850-LED_Manual_210204al.ai Cyan Magenta HGC - Sun System RS 1850 LED Mid Tier 6-Rail User Manual Yellow SKU #: Black HGC906145 8.5” X 11” 12-page Instruction manual Component #: xxxxxx 02/04/2021 Hawthorne Project Number:...
Need help?
Do you have a question about the RS 1850 LED and is the answer not in the manual?
Questions and answers