
Subscribe to Our Youtube Channel
Related Manuals for Forever Redwood GARDEN PERGOLAS

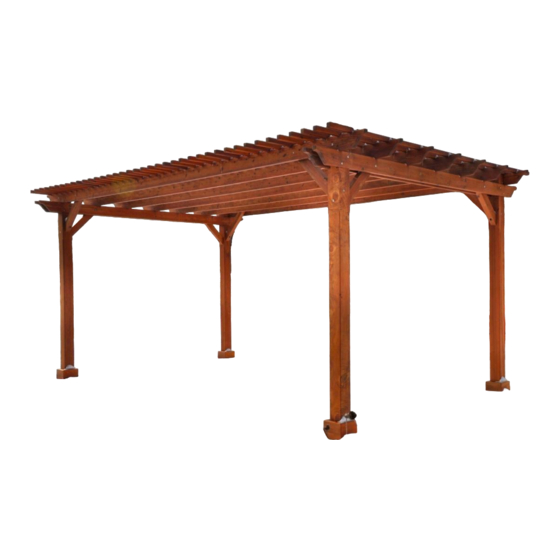
Summary of Contents for Forever Redwood GARDEN PERGOLAS
- Page 1 ______________________________________________________ 866.332.2403 (Toll Free); 8am-5pm Pacific Time, Monday-Friday Assembly instructions for: GARDEN PERGOLAS Garden Pergolas www.foreverredwood.com...
- Page 2 Depending on size Hardware: Bolts and Deck Screws Bolts, washers and nuts deck screws Hurricane anchors Anchors (U brackets, (if you ordered) Gale Wind or hurricane anchors) Gale Wind brackets Ceiling Fan base (if you ordered) Garden Pergolas www.foreverredwood.com...
- Page 3 Note: print the drawings that you approved before start the construction, they are needed to see the distances between the posts. Step 1. Attach the post to the ground. There are different ways to do it. Please see the How to anchor your pergola document. Garden Pergolas www.foreverredwood.com...
- Page 4 This beam must be in the interior of the support and bolted after you attach the supports to posts as shown below: Attach with carriage bolts, washers and nuts. The quantity of bolts depends on supports length. Beam between the supports Garden Pergolas www.foreverredwood.com...
- Page 5 4 ½” x 5/16” Bolt, washers & nut. 8”x 3/8” Bolt, washers & nut. NOTE: if your pergola is with lattice roof , you will attach the secondary knee brace like this: 8”x 3/8” Bolt, washers & nut. Garden Pergolas www.foreverredwood.com...
- Page 6 (default rafter spacing is 18” on center unless custom ordered differently). Start at one end and attach one rafter at a time from both sides and on both ends before moving to the next rafter. And repeat the process in all Rafters. Garden Pergolas www.foreverredwood.com...
- Page 7 Attach each rafter to dual support beams, and attach the roof lattice panels to both dual support beams and to the sides of the rafters. A screw every 2 or 3 feet is enough. Thank you. If you have any questions, please call or email us. Garden Pergolas www.foreverredwood.com...
Need help?
Do you have a question about the GARDEN PERGOLAS and is the answer not in the manual?
Questions and answers