
Related Manuals for Kinki Studio EX-M7


Summary of Contents for Kinki Studio EX-M7
- Page 1 KINKI STUDIO EX-M7 STEREO POWER AMPLIFIER INSTRUCTION MANUAL English We are from China...
- Page 2 In order to obtain the best results, KINKI STUDIO insists on using the advanced technology in the audio industry, continuous improvement and refinement over the years, created KINKI STUDIO today.
- Page 3 WARNING 警 告 These instructions must be read before starting the connection or operation, otherwise the amplifier may be risk to mis-operational damage. Please read and understand the operation and application in detail below. This is a very high quality amplifier, features with new technology. It is the industry leading audio system for reproducing accurate sound.
- Page 4 CONTENT 目 錄 0 1 U n p a c k i n g - - - - - - - - - - - - - - - - - - - - - - - - - - - - - - - - - - - - - - - - - - - - - - - - - - - - - - - - - - - - - - - - - - - - - - - - - - - 1 0 2 P l a c e m e n t &...
- Page 5 If the power amplifier needs to be returned to the factory for servicing/warranty or secondary transportation, please use the original packaging. The packaging is specially designed and manufactured by KINKI STUDIO, which can better protect the amplifier during transportation, so please keep the original after unpacking the package.
- Page 6 To ensure good heat dissipation and cooling, do not place temperature sensitive equipment on top of the amplifier. EX-M7 comes with 4pcs of footers. Please ensure they are properly placed on the flat surface on the rack.
- Page 7 The normal working voltage of the EX-M7 is AC 100-120V for AC110 option, and AC 200V~245V for AC230 option. If your normal operating voltage is outside the above range, please consult us. The EX-M7 is protected by a fuse located at the IEC inlet, rated at 10A slow blow fuse.
- Page 8 KINKI STUDIO CONNETIONS 4. Connections 連接 Connect the power cord to the IEC inlet of the amplifier and plug it into the power plug socket. For safety reasons, a 3-wire grounding (earth) plug must be used, whenever possible. In order to get the best sound from the amplifier, avoid using any multiple plugs socket or extension cords.
- Page 9 Power Up The power inlet IEC of the EX-M7 is located at the rear panel. After the power is supplied to the amplifier, it will be in Start-up state. The display will indicate WAIT and Orange LED blinks for 5s.
-
Page 10: Sound Quality Optimization
55 degrees Celsius. Note: The EX-M7 amplifier takes about 300 hours to burn in. Please don't worry, the sound will and can only be improved as it burns in. - Page 11 Input Signal Connect only the RCA or XLR interconnect to the EX-M7, one at a time. The interconnect shall not be placed in parallel to the Power Cord. Placement as such may cause the amplifier to oscillate.
- Page 12 MAINTENANCE 維護 8. Product Care The EX-M7 usually requires no maintenance and requires only occasional cleaning of the physical surface. The power must be turned off and removed before cleaning the amplifier. Clean the surface of the amplifier with a soft, slightly damp cloth. Wipe gently with a soft cloth dampened with water or a mild detergent solution.
-
Page 13: Technical Specifications
KINKI STUDIO 9. Technical Parameters TECHNICAL SPECIFICATIO Frequency Response: 0-2.5MHz (±3dB) 技術數據 THDN: <0.07% (-80db) S/N Ratio: >103db(0.01Hz- 1 MHz), >130db (A-Weighted) Output Power: 250W(8 Ohms), 420W(4 Ohms) Max Instantaneous Power: 400w RMS (8 Ohms) Max Output Voltage: 72VAC, 18A Slew Rate: 200 V /us (Rise Time <... -
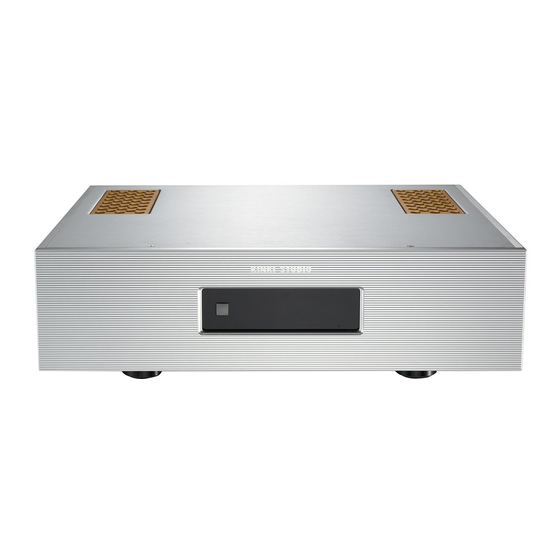
Page 14: Front Panel
KINKI STUDIO 1. Power Button 2. Display 3. Standby LED 4. Operation LED 5. Fault LED Front Panel... -
Page 15: Rear Panel
KINKI STUDIO 1. Speaker Binding Post 2. Signal Input 3. 12V Trigger 4. AC Filter Switch 5. Fused AC Power Inlet 6. GND Terminal 7. EARTH Terminal 8. Earth Toggle Switch Rear Panel... - Page 16 KINKI STUDIO The EX-M7 is equipped with EARTH/GND optimization scheme where you may utilize it to optimize the sonic performance of the system. Toggle the LINK/FLOAT switch (3) to engage or dis-engage the power earth (2) with the chassis (1).
- Page 17 KINKI STUDIO...
Need help?
Do you have a question about the EX-M7 and is the answer not in the manual?
Questions and answers