Table of Contents
Advertisement
Available languages
Available languages
Quick Links
Advertisement
Chapters
Table of Contents

Related Manuals for ELCOM Uniq PC 150


Summary of Contents for ELCOM Uniq PC 150
- Page 1 Uniq PC 150 Používate¾ská príruèka verzia príruèky 1.01...
- Page 2 Tento manuál neprešiel jazykovou korektúrou. Tento manuál a ani žiadna z jeho častí nesmú byť kopírované, alebo inak šírené bez súhlasu firmy Elcom. Všetky práva vyhradené. © 2009, Elcom, s. r. o.
-
Page 3: Table Of Contents
Uniq PC Obsah Úvod ............................5 Dôležité upozornenia ............................ 6 PoPIS ProdUktU ........................7 Časti Uniq PC, základné parametre ......................8 Možnosti pripojenia externých zariadení ....................9 obSlUha zarIadenIa ......................11 Zapnutie ..........................12 Vypnutie ..........................12 Reštart ..........................12 Kalibrácia dotykového panela ........................12 4 - bodová... -
Page 5: Úvod
ÚvOd... -
Page 6: Dôležité Upozornenia
Úvod Ďakujeme Vám, že ste si vybrali produkt Uniq PC. Skôr než začnete zariadenie používať, prečítajte si tento návod k používaniu, aby ste sa oboznámili s jeho vlastnosťami a funkciami. Túto príručku si odložte aj pre jej používanie v budúcnosti. Príručka Vám pomôže, pri riešení niektorých problémov. DôlEžIté... -
Page 7: Popis Produktu
POPIs PrOduktu... -
Page 8: Časti Uniq Pc, Základné Parametre
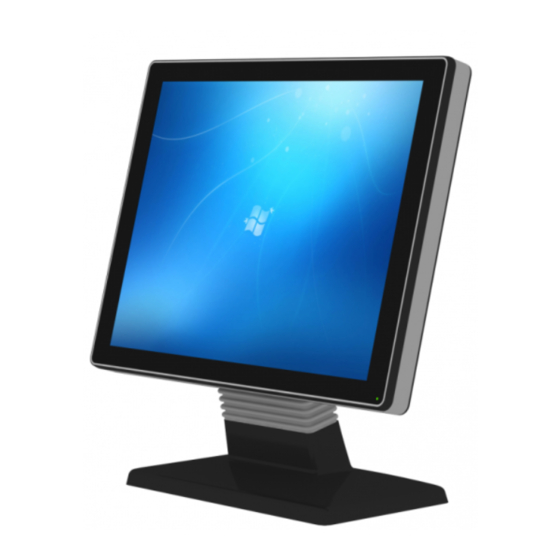
Popis produktu ČaStI UNIq PC, záKlaDNé ParaMEtrE Uniq PC je komplexné riešenie pozostávajúce z monitora, počítača a dotykového panela a to všetko v jed- nom celku. Vysoká priemyselná kvalita a široké možnosti použitia vytvárajú z Uniq PC jedinečné riešenie pre vaše podnikanie. Uniq PC je určený hlavne pre obchodné prevádzky, súkromné a verejné inštitúcie, či pre medicínsky sektor ako náhrada zobrazovacích, optických a výpočtových zariadení... -
Page 9: Možnosti Pripojenia Externých Zariadení
Tie môžu byť pripojené priamo k Uniq PC alebo prostredníctvom replikátora portov, ktorý vám umožní dis- krétne uloženie káblov. Výber replikátora závisí len od vašich požiadaviek a potrieb. Bližšie informácie o ponuke replikátorov portov získate na stránke www.elcom.eu. Obrázok 1.2 – Popis konektorov 2x USB2.0... - Page 10 Popis produktu Obrázok 1.3 - Popis rozšírených portov RS232 RS232 (RS232) Obrázok 1.4 - Popis káblov DC in 2x USB2.0 VGA monitor COM1...
-
Page 11: Obsluha Zariadenia
Obsluha zarIadenIa... -
Page 12: Zapnutie
Zariadenie sa zapne stlačením tlačidla POWER na boku panela, následne sa rozsvieti LED indikátor a spustí sa príslušný operačný systém (Obr. 1.1). Poznámka: U OS Linux CentOS 5.5 je prednastavený užívateľ s username: elcom, password: elcom (root má password elcom123) Vypnutie Zariadenie je možné... -
Page 13: Bodová Kalibrácia (4 Point Calibration)
Obsluha zariadenia 4 - bodová kalibrácia (4 Point Calibration) Počas kalibrácie sa v každom rohu monitora postupne zobrazuje symbol kríža s kružnicou. Pre správnu kalibráciu je potrebné podržať stlačený stred symbolu, kým nebude modrý. Tým zabezpečíte nastavenie presnej hodnoty k stlačenému bodu na displeji. Obrázok 2.2 rozloženie kalibračných bodov pri 4 - bodovej kalibrácii Nulovanie parametrov linearizácie a nová... -
Page 14: Test Kreslenia (Draw Test)
Obsluha zariadenia test kreslenia (Draw test) Tento nástroj slúži pre overenie presnosti a kontrolu funkčnosti dotykového panela. Príkazom „Clear“ sa vy- čistí plocha a vymažú sa všetky nakreslené objekty. Príkazom „Quit“ sa ukončí nástroj kreslenia. NaStaVENIE DOtyKOVéhO PaNEla K ponuke nastavenia dotykového panela sa dostanete cez: OS Windows: Štart - PrOGraMy - tOUChKIt CONFIGUrE UtIlIty. -
Page 15: Nastavenie Parametrov Obrazu V Os Windows Embedded
Obsluha zariadenia Normal mode ponuka pre návrat k základnému (default) nastaveniu dotykového displeja Options možnosti špecifických doplnkových nastavení dotykového displeja Enable auto right click povolenie funkcie pravého tlačítka Enable touch vypnutie funkcie dotykového panela Enable cursor stabilization funkcia stabilizácie kurzora a ďalšie NaStaVENIE ParaMEtrOV ObrazU V OS WINDOWS EMbEDDED Nastavenie kontrastu a jasu Pre nastavenie kontrastu a jasu stlačte panel na pracovnej ploche a podržte, pokiaľ... - Page 16 Obsluha zariadenia Obrázok 2.6 Otočenie obrazu o 180° Poznámka: Pri OS Linux CentOS 5.5. V prípade nastavenia šetriča obrazu a aktivácii funkcie prihlásenia cez heslo uživateľa je nutné pre zadanie hesla použiť klávesnicu. Nie je možné zadať heslo cez Touch.
-
Page 17: Pomoc V Núdzi
POmOc v nÚdzI... -
Page 18: Obnova Operačného Systému V Prípade Poruchy
štandard- ne dodávaného výrobcom tohto produktu. Pre kompletnú obnovu operačného systému zapnite zariadenie a stlačte opakovane kláves F10, až kým sa nezobrazí obrazovka s logom „elcom - rescue“ a následne hlavné menu s možnosťami obnovy systému. -
Page 19: Spôsoby Uchytenia
sPôsOby uchytenIa... -
Page 20: Umiestnenie Na Zvislej Podložke (Stena) Pri Variante Stojanu Na Stôl
Obrázok 4.1 Možnosti uchytenia Poznámka: v prípade umiestnenia Uniq PC na stenu je možné dosiahnúť väčší uhol ohnutia monitora otočením jeho nohy o 180°. Túto operáciu sú oprávnené vykonať iba servisné strediská ELCOM. Umiestnenie na zvislej podložke (stena) pri variante stojanu na stôl V balení... -
Page 21: Stojan Tube 50 Mm A 130 Mm
Spôsoby uchytenia Obrázok 4.2 Spôsob prichytenia stojana na zvislej podložke 176 mm Stojan tube 50 mm a 130 mm Stojan Tube je masívne a pevné riešenie s inteligentným dizajnom a chránenými káblami. Káble sú vedené vnútrom kovovej tuby stojana a taký typ konštrukcie zabezpečuje vysoký stupeň krytia IP 54. Stojan sa upev- ní... - Page 22 Spôsoby uchytenia Dodatočné nastavenie polohy pootočenia stojana upravíte uvoľnením štyroch skrutiek zo spodu stojana a nastavením požadovaného uhlu pootočenia. Pre zaistenie polohy je treba skrutky dotiahnúť a tak pripevniť stojan k stolu. Obrázok 4.4 Pohľad na stojan zo spodu - dodatočné nastavenie uhla pootočenia stojana...
-
Page 23: Identifikačné A Ochranné Prvky Produktu
Spôsoby uchytenia IDENtIFIKaČNé a OChraNNé PrVKy PrODUKtU Obrázok 4.5 Identifikačné a ochranné prvky produktu trieštivá ochranná nálepka výrobný štítok licenčná známka WEPOS... - Page 25 Uniq PC 150 User manual version 1.01...
- Page 26 This manual was not subject to any language revision. This manual or any part of it may not be copied, reproduced or otherwise distributed without the consent of the Elcom company. All rights reserved. © 2009, Elcom, s. r. o.
- Page 27 Uniq PC table Of cOntent IntrodUCtIon ........................29 Important notice ............................30 ProdUCt deSCrIPtIon ......................31 Parts of the uniq pc, basic features ......................32 Opportunities for attaching peripheral devices ..................33 haNDlING thE EqUIPMENt ....................35 Switching on ........................36 Switching off ........................36 Restarting ..........................36 Calibration of the touchscreen panel .......................36 4-Point Calibration ......................37 Clear and Calibrate ......................37...
-
Page 29: Introduction
IntrOductIOn... -
Page 30: Important Notice
Introduction Thank you for choosing the Uniq PC. Please read this user manual before you begin using the equipment in order to become familiar with its features and functions. Also keep this user manual for future use. It will help you solve problems that may arise. -
Page 31: Product Description
PrOduct descrIPtIOn... -
Page 32: Parts Of The Uniq Pc, Basic Features
Product description PartS OF thE UNIq PC, baSIC FEatUrES The Uniq PC is a complete solution consisting of a monitor, a computer and a touch screen panel all in one unit. The high-quality production and wide possibilities for use make the Uniq PC a unique solution for your business. -
Page 33: Opportunities For Attaching Peripheral Devices
These can be attached directly to the Uniq PC or through a replicator port, which allows for discreet placement of cables. The choice of replicator depends on your demands and needs. You can get more detailed information about replicator ports on our Web page at www.elcom.eu. Figure 1.2 – Description of connectors 2x USB2.0... - Page 34 Product description Obrázok 1.3 - Description of extended connectors variant RS232 RS232 (RS232) Obrázok 1.4 - Description of connectors for tubeholder variant DC in 2x USB2.0 VGA monitor COM1...
-
Page 35: Handling The Equipment
handlInG the eQuIPment... -
Page 36: Switching On
The equipment is switched on by pushing the POWER button on the side panel. The LED indicator will light up and the installed operating system will be launched (Fig. 1.1). Note: For OS Linux CentOS 5.5 is pre-defined user, username: elcom, password: elcom (root has password elcom123) -
Page 37: 4-Point Calibration
Handling the equipment 4-Point Calibration During calibration, the symbol of a cross with a circle will gradually appear in each corner of the monitor. For proper calibration, it is necessary to hold down the center of the symbol until it turns blue. In this way you ensure the setting of the exact value regarding the pressing point on the display. -
Page 38: Draw Test
Handling the equipment Draw test This instrument serves for verifying the precision and checking the functionality of the touch screen panel. The command “Clear“ clears the surface and deletes all objects drawn. The command “Quit“ terminates the drawing instrument. Setting up the touch panel Arrive at the menu for setting up the touch screen panel through: OS Windows: Start - PrOGraMS - tOUChKIt CONFIGUrE UtIlIty OS Linux CentOS: SyStEM - aDMINIStratION - tOUChPaNEl CalIbratION... -
Page 39: Setting Up The Monitor In Os Windows
Handling the equipment Enable touch switching off the functionality of the touch screen panel Enable cursor stabilization a function for stabilizing the cursor and others SEttING UP thE MONItOr IN OS WINDOWS Setting the contrast and brightness For setting the contrast and brightness, press the working surface of the panel and hold it down until the op- tions appear (right mouse click). - Page 40 Handling the equipment Figure 2.6 rotating the image by 180° Note: In case of OS Linux CentOS using screensaver with options to log-in by password is necessary to use stan- dard keyboard for typing password. Can not use touch screen keyboard.
-
Page 41: Emergency Help
emerGency helP... -
Page 42: Restoring The Operating System In Case Of Malfunction
For a complete restore of the operating system, switch on the equipment and repeatedly press the F10 key, until the logo “elcom – rescue“ appears on the screen and subsequently a main menu with the possibilities for restoring the system. -
Page 43: Ways Of Mounting
Ways Of mOuntInG... -
Page 44: Placement On A Vertical Surface (Wall) For Standard Stand
Note: for placing a Uniq PC on a wall it is necessary to achieve a larger angle curvature of the monitor by rotating its legs by 180°. This operation is only authorized to be done at an ELCOM service center. -
Page 45: The Base Tube 50 Mm And 130 Mm
Ways of mounting Figure 4.2 the method of attaching the base to a high mounting 176 mm the base tube 50 mm and 130 mm The base tube is a solid and firm solution with an intelligent design and protected cables. The cables are led through a metal tube in the base and this type of construction guarantees a high degree of IP 54 coverage. - Page 46 Ways of mounting We can alter the setting of the position of the rotated base by loosening the four screws from the bottom of the base and by setting the required angle of rotation. For assuring the position, it is necessary to drive the screws and thus anchor the base to the table.
-
Page 47: Identification And Protective Elements
Ways of mounting IDENtIFICatION aND PrOtECtIVE ElEMENtS Figure 4.5 Identification and protective elements fragmentation strip bond product label licence label WEPOS... - Page 48 Poznámky / Notes...
Need help?
Do you have a question about the Uniq PC 150 and is the answer not in the manual?
Questions and answers