Table of Contents
Advertisement
NXD-6301
October 15, 2019
NEXUS
NX6220 and
NX6330
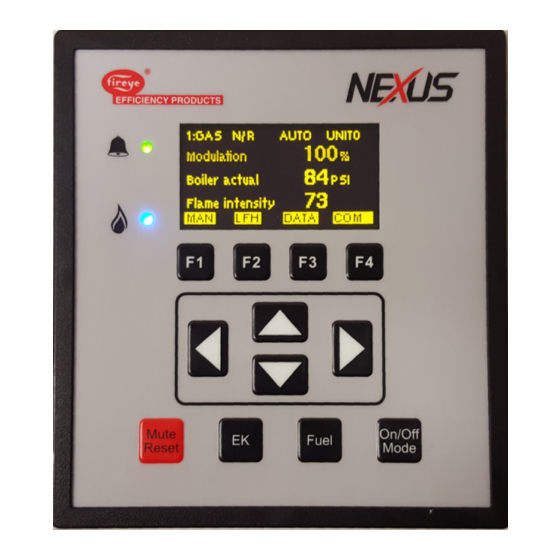
12-Key
KEYPAD
DISPLAY
INTRODUCTION:
The Fireye NX6220 or NX6330 (with Ethernet) OLED (Organic LED) 12 key keypad
display provide an easy to read, bright operator interface for operation and
commissioning of Fireye NX6100 or PPC6000* series control. The addition of four multi-
function soft keys, make commissioning quicker and easier. Once in commissioning
mode, these keys group related options, such as all servomotor options, together for
convenience, minimizing the risk of skipping options that are related but in different
areas of the program.
Two models are available; NX6220 (basic display with USB port) and NX6330 (USB and
Ethernet port). Both displays include complete commissioning back up as well as three
user defined relays. English, French and Spanish languages are supported and can
easily be selected from a list of available languages stored within the display. Other
languages may be added from time to time, consult the factory for availability.
The NX6330 Display also includes a choice of MODbus TC/PIP or BACnet integration
into Building Automation Systems (BAS). See Fireye Bulletin MOD-6001 for the
appropriate register point lists.
The tactile membrane keypad provides a "click" feedback for positive key stroke entry.
The lithium ion battery maintains the commissioned backup, clock, calendar and event
log function in the event of power loss.
* When used with the Fireye PPC6000, the Fuel key will have no function as fuel
selection is performed externally to the PPC6000.
Advertisement
Table of Contents


Need help?
Do you have a question about the NEXUS NX6220 and is the answer not in the manual?
Questions and answers