Advertisement
Advertisement

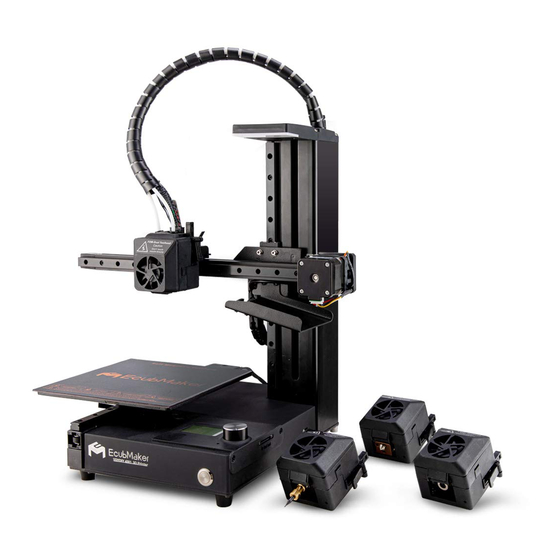
Related Manuals for EcubMaker TOYDIY


Summary of Contents for EcubMaker TOYDIY
- Page 1 TOYDIY 4in1 3D Printer Quick Start Guide 快 速 向导...
-
Page 2: Table Of Contents
Contents 目录 快速开箱 Unpacking operation 结构示意图 Drawings 主机结构示意图 Mechanical Drawings 工具头结构示意图 Toolhead Drawings 首次使用 3D 打印机 Start 3D Printing 首次使用激光雕刻机 Start Laser Engraving 首次使用 CNC 雕铣机 Start CNC Carving... -
Page 3: Unpacking Operation 快速开箱
Unpacking Take out the machine After you receive the TOYDIY 4in1 3D Printer, please open the box Grasp two Zip tie to hold the machine with your both hands, and gentlytake TOYDIY 4in1 3D Printer out of the box. Be careful not according to following the steps. - Page 4 Cut the three white Zip ties in Figure. Place the machine in a stable surface and remove the wrapped plastic 剪断 3 条白色扎带。 protective bag, cut the X-axis toolhead fixing seat Zip tie. 把机器放置在平稳的地方,去掉包裹的塑料保护袋 , 剪掉 X 轴固定座的 扎带。...
- Page 5 Take out all the packing accessories from the accessory box (the Unscrew the screw on the left side of the platfrom (to limit the bed packing accessories with different configurations are different, which movement during shipment) and four screws on the back side of the shall be subject to the physical objects received.
- Page 6 Unpacking Completed . 开箱完成。...
-
Page 7: Drawings 结构示意图
主机结构示意图 主机结构示意图 Mechanical Drawings Filament tube Filament tube 耗材导丝管 耗材导丝管 Handle ------------------------- 手柄 - - - - - - - - - - - - - - - - - - - - - - - - - - - - - - - - - Filament tube pressure ring... - Page 8 FDM 工具头结构示意图 FDM Toolhead Drawings Wire insertion port 排线插入口 -------------------------- Filament tube pressure ring 导丝管安装压环 (PC4-M6 直通 ) -------------------------- Filament tube pressure ring 导丝管安装压环(PC4-M6 直通) - - - - - - - - - - - - - - - - - - - - - - - -...
- Page 9 FDM-Dual 工具头结构示意图 FDM-Dual Toolhead Drawings Wire insertion port 排线插入口 -------------------------- Filament tube pressure ring 导丝管安装压环 (PC4-M6 直通 ) -------------------------- Filament tube pressure ring 导丝管安装压环(PC4-M6 直通) - - - - - - - - - - - - - - - - - - - - - - - -...
- Page 10 Laser 工具头结构示意图 Laser Toolhead Drawings sensor button 传感器压块 ------------------------ Auto-leveling sensor 自动调平传感器 ------------------------ Sensor block 传感器弹块 ------------------------- Z-Axis limit switch Z 轴传感器 ------------------------- Laser Beam 激光器 ------------------------- Heat sink Laser focus adjustment dial 散热器 激光器焦距调节旋钮 ---------------------------------------------------------- ---------------------------- Auto-leveling probe 及自动调平探针 ------------------------------------------ 激光工具头...
- Page 11 CNC 工具头结构示意图 CNC Toolhead Drawings Motor 电机 - - - - - - - - - - - - - - - - - - - - - - - - - - Motor Mount 电机固定座 - - - - - - - - - - - - - - - - - - - - - - - - - - Rotating Shaft 转轴...
-
Page 12: Start 3D Printing
使用 3D 打印机 Start 3D Printing 安装 FDM 双头工具头 Install FDM dual toolhead Take out the FDM-dual toolhead from the accessories box. Unscrew the mounting screw on the fixing seat of X-axis(Toolhead). 从配件箱里取出 FDM 双头工具头。 先旋下 X 轴(工具头)固定座上的手拧螺丝。... - Page 13 Connect the toolhead flat cable, and fix the toolhead with Place the toolhead into the toolhead clamping groove of the the mounting screw. X-axis (tool head) fixing seat from top to bottom. 工具头从上至下卡进 X 轴(工具头)固定座卡槽。 连接工具头排线,然后旋上手拧螺丝。 ˇ ˇ...
- Page 14 Insert the filament tube into the toolhead and insert it to the end. 把导丝管插入工具头,插到底。 Insert about 4cm into the end 插入 4cm 左右 插到底 Toolhead cross-section view 工具头内部指示图 ! Note: The filament tube must be inserted into the toolhead at the very end, otherwise it will cause the filament to be blocked. 注意:导丝管必须插入工具头到底,否则会引起耗材堵住。...
- Page 15 安装耗材与软磁板 Install filament and soft magnetic plate Place the filament roll on to the Filament holder. Then insert the filament (the head of the filament should be flat and straight) into the filament tubes of the upper and lower extruders (please hold up the extruder block when inserting the filament, otherwise it will be difficult to insert the filament), and insert it up to 1cm above to the filament port of the toolhead。...
- Page 16 Take out the magnetic plate from the accessories box and place it on the printing bottom plate. 从配件箱中取出软磁板,放置在打印底板上。...
- Page 17 开机 Turn on the machine Take out the power adapter and power cable from the accessories box, connect them together, and Turn on the machine. 从配件箱中取出电源适配器与电源线,连接在一起,给机器通电。 220V-110V...
- Page 18 (factory default status).If not please read the other 按下电源开关按钮,打开机器。此时手把灯亮,显示屏点亮。 section in the manual to change the firmware status. 显示屏显示当前机器状态为 FDM 3D Printer 状态(出厂默 认状态)。如不是,请查看用户使用说明书更改机器状态。 EcubMaker TOYDIY Toolhead status 机器工具头状态 FDM 3D Printer Print From SD Filament...
- Page 19 FDM 3D Printer Test ! R:1 5/0 C L:15 / 0 C Note: TOYDIY 4in1 3D Printer can only be uses with Ecubware slicing Bed: 15/ 0 C software. If you use "Cura" for slicing it might be casue for printing Times:28s failure.
- Page 20 Observe whether the printing process is normal, and wait for The machine automatically performs operations such as the printing to be completed. Remove the soft magnetic plate, Auto-home return-Nozzle heating-bottom plate heating- bend the soft magnetic plate, and remove the model. Start Printing without any manual intervention.
- Page 21 取出耗材 Take out the filament Since the head of filament is deformed by heat and cannot be directly pulled out from the extruder, the following steps are taken to take out the filament: 由于耗材头部受热变形,无法直接从挤出机处拉出,所以进行以下几步操作取出耗材: Press the black leather ring on the filament tube port at the toolhead end and pull out the filament tube. 按下工具头端导丝管接口上的导丝管安装压环,拔出导丝管。...
- Page 22 Push filament up from the extruder end (press and hold the upper extruder block), and make sure the filament is out of the filament tube,Cut off the deformed part of the filament head to prevent it from getting stuck in the filament tube. . 从挤出机端往上推耗材(按住上、下挤出机压块),将耗材从导丝管里推出...
- Page 23 Press the upper (1) extruder block and pull out the filament. Bend the soft magnetic plate, and remove the model from the bed. Done! 最后压住挤出机压块,向下拉出耗材 , 再安装导丝管。...
- Page 24 什么是 Z-offset 值 What is the Z-offset The Z-offset value is the difference in the Z-axis distance between the toolhead and nozzle and the auto-leveling sensor probe during the auto leveling. Z-offset 值是工具头喷嘴与自动调平传感器探针触发时的 Z 轴距离差值。 Nozzle Z-offset 值 Auto-leveling probe !...
- Page 25 自动设置 Z-offset 值 Adjust z offset automatically set the Z-offset , follow the steps in the menu below. 自动设定 Z-offset 值方法,按照下图菜单逐步操作即可。 EcubMaker TOYDIY Main Back FDM 3D Printer Auto home Auto Set Z offset Print From SD Move axis Manual Input Z offset...
- Page 26 Put a piece of A4 paper on the platform, turn the menu knob to adjust the height of the tool head, until the nozzle and the A4 paper form friction resistance, the A4 paper cannot be moved, click Finish and save, shut down and restart. 在平台上放一张...
- Page 27 每次调整增加 0.2mm。 Enter the menu Utility > Z offset > Manual Input Z offset > Z offset(mm) > Save Settings 调节方法,进入菜单 Utility > Z offset > Manual Input Z offset > Z offset(mm)> Save Settings EcubMaker TOYDIY Main Back FDM 3D Printer...
- Page 28 如何处理耗材堵头 How to fix Filament Jamming Issue The reason of the Jam and the jamming location: 堵头原因及堵头位置点: Generally, Jamming issue occurs when the filament exit the nozzle throat, and the end of the filament swells and cannot pass through the nozzle throat or filament tube. 一般发生堵头都是在耗材退出喷头喉管时,耗材末端膨胀无法通过喷头喉管或导丝管引起的。...
- Page 29 如何处理耗材堵头 How to fix Filament Jamming Issue Method of solving the issue: 处理堵头方法: Press toolhead pressure right and pull out the filament Remove the two Phillips screws shown by the circle tube, cut the consumables, and pull out the remaining in the figure and the two stainless steel screws in the filament in the filament tube from the extruder end.
- Page 30 Unscrew the fixing screw of the throat pipe, and separate the Cut off the deformed part of the end of the filament, and heat sink and throat pipe. pull out the remaining filament in the nozzle and Teflon 旋下喉管固定螺丝 , 分离环形散热器及喉管。 tube.
-
Page 31: Start Laser Engraving 首次使用激光雕刻机
首次使用激光雕刻机 Start Laser Engraving 安装 Laser 工具头 Install Laser toolhead Unscrew the mounting screw on the fixing seat of x axis (tool head). Take out the Laser toolhead from the accessory box. 从配件箱里取出 Laser 工具头。 先旋下 X 轴(工具头)固定座上的手拧螺丝。... - Page 32 Connect the toolhead flat cable, and fix with the mounting screw. Clamp the toolhead into the clamping groove of the X-axis 连接工具头排线,然后旋上手拧螺丝。 (toolhead) fixing seat from up to downwards, and then tighten the mounting screw. 工具头从上至下卡进 X 轴(工具头)固定座卡槽。 ˇ ˇ...
- Page 33 开机,更换机器状态 Turn on and Change the Machine Status Take out the power adapter and power cord from the accessories box. Connect them together and plug on the machine's power port. 从配件箱中取出电源适配器与电源线,连接在一起,给机器通电 。...
- Page 34 Press the power switch button to turn on the machine. At this time, the upper beam lights up and the display screen lights up.The machine status on the display screen is FDM status (factory default status). Change to Laser 3D Printer. 按下电源开关按钮,打开机器。此时手把灯亮,显示屏点亮,显示屏上机器状态为 FDM 状态(出厂默认状态)。调整为 Laser 3D Printer。 Factory default EcubMaker TOYDIY Toolhead status FDM 3D Printer 出场默认机器工具头 状态...
- Page 35 Rotate the Menu b utton, enter Utility>Change ToolHeader>Change To Laser Header>Check what is displayed on the screen and Follow the instruction step by step. 旋转显示屏按钮,进入 Utility > Change ToolHeader > Change To Laser Header,按照屏幕上显示的内容操作并点击至最后一步内容。 EcubMaker TOYDIY Main Back FDM 3D Printer...
- Page 36 Press the power switch button to turn on the machine. At this time, upper beam lights up and the display lights up. 重启设备,显示屏上机器状态为 Laser 3D Printer。 EcubMaker TOYDIY Toolhead status Laser 3D Printer 机器工具头状态 Laser Print Guide Utility ! Note: If the replacement of the machine state fails, please perform step 3 again and restart the machine.
- Page 37 打印步骤 Print step Enter the menu "Laser Print Guide" and follow the steps. Please take out the goggles, sample materials and SD card from the accessories box. Insert the SD card into the SD card slot. During every Laser engraving operation, make sure you wear the safety goggles. 进入菜单...
- Page 38 "Step1:Place Objects"- Place the workpiece objects on the platform. Step1:Place Objects(放置需要雕刻的物体在平台上)。 Step1:Place Objects Step2:Auto Home-Center Step3:Laser Prescan Step4:Set Origin Step5:Print From SD...
- Page 39 "Step2:Auto Home-Center"- In this step, you will see that the tool head moves to the machining center after returning to zero. Don't do anything just wait to finish this step. Step2:Auto Home-Center。工具头回零后移动到加工中心的位置。 Auto home-center 回零后...
- Page 40 "Step3: Laser Prescan"- In this step, you will see that the tool head moves a cross line on the surface of the workpiece, so that you can judge whether the carved object placed at this time is centered and correct. If you feel that the object is placed wrong, you can re-adjust the position and then perform "step3"...
- Page 41 "Step4:Set Origin"- Click Set Origin to save the current " Step5: Print From SD"- click to select the model Gcode file position as the center of printing. from SD cardthat you wanted to engrave. Step4:Set Origin。点击 Set Origin,设定当前位置为打印 文件中找到 Laser Engraving Test Modle.gcode,开始打印。 的中心位置。...
-
Page 42: Start Cnc Carving 首次使用 Cnc 雕铣机
开始 CNC 雕铣 Start CNC Carving 安装 CNC 工具头 Install CNC toolhead Unscrew the mounting screw on the fixing seat of x axis (toolhead). Take out the CNC toolhead from the accessories box. 先旋下 X 轴(工具头)固定座上的手拧螺丝。 从配件箱里取出 CNC 工具头。... - Page 43 Turn on the equipment and enter the menu CNC printer guide > step 2: move axis > move z; Elevate the z axis. 打开设备,进入菜单 CNC Printer Guide > step2:Move Axis > Move Z;抬升 Z 轴。 EcubMaker TOYDIY Back CNC 3D Printer...
- Page 44 Clamp the toolhead into the clamping groove of the X-axis (tool Turn off the machine and connect the tool head flat cable. head) fixing seat from up to downwards, and then tighten the 关闭设备,连接工具头排线 , 然后旋上手拧螺丝。 mounting screw. 工具头从上至下卡进 X 轴(工具头)固定座卡槽。 ˇ...
- Page 45 开机,更换机器状态 Turn on and Change the Machine Status Take out the power adapter and power cord from the accessories box. Connect them together and plug on the machine's power port. 从配件箱中取出电源适配器与电源线,连接在一起,给机器通电。...
- Page 46 Press the power switch button to turn on the machine. At this time, the hand lamp lights up and the display screen lights up.The machine status on the display screen is FDM status (factory default status). Adjust to Laser 3D Printer. 按下电源开关按钮,打开机器。此时手把灯亮,显示屏点亮,显示屏上机器状态为 FDM 状态(出厂默认状态)。需要调整为 CNC 3D Printer。 Factory default EcubMaker TOYDIY Toolhead status FDM 3D Printer 出场默认机器工具头 Print From SD 状态...
- Page 47 Rotate the Menu button, enter Utility > change tool header > change to CNC header, check the contents displayed on the screen and follow the instruction step by step. 旋转显示屏按钮,进入 Utility > Change ToolHeader > Change To CNC Header,查看屏幕上显示的内容并点击至最后一步内容。 EcubMaker TOYDIY Main Back...
- Page 48 Restart the machine and check whither the machine status on the display screen shows "CNC 3D Printer". 重启设备,显示屏上机器状态为 CNC 3D Printer。 EcubMaker TOYDIY Toolhead status CNC 3D Printer 机器工具头状态 CNC Print Guide Utility ! Note: If the replacement of the machine state fails, please perform step 3 again and restart the machine.
- Page 49 安装 CNC 垫板和夹具 Install CNC Carving Raft and fixture Please fix the CNC Carving Raft, CNC fixture, magnet (rubber pad) and CNC clamping screws on the printing platform. 请依次将 CNC 垫板,CNC 夹具和磁铁(橡胶垫),CNC 手拧螺丝固定在打印底板上。...
- Page 50 打印步骤 Print step Enter the menu CNC Print Guide and follow the steps. please take out goggles, carvings and SD cards from the accessory box. Insert the SD card into the SD card slot. 进入菜单 CNC Print Guide, 按步骤进行操作,请从配件箱中取出护目镜、雕刻物和 SD 卡。把 SD 卡插入 SD 卡卡槽内。 !...
- Page 51 CNC fixture and magnet. Because the CNC working process will produce large amount of movement and shaking, it is necessary to ensure that the carving object is fixed tightly with the bed. Step1:Place Objects(放置需要雕刻的物体在平台上),并通过 CNC 夹具固定,通过 CNC 夹具和垫块辅助,压住物体。因 CNC 工作过 程会产生很大的加工力量,所以务必确保雕刻的物体固定紧。 EcubMaker TOYDIY Set origin point CNC 3D Printer 加工起始点...
- Page 52 Step2: Move Axis; Move axis>Move XYZ, move the XYZ axis so that the CNC bit of the CNC toolhead is aligned with the center point of the surface of the workpiece. Step2:Move Axis;Move axis > Move XYZ,移动 XYZ 轴,使得 CNC 工具头的刀尖对准被加工物件的表面中心点,并将刀头接触到加工 物表面。...
- Page 53 Step3:Set Origin - After adjusting to a suitable distance in the previous step, execute this step and set the current state as the machining origin. Step3:Set Origin。在上一步调整到合适的距离后,执行此步骤,设置当前状态为起始点。 ! Note: The working area of the test file is 80x80mm, and the fixture cannot exceed this range.
- Page 54 Step4:Print From SD. Find CNC Craving Test Modle.gcode from SD card file. Select this file to perform CNC engraving processing. Step4:Print From SD。从 SD 卡文件中找到 CNC Craving Test Modle.gcode。选择该文件执行 CNC 雕刻加工。 Back CNC Craving Test Step1:Place Objects Model.gcode Step2:Move axis Step3:Set Origin Step4:Print From SD...
- Page 55 After printing, loosen the CNC hand screws and remove the model. 打印完成后,先上升 Z 轴 50mm, 松开 CNC 手拧螺丝,取下模型。 EcubMaker TOYDIY Back CNC 3D Printer Step1:Place Objects CNC Print Guide Step2:Move axis Utility Step3:Set Origin Step4:Print From SD Move axis Move X Move Z: +050.0...
- Page 56 Debris cleaning on rails. 导轨上的碎屑清理。 ! Note: CNC machining is high-strength machining, so it is necessary to ensure that no contact with equipment is made during machining. At the same time, the continuous processing time of the subsequent new processing model should not exceed 8 hours, otherwise the tool life will be affected.
- Page 57 Precautions 注意事项 The EcubMaker TOYDIY 4in1 3D Printer is a 3D printer with 4 functions. Before you step forward to First use, Please read the Quick start guide carefully. EcubMaker TOYDIY 4in1 3D Printer 是一款拥有 4 种功能的 3D 打印机,请第一次使用时按照快速使用向导进行操作。 EcubMaker TOYDIY 4in1 3D Printer is different from ordinary open source 3D printers. Do not use it with the experience of using ordinary 3D printers.
- Page 58 EcubMaker 官网、Facebook 讨论组、youtube 频道,support@zd3dp.com 都有相应的教程与官方技术人员,如果遇到任何无法解决的问题, EcubMaker 会协助你解决问题。 The EcubMaker team hopes that you will be satisfied with the product. We are willing to listen to your opinions and continuously improve product performance and quality with the assistance of each customers feedback.
- Page 59 联系我们 Contact us Official After-sale Support: Support@zd3dp.com Official Website: www.ecubmaker.com Scan the QR code below to learn more from EcubMaker Youtube and Facebook Page. 扫描下面的二维码,从 EcubMaker ,Youtube 和 Facebook 平台中了解更多信息。 YouTube Facebook Page Facebook Group...
Need help?
Do you have a question about the TOYDIY and is the answer not in the manual?
Questions and answers