Table of Contents
Advertisement
Advertisement
Table of Contents

Related Manuals for EcubMaker TOYDIY


Summary of Contents for EcubMaker TOYDIY
- Page 1 Manual --------------------------- --------------------------- Default Z-offset of FDM toolhead Single : Dual: *Tips : Please set the Z-offset again if you have changed the toolhead *Make sure you read the manual and watch video in the SD card before using TOYDIY...
-
Page 3: Table Of Contents
Directory ------------------------------------------------------------------------------------------------------------------------------------------ A. Product overview Disclaimer---------------------------------------------------------------------------------- Safety Instructions------------------------------------------------------------------------ Mechanical Drawings------------------------------------------------------------------ Specification------------------------------------------------------------------------------- Packing List-------------------------------------------------------------------------------- B. TOYDIY Setup Unpacking-------------------------------------------------------------------------------- Ready to start----------------------------------------------------------------------------- Menu Overview----------------------------------------------------------------------- Change Toolhead----------------------------------------------------------------------- FDM function demonstration------------------------------------------------------- Laser function demonstration-------------------------------------- ---------------- CNC function demonstration-------------------------------------- ----------------- C. EcubWare slice Settings Setup EcubWare-------------------------------------------------------------------------... - Page 4 Welcome to choose EcubMaker...
-
Page 5: Disclaimer
Settings. Section C~E mainly introduces how to level, print, maintain and repair. We are glad that you choose TOYDIY 4in1 3D printer. This manual will let you know about the operation of TOYDIY, make you create more possibilities in the 3D world. -
Page 6: Safety Instructions
Make sure that you comply fully with all applicable rules. ● Do not touch the Laser Toolhead of the TOYDIY while the Laser is on. If you were burnt by accident, turn it off immediately and seek help from doctors. - Page 7 ② If it is safe to do so, extinguish the fire with a wet towel or a fire extinguisher. ③ If the fire can not be extinguished or if it spreads outside the TOYDIY, call your local emergency number (for example 911) and evacuate the building.
- Page 8 ● The size of the material must be smaller than 180 x180 mm (7.0” x 7.0”). ● Do not place rolled-up material in the TOYDIY. It may be too tall, or unroll during laser engraving, obstructing operation.
- Page 9 ● Do not use your TOYDIY while under the influence of alcohol or drugs. ● Do not touch the CNC Toolhead while the TOYDIY is on. If you are cut by accident, turn off TOYDIY immediately and seek help from doctors.
-
Page 10: Mechanical Drawings
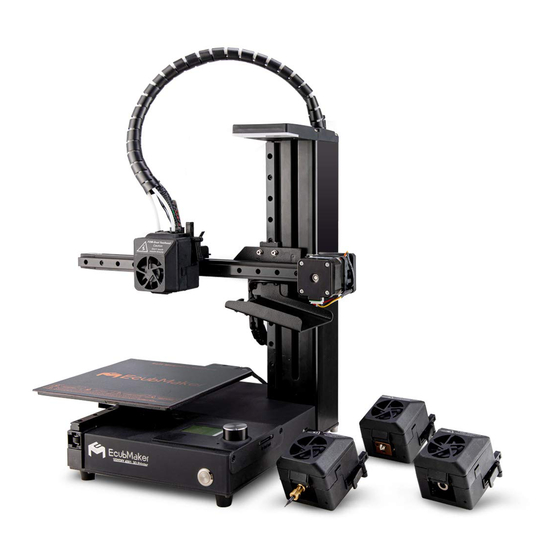
Menu Button USB cable Slot Y-Axis SDcard Slot Power switch TOYDIY frontside view Filament tube Extruder block Extruder block ① extruder Extruder block Pla filament ② extruder Extruder block Power adapter jack TOYDIY Backside view -------------------------------------------------------------------------------------------------------------------------------------------- A Welcome to choose EcubMaker... - Page 11 Toolhead sensor button Z-Axis limit switch &Toolhead automatic leveling probe Toolhead outside view Filament tube fitting Heat sink Arrival of Filament tube Teflon tube Stainless steel throat Heating rod Thermistor Nozzle Tool header internal view ------------------------------------------------------------------------------------------------------------------------------------------- A Welcome to choose EcubMaker...
-
Page 14: Toydiy Setup
TOYDIY Setup... -
Page 15: Unpacking
Please be careful when unpacking. Tip: Please take TOYDIY out of the box lightly and carefully. So as to avoid the damage of TOYDIY . If you tear too hard, it may scratches o and even damage TOYDIY. - Page 16 1. Unpacking (1) Lay the unopened TOYDIY on the floor. (2)Open the box, remove the lid and take out TOYDIY user manual. It is recommended that you follow the steps in the user manual to install and know the contents in the box. If you fi nd that anything described in the manual is missing, please contact your vendor.
- Page 17 Unpacking ------------------------------------------------------------------------------------------------------------------------------------------- (5)Place TOYDIY in a smooth place and remove the plastic wrap. ----------------------------------------------------------------------------------------------------------------------------------------- ----------------------------------------------------------------------------------------------------------------------------------------- B EcubMaker TOYDIY basic setup and installation B EcubMaker TOYDIY basic setup and installation...
- Page 18 (6)Take out all the packing accessories from the fitting box (different packing accessories are different, subject to the receipt of the actual product, as demonstrated by the four tool heads) (7)Remove the M3.0 screwdriver from the toolbox. --------------------------------------------------------------------------------------------------------------------------------------- B EcubMaker TOYDIY basic setup and installation...
- Page 19 (to fix the X-axis guide rail and four screws on the printing base plate). ----------------------------------------------------------------------------------------------------------------------------------------- ----------------------------------------------------------------------------------------------------------------------------------------- B EcubMaker TOYDIY basic setup and installation B EcubMaker TOYDIY basic setup and installation...
- Page 20 Unpacking ------------------------------------------------------------------------------------------------------------------------------------------- (9)Cut the X axis fixing seat tie. (10)Finish unpacking. Tip:The Toolhead Flat Cable is not a handle. Never pull or twist the Toolhead Flat Cable. --------------------------------------------------------------------------------------------------------------------------------------- B EcubMaker TOYDIY basic setup and installation...
-
Page 21: Ready To Start
After unboxing, let's assemble TOYDIY. Assemble Toolhead(Please assemble FDM-Dual Toolhead first),Lock tool head hand screws. 2. Plug into the adapter 3.Press the power switch,then the handle light and the display will be light up. ----------------------------------------------------------------------------------------------------------------------------------------- B EcubMaker TOYDIY basic setup and installation... -
Page 22: Menu Overview
Move axis menually Z Offset Set the correct distance nozzle to platfrom Change ToolHead Change current toolhed to other Restore Defaults Restore the factory reset menu Printer info Firmware and other details ------------------------------------------------------------------------------------------------------------------------------------------ B EcubMaker TOYDIY basic setup and installation... - Page 23 > Set Laser Focus Set the Laser focal length to ensure the better Engraving,usally you don't need to change it ChangeToolHeader Restore Defaults Printer info Back Step1:Auto Home Step2:Move to Center Step3:Adjust focus Step4:Adjust Finish --------------------------------------------------------------------------------------------------------------------------------------- B EcubMaker TOYDIY basic setup and installation...
- Page 24 Save the Previous 2 steps data. Must do this step. Step4:Print From SD Select the model you want to carve. EcubMaker TOYDIY CNC 3D Printer CNC Print Guide > Utility Back ChangeToolHeader Restore Defaults Printer info ------------------------------------------------------------------------------------------------------------------------------------------ B EcubMaker TOYDIY basic setup and installation...
-
Page 25: Change Toolhead
Change Toolhead -------------------------------------------------------------------------------------------------------------------------------------------- 1.Learn 4in1 TOYDIY is 4in1 3D printer. The four functions (FDM printing/FDM-Dual printing /Laser engraving /CNC engraving) are completed by three different tool heads (FDM-dual toolhead /Laser toolhead /CNC toolhead) and three different settings of firmware (different firmware will display FDM 3D Printer/Laser 3D Printer/CNC 3D Printer respectively on the screen). - Page 26 Current firmware toolhead type Laser Print Guide Utility *Tips : If the screen menu does not display the correct function header. Please perform this step (2) again and switch the power again. --------------------------------------------------------------------------------------------------------------------------------------- B EcubMaker TOYDIY basic setup and installation...
-
Page 27: Fdm Function Demonstration
*Tips : The initial position of the filament front must be placed in right place, otherwise it will cause the toolhead plug or printing failure. ------------------------------------------------------------------------------------------------------------------------------------------ B EcubMaker TOYDIY basic setup and installation... - Page 28 (3)Auto home-Nozzle heating-bed heating-Start Printing. (4)Observe if the printing process is normal and wait for the printing to complete. (5)Remove the printing plate, bend the plate, and remove the model. ------------------------------------------------------------------------------------------------------------------------------------------ B EcubMaker TOYDIY basic setup and installation...
- Page 29 Back > Z-offset Amend:-0.20 *Tips : This step has a very detailed video tutorial, it is recommended to read the manual and then learn through video tutorial to deepen the impression . ------------------------------------------------------------------------------------------------------------------------------------------ B EcubMaker TOYDIY basic setup and installation...
-
Page 30: Laser Function Demonstration
(4)Step4:Set Origin. Click Set Origin to save the current position as the center of the print. (5)Step5:Print From SD. select Laser Engraving Test Modle.gcode and print it. ------------------------------------------------------------------------------------------------------------------------------------------ B EcubMaker TOYDIY basic setup and installation... - Page 31 (5)Step4:Adjust Finish. Main EcubMaker TOYDIY > Set Laser Focus Laser 3D Printer ChangeToolHeader Laser Print Guide Restore Defaults > Utility Printer info Back > Step1:Auto Home Step2:Move to Center Step3:Adjust focus Step4:Adjust Finish ------------------------------------------------------------------------------------------------------------------------------------------ B EcubMaker TOYDIY basic setup and installation...
-
Page 32: Cnc Function Demonstration
CNC cutter from falling . Make sure to use original tool. (2)Install CNC plate and fixture.Please fix the CNC plate, CNC fixture, magnet/ washer and CNC hand screws on the print base plate.Refer to the figure below. --------------------------------------------------------------------------------------------------------------------------------------- B EcubMaker TOYDIY basic setup and installation... - Page 33 (2)Step2:Move Axis。Move axis > Move XYZ,The tip of the CNC cutter is aimed at the center of the surface of the object being processed(The gap between CNC bit and PMMA must be same thickness as a piece of A4 paper)。 ------------------------------------------------------------------------------------------------------------------------------------------ B EcubMaker TOYDIY basic setup and installation...
- Page 34 Note: CNC engraving is a high intensity processing, processing must be sure not to touch the equipment.At the same time, the subsequent continuous processing time of the new engraving model should not exceed 3 hours, --------------------------------------------------------------------------------------------------------------------------------------- B EcubMaker TOYDIY basic setup and installation...
- Page 35 Help -------------------------------------------------------------------------------------------------------------------------------------------- TOYDIY is a multi-function 3D printer, because the text description content is limited.For more demos and video tutorials, check out the SD card content, as well as the latest tutorials and video tutorials available on the official website or Our Official Youtube channel.
-
Page 36: Ecubware Slice Settings
EcubWare slice Settings ------------------------------------------------------------------------------------------------------------------------------------------ D 软件安装和使用说明... - Page 37 1. Introduction to EcubWare EcubWare is a 3D model slicing software. It is only suitable for TOYDIY made by EcubMaker. TOYDIY does not support other slicing software. Please download the detailed parameter Settings and instructions from the official website.
-
Page 38: Setup Ecubware
Setup Ecubware -------------------------------------------------------------------------------------------------------------------------------------------- Set the path and click next Click next --------------------------------------------------------------------------------------------------------------------------------------- C EcubWare installation and instructions... - Page 39 Setup Ecubware -------------------------------------------------------------------------------------------------------------------------------------------- Installing... The installation complete --------------------------------------------------------------------------------------------------------------------------------------- C EcubWare installation and instructions...
- Page 40 -------------------------------------------------------------------------------------------------------------------------------------------- 3.FDM 3D print Applicable Toolhead: FDM Toolhead (1)FDM 3D print Function: Mainly use to slice single model. ① Open the EcubWare -- printer type:TOYDIY 4in1 ② Select STL model and import the model --------------------------------------------------------------------------------------------------------------------------------------- C EcubWare installation and instructions...
- Page 41 ③ Adjust the model and parameters ④ Click the "slicing" button to slice. Then, save the generated Gcode file into the SD card. Now it's ready to print with TOYDIY 3D printer. Note: Saving a Gcode must have to use English name. 0...
- Page 42 ① Open the EcubWare -- select printer model TOYDIY for FDM-Dual ToolHead only ② Select stl model. The Dual-color model needs two stl files that are matched and nested.
- Page 43 EcubWare Settings -------------------------------------------------------------------------------------------------------------------------------------------- ③ Select the same print Filament for each stl file and choose the extruder for both stl file. ④ Select two models and merge the two stl models into a composite model. --------------------------------------------------------------------------------------------------------------------------------------- C EcubWare installation and instructions...
- Page 44 ⑤ Set printing parameters for the materials of extruder ① and extruder ② , respectively. ⑥ Click the "slicing" button to slice. Then, save the generated Gcode file into the SD card. Now it's ready to print with TOYDIY 3D printer. Note: When saving as Gcode file, please use an English name .
-
Page 45: Other Function
EcubWare Settings -------------------------------------------------------------------------------------------------------------------------------------------- 4.Other Function (1)View shows ① Entity view Description: Display the entity of the model intuitively, offer multi-angle observation. The default view in the software is "Solid view", and each view is switch through the buttons in the following red area. ②... - Page 46 EcubWare Settings -------------------------------------------------------------------------------------------------------------------------------------------- ⑤ Speed display ⑥ Layer density display --------------------------------------------------------------------------------------------------------------------------------------- C EcubWare installation and instructions...
- Page 47 EcubWare Settings -------------------------------------------------------------------------------------------------------------------------------------------- ⑦ Drag the slider to display --------------------------------------------------------------------------------------------------------------------------------------- C EcubWare installation and instructions...
- Page 48 EcubWare Settings -------------------------------------------------------------------------------------------------------------------------------------------- (2)Model color Settings ① Same materials multi-color display Description: easy to observe the multi-color model a.Enter Manage Materials b. Edit colors Description: create filament type --------------------------------------------------------------------------------------------------------------------------------------- C EcubWare installation and instructions...
- Page 49 EcubWare Settings -------------------------------------------------------------------------------------------------------------------------------------------- c.Edit the color --------------------------------------------------------------------------------------------------------------------------------------- C EcubWare installation and instructions...
- Page 50 EcubWare Settings -------------------------------------------------------------------------------------------------------------------------------------------- d.Activate the color --------------------------------------------------------------------------------------------------------------------------------------- C EcubWare installation and instructions...
- Page 51 EcubWare Settings -------------------------------------------------------------------------------------------------------------------------------------------- (3)Language Settings The EcubWare supports multi-language Settings, with English as the default. The language setting method is as follows: ① Open Settings -- Configure EcubWare: ② Language selection: ③ Reboot the EcubWare to implement the language switch. --------------------------------------------------------------------------------------------------------------------------------------- C EcubWare installation and instructions...
-
Page 52: Firmware Upgradation
(4) Firmware Upgradation ① Installs the driver program in the computer. Open the SD card > EcubMaker > s of t w a re a n d d r i v e r > D r i v e _ 6 4 b i t o r c l i c k t h e D o w n l o a d of TOY D I Y _ Drive_64bit_20190628 in the the website http://www.ecubmaker.com/support-down.aspx... - Page 53 EcubWare Settings -------------------------------------------------------------------------------------------------------------------------------------------- --------------------------------------------------------------------------------------------------------------------------------------- C EcubWare installation and instructions...
- Page 54 EcubWare Settings -------------------------------------------------------------------------------------------------------------------------------------------- ① Connect the printer to the computer via USB ② Settings-Configure EcubWare --------------------------------------------------------------------------------------------------------------------------------------- C EcubWare installation and instructions...
- Page 55 EcubWare Settings -------------------------------------------------------------------------------------------------------------------------------------------- ③ Upgrade Firnware ④ Uplode custom Frrmware --------------------------------------------------------------------------------------------------------------------------------------- C EcubWare installation and instructions...
- Page 56 EcubWare Settings -------------------------------------------------------------------------------------------------------------------------------------------- --------------------------------------------------------------------------------------------------------------------------------------- C EcubWare installation and instructions...
- Page 57 EcubWare Settings -------------------------------------------------------------------------------------------------------------------------------------------- ⑤ Restore Defaults ⑥ Restart the printer --------------------------------------------------------------------------------------------------------------------------------------- C EcubWare installation and instructions...
- Page 58 EcubWare Settings -------------------------------------------------------------------------------------------------------------------------------------------- 5.Laser Engraving Applicable Toolhead: Laser Toolhead (1) Open the EcubWare -- Add machine--TOYDIY 4in1--Laser Toolhead Next (2) Introduction of interface --------------------------------------------------------------------------------------------------------------------------------------- C EcubWare installation and instructions...
- Page 59 EcubWare setup -------------------------------------------------------------------------------------------------------------------------------------------- ① Main menu. File menu includes importing picture files, opening last opened files and saving gcode; language can be switched between Chinese and English, and restart after switching; other menus are divided into online help, official website and sub-menu. ②...
- Page 60 EcubWare setup -------------------------------------------------------------------------------------------------------------------------------------------- ⑦ Laser Engraving Preview: The ideal effect is a little different from the reality. Original picture: imported original picture ⑧ Graphic display area ⑨ Import: Import picture files; Slice: Transform graphics into gcode files recognized by macine; Save: Save as gcode files.
- Page 61 EcubWare Setting -------------------------------------------------------------------------------------------------------------------------------------------- (5) Setting Carving Parameters,Generating engraving files. --------------------------------------------------------------------------------------------------------------------------------------- C EcubWare installation and instructions...
- Page 62 EcubWare Setting -------------------------------------------------------------------------------------------------------------------------------------------- Among them: quality. The denser the point is, the greater the value is, the denser the display is, and the reference mass value is 10. Air speed. Represents the movement speed of the laser head in the non-sculptured area of the image. Carving speed.
- Page 63 EcubWare Setting -------------------------------------------------------------------------------------------------------------------------------------------- 6.CNC Carving Applicable Toolhead: CNC Toolhead (1) Open the EcubWare -- Add machine--TOYDIY 4in1--CNC Toolhead Next (2) Interface --------------------------------------------------------------------------------------------------------------------------------------- C EcubWare installation and instructions...
- Page 64 EcubWare Setting -------------------------------------------------------------------------------------------------------------------------------------------- 1.File Import button. Vector graph supports opening "*. SVG", "DXF". Bitmap files support "*. JPG", "*. JPEG" *. BMP "," *. GIF "," *. PNG ". 2.Create a drawing. You can create text and simple shapes. 3.Zoom the drawing. If x and y are greater than 180mm and out of the range of the platform, the graphic size displays a red warning.
- Page 65 EcubWare Setting -------------------------------------------------------------------------------------------------------------------------------------------- (4) Import Bitmap --------------------------------------------------------------------------------------------------------------------------------------- C EcubWare installation and instructions...
- Page 66 EcubWare Setting ------------------------------------------------------------------------------------------------------------------------------------------- Note: Generally, all supported bitmap formats can be opened, but some bitmaps have a border around them after they are imported into the software. --------------------------------------------------------------------------------------------------------------------------------------- ----------------------------------------------------------------------------------------------------------------------------------------- --------------------------------------------------------------------------------------------------------------------------------------- C EcubWare installation and instructions...
- Page 67 EcubWare Setting EcubWare Setting ------------------------------------------------------------------------------------------------------------------------------------------- ------------------------------------------------------------------------------------------------------------------------------------------- (5) Import gcode --------------------------------------------------------------------------------------------------------------------------------------- C EcubWare installation and instructions...
- Page 68 EcubWare Setting ------------------------------------------------------------------------------------------------------------------------------------------- (6) Create Text (7) Creat Shape --------------------------------------------------------------------------------------------------------------------------------------- ----------------------------------------------------------------------------------------------------------------------------------------- --------------------------------------------------------------------------------------------------------------------------------------- C EcubWare installation and instructions...
- Page 69 EcubWare Setting ------------------------------------------------------------------------------------------------------------------------------------------- (8) Create Embossed Enter the text to be created this software does not support the function of creating relief, but provides a tool to create relief, that is, the fusion360 of Autodesk company. For details, please refer to "fusion360 create relief download address" and "fusion360 create relief tutorial". --------------------------------------------------------------------------------------------------------------------------------------- C EcubWare installation and instructions...
- Page 70 EcubWare Setting ------------------------------------------------------------------------------------------------------------------------------------------- (9) Note 9.1 The vector file cannot be opened A. Problems in graphics (line color, encrypted, etc.) B. Tool problem generating vector file. 9.2 Gcode generated by bitmap file has border Generally with the bitmap file itself line or color problems. 9.3 Z does not rise when carving A.
- Page 71 EcubWare Setting ------------------------------------------------------------------------------------------------------------------------------------------- Read me: We have taken details demostration tutorial video for all the function individually along with the software function, after reading the manual you are required to watch the video from your SD or you can visit our Website and our Youtube channel. During your use if you find any kind of difficulty feel free to contact us.
-
Page 72: Equipment Maintenance
Equipment maintenance... -
Page 73: Guide Rail Maintenance And Cleaning
Equipment maintenance ------------------------------------------------------------------------------------------------------------------------------------------- 1.Maintenance and cleaning of guide rail This machine uses the stainless steel guide rail, used in the normal environment (25 degrees temperature, 30~60% humidity) will not get rusty. In order to ensure the better performance of the guide rail, it is necessary to coat XYZ three linear guide rail with lubricating oil regularly(usually 1 month) . - Page 74 Common faults...
-
Page 75: Common Faults
Common faults ------------------------------------------------------------------------------------------------------------------------------------------- We have uploaded many common problems video tutorials on SD card and official website. If you have any problems, please read the tutorials first and solve them. If you still can't solve them, please contact us. 1.Unable to start-up Problem: After plugging in the power, turn on the power button. - Page 76 Common faults ------------------------------------------------------------------------------------------------------------------------------------------- Problem: When the autohome operation is performed or the system autohome before printing, a certain axis can not back to zero (usually there will be a strong krkr sound). Reason Inspection: When returning to zero, check out whether the endstop is triggered (if the endstop is triggered, the indicator light will be bright) at first.
- Page 77 195 degrees). After the temperature setting is work, the extruder on the back of TOYDIY can be checked for normal rotation after heating. If not, the extruder is abnormal. If the extruder is working normally and makes a tatata sound, it is a sprinkler plug.
- Page 78 Ecubmaker@zd3dp.com(General query) ; Support@zd3dp.com(For Support) WebSite: http://www.ecubmaker.com Jinhua EcubMaker Technology Co. LTD Add:Room 1111, 1-1 / f, zhongke science park, no. 589 longtan road, jinhua, zhejiang YOUTUBE:(Search:EcubMaker 3D Printer) Facebook:http://www.facebook.com/Ecubmaker3D/...
Need help?
Do you have a question about the TOYDIY and is the answer not in the manual?
Questions and answers