Table of Contents
Advertisement
Quick Links
Advertisement
Table of Contents

Subscribe to Our Youtube Channel
Related Manuals for Adexa VS2660


Summary of Contents for Adexa VS2660
- Page 1 VS2660 VACUUM SEALER INSTRUCTIONS...
-
Page 2: Table Of Contents
CONTENTS IMPORTANT SAFEGUARDS---------------------------------------------2 CONSTRUCTION AND FUNCTIONS-----------------------------------4 OPERATING INSTRUCTIONS--------------------------------------------7 HINTS FOR BEST VACUUMING PERFORMANCE ---------------11 FOOD STORAGE AND SAFETY INFORMATION-------------------14 GENERAL RULES FOR FOOD SAFETY ------------------------------16 CLEANING AND MAINTENANCE---------------------------------------17 TROUBLESHOOTING------------------------------------------------------18 DISPOSAL OF THE DEVICE----------------------------------------------21 FOOD PRESERVATION GUIDELINES---------------------------------22 WIRING INSTRUCTIONS – FOR U.K. ONLY.----------------------- -- 23 - 1 -... -
Page 3: Important Safeguards
IMPORTANT SAFEGUARDS When using this electrical appliance, safety precautions should always be observed, including the following: READ ALL INSTRUCTIONS 1. Carefully read all of the instructions before using this appliance and save for future reference. 2. Before plugging cord into wall outlet, or disconnecting, make sure that the cover of the machine is in unlocked condition, and unplug from outlet when not in use or before cleaning. - Page 4 a heat source. 11. It’s better not to use an extension cord with this unit. However, if one is used, it must have a rating equal to or exceeding the fating of this appliance. 12. When disconnect, to avoid any injury, please unplug by grasp the plug, not the cord.
-
Page 5: Construction And Functions
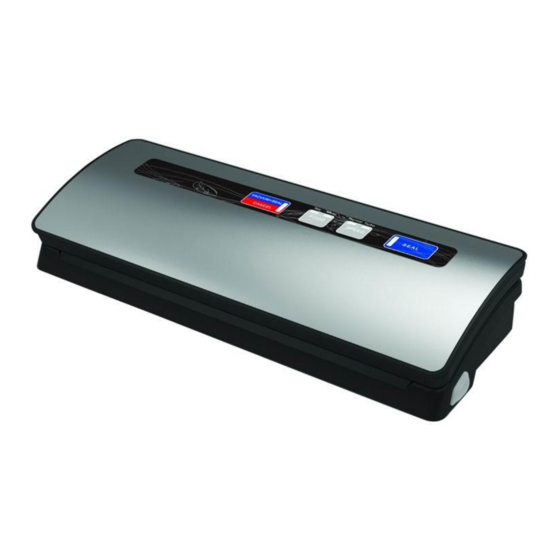
CONSTRUCTION AND FUNCTIONS 1. Vacuum&seal / Cancel: This button has two functions depending on the machine status: ⚫ At stand-by condition, it starts the automatic operation of vacuuming the bag and then automatiically seals the bag when vacuum is complete; ⚫... - Page 6 5. LED Indicators: Indicates the status of vacuum or seal process, and - 5 -...
- Page 7 the status of the machine setting. 6. Canister switch: To start vacuuming for canisters, jar lids, wine stoppers or other accessories through a hose. 7. Release Button: two provided. Press both sides to open the cover. And release the vacuum pressure inside the machine. 8.
-
Page 8: Operating Instructions
OPERATING INSTRUCTIONS I. Making a bag with bag roll Fig.1 1. Plug the unit into a power source; scissors to cut a bag from the bag rolls 2. Use – Fig.1 to the length which you want 3. Put one end of the bag on top of the sealing Strip, but not enter the vacuum chamber –... - Page 9 II. Vacuum packaging with a bag Fig.1 1. Put the items inside the bag. Use only the specially designed vacuum bags supplied by us with vacuum channels. 2. Clean and straighten the open end of the bag, make sure no dust, wrinkle or ripples. Fig.2 3.
- Page 10 7. The vacuum packaging is done. Press the release buttons on the both side of the machine simultaneously to open the cover and take out the packed bags – Fig. 4 NOTE: ⚫ For best sealing effect, it is better to let the appliance cool down for 1 minute before using it again.
- Page 11 of canister cover is turned to “SEAL” position– Fig. 1&2 4.Press the canister switch (just above the air intake) to start vacuuming– Fig. 3. To ensure there is no air leaking between the cover and the canister, use your hand to push down the cover Knob at the beginning Fig.3 of the vacuuming work.
-
Page 12: Hints For Best Vacuuming Performance
Hints for best vacuuming performance Do not put too much stuff inside the bag: leave enough empty space in the open end of the bag so that the bag can be placed in the vacuum chamber area without creating wrinkles or ripples; Do not wet the open end of the bag. - Page 13 During bag vacuum packaging process, small amounts of liquids, crumbs or food particles can be inadvertently pull into the vacuum chamber, clogging the pump and damaging your appliance. To avoid this, freeze moist and juicy foods first before sealing bags or place a folded paper towel near the inside top of the bag.
- Page 14 general, vacuum packaging keeps food fresh up to three times as long as other traditional food storage methods. Once this appliance as an indispensable part of your life, it will less food spoilage and save more money. Cook in advance to vacuum seal and store individual portions or entire meals.
-
Page 15: Food Storage And Safety Information
FOOD STORAGE AND SAFETY INFORMATION This Vacuum Sealer will change the way you purchase and store foods. Once you are accustomed to vacuum packing, it will become an indispensable part of your food preparation. When preparing and vacuum packing foods using your vacuum sealer, there are certain procedures that must be followed to ensure food quality and safety. - Page 16 botulinum, and they can grow under the right conditions without air: in the temperature range of 40˚F to 115˚F(4˚to 46˚). Conditions for growth are foods lacking acid, low oxygen environment and temperatures greater than 40˚F(4˚c) for extended time. 7. Frozen, dried, high in acid, salt or sugar foods can resistant to botulinum.
-
Page 17: General Rules For Food Safety
14. When packaging large volumes of meat, fish, or any food products, we advise the following: 1. Make sure to properly clean your hands, all utensils and surfaces to be used for cutting and vacuum packing foods. 2. Once you've packed perishable foods, refrigerate or freeze them immediately. -
Page 18: Cleaning And Maintenance
4. Don't consume foods if they are perishable and have been left out at room temperature for more than a few hours. This is especially important if they have been prepared with a thick sauce, in a vacuum package, or in a low oxygen environment. 5. -
Page 19: Troubleshooting
Accessories Washing all vacuum accessories in warm water with a mild dishwashing soap, But do not immerse cover in water. 1. Canister bases (not lids) are top rack dishwasher safe. But canister cover should be wiping down with a damp cloth. 2. - Page 20 and position. Make sure no breaking or distortion of the foam seal gaskets on both the cover and on the base around the vacuum chamber. Wipe clean and smooth them back into place. Vacuum bag may have a leak. To test, seal the bag with some air in it, submerge in water, and apply pressure.
- Page 21 Air has re-entered into the bag after being sealed. Leaks along the seal which can be caused by wrinkles, debris crumbs, grease or liquids. Reopen bag, wipe the top inside of the bag and smooth it out along the sealing strip before resealing. The release of natural gases or fermentation form foods (such as fresh fruits and vegetables) may occur.
-
Page 22: Disposal Of The Device
DISPOSAL OF THE DEVICE PROTECTION OF THE ENVIRONMENT At the end of the life of your product, it should go to a specially adapted waste-recycling centre. ENVIRONMENT PROTECTION FIRST 1. The symbol on the product or on its packaging indicates that this product may not be treated as household waste. -
Page 23: Food Preservation Guidelines
FOOD PRESERVATION GUIDELINES Classificatio Normal Vacuum Food Items Temperature Preservation Preservation 5 ± 3 ℃ 2 ~ 3days 8 ~ 9days Fresh Raw Meat Fresh Fish/ Sea 5 ± 3 ℃ 1 ~ 3days 4 ~ 5days Food 5 ± 3 ℃ 4 ~... -
Page 24: Wiring Instructions - For U.k.only
WIRING INSTRUCTIONS – FOR U.K.ONLY. SAFETY NOTES – FOR REWIREABLE OR MOULDED PLUG The mains lead of this appliance may be already fitted with a BS 1363 13 A plug. Should the fuse need to be replaced, a 13 A ASTA approved BS 1362 fuse must be used.
Need help?
Do you have a question about the VS2660 and is the answer not in the manual?
Questions and answers