
Related Manuals for Cafe Advantium CSB923


Summary of Contents for Cafe Advantium CSB923
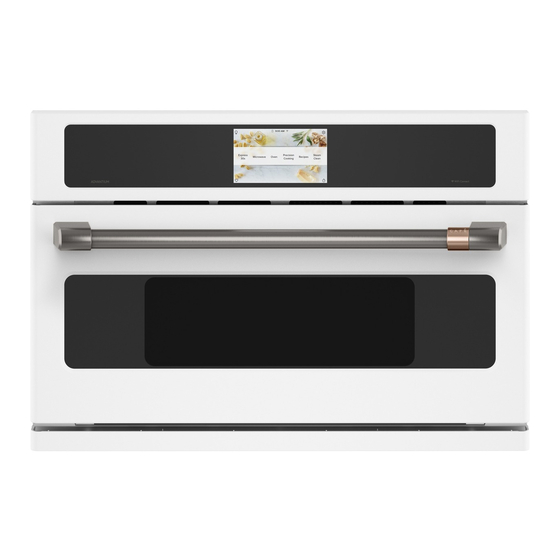
- Page 1 INSTALLATION INSTRUCTIONS Advantium 240V ® Built-In Wall Oven CSB923 MFL59060927_00 31-2000356 Rev.0 02-19 GEA...
-
Page 2: Table Of Contents
Safety Information BEFORE YOU BEGIN CONTENTS Read these instructions completely and Design Information carefully. Models Available ..........2 Product Dimensions and Clearances ....3 IMPORTANT — Save these instructions Tools and Parts Required ......... 3 for local inspector’s use. Advance Planning ..........3 IMPORTANT —... -
Page 3: Product Dimensions And Clearances
Design Information PRODUCT DIMENSIONS AND CLEARANCES NOTE: Appearance will vary by model. 21-1/2” 29-3/4” 2-1/4″ 20 1/8” 1” 1-1/4″ 13 1/4” ADVANCE PLANNING TOOLS AND PARTS REQUIRED • These ovens may be installed directly into a 30” (NOT SUPPLIED wide oven cabinet. •... -
Page 4: Installation Preparation
Installation Preparation ELECTRICAL REQUIREMENTS grounded receptacle must be installed. See instructions packed with the warming drawer. Single Advantium Installation WARNING Product rating is 120/208 or 120/240 volt, 60 Hz, 30 amps. This product must be connected to a supply • The electrical power to the oven branch circuit must circuit of the proper voltage and frequency and protected be shut off while line connections are being made. -
Page 5: Preparing The Opening
Installation Preparation IMPORTANT: Always maintain 36-3/4” minimum height from the floor to the cutout in any single or combined installation. PREPARE THE OPENING PREPARE THE OPENING (CONT.) Installation over a Warming Drawer: The Advantium 240V can be installed in combination with other Built-In appliances. - Page 6 Installation Preparation IMPORTANT: Always maintain 36-3/4” minimum height from the floor to the cutout in any single or combined installation. PREPARE THE OPENING PREPARE THE OPENING (CONT.) (CONT.) Installation over a Wall Oven: Installation over a Wall Oven and Warming Drawer: Construct 23-1/2”...
- Page 7 Flush Mount Installation Preparation PREPARE THE INTERIOR PREPARE THE OPENING Cut and install side cleats: The Advantium Built-In Oven can be installed • Cut side wood cleats to height of cabinet opening in combination with other Advantium Built-In and approx. 2-1/2” in depth. Install, on each side, ovens.
-
Page 8: Flush Mount
Installation Preparation with Accessory Storage Drawer Preparation with an Accessory Storage Drawer As needed, see the Standard Mount Installation Preparation OR Flush Mount Installation Preparation for configuration details. Note the modified cutout height below. PREPARE THE OPENING (cont.) The Advantium Built-In Oven can be installed in combination with other GE Appliances/Monogram appliances. Always follow each product’s Installation Instructions to complete the installation. -
Page 9: Installation Instructions
Installation Instructions 1 REMOVE THE PACKAGING AND PARTS • Remove all packing material and tape. • Locate parts package containing mounting screws. Rack • Remove the oven from the carton. Do not lift unit by handle or conduit. Two people are required to lift this oven. - Page 10 Installation Instructions 2 ROUTE CONDUIT THROUGH 2 ROUTE CONDUIT THROUGH CUTOUT CUTOUT (CONT.) When connecting to a 3-conductor branch CAUTION Two people are required to lift circuit: the oven into the opening. • Connect oven red lead to branch circuit red lead. Grasp the bottom at front and rear.
-
Page 11: Step 3, Install Bottom Trim
Installation Instructions 4 INSTALL MOUNTING SCREWS 3 INSTALL BOTTOM TRIM NOTE: If installing the Advantium 240 Oven with an accessory storage drawer, the bottom trim is not required. Proceed to Step 4. • Align bottom trim tabs to slots in the bottom of the oven. - Page 12 Notes 31-2000356 Rev. 0...
- Page 13 Notes 31-2000356 Rev.0...
- Page 14 NOTE: While performing installations described in this book, safety glasses or goggles should be worn. NOTE: Product improvement is a continuing endeavor at General Electric. Therefore, materials, appearance and specifications are subject to change without notice. Printed in China 31-2000356 Rev. 0...
- Page 15 INSTRUCTIONS D'INSTALLATION Four encastré Advantium 240 V ® CSB923 MFL59060927_00 31-2000356 Rév. 0 02-19 GEA...
- Page 16 Consignes de sécurité AVANT DE COMMENCER TABLE DES MATIÈRES Lisez attentivement toutes ces instructions. Information de conception IMPORTANT Modèles disponibles ............2 – Conservez ces instructions pour Dimensions du produit et dégagements ......3 l'inspecteur local. Outils et pièces nécessaires ..........3 IMPORTANT Planification.................3 –...
-
Page 17: Dimensions Du Produit Et Dégagements
Information de conception DIMENSIONS DU PRODUIT ET DÉGAGEMENTS l'autre. REMARQUE : L'aspect varie d'un modèle à 21-1/2 po 29-3/4 po 2-1/4 po 20-1/8 po 1 po 1-1/4 po 13-1/4 po PLANIFICATION OUTILS ET PIÈCES NÉCESSAIRES • Ces fours peuvent être installés directement dans une (NON FOURNIS) armoire de four de 30 po. -
Page 18: Préparatifs Avant L'installation
Préparatifs avant l'installation EXIGENCES ÉLECTRIQUES Installation Advantium simple AVERTISSEMENT Le produit est coté à 120/208 ou 120/240 volts, 60 Hz, 30 ampères. Ce produit doit être branché à un circuit • L'alimentation électrique du circuit de dérivation du four doit d'alimentation de tension et de fréquence appropriées être coupée avant de faire les raccordements. -
Page 19: Préparation De L'ouverture (Installation Sans Tiroir De Rangement Des Accessoires)
Préparatifs avant l'installation IMPORTANT : Maintenez toujours une hauteur minimum de 36-3/4 po au-dessus du plancher jusqu’à la découpe d'une installation simple ou combinée. PRÉPARATION DE L'OUVERTURE PRÉPARATION DE L'OUVERTURE (suite) L'Advantium 240 V peut être installé en combinaison avec Installation au-dessus d'un tiroir-réchaud : d'autres appareils encastrés. - Page 20 Préparatifs avant l'installation IMPORTANT : Maintenez toujours une hauteur minimum de 36-3/4 po au-dessus du plancher jusqu’à la découpe d'une installation simple ou combinée. PRÉPARATION DE L'OUVERTURE PRÉPARATION DE L'OUVERTURE (suite) (suite) Installation au-dessus d'un four encastré : Installation au-dessus d'un four encastré et d'un tiroir-réchaud : 23-1/2 po Construisez un...
- Page 21 Préparatifs de montage encastré PRÉPARATION DE L'INTÉRIEUR PRÉPARATION DE L'OUVERTURE Coupez et installez les taquets latéraux : Le four encastré Advantium peut être installé en combinaison • Coupez les taquets latéraux en bois à la hauteur de avec d'autres fours encastrés Advantium. Suivez toujours les l'ouverture de l'armoire et d'une profondeur d'environs instructions d'installation de chaque produit.
-
Page 22: Montage Encastré
Préparatifs d'installation avec un tiroir de rangement des accessoires Préparatifs avec un tiroir de rangement des accessoires Au besoin, consultez les préparatifs d'installations standard OU les préparatifs de montage encastré pour les détails de la configuration. Veuillez noter la hauteur modifiée de la découpe ci-dessous. PRÉPARATION DE L'OUVERTURE (suite) Le four encastré... -
Page 23: Instructions D'installation
Instructions d'installation RETIRER L'EMBALLAGE ET LES PIÈCES • Retirez tout le matériel d'emballage et le ruban adhésif. • Repérez le sachet de pièces contenant les vis de montage. • Retirez le four de la boîte. Ne soulevez pas le four par la Grille poignée ou le conduit. - Page 24 Instructions d'installation ACHEMINER LE CONDUIT DANS ACHEMINER LE CONDUIT DANS LA DÉCOUPE LA DÉCOUPE (suite) Raccordement au circuit de dérivation à ATTENTION l faut deux personnes pour lever le 3 conducteurs : four et le placer dans l'ouverture. • Raccordez le fil rouge du four au fil rouge du circuit Saisissez le fond à...
- Page 25 Instructions d'installation INSTALLER LA FINITION INSTALLER LES VIS DE MONTAGE INFÉRIEURE REMARQUE : Si vous installez le four Advantium 240 V avec un tiroir de rangement des accessoires, la finition inférieure n'est pas requise. Passez à l'étape 4. • Alignez les pattes de finition inférieure avec les fentes dans le bas du four.
- Page 26 Notes 31-2000356 Rév. 0...
- Page 27 Notes 31-2000356 Rév. 0...
- Page 28 REMARQUE : Lors de la procédure d'installation décrite dans ce manuel, il est recommandé de porter des lunettes de sécurité. ÉLECTROMÉNAGERS GE REMARQUE : L'amélioration des produits est un effort continu chez General Electric. Par conséquent, les matériaux, l'apparence et les spécifications Imprimé...
Need help?
Do you have a question about the Advantium CSB923 and is the answer not in the manual?
Questions and answers