Table of Contents
Advertisement
Quick Links
Advertisement
Table of Contents

Subscribe to Our Youtube Channel
Related Manuals for Sana 727 Supreme


Summary of Contents for Sana 727 Supreme
- Page 3 SANA SUPREME INSTRUCTION MANUAL Safety precautions Ingredient preparation and troubleshooting Parts and assembly Operating the Sana Supreme Cleaning the Sana Supreme Recommended juicer settings Specifications 1. This juicer is intended for household use only. 2. Please read this instruction manual thoroughly before using the juicer.
-
Page 4: Safety Precautions
Safety precautions Warning Failure to comply with the label instructions may result in injury. Do not plug or unplug the power cord with wet hands. For your safety, check whether your outlet is grounded. (Make sure that you use a grounded outlet.) They should not be grounded to gas pipes, plastic Only use with 220-240V power water pipes, or telephone lines. - Page 5 Safety precautions Warning Failure to comply with the label instructions may result in injury. Do not put your fingers or other foreign objects in the hole into which the Disconnect the power cord from the outlet when the product is not in use. auger fits.
- Page 6 Safety precautions Ingredients that require attention and how to prepare them Do not juice or process the following ingredients. They can damage the juicing screen and auger. When juicing large batches, repeat the process of juicing about 1 kg of an ingredient, disas- sembling the product, and then washing it.
-
Page 7: Troubleshooting
Troubleshooting Do not insert anything into the feeding tube besides the pusher, Please check the following troubleshooting steps before requesting including kitchen utensils or tools. It may get caught in the auger, causing repair. If you need service, please contact the retailer from whom you the auger and juicing screen to break. -
Page 8: Parts And Assembly
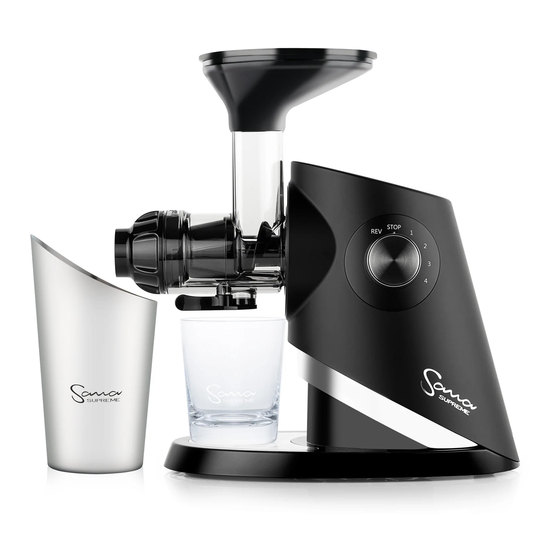
Feed Chute Pulp outlet 1 Parts and Assembly Power Dial Juice Outlet Page 08... -
Page 9: Part Names
Part Names Pusher Main Body Drum Juice Cap Auger Fine juicing screen Coarse juicing screen Homogenizing screen Drum Cap Pulp blade Drum Cap gasket Blade Stopper Spare Blade Stopper Cleaning Brush Juice glass Pulp Cup Hopper Lid Juice glass strainer Page 09... -
Page 10: Assembly For Juicing
Assembly for juicing Select the proper juicing screen. Fine screen: Creates higher pressure, more yield, and less pulp. Suitable for firm fruits and vegetables. Coarse screen: Bigger holes are less likely to clog with soft or fibrous produce. Suitable for berries, soft apples, pineapple, and other soft fruits. -
Page 11: Assembly For Homogenizing
Assembly for homogenizing Assembly for homogenizing The homogenizing screen doesn’t separate juice from pulp. Instead it crushes and mixes ingredients together. Use it with the juice cap closed. 1. Insert the drum into the main body and turn the drum 2. - Page 12 Feed Chute 2 Operation instructions Power Dial Drum Cap Assem- bly Guide Mark Page 12 Pulp outlet...
- Page 13 Juicing coarse screen fine screen Use the fine screen for most produce. If juicing soft produce like berries, pineapple, peaches, softer apples, etc., use the coarse screen. Tip: If you prefer virtually pulp-free juice, place the strainer on the juice glass before juicing. Place the juice glass under the juice outlet.
- Page 14 Homogenizing Use the homogenizing screen (the black screen with no holes). Place a container under the drum cap and close the Insert a small amount of ingredients at a time. Turn on the power dial. juicing cap. Set the dial according to the chart on page 20. Use the pusher if needed.
- Page 15 About the Power Dial and Auto-Reverse Option Power Dial Operation 1. Turn the dial clockwise to the recommended setting to start the juicer. 2. Turning the dial to STOP causes the motor to gradually stop to ensure safety. 3. Holding the dial in the REV position causes the motor to run backward slowly.
- Page 16 3 Cleaning/tips Drum Auger Screen Drum Cap Page 16...
- Page 17 Cleaning Wash the drum set in water, and wipe the main body with a well-squeezed damp towel. 1. Close the juice cap to prevent drips, then remove the drum by pressing the button and turning the drum clockwise. 2. Wash the drum cap, screen, auger, and drum under running water. Use the cleaning brush on the juicing screen.
- Page 18 Disassembling the Drum Cap Press the blade spindle with your finger. Remove the stopper, blade, and drum cap gasket. Clean the parts under running water and dry them Make sure not to lose the stopper. thoroughly before reassembly. Assembling the Drum Cap Make sure the wider side of the drum cap gasket is Insert the blade spindle into the drum cap first.
- Page 19 Notes: Page 19...
- Page 20 Juicing Settings Recommended for Different Ingredients INGREDIENT Berries Soft apples Pineapple Peach Firm apples Almonds (softened for almond milk) Carrot Leafy greens / celery Sorbet Oil extraction Orange Tomato Grapes Page 20...
-
Page 21: Product Specifications
Product Specifications Sana Supreme Juicer Product Name Model Name Rated Voltage 220-240 V 50/60Hz Rated Frequency Rated Power 150 W Consumption 40/65/90/120 rpm Revolutions Per Minute 1.4 m Cord Length BLDC Motor Motor 5 A 250 V Fuse Product Weight... - Page 22 Sana Supreme’s powerful motor, the Sana oil extractor makes pressing your own oil simple and easy. Just attach the oil extractor to your Sana Supreme juicer, turn on the juicer, and pour your seeds or chopped nuts into the hopper. Almost immediately, oil will begin pouring into the included glass oil pitcher.
- Page 23 Get access to exclusive videos, new product announcements, special discount offers, recipes, and a members-only forum for tips and advice moderated by our Sana team. Register your Sana Supreme and get an additional one year warranty on the motor. It’s easy to do. Just visit the website below, or scan the QR code on your mobile device.
Need help?
Do you have a question about the 727 Supreme and is the answer not in the manual?
Questions and answers