Table of Contents

Related Manuals for AmeriWater Centurion Plus Heat


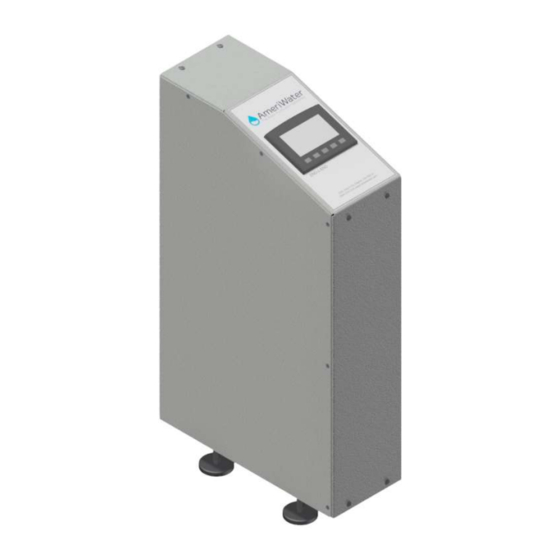
Summary of Contents for AmeriWater Centurion Plus Heat
- Page 1 AmeriWater Operation & Maintenance Manual The Water Purification Specialists Centurion Plus Heat Disinfection System 3345 Stop 8 Rd, Dayton, OH 45414 | 800 535 5585 | www.ameriwater.com 098-0007 Rev B Manufactured With Pride in The USA...
-
Page 3: Table Of Contents
Dealing with leaks from the unit ......................7 Unauthorized conversion and manufacturing replacement parts ............7 Warranty claims and liability ......................8 ABOUT YOUR CENTURION PLUS HEAT DISINFECTION DEVICE ............8 General Views ..........................8 Overview ............................9 Detailed description of disinfection process ..................9 INSTALLATION &... - Page 4 7.4.1 Standby ............................. 31 7.4.2 Storage Mode ..........................31 7.4.3 Preheat ............................. 32 7.4.4 Dispensing ..........................32 7.4.5 Manual Tank Drain ........................32 Operation ............................32 7.5.1 Start-Up............................. 32 7.5.2 System Operational Controls ......................33 Settings Descriptions and Defaults ....................41 Controller Detail View ........................
-
Page 5: General Information
This provides information required for trained renal technicians to use the device and perform the basic service and maintenance required on the Centurion Plus Heat disinfection device. Please read and understand all of the instructions carefully prior to using the device or carrying out any service or repairs. -
Page 6: Health & Safety
2.1 Cautionary Labeling There are a number of labels applied to the Centurion Plus Heat disinfection device which identify potential hazards to a user or service technician. See the list below for information regarding each label found on the device. -
Page 7: Rear Panel Labels
2.2 Rear Panel Labels Feed Water and Electrical Supply information is listed at top of label. Alarm will sound when an alarm condition is detected by the system controller. The label identifies the location of the Mains fuses for the system. Detailed information about the fuses can be found in Section 5.2.4. -
Page 8: Safety Considerations
Do not remove the side covers from the device while it is connected to a mains power supply unless you are properly trained to service or repair the system The system shall only be serviced by AmeriWater or suitably trained/authorized technician Failure to observe the instructions provided in this manual may compromise the safety performance and reliability of the system and may void any warranty ... -
Page 9: Residual Dangers
As a precaution, shut the RO system down to shut off the water supply to the Centurion Plus Heat disinfection device. Refer to the RO manual for detailed information on bring the RO to an immediate stop. -
Page 10: Warranty Claims And Liability
2.9 Warranty claims and liability This product is covered under the standard AmeriWater warranty policy. For specific terms and conditions contact your AmeriWater sales Representative. ABOUT YOUR CENTURION PLUS HEAT DISINFECTION DEVICE 3.1 General Views... -
Page 11: Overview
The Centurion Plus Heat disinfection device contains a 120 VAC outlet which is located behind the block off plate at the rear of the device. This plug is intended to be used to power an AmeriWater Centurion system. The Centurion Plus Heat disinfection device monitors the current draw from the AmeriWater Centurion device to prevent both systems from performing a heat disinfection at the same time. -
Page 12: Packing List
CLEAR included. Install kit is included with Centurion Plus Heat disinfection device Cart assembly may be purchased as a complete assembly with pretreatment filters installed or as a bare cart which requires the user to reuse the filter assembly from an existing MROC pretreatment cart. -
Page 13: Installation On Centurion Pretreatment Cart
4.3 Installation on Centurion Pretreatment cart The Centurion Plus Heat Disinfection Device is designed to be installed onto a cart with the AmeriWater MROC Heat Disinfection RO system. The Cart contains the sediment and carbon filtration required for the RO system to perform as intended. The following steps are required to install the Centurion Plus Heat disinfection device onto the Cart along with the MROC. - Page 14 With the check valves installed, reinstall the side cover ontop the MROC . e) Place the Centurion Plus Heat disinfection device onto the pretreatment cart in the location shown. Align the feet of the device with the slots on the cart and slide the device into the slots.
- Page 15 g) Place the MROC onto the pretreatment cart as shown. Use the locking pin to secure the foot of the system. Assembly should h) Install the water connections as detailed in Section 4.5.1. 098-0007 Rev B...
-
Page 16: Environment
Centurion Plus Heat disinfection device. 4.5 Checking Water Services The Centurion Plus Heat disinfection device will use a portable RO system as the feed water supply. The RO system must be capable of being connected to an 8mm/5/16” push-fit connection. It is recommended that the RO have a recirculation line back from the Hemodialysis machine. -
Page 17: Checking Electrical Services
4.7 Setting Time and Date The Centurion Plus Heat disinfection device will arrive set to Eastern Standard Time. The device will NOT auto update for daylight savings time. To adjust the date and time displayed, use the following steps: ... -
Page 18: Connection To Ro
Centurion RO system are included in the installation kit for the device. The tubing sections included with the installation kit will be labeled with the connection location for ease of install. The Centurion Plus Heat disinfection device will be placed on the extended Centurion pretreatment cart as shown in Section 4.3. -
Page 19: Performing First Disinfection Cycle
Prior to commissioning the Centurion Plus Heat disinfection device for dialysis use, an initial disinfection cycle shall be preformed to ensure the system functions as intended. All Centurion Plus Heat disinfection devices are functionally tested by AmeriWater prior to shipment. Refer to Section 8.3 for detailed information on performing a disinfection using the Centurion Plus Heat disinfection device. -
Page 20: Technical Information
Turn off the Feed water supply to the RO system. Turn off the Centurion Plus Heat disinfection device using the rocker switch at the rear of the system. Disconnect tubing from all water connections located at the rear of the device (only recommended if shipping the device to another building). -
Page 21: Drain Specifications
Plus Heat disinfection Operation. 5.2.4 Fuse Specification External: (Located at rear of unit) Type: 2 - 120 VAC, 12 A, fast blow, 0314012 - 0.25” OD x 1.25” L (AmeriWater PN 063-0006) NOTE: Fuses should only be replaced by an AmeriWater supplied, or AmeriWater approved fuse. -
Page 22: Product Water Storage Tank
Product Return Unused RO product water return from HD machine 5/16” (8 mm) Push-Fit System Drain Common system drain for RO reject water and 5/16” (8 mm) Push-Fit Centurion Plus tank drain 5.2.6 RO Product Water Storage Tank Working Volume: 11.5 L Material: 316L Stainless Steel Heating Element Connection: 1”... -
Page 23: Environmental/Transport
5.3 Environmental/Transport This device is intended for use/transport in the following conditions: Location Indoor Altitude [m] Up to 2000 Ambient Temperature range 10-40 [°C] Relative Humidity 10-95% Mains Supply Voltage ±10% of the nominal voltage Fluctuation COMPONENTS IDENTIFICATION AND SCHEMATICS 6.1 Component Identification Front Rear... - Page 24 Right Side 098-0007 Rev B...
- Page 25 Left Side Top (with top panel and controller removed) 098-0007 Rev B...
-
Page 26: Electrical Schematic
Component Identification 6.2 Electrical Schematic Label Description High Level Float Switch Low Level Float Switch Tank Fill Solenoid Valve Tank Drain Solenoid Valve Return from HD Solenoid Valve Inlet Solenoid Valve Pump Heater K-Type Thermocouple Return Flow Meter Current Switch Power Supply (24 VDC) Power Supply (12 VDC) Terminal Block... -
Page 27: Flow Schematic
6.3 Flow Schematic 6.3.1 Standby Mode 098-0007 Rev B... -
Page 28: Preheat Mode
6.3.2 Preheat Mode 098-0007 Rev B... -
Page 29: Dispensing Mode
6.3.3 Dispensing Mode 098-0007 Rev B... -
Page 30: Drain Mode
6.3.4 Drain Mode 098-0007 Rev B... -
Page 31: Controller
CONTROLLER 7.1 User Interface The Centurion Plus Heat Disinfection Device is controlled via the touch screen located on the top of the unit. The image below shows a representation of the home screen display. To select an action, touch the screen on the appropriate button one time with your finger. -
Page 32: Levels Of Access
Storage mode toggle button Diagnostics Menu Properly trained service Software Version technician Restore Defaults AmeriWater technical staff Level 2 3345 Manual Operation Menu Alarm Log (when alarm is not active) Properly trained service ... -
Page 33: Controller Inputs/Outputs
7.4 Modes of Operation 7.4.1 Standby The default mode of operation for the Centurion Plus Heat disinfection device is Standby. In standby mode, the device shall remain idle. No system outputs will be active during this mode. Standby mode shall be activated upon system start-up, following a successful disinfection cycle, or after an alarm condition has been activated during disinfection. -
Page 34: Preheat
The preheat cycle will begin by filling the storage tank on the Centurion Plus Heat disinfection device with approximately 11 L of water. Once the high level float switch closes, the RO water will return to passing through the Centurion Plus Heat disinfection device. -
Page 35: System Operational Controls
7.5.2 System Operational Controls The Centurion Plus Heat Disinfection device is controlled by a Programmable Logic Controller (PLC) with an integrated operation panel that sends and receives signals to and from various components in the device. The user can set and view various parameters on the Human Machine Interface (HMI) display on the front of the device. - Page 36 Screen Example Screen Description This button will be hidden unless the device is in storage mode AND the current day is equal to the scheduled day of disinfection. Pressing and holding the button (2 seconds) will cancel a scheduled disinfection until the following day. Disinfection Confirmation This screen will appear after the “START”...
- Page 37 Screen Example Screen Description This button will appear when the tank maintain mode has been toggled on AND the measured tank temperature ≥ the disinfection set-point. During Temperature maintain mode, the button must be pressed to send hot water to the HD machine.
- Page 38 Screen Example Screen Description The Centurion Plus Heat disinfection device uses an SD card to store the data recorded during disinfection cycles. The green indicator light will appear when this SD card is inserted and ready to accept data. SD Card Safe to Eject When the green indicator light is displayed, the SD card may be safely ejected from the controller.
- Page 39 Screen Example Screen Description Storage Mode On/Off Pressing the storage mode On/Off toggle at the bottom of the display will toggle the schedule based operation on or off for the device. Turning storage mode “off” will hide the day of the week settings.
- Page 40 Screen Example Screen Description Diagnostics Menu-Page 1 When the user successfully enters a “Level 2” password after pressing the Diagnostics button, page 1 of the diagnostics menu will be displayed. The user may manually cycle the outputs on and off using this menu. This screen is intended for users to diagnose issues with specific outputs.
- Page 41 Screen Example Screen Description Manual Tank Drain Mode Pressing the “Tank Drain” Button will activate the manual tank drain mode. The pump will activate to drain the water from the storage tank. Disinfection Log The disinfection log is accessed by pressing the last disinfection status message on the home screen.
- Page 42 Screen Example Screen Description Pressing and holding this button for 2 seconds will clear the alarm log. System Keyboard When the user is prompted to enter a password or settings value, a simple keyboard will appear. Using the ESC button will allow the user to return to the previous screen.
-
Page 43: Settings Descriptions And Defaults
7.6 Settings Descriptions and Defaults Setting Description Default Setting Range This temperature will determine the temperature at which the Preheat cycle Disinfection will end prior to dispensing mode. 188°F 50.0-195.0°F Temperature Temperatures below 176°F should only be used for troubleshooting the device. The heat loss setting sets the temperature Heat Loss below the disinfection set-point at which... -
Page 44: Heat Disinfection
HEAT DISINFECTION 8.1 What is being disinfected? The Centurion Plus Heat disinfection device is intended to disinfect the hose used to feed a Hemodialysis machine with purified RO water. Typically, the RO and Hemodialysis machine are disinfected using their own automated disinfection processes. Neither the RO or Hemodialysis machines disinfection procedures disinfect the feed water hose which leaves it up to the end user to chemically disinfect. - Page 45 Upon the completion of the Preheat cycle, the pump will turn on and begin pumping the hot water to the Hemodialysis machine. The Centurion Plus Heat disinfection device will return to the Home screen upon completion of the dispensing mode.
-
Page 46: Monitoring
MONITORING 9.1 On board data logging The Centurion Plus Heat Disinfection Device is equipped with a 16 GB microSD card that records data every 30 seconds during the disinfection cycle. The system will record the date, time, tank temperature, SV1-SV4 status, pump status, heater status, FS1 and FS2 status and the result of the disinfection cycle. -
Page 47: Maintenance
10 MAINTENANCE 10.1 Planned Routine Checks It is recommended that regular checks are carried out on the device and its performance to ensure safe and uninterrupted operation. Refer to the table below for details. NOTE: The frequency of performing the checks indicated should be considered as a guide only and will depend on how often the device is used. -
Page 48: Planned Preventative Maintenance Schedule
10.3 Planned Preventative Maintenance Schedule The Centurion Plus Heat disinfection device has a designed operation life of a minimum of 5 years. The components listed in the preventative maintenance schedule have the potential for failure during that lifespan depending on environmental conditions and routine maintenance of the device. This table is intended to provide guidance for the replacement schedule of components, but is NOT mandatory for safe and effective operation of the device. -
Page 49: Plc Battery Replacement
10.5 PLC Battery Replacement The PLC for the device monitors the internal battery voltage constantly. When the battery voltage is low, an alarm will appear informing the user that the battery needs to be replaced. If the battery is not replaced, the time and date will not be stored and the device may lose the PLC memory when the power is removed. - Page 50 Steps Actions Step 4: Lay the top panel with the PLC on a soft surface to avoid scratching the display or powder coating on the top panel. Use a #2 Phillips screw driver to unscrew the 4 screws holding the rear cover for the PLC. With the screws removed, pull the plastic cover straight up to remove and expose the circuit board below.
- Page 51 Steps Actions the tray. Reinstall the new battery into the tray. Step 7: With the new battery installed, reinstall the upper circuit board onto the lower. Be sure to align the pins shown to avoid bending them. Do not force the connector together or damage may be caused to the PLC.
-
Page 52: External Fuse Replacement
10.6 External Fuse Replacement The Centurion Plus Heat disinfection device is equipped with 2 – 12 A fast acting cartridge fuses located on the rear of the device. These fuses may be replaced by the operator of the device or an authorized technician. -
Page 53: How To Format Sd Card
If this SD card is lost, damaged or replaced with an SD card that was NOT supplied by AmeriWater, that SD card must be formatted before use to work properly. Use the following steps to format the SD card. Refer to Section 0 for SD card specifications. - Page 54 Steps Actions Step 5: Once in the Tools menu, the card formatter tab will be open. Select the drive to format from the drop down menu. Name the card “SD”. Check the “Format Drive using Windows” box. Once these steps are complete, press “Start”. NOTE: Formatting the SD card will erase all existing data.
-
Page 55: Alarms
11 ALARMS 11.1 Fault Conditions Display Alarm Fault Condition Fault Description What to Check Verify that float switches move freely Verify that all connections are Float switches were detected to Level Sensor tight be in the same position (both Error ... - Page 56 Alarm Fault Condition Fault Description What to Check Verify that the heating element is functioning properly Check current switch to ensure indicator light is not flashing rapidly Check that LED light on SSR1 is illuminated during preheat. LED light should be constant.
-
Page 57: Resetting Alarm Condition
Alarm Fault Condition Fault Description What to Check Check that LED light on SSR1 is illuminated during preheat Verify that device draws approximately 1000 W during preheat If performing disinfections back to back, a manual refill of the tank may be required in order to cool tank temperature before starting a disinfection... - Page 58 When the controller on the Centurion Plus detects an alarm that requires reset from the list of alarms in Section 11.1, the following steps will be required to clear the alarm. Screen Display Operators Action When an alarm condition occurs during a disinfection cycle, the following screen will appear.
-
Page 59: Troubleshooting
12 TROUBLESHOOTING 12.1 Mechanical/Electrical Failures WARNING: Only authorized persons should attempt to troubleshoot or service the Centurion Plus Heat Disinfection System. Ensure power is disconnected before opening or servicing the control system. CONTACT INFO: For Technical assistance, contact AmeriWater at 1-800-535-5585. - Page 60 heater button located on Diagnostics menu page 1 Output will provide 24 VDC when active Verify that touch screen is functional when power switch is on. If touch screen is not active, 24 VDC power 24 VDC power supply (PS1) supply may be shorted or failure faulty...
- Page 61 If water does not pass Water does not pass through device, disconnect through device in standby RO from Centurion Plus Heat disinfection device to continue patient treatment Valve SV1 has failed in the “N.C” Check float switch status on position (diverts all water to Diagnostics page 2.
- Page 62 Verify that valve SV4 is not manually activated on diagnostics menu page 1 Valve SV4 fails closed Verify that RO is producing approximately 1500 mL/min using the sample port on the RO product hose Use diagnostics menu to HD machine low water check tank level alarm when Centurion Plus...
-
Page 63: Valve Position
12.2 Valve Position Mode Valve Position SV1: Off SV2: Off Standby SV3: Off SV4: Off SV1: Off Preheat Mode SV2: Off (Tank Full) SV3: Off SV4: Off SV1: On SV2: Off Preheat Mode ... -
Page 64: Setting Current Switch
NOTE: This feature only works if the MROC is plugged into the power outlet located at the rear of the Centurion Plus Heat disinfection device. CAUTION: The system must be powered on when adjusting the current switch. Only trained personnel should attempt this adjustment. - Page 65 Steps Actions Step 4: Locate the adjustment screw on the current switch (CS1). Step 5: Stop the MROC and place the system into heat disinfection mode. Wait 098-0007 Rev B...
- Page 66 Steps Actions approximately 5 minutes for the heating element to turn on. Step 6: Manually activate the heater on the Centurion Plus using diagnostics page 1. Verify that the red LED light on the current switch is flashing rapidly and the Green LED on SSR1 is off.
- Page 67 Stop the heat disinfection mode on the Step 8: MROC. Place the MROC in to normal operation. Verify that the heating element on the Centurion Plus Heat disinfection device is activated while the MROC is running in Step 9: normal operation. NOTE: Green LED on SSR1 will be illuminated when heater is on.
-
Page 68: Spare Part Listing
13 SPARE PART LISTING 13.1 Exploded View 098-0007 Rev B... - Page 69 098-0007 Rev B...
- Page 70 098-0007 Rev B...
- Page 71 098-0007 Rev B...
- Page 72 098-0007 Rev B...
- Page 73 098-0007 Rev B...
- Page 74 098-0007 Rev B...
- Page 75 ITEM PART NUMBER DESCRIPTION 001-053-0008 CONTROL ASSY,END-2-END 062-0001 POWER SUPPLY,12VDC,40W,OPEN FRAME 062-0002 POWER SUPPLY,24VDC,40W,OPEN FRAME 064-0004 RELAY,SOLID STATE, SPST, NO, 25A, 42-265 V OUTPUT, 3-32 VDC CONTROL 064-0005 RELAY,SOLID STATE, SPST, NO, 3A, 3.5-60VDC OUTPUT, 3.5-32 VDC CONTROL 065-0003 CURRENT SWITCH,FIXED CORE,1A TO 150A, N.C. OUTPUT 066-0006 CONNECTOR,JST CRIMP PIN, FOR VHR CONNECTOR 090-0021...
- Page 76 010-0015 MALE CON.5/16" T X 1/4" MNPT,TRUE-SEAL 039-0001 THERMOCOUPLE,K TYPE, 1/4 NPT,GROUNDED 039-0002 THERMOSTAT,MANUAL RESET,194 F,.25 QC 066-0021 CONNECTOR, TYCO MATE N LOCK, 2 CIRCUIT, SOCKET HOUSING, NATURAL 067-0001 SWITCH,FLOAT,1/2" NPT,POLYPROPYLENE,105 C WORKING TEMP 090-0017 TANK ASSY,316 SS,N2N 090-0029 LID,TANK,N2N 090-0030 BAFFLE,TANK,N2N,316 SS 092-0009...
- Page 77 090-0019 ENCLOSURE,BASE,N2N 090-0022 ENCLOSURE, MAIN STRUCTURE,N2N 090-0025 ENCLOSURE,SUPPORT BRACKET,N2N 090-0028 ENCLOSURE,FRONT INNER SUPPORT,N2N 090-0031 SHIM,SOLENOID VALVE,END TO END,ALUMINUM 092-0002 WASHER,LOCK,#10,18-8 SS 092-0020 NUT,10-32,NYLOCK,18-8 SS 093-0007 SCREW,#10-32 X 1/2", 18-8 STAINLESS STEEL,PAN HEAD,PHILLIPS 093-0008 SCREW,10-32 X 1.25",PAN,PHILLIPS,18-8 SS 10-L204 LEGRIS UNION EL, 5/16T X 5/16T,W/SAFETY CLIP 10-L304 LEGRIS,SPLITER,Y, DIVIDER, 5/16T X 5/16T,W/SAFETY CLIP 10-L381...
-
Page 78: Consumables
13.2 Consumables Part Number Description 063-0006 FUSE CERM, 12A, 250VAC, 125VDC, 3AB,.25" X 1.25" 999-3686 BATTERY,CR2450N,3V 08-0025 TUBING, FEP 8MM O.D X 6MM I.D. CLEAR 14 Appendix 14.1 How to use push-fit connectors Installation Ensure that the tubing is cut square. Push the tube into the fitting until it stops. - Page 79 (PVC). The AmeriWater system you have purchased may contain PVC or stainless steel parts. While warnings are only required in the State of California, AmeriWater has initiated the use of Prop 65 labeling for all products to ensure compliance with California regulations. Please note that the above warning does not necessarily mean that the product that you have purchased is unsafe.
Need help?
Do you have a question about the Centurion Plus Heat and is the answer not in the manual?
Questions and answers