Advertisement
Quick Links
FPE100
WARNING
1
TM
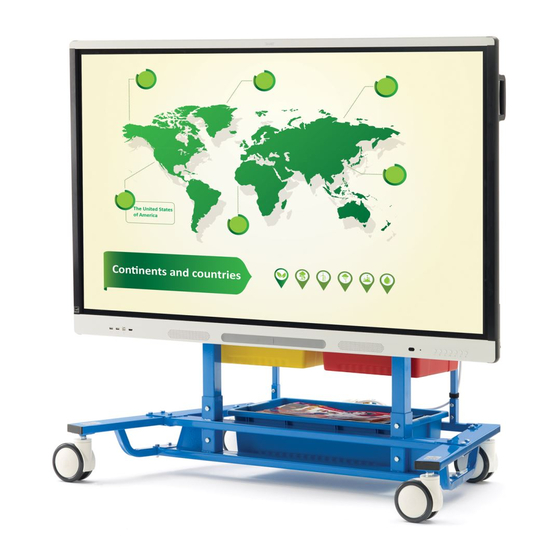
iRover2
Assembly Guide
FPE100 2019 C
Check out our other products online at
www.copernicused.com
This product is meant to be assembled by an adult.
Ÿ
In its unassembled state, small parts present a hazard.
Ÿ
To be used under direct supervision of an adult.
Ÿ
Shown with SMART MX265 Flat Panel (sold separately)
FPE100 - Version C - Released December 13, 2019 - Copernicus Educational Products Inc.
Interactive Flat Panel Easel
For assistance, please contact us:
1-800-267-8494
Email info@copernicused.com
Have your packing slip ready for reference
Advertisement

Related Manuals for Copernicus iRover2


Summary of Contents for Copernicus iRover2
- Page 1 In its unassembled state, small parts present a hazard. Ÿ To be used under direct supervision of an adult. Ÿ Shown with SMART MX265 Flat Panel (sold separately) FPE100 - Version C - Released December 13, 2019 - Copernicus Educational Products Inc.
- Page 2 Have your packing slip ready for reference Dear Educator, Thank you for purchasing the iRover2 Interactive Flat Panel Easel. We hope it meets all your expectations and you and your students enjoy using it at your school. If you have any questions, concerns or ideas on how we can improve please let us know by contacting our Customer Solutions Ninjas at 1-800-267-8494 or info@copernicused.com.
- Page 3 72 consecutive hours. Turn off power strip before unplugging. Specifications Read the electrical specifications of any electronic equipment you are using with your Copernicus products. Failure to read these specifications and follow their instructions could result in damage to your equipment or personal injury.
- Page 4 Check out some of our Please call the reseller that you bought the product from first other great products! (reseller information can be found on your packing slip). www.copernicused.com FPE100 - Version C - Released December 13, 2019 - Copernicus Educational Products Inc.
- Page 5 5 lbs Weight Limit (33141) Really Big Tub - Blue 6 Outlet Powerbar (CC4073) Cable Hook (25515) (34091) 15 lbs Weight Limit ... hardware on following page FPE100 - Version C - Released December 13, 2019 - Copernicus Educational Products Inc.
- Page 6 Metric VESA Mounting Hardware M6 x 15mm VESA Screw M6 x 20mm VESA Screw M8 x 15mm VESA Screw M8 x 25mm VESA Screw (432151) (43222) (432764) (432765) FPE100 - Version C - Released December 13, 2019 - Copernicus Educational Products Inc.
-
Page 7: Install Casters
6 months for proper maintenance. Install Right Foot (Back) (Back) (Front) Install all bolts Do not tighten yet Install Left Foot (Back) Install all bolts Do not tighten yet FPE100 - Version C - Released December 13, 2019 - Copernicus Educational Products Inc. - Page 8 Base Frame Back Stretcher Install Back Stretcher Tighten all bolts now Actual Size: You will need: (Not to Scale) Screwdriver Phillips #2 or #3 Cable Hook Install Cable Hook FPE100 - Version C - Released December 13, 2019 - Copernicus Educational Products Inc.
- Page 9 You will need: (Not to Scale) Screwdriver Phillips #2 or #3 Rear Tube Support Install Rear Tube Supports Install screws on both sides Do not tighten yet FPE100 - Version C - Released December 13, 2019 - Copernicus Educational Products Inc.
- Page 10 Install Front Tub Channels Note channel orientation Install hardware on both sides Do not tighten yet Install Rear Tub Channels Install hardware on both sides Do not tighten yet FPE100 - Version C - Released December 13, 2019 - Copernicus Educational Products Inc.
- Page 11 Phillips #2 or #3 Tub Channel Joining Stretcher Install Tub Joining Stretchers Install hardware on both sides. Now fully tighten all hardware from Step 4 - 7. FPE100 - Version C - Released December 13, 2019 - Copernicus Educational Products Inc.
- Page 12 VESA screws. (Showing SMART MX265 Flat Panel) (4x) (4x) FPE100 - Version C - Released December 13, 2019 - Copernicus Educational Products Inc.
- Page 13 Do not secure in these holes, they are used for attaching an optional soundbar mount Install screws in holes with threads, only 2 of 4 holes will have threads FPE100 - Version C - Released December 13, 2019 - Copernicus Educational Products Inc.
- Page 14 2-Person Task Secure Flat Panel To Cart Insert all 4 adapters into keyholes. Insert all 4 Safety Screws Lock all casters before attaching flat panel to cart FPE100 - Version C - Released December 13, 2019 - Copernicus Educational Products Inc.
- Page 15 Install Laptop Shelf Actual Size: You will need: (Not to Scale) Shallow Tub Really Big Tub Tiny Tub Open Tub Install Tubs Install Really Big Tub from behind FPE100 - Version C - Released December 13, 2019 - Copernicus Educational Products Inc.
-
Page 16: Final Assembly Checks
Check entire assembly for loose parts; tighten all casters, bolts, screws and nuts Tighten all casters using supplied Caster Wrench. Keep wrench with unit. Casters must be tightened every 6 months for proper maintenance. FPE100 - Version C - Released December 13, 2019 - Copernicus Educational Products Inc.
Need help?
Do you have a question about the iRover2 and is the answer not in the manual?
Questions and answers