Advertisement
Quick Links
S S S ummarize
ummarize
ummarize
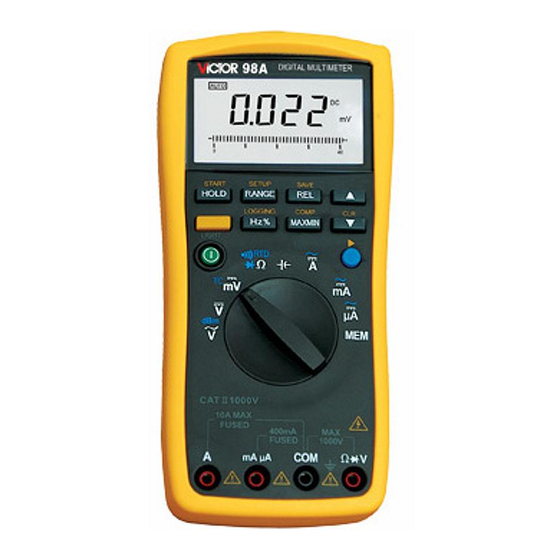
The meter is a handled, battery-operated tool for measuring electrical parameters. It has all the features of a digital millimeter
and measure AC voltage, DC voltage, AC current, DC current, resistance, capacitance, frequency, duty cycle ratio, dBm, TC,
RTD,
and
Diode
Test,
Continuity
Diode
Diode Test,
Test,
Continuity
Continuity Check
Besides, it has features like:
Large LCD screen could display the three characteristic of one input signals.
Different reference impedance for dB measure function.
AUTO HOLD, DISPLAY HOLD and PEAK HOLD to display the measuring value.
Panel calibration function.
Three convenient data recording modes: LOG mode, MANUAL mode, and COMP mode.
USB-IR jack to connect with a PC
Open-case
Open-case Inspection
Open-case
Inspection
Inspection
Open the case to check, if the meter is damaged or something is missing, contact the place of purchase immediately. Contact
the distributor for information about DMM accessories.
Accessories: A copy of user's manual
A set of CF-733370 industrial test lead
One USB to UART Bridge Controller (USB_DMM)
DMMVIEW_ A disk
Options: K-TYPE TC
Safety
Safety
Safety Information
Information
Information
The meter complies with IEC61010.1-93 Over voltage Ⅱ Pollution Degree 2. Use the meter only as specified in this manual.
Otherwise, the protection provided by the meter may be impaired.
A Warning
Warning
Warning identifies conditions and actions that pose hazards to the user.
A Caution
Caution identifies conditions and actions that may damage the meter or the equipment under test.
Caution
A
identifies symbols of the operation and explanations of the features. International symbols used on the meter and in
Notice
Notice
Notice
this manual are explained in Table 1-1.
To
avoid
possible
electric
To
To avoid
avoid possible
possible electric
electric shock
Use the
Use
Use
the
the meter
meter as
meter
as the
as
the instructions
the
Do
not
use
the
meter
meter if if if it it it is is is damaged.
Do not
Do
not use
use the
the meter
Pay
Pay particular
Pay
particular
particular attention
attention
attention to to to the
Take the
Take
Take
the
the leads
leads off
leads
off the
off
the meter
the
Inspect
Inspect the
Inspect
the
the test
test
test leads
leads for
leads
test
test leads
test
leads before
leads
before you
before
you use
you
Do not
Do
Do
not
not use
use the
use
the
the meter
meter if if if it it it operates
meter
Do not
Do
Do
not operate
not
operate
operate the
the meter
the
meter
meter around
Do not
Do
Do
not
not apply
apply more
apply
more
more than
than
than the
ground.
ground.
ground.
Make
Make sure
Make
sure
sure the
the
the meter
meter
meter works
When
When in in in doubt,
doubt,
have
When
doubt, have
have the
To
avoid
possible
electric
To avoid
To
avoid possible
possible electric
electric shock
functions,
including
functions,
functions, including
including manual
selecting
selecting a a a direct
direct
voltage
selecting
direct voltage
voltage range
T T T o o o avoid
avoid
false
readings,
avoid false
false readings,
readings, which
the
low
battery
indicator
the
the low
low battery
battery indicator
indicator
Do
not
touch
the
exposed
Do not
Do
not touch
touch the
the exposed
exposed wine,
Use
only
type
AAA A A batteries,
AA
Use
Use only
only type
type AA
Use
caution
when
working
Use
Use caution
caution when
when working
working above
Avoid
Avoid
Avoid working
working
working alone.
alone.
alone.
When
using
the
probes,
When
When using
using the
the probes,
probes, keep
Connect the
Connect
Connect
the
the common
common test
common
test
test lead
test
lead
lead first.
first.
first.
To avoid
To
To
avoid
avoid possible
possible fire
possible
fire
fire or or or electric
To avoid
To
To
avoid possible
avoid
possible damage
possible
damage
damage to to to the
Set
Set
Set the
the
the rotary
rotary
rotary switch
switch on
switch
the
the
the measuring
measuring process.
measuring
process.
process.
Read
Read Safety
Read
Safety Information
Safety
.
Check
Check
shock or or or personal
shock
personal
personal injury,
instructions of of of the
instructions
the
the producer;
producer;
producer; otherwise
damaged.
Before
damaged. Before
Before you
the insulation
the
insulation
insulation surrounding
surrounding
surrounding the
meter
meter before
before
before unlock
unlock
unlock the
the battery
the
for
for damaged
damaged insulation
damaged
insulation or or or exposed
insulation
use
use the
the meter.
the
meter.
meter.
operates
operates abnormally.
abnormally. Protection
abnormally.
around
around explosive
explosive
explosive gas,
gas,
gas, vapor,
the
the rated
rated voltage,
rated
voltage, as
voltage,
as
as marked
works normally
works
normally
normally as
as per
as
per
per testing
the
meter
serviced.
the meter
meter serviced.
serviced.
shock
caused
by
shock caused
caused by
by false
manual
and
auto
rang
ing
ing, , , make
manual and
and auto
auto rang
ranging
range
equals
equals to to to or or or higher
range equals
which
could
lead
lead to to to possible
which could
could lead
appears.
appears.
appears.
wine,
connector
connector or or or unused
wine, connector
batteries,
properly
installed
installed in in in the
batteries, properly
properly installed
above
30
30 V V V ac
ac
rms,
above 30
ac rms,
rms, 42
keep
your
fingers
behind
keep your
your fingers
fingers behind
behind the
test
test lead
lead before
lead
before you
before
you
you connect
connect the
connect
electric
electric shock,
shock, do
shock,
do
do not
not
not connect
the
the meter
meter
meter or or or to to to the
the
the equipment
equipment under
equipment
on the
on
the
the right
right
right range.
range. Do
range.
Do
Do cut
Warning
Warning
Warning
Information
Information before
before
before using
using the
using
Warning
Warning
Warning
injury,
follow
these
injury, follow
follow these
these guidelines
otherwise
otherwise, , , the
the protective
the
protective function
protective
you
use
the
meter,
inspect
you use
use the
the meter,
meter, inspect
inspect the
the
the connectors.
connectors.
connectors.
battery
battery door.
door.
door.
exposed
exposed metal.
metal.
metal. Check
Check
Check the
Protection may
Protection
may be
may
be impaired.
be
impaired. When
impaired.
vapor,
vapor, or or or dust.
dust.
dust.
marked
marked on
on the
on
the
the meter,
meter, between
meter,
between terminals
between
testing
testing a a a known
known voltage.
known
voltage.
voltage. Do
false
reading
due to to to exist
due
exist
false reading
reading due
exist ting
make
sure
whether
there is is is any
there
make sure
sure whether
whether there
higher
than
the
alternating
higher than
than the
the alternating
alternating voltage.
possible
electric
shock or or or personal
shock
possible electric
electric shock
unused
input
jack
jack or or or circuit
circuit
unused input
input jack
circuit under
the
meter
case to to to power
case
power
the meter
meter case
power the
42
42 V V V peak,
peak, or or or 60
peak,
60 V V V dc.
60
dc.
dc. Such
the
finger
guards
on
the finger
finger guards
guards on
on the
the
the live
live test
live
test lead.
test
lead. When
lead.
connect
connect TC
TC
TC with
with the
with
the live
the
live circuit.
live
Caution
Caution
Caution
under
under test:
test:
test:
cut
cut off
off
off the
the
the testing
testing
testing leads
leads
leads and
- 1 -
the meter.
the
meter.
meter.
guidelines. . .
guidelines
function shall
function
shall be
shall
be
be invalid.
the
case.
Look
for
cracks or or or missing
cracks
the case.
case. Look
Look for
for cracks
the
the test
test
test leads
leads for
leads
for continuity.
for
continuity. Replace
continuity.
When
When in in in doubt,
doubt, have
doubt,
have the
have
terminals or or or between
terminals
between
between any
Do
Do not
not use
not
use the
use
the meter
the
meter
meter if if if it it it operates
ting
alternating
voltage in in in all
voltage
ting alternating
alternating voltage
any
alternating
voltage
any alternating
alternating voltage
voltage existing
voltage.
voltage.
personal
injury,
replace
personal injury,
injury, replace
replace the
under
test
when
the
under test
test when
when the
the meter
the
meter.
the meter.
meter.
Such
voltages
pose a a a shock
pose
shock
Such voltages
voltages pose
shock hazard.
the
probes.
the probes.
probes.
When you
When
you
you disconnect
disconnect
disconnect test
test
test leads,
circuit.
circuit.
and
and circuit
circuit before
circuit
before
before switching
switching
switching. . . Forbid
Chapter 1 1 1
Chapter
Chapter
Introduction
Introduction
Introduction
invalid.
invalid.
missing
plastic.
missing plastic.
plastic.
Replace damaged
Replace
damaged
damaged
the meter
the
meter
meter serviced.
serviced.
serviced.
any
any terminal
terminal
terminal and
and
and earth
earth
earth
operates abnormally.
operates
abnormally.
abnormally.
all
the
direct
current
all the
the direct
direct current
current
existing or or or not
existing
not
before
not before
before
the
batteries
as
soon
as
the batteries
batteries as
as soon
soon as
as
meter
meter is is is working.
working.
working.
hazard.
hazard.
leads,
leads, disconnect
disconnect
disconnect the
the live
the
Forbid to to to switch
Forbid
switch during
switch
during
during
live
live
Advertisement

Related Manuals for Victor 98A


Summary of Contents for Victor 98A
- Page 1 Chapter Chapter 1 1 1 Chapter Introduction Introduction Introduction Warning Warning Warning Read Read Read Safety Safety Safety Information Information Information before before before using using using the the meter. meter. meter. S S S ummarize ummarize ummarize The meter is a handled, battery-operated tool for measuring electrical parameters. It has all the features of a digital millimeter and measure AC voltage, DC voltage, AC current, DC current, resistance, capacitance, frequency, duty cycle ratio, dBm, TC, RTD, Diode...
- Page 2 C C C ut ut ut off power complete discharge before measur resistance, continuity, diodes, diodes, or or or capacitance capacitance with live off the the power power and and complete complete discharge discharge before before measur measuring ing resistance, resistance, continuity,...
-
Page 3: Push Button
Display Unit Display Display Unit Unit Figure 2-4 and Table 2-3 explains the meaning of the every displaying unit. Communication interface Communication Communication interface interface You could use the USB_DMM and the DMMVIEW_A software to transfer the content stored in the meter and real time measuring value to a PC.(See Chapter 4”... - Page 4 Figu Figu Figu re re re 2- 2- 2-3 3 3 . . . Rotary Rotary Rotary Switches Switches Switches Table Table 2- 2- 2- 2.Rotary Switches Table 2.Rotary 2.Rotary Switches Switches Position Position Position Rotary Rotary Rotary Switch Switch Switch Function Function Function...
- Page 5 Figure2-4.Display Figure2-4.Display Figure2-4.Display Unit Unit Unit Table Table Table 2-3.Display 2-3.Display 2-3.Display Unit Unit Unit Unit Meaning Unit Unit Meaning Meaning Display Hold:To hold present value in the main display ① Peak Hold:Valid only in DCV position Auto Hold:To freeze the present value in auto hold mode ②...
- Page 6 Table 2-3. Display Unit (Cont.) Table Table 2-3. 2-3. Display Display Unit Unit (Cont.) (Cont.) Unit Unit Unit Meaning Meaning Meaning Ω Ω Ω 、k k k Ω Ω Ω 、M M M Ω Ω Ω The unit of resistance: Ohm, Kilohm, Megohm. Hz、kHz kHz、MHz The unit of frequency: Hertz, Kilohertz, and Megahertz.
- Page 7 - 7 -...
- Page 8 Table Table Table 2-4.Pushbutton 2-4.Pushbutton 2-4.Pushbutton Description Description Description Yellow Yellow Yellow Button Button Button Description Description Description Pushbutton Pushbutton Pushbutton Function Function Function Note Press to access “Yellow Button Functions”, and will be on display Press to access blue functions on the rotary switch. In Setup and Comparative Mode, use arrow ○...
- Page 9 Auto HOLD Mode Mode ( ( ( A.H) A.H) Auto Auto HOLD HOLD Mode A.H) Warning Warning Warning Auto Auto Auto HOLD HOLD HOLD mode mode mode does does does not not capture capture capture unstable unstable unstable or or or noisy noisy noisy readings.
- Page 10 Selecting Selecting Selecting the the Range Range Range Press to select a fixed range. Auto ranging (“ ”lighted in the display) always comes on initially when you select a new function. In auto range, the meter selects the lowest input range possible, ensuring that the reading appears with the highest available precision (resolution). If AUTO is already on, press to enter MANUAL ranging in the present range.
- Page 11 Chapter Chapter 3 3 3 Chapter Making Measurements Making Making Measurements Measurements Introduction Introduction Introduction Chapter 3 explains how to make measurements. Most measurement functions can be selected by using the rotary switch. White letters or symbols identify primary functions; blue letters or symbols identify alternative functions. Press the blue button 、...
- Page 12 Warning Warning Warning apply more than 1000 1000 V V V or or or AC voltage; meter will possibl possible e e be be be damaged damaged though value Do not not apply apply more more than than DC DC 1000 AC 750...
- Page 13 Figure3-3.DC Voltage Measurement Warning apply more than 1000 1000 V V V or or or AC voltage; meter will possibl possible e e be be be damaged damaged though value Do not not apply apply more more than than DC DC 1000 AC 750...
- Page 14 Figure3-5.TC Measurement The temperature degree is shown on the primary display, the TC value on the secondary display and Fahrenheit degree on elapsed time display. When the output jack is open circuit, the screen displays OL. Warning Warning Warning To avoid avoid avoid possible possible...
- Page 15 Figure3-7. Diode Diode Diode Test Test Test In a circuit, a similar diode should still indicate a forward bias reading of 0.5 V to 0.8 V; however, the reverse-bias reading can vary depending on the resistance of other pathways between the probe tips. Note Note Note...
- Page 16 See Figure3-9.RTD Figure3-9.RTD Figure3-9.RTD Measurement Measurement Measurement 1. Set the rotary switch to position, and press blue button ( ) three times to select diodes testing. COM” terminal, and the red lead to into the “Ω Ω Ω V V V ” terminal. 2.
- Page 17 measurement. measurement. measurement. You must open circuit under test, then place meter meter in in in series series with circuit. You must must open open the the circuit circuit under under test, test, then then place place the the meter series with with the...
- Page 18 Figure3-1 Figure3-12 2 2 . . . A A A C C C Current Current Measurement Figure3-1 Current Measurement Measurement Measuring Frequency Duty cycle ratio ratio ( ( ( See Figure3-13) Measuring Measuring Frequency Frequency and and Duty Duty cycle cycle ratio See Figure3-13) Figure3-13)
-
Page 19: Save Mode
Chapter Chapter Chapter 4 4 4 Using Memory Memory & & & Communications Communications Features Using Using Memory Communications Features Features Introduction Introduction Introduction Chapter 4 shows you how to use memory and communication features available on the meters. Data Storage Data Data Storage... - Page 20 In In In MEM MEM function, function, function, each each each operation operation operation could could could only only only read read read or or or clear clear clear the the data data data of of of one one storing storing storing part.
-
Page 21: Chapter Maintenance
Chapter Chapter 5 5 5 Chapter Changing Default Settings Changing Changing the the Default Default Settings Settings Introduction Introduction Introduction The meter allows you to change the default-operating configuration of the meter by changing setup options made at the factory. Many of these setup options affect general meter operations and are active in all functions. - Page 22 To check the fuse, proceed as follows: 1. Set the rotary switch on 2. Insert the black lead to COM jack and red lead to mA mA jack. 3. Using an ohmmeter, check the resistance between the meter tested leads .If the resistance is about 1Ω, the fuse is good. An open reading means that fuse F1 is blown.
- Page 23 Figure Figure 6- 6- 6-1 1 1 .Battery .Battery Fuse Replacement Figure .Battery and and Fuse Fuse Replacement Replacement Chapter Chapter Chapter 7 7 7 Specifications Specifications Specifications Safety Compliance Safety Safety and and Compliance Compliance Highest voltage of all input jacks to earth ground 1000V dc or ac Complies with IEC61010.1-93 Over voltage Ⅱ...
- Page 24 Deta Deta Deta iled iled iled Function Function Function Ranges/Description Ranges/Description Ranges/Description urac urac urac DC Voltage 0 to 1000V y y y AC Voltage, averaging converter 0 to 750V cific cific cific atio atio atio Basic Accuracy Basic Basic Accuracy Accuracy DC Voltage:0.2% AC Voltage:0.5%...
- Page 25 400.0µA 0.1µA 0.2%+4 Measuring Impedance : 4000µA 1µA 0.2%+4 100Ω Overvoltage protection:0.5A/250V 40.00mA 0.01mA 0.2%+4 fast-blow fuse Measuring Impedance: 400.0mA 0.1mA 0.2%+4 1Ω 4.000A 0.001A 0.5%+4 Measuring Impedance : Overvoltage protection : 10A/250V 10.00A 0.01A 1.0%+4 0.01Ω fast-blow fuse Current Measurement AC Current Current Measurement...
- Page 26 By using ITS-90 temperature scale Note: The accuracy does not include the 0.5%+2(≤-100℃) error internal temperature -200 to 950℃ 1℃ 0.5%+1(> -100℃) compensation caused by a sensor. The range of the internal temperature compensation sensor is + 2℃. RTD Measurement Measurement Measurement Function...
Need help?
Do you have a question about the 98A and is the answer not in the manual?
Questions and answers