Table of Contents
Advertisement
Available languages
Available languages
Quick Links
WARNING!
Failure to install or use this product according to manufacturer's recommendations may result in property damage, serious injury, and/or death
to those you are seeking to protect!
Do not install and/or operate this safety product unless you have read and understood the safety
information contained in this manual.
1.
Proper installation combined with operator training in the use, care, and maintenance of emergency warning devices are essential to ensure the
safety of emergency personnel and the public.
2.
Emergency warning devices often require high electrical voltages and/or currents. Exercise caution when working with live electrical connections.
3.
This product must be properly grounded. Inadequate grounding and/or shorting of electrical connections can cause high current arcing, which
can cause personal injury and/or severe vehicle damage, including fire.
4.
Proper placement and installation is vital to the performance of this warning device. Install this product so that output performance of the system
is maximized and the controls are placed within convenient reach of the operator so that they can operate the system without losing eye contact
with the roadway.
5.
Do not install this product or route any wires in the deployment area of an air bag. Equipment mounted or located in an air bag deployment area
may reduce the effectiveness of the air bag or become a projectile that could cause serious personal injury or death. Refer to the vehicle owner's
manual for the air bag deployment area. It is the responsibility of the user/operator to determine a suitable mounting location ensuring the safety
of all passengers inside the vehicle particularly avoiding areas of potential head impact.
6.
It is the responsibility of the vehicle operator to ensure daily that all features of this product work correctly. In use, the vehicle operator should
ensure the projection of the warning signal is not blocked by vehicle components (i.e., open trunks or compartment doors), people, vehicles or
other obstructions.
7.
The use of this or any other warning device does not ensure all drivers can or will observe or react to an emergency warning signal. Never take
the right-of-way for granted. It is the vehicle operator's responsibility to be sure they can proceed safely before entering an intersection, drive
against traffic, respond at a high rate of speed, or walk on or around traffic lanes.
8.
This equipment is intended for use by authorized personnel only. The user is responsible for understanding and obeying all laws regarding
emergency warning devices. Therefore, the user should check all applicable city, state, and federal laws and regulations. The manufacturer
assumes no liability for any loss resulting from the use of this warning device.
CONTENTS:
1
Light Head
2
Screws
1
Installation Guide
1
Mounting Gasket
1
Bezel
1
Alcohol Wipe
SPECIFICATIONS:
Input Voltage
Current
Physical H x W x L
Ship Weight
Maximum flex is 120 degrees
Max 30 degree
angle from
center
Installation and Operation Instructions
12-24VDC
0.8A Max @ 12VDC
0.5A Max @ 24VDC
3.9 in x 0.9 in x 0.4 in
9.9 cm x 2.3 cm x 1 cm
0.1 lb (0.05 Kg)
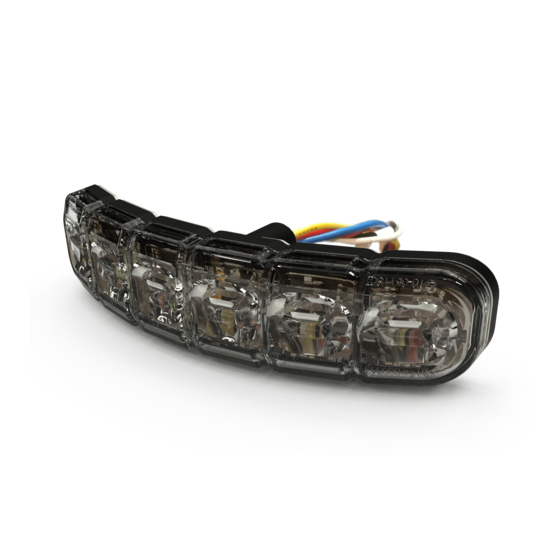
ED3794 FLEXIBLE DIRECTIONAL
Important!
This unit is a safety device and it must be connected to its own
separate, fused power point to assure its continued operation should any other
electrical accessory fail.
Caution:
When drilling into any vehicle surface, make sure the area is
free from any electrical wires, fuel lines, vehicle upholstery, etc. that could be
damaged.
Caution:
- light cannot be twisted or pulled
- do not bend in the lens direction
- Mounts to a surface curvature with a minimum radius of 3 inches.
No Pulling
Can not pull the wire because the PCB and
components will be damaged.
No Twisting
The product can't be twisted because the PCB and
components will be damaged.
Page 1 of 4
Advertisement
Table of Contents

Subscribe to Our Youtube Channel
Related Manuals for Ecco ED3794


Summary of Contents for Ecco ED3794
- Page 1 Installation and Operation Instructions ED3794 FLEXIBLE DIRECTIONAL WARNING! Failure to install or use this product according to manufacturer’s recommendations may result in property damage, serious injury, and/or death to those you are seeking to protect! Do not install and/or operate this safety product unless you have read and understood the safety information contained in this manual.
-
Page 2: Operation Environment
Mounting: Mounting on a curved surface: 1. Mark hole location using gasket as a template and drill hole for wire exit using 11/32 in. drill bit. 2. Wipe surface clean with alcohol wipe. Wait until dry. 3. Mount light using VHB adhesive. Peel adhesive backing and apply pressure to adhere to surface for 20 seconds. - Page 3 ED3794 DUAL COLOR FLASH PATTERN CHART SAE J595 CA T13 ECE R65 SAE J845* Red & White Red Wire White Wire PATTERNS SYNC. Wire AMBER BLUE WHITE AMBER BLUE AMBER BLUE AMBER BLUE WHITE 1-Default Single 75FPM Ph1 Color 1 Synchronous Color 3...
- Page 4 833 West Diamond St, Boise, Idaho 83705 Customer Service USA 800-635-5900 UK +44 (0)113 237 5340 | AUS +61 (0)3 63322444 ECCOESG.com An ECCO SAFETY GROUP™ Brand ECCOSAFETYGROUP.com 920-0642-00 Rev. C Page 4 of 4...
- Page 5 Instrucciones de instalación y uso, ED3794 DIRECCIONAL FLEXIBLE ¡ADVERTENCIA! Si no sigue las instrucciones del fabricante a la hora de instalar o usar el producto, pueden producirse daños materiales, y lesiones graves o incluso mortales a aquellos que pretende proteger.
-
Page 6: Montaje
Montaje: Montaje en una superficie curva: 1. Marque la ubicación del orificio usando la junta como referencia y perfore el orificio para la salida del cable con una broca de 11/32 pulg. 2. Limpie la superficie usando la toallita con alcohol. Espere hasta que se seque. - Page 7 Algunas jurisdicciones no permiten la exclusión o limitación de los daños derivados o fortuitos. 833 West Diamond St, Boise, Idaho 83705 Servicio Al Cliente EE.UU. 800-635-5900 +44 (0)113 237 5340 | AUS +61 (0)3 63322444 Reino Unido ECCOESG.com An ECCO SAFETY GROUP™ Brand ECCOSAFETYGROUP.com 920-0642-00 Rev. C Página 3 de 3...
-
Page 8: Instructions D'installation Et D'utilisation
Instructions d'installation et d'utilisation ED3794 DIRECTIONNEL FLEXIBLE AVERTISSEMENT! Le non-respect des recommandations du fabricant au cours de l’installation ou de l’utilisation de ce produit peut entraîner des dommages matériels et causer à ceux que vous souhaitez protéger des blessures graves, voire mortelles! N’installez pas ce produit de sécurité... -
Page 9: Montage
Montage : Montage sur une surface incurvée : 1. Marquer l’emplacement du trou en utilisant le joint comme modèle et percer le trou pour sortir le fil en utilisant un foret de 8,7 mm (11/32 po). 2. Nettoyer la surface avec une lingette imbibée d’alcool. Attendre qu’elle soit sèche. - Page 10 Certains territoires de compétence n’autorisent pas l’exclusion ou la limitation des dommages accessoires ou consécutifs. 833 West Diamond St, Boise, Idaho 83705 Le Service Client États-Unis 800-635-5900 Royaume-Uni +44 (0)113 237 5340 | AUS +61 (0)3 63322444 ECCOESG.com An ECCO SAFETY GROUP™ Brand ECCOSAFETYGROUP.com 920-0642-00 Rev. C Page 3 sur 3...
-
Page 11: Installations- Und Bedienungsanleitung
Installations- und Bedienungsanleitung ED3794 FLEXIBLE GERICHTETE BELEUCHTUNG WARNUNG! Wenn Sie dieses Produkt nicht gemäß den Empfehlungen des Herstellers installieren oder verwenden, kann dies zu Sachschäden, ernsthaften Ver- letzungen und/oder zum Tod für die Personen, denen Sie helfen möchten, führen! Installieren und/oder verwenden Sie dieses Sicherheitsprodukt nur, wenn Sie die Sicherheitsinformationen gelesen und verstanden Eine ordnungsgemäße Installation sowie eine Bedienerschulung in Hinsicht auf die Verwendung, Pflege und Wartung von Warnvorrichtun-... - Page 12 Montage: Montage auf einer gekrümmten Oberfläche: 1. Markieren Sie die Position der Bohrung mit der Dichtung als Schablone und bohren Sie das Loch für den Drahtausgang mit dem 8,7 mm (11/32") Bohreinsatz. 2. Wischen Sie die Oberfläche mit einem alkoholgetränkten Tuch sauber.
- Page 13 Ausschluss oder die Beschränkung von Neben- oder Folgeschäden nicht zulässig. 833 West Diamond St, Boise, Idaho 83705 Customer Service USA 800-635-5900 UK +44 (0)113 237 5340 | AUS +61 (0)3 63322444 ECCOESG.com An ECCO SAFETY GROUP™ Brand ECCOSAFETYGROUP.com 920-0642-00 Überar beitet B+ Seite 3 von 3...
Need help?
Do you have a question about the ED3794 and is the answer not in the manual?
Questions and answers