
Related Manuals for Agilent Technologies E8041A Interposer


Summary of Contents for Agilent Technologies E8041A Interposer
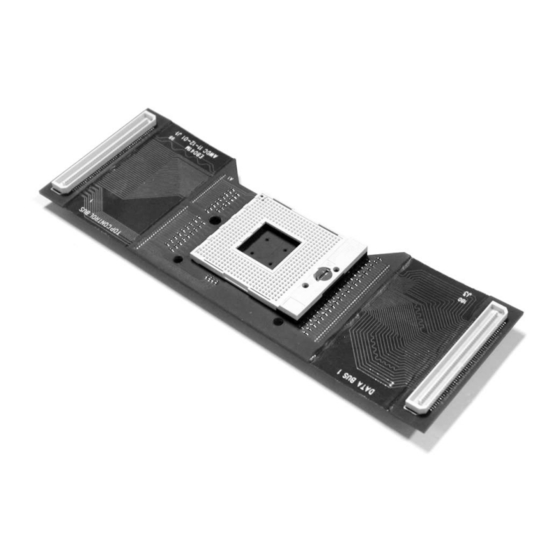
- Page 1 Agilent Technologies ® ® E8041A Interposer for the Intel Pentium Processor in the 478-Pin Package Interposer Installation Quick Start...
- Page 2 DO NOT insert any kind of tool between the interposer and the microprocessor, except as described in this manual. DO NOT kink the analysis probe cables. DO NOT pull on or twist the "wings" of the interposer. E8041A Interposer Quick Start...
- Page 3 1 Remove the heatsink from the microprocessor. 2 Remove the microprocessor from the target system. 3 Remove the Intel retention module from the target system. 4 Install the Agilent retention modules. E8041A Interposer Quick Start...
- Page 4 5 Check that the socket on the target system is still open. 6 Remove the pin protector from the interposer. Keep the pin protector. You will need it to prevent damage to the interposer whenever the interposer is not plugged into the target system. E8041A Interposer Quick Start...
- Page 5 8 Gently wiggle the interposer until you feel the pins fall into the holes of the socket. 9 Visually check that the bottom of the interposer is flush with the top of the socket on the target system. E8041A Interposer Quick Start...
- Page 6 12 Gently wiggle the assembly until you feel the pins fall into the holes. Visually check that the bottom of the processor module is flush with the top of the socket on the interposer. E8041A Interposer Quick Start...
- Page 7 13 Apply light downward pressure on the processor while you close the interposer socket. 14 Re-install the heatsink. E8041A Interposer Quick Start...
- Page 8 15 Install the clip assembly to hold the heatsink in place. Use the clip assembly which you removed earlier. E8041A Interposer Quick Start...
- Page 9 Install the supplied clips to keep the paddles on the end of the analysis probe cables from pulling apart. 17 Connect the analysis probe to the logic analyzer. Connect the pod cables to the connectors on the analysis probe as shown on the back of the analysis probe. E8041A Interposer Quick Start...
- Page 10 E8041A Interposer Quick Start...
- Page 11 Hazardous voltage symbol. agreement and written consent (see the following warnings). In source. from Agilent Technologies, Inc. as addition, note the external • Whenever it is likely that the governed by United States and markings on the instrument that ground protection is impaired, international copyright laws.
- Page 12 During the warranty period, Publication number Agilent Technologies will, at its Exclusive Remedies E8041-92001, October, 2001 option, either repair or replace Printed in USA. products that prove to be The remedies provided herein defective.