Table of Contents
Advertisement
Advertisement
Table of Contents

Related Manuals for CAE Healthcare Ares


Summary of Contents for CAE Healthcare Ares
- Page 1 User Guide Your worldwide training partner of choice...
- Page 2 CAE Inc. Trademark Information Trademarks and/or registered trademarks of CAE Healthcare Inc. and/or its affiliates include but are not limited to: Apollo, Ares, AresAR, Aria, Athena, BabySIM, BluePhantom, Caesar, CathLabVR, EndoVR, HPS, ICCU, InfantSIM, iStan, Juno, LapVR, LearningSpace, Lucina, LucinaAR, Luna, Maestro, METIman, Müse, NeuroVR, PediaSIM, SimEquip, Simulex, StethoSym, SymDefib,...
-
Page 3: Table Of Contents
Contents Contents Cautions and Warnings ....................1 Electrical Safety..............1 Product Use Warnings . - Page 4 Step 1: Place Ares Manikin in the Work Area ....... .
- Page 5 System Tools ............. . 56 Using Ares ........................57 Neurologic System .
- Page 6 CAEAres Contents Chest Compressions ............73 ECG .
-
Page 7: Cautions And Warnings
Cautions and Warnings AUTIONS AND ARNINGS Please read and understand these cautions and warnings before you begin using the Product. IMPORTANT: Do not use the product in any manner other than specified, as safety features designed for protection may be impaired. Electrical Safety •... -
Page 8: Product Use Warnings
Fluids System For manikins such as Ares that are equipped with fluid systems: • Do not modify the reservoirs or any assembly component. • Always protect your eyes, skin, and clothing against accidental exposure. -
Page 9: Battery
Cautions and Warnings Battery Manikins and tablets use lithium batteries that all have special handling requirements to avoid hazardous situations. For more information about battery specifications, see the Specifications section. For more information about battery safety, see the Battery Safety Information section. Simulator Batteries Manufacturer RRC power solutions GmbH... -
Page 10: Precautions For Handling
CAEAres Cautions and Warnings Precautions for Handling Hazards are associated with the contents of the cell or battery. Under recommended use conditions, the electrode materials and liquid electrolyte are non-reactive, as long as the cell or battery integrity remains, and the seals remain intact. Potential exposure should not exist unless the cell or battery: •... -
Page 11: Potential Health Effects
Cautions and Warnings Potential Health Effects • Acute (short term): In the event that the cell or pack ruptures, the electrolyte solution contained within the cell will corrode and can cause burns to skin and eyes. • Inhalation: Inhaling materials from a sealed cell is not an expected route of exposure. Vapors or mists from a ruptured cell can cause respiratory irritation. - Page 12 CAEAres Cautions and Warnings Item Description Batteries Shipped Independent of Batteries contained in or packed the Manikin, Tablet, and Laptop with the Manikin, StethoSym, Tablet, Laptop, and HoloLens UN No. 3480N No. 33480480 3481 UN Shipping Lithium-ion Batteries Lithium-ion Batteries Name: Transport Hazard Class:...
-
Page 13: Specifications
Specifications PECIFICATIONS All hardware and software needed for operating the simulator are provided with the shipment. Size and Weight Equipment Size Weight Manikin/Simulator 69” H x 22” W x 15” D 48.5 lbs (22 kg) (175 cm x 56 cm x 38 cm) Instructor Tablets Galaxy S3 Galaxy S3... -
Page 14: Battery
CAEAres Specifications Battery Item Description Commercial product name RRC2054 Use of the substance/ Lithium-ion (Li-ion) battery preparation Additional Information Battery-System: Lithium-ion Wh rating: 48 Wh Power Item Description Power Adapter • AC Input: AC 100 – 240 VAC, 50/60 Hz •... -
Page 15: System Requirements
These requirements also apply to devices running Maestro Standalone. CAEMaestro Software The following identifies the software version associated with the release of this user guide. Document Document Version Software Version Maestro for Ares 905K640552 v1.4 CAE Maestro v2.5 Ares User Guide 905K640152 v1.2 CAE Maestro v1.4 - 2.5 Note: There are periodic system updates for Maestro that can be downloaded from any device with an Internet connection. -
Page 16: Approved Devices
CAEAres System Requirements Approved Devices Make/Model • Samsung Galaxy Tab S3 / SM-T820 / 9.7 in. Software • Android version 7.0 • Chrome version 60 or higher Hardware • 2.15 GHz Quad-Core • 4 GB LPDDR4 RAM • 10 GB Hard Drive space available •... -
Page 17: Equipment Overview
Optional equipment is available to enhance learning scenarios. For more information, see Optional Equipment in this user guide. Standard Equipment Ares comes with standard equipment for each of the three configurations. Base Configuration Equipment Basic Airway Head with Tristate eyes... -
Page 18: Iv/Io Arm
CAEAres Equipment Overview IV/IO Arm The IV/IO arm comes with a removable IM deltoid injection pad which can be interchanged with an IO deltoid pad. IV/IO Arm NIBP and Pulse Arm The non-invasive blood pressure and pulse arm allows users to perform blood pressure readings using a modified blood pressure cuff, palpate radial and brachial pulses, and auscultate Korotkoff sounds. -
Page 19: Male And Female Genitalia, And Chest Skins
Equipment Overview Male and Female Genitalia, and Chest Skins All Ares configurations come with interchangeable male and female genitalia, and chest skins. This also includes gender specific torso skins, breasts, and wigs. Female and Male Genitalia and Chest Skins Male and Female Wigs... -
Page 20: Stethosym
CAEAres Equipment Overview StethoSym The CAE StethoSym™ assembly attaches to a stethoscope and pairs with the manikin via Bluetooth technology. This device allows users to auscultate heart, lung, and bowel sounds. One StethoSym assembly is included with the manikin. CAE StethoSym™ ©2021 CAE 905K640152 v1.2... -
Page 21: Tools And Supplies
Equipment Overview Tools and Supplies Additional supplies are included with the simulator. IO Pad, Gown, and Arm Sleeves Screwdriver, Tape, Laryngospasm Assembly, and Lubricant ©2021 CAE 905K640152 v1.2... -
Page 22: Surface Go Tablet
CAEAres Equipment Overview Surface Go Tablet The Surface Go provides the capabilities of a laptop in an ultra-portable tablet. This mobile workstation features a Windows 10 operating system, a 10 in (25.4 cm) touchscreen, and up to 9 hours battery life. The Surface Go tablet comes equipped with pre-installed CAE Maestro™... -
Page 23: Advanced And Complete Configurations
SymEyes replace Tristate SymDefib SymEyes While the Ares Base configuration comes equipped with manually controlled Tristate eyes, the Advanced and Complete Ares configurations are equipped with software controlled CAE SymEyes™. The SymEyes feature includes realistic blinking, eye panning and light-reactive pupils. Additional conditions can be selected to be displayed in the eyes, such as jaundice and hemorrhage. -
Page 24: Optional Equipment
Articulated Arm IO Leg The Ares IO leg accessory can be used for either the left or right lower leg for training on intraosseous access and infusion. A replaceable tibia bone, skin wrap and fluid reservoir are included. IO Leg... -
Page 25: Breast Examination Module
Equipment Overview Breast Examination Module The optional Breast Examination module includes: • Two breasts with configurable nodule inserts • Small (10 mm) hard with peg (6) • Small (10 mm) hard with longer peg (2) • Medium (15 mm) hard (2) •... -
Page 26: Post-Mastectomy Module
CAEAres Equipment Overview Post-Mastectomy Module This optional module allows for the practice of post-mastectomy care. The kit includes: • Post-operative left total mastectomy incision with staples • Opening for drain tube to be placed under the skin • Normal right breast Post-Mastectomy Wound Kit ©2021 CAE 905K640152 v1.2... -
Page 27: Complete Wound Kit
Equipment Overview Complete Wound Kit This optional kit for Ares contains the following eight (8) wounds: • Thigh incision • Thigh suture • Thigh bite wound • Thigh debridement • Lower leg with varicose veins and stasis ulcer • Below knee amputation stump •... - Page 28 The lower leg wound can replace the lower leg that comes on Ares. Varicose Veins with Stasis Ulcer Upper Leg Amputation Wound The upper leg amputation wound can replace the right leg that came on Ares. Below the Knee Amputation Stump ©2021 CAE 905K640152 v1.2...
-
Page 29: Moulage Kit
Equipment Overview Foot Wounds The two (2) foot wounds can replace the foot that comes on Ares. Foot with Skin Tear Diabetic Foot with Toe Infection and Heel Ulcer Moulage Kit The STOPS Hyper-Realistic® Moulage Kit (HRMK) is a versatile and reusable special effects kit for wound treatment simulation. -
Page 30: Blood Pumping System
CAEAres Equipment Overview Blood Pumping System The STOPS Blood Pumping System® (BPS) is a bleed simulation kit for realistic, severe hemorrhage simulations. The BPS is wirelessly controlled and can support up to four simultaneous venous and/or arterial bleeds. The Basic BPS model includes: •... -
Page 31: Blue Phantom Ultrasound Iv-Picc Arm
Use and care instructions can be found in the CAE Blue Phantom Ultrasound IV-PICC Arm User Guide. Geriatric Face Mask The Ares manikin can simulate a geriatric patient with the addition of the geriatric male face mask. Geriatric Face Mask... - Page 32 CAEAres Equipment Overview THIS PAGE INTENTIONALLY LEFT BLANK ©2021 CAE 905K640152 v1.2...
-
Page 33: Meet Ares
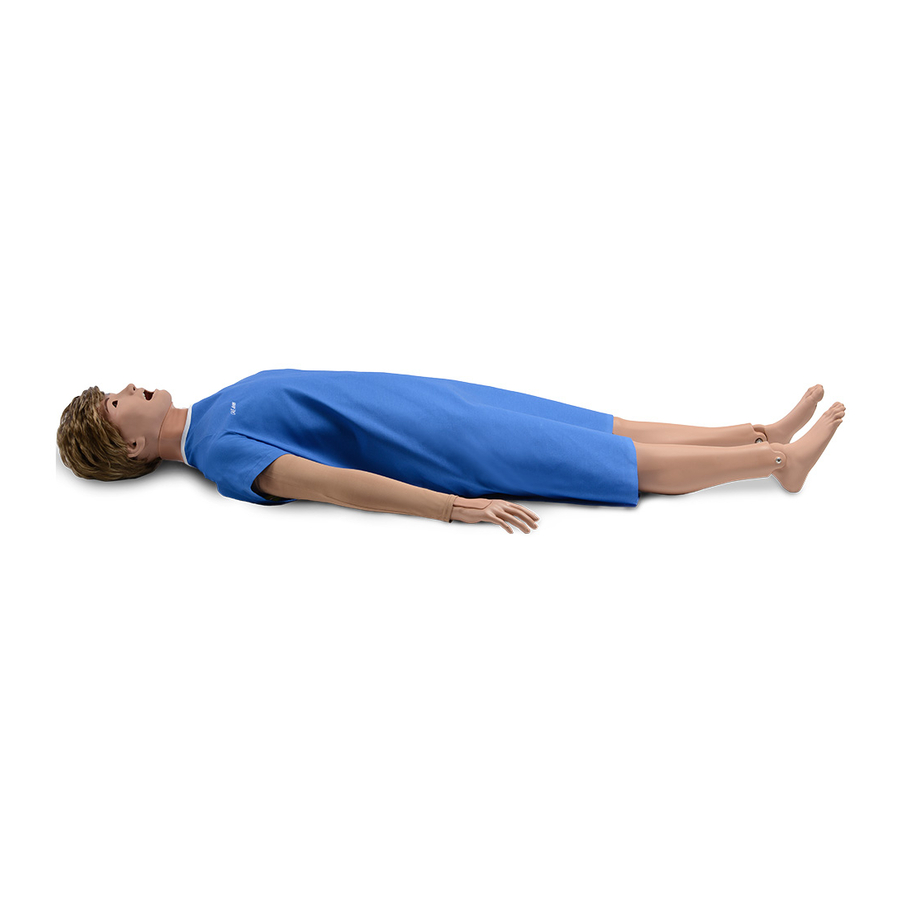
This simulator is mobile, lightweight, easy to use, and anatomically accurate for better skills proficiency and clinical assessment. Ares configurations come with interchangeable male and female chest skins, wigs and genitalia, giving you two patient simulators in one. For information on how to change the simulator’s genitalia, see Changing the Simulator’s Genitalia in this user guide. -
Page 34: Simulator Configurations
CAEAres Meet Ares Simulator Configurations The simulator is available in three configurations; Base, Advanced and Complete. Configuration Components Ares Base • Tristate eyes • Articulation with range of motion in hips, knees, ankles, shoulders • IV/IO arm and a NIBP/pulse arm •... - Page 35 • STOPS Blood Pumping System (BPS) • Blue Phantom Ultrasound IV/PICC arm • Geriatric male face mask In addition to these Ares configurations and options, CAE has a number of advanced, compatible systems available for purchase, which complement the Ares training experience. These are: •...
- Page 36 CAEAres Meet Ares THIS PAGE INTENTIONALLY LEFT BLANK ©2021 CAE 905K640152 v1.2...
-
Page 37: Setup
Setup ETUP The following instructions and guidelines inform users how to assemble the simulator and to connect to the simulator’s wireless network. Unpacking the Manikin The manikin comes in a custom-designed container that provides proper placement for all parts and accessories (skin, hospital gown, tools, etc.). -
Page 38: Setup Procedure
Setup Procedure After reviewing the guidelines for unpacking the manikin and setup preparation, proceed to the setup procedure steps. Setup Procedure Place Ares Manikin in the Work Area Prepare Ares for Legs Attach Ares’ Legs Install Ares IO Leg (Optional) Prepare Ares for Arms Attach Ares’... -
Page 39: Step 1: Place Ares Manikin In The Work Area
To prepare Ares for attaching the legs: a. Reach under Ares’ buttocks and pull the torso skin away from the skin attachment pegs. There are two skin attachment tabs on each peg. Only remove the top tab from each peg and leave the lower tab in place. - Page 40 Insert the leg screw attached to the top of the leg into the hip joint hole. Leg screw Ares’ Leg b. Place the spring over the end of the knurled nut. c. Place a metal washer on top of the spring.
- Page 41 Ensure the metal washer is against the simulator’s body. The metal washer prevents the spring from damaging the plastic. Metal washer Attaching Ares’ Legs f. Ensure that the leg moves freely. g. Repeat steps a through f for the second leg. h. Reattach the genitalia and skin.
-
Page 42: Step 4: Install Ares' Io Leg (Optional)
Remove the current left or right leg and foot from Ares at the knee joint using the Phillips screwdriver that came with Ares and a 7/16” wrench. b. Attach the left or right IO leg and foot to Ares’ thigh at the knee joint using the Phillips screwdriver and 7/16” wrench. - Page 43 Setup d. Place the skin wrap over the tibial tuberosity area, matching up the indentation in the skin with the bony prominence. Skin Wrap Indentation e. Wrap the skin around the leg and secure the hook and loop fasteners on the back of the leg.
-
Page 44: Step 5: Prepare Ares For Arms
CAEAres Setup Step 5: Prepare Ares for Arms The following tools and hardware are included: • One (1) Phillips screwdriver • Two (2) arm screws • Two (2) joint spheres To prepare for the arms: a. Remove the IM/IO pads from both arms and set them aside. -
Page 45: Step 6: Attach Ares' Iv Arm
Setup Step 6: Attach Ares’ IV Arm The following tools and hardware are included: • One (1) Phillips screwdriver • The IV arm To attach the IV arm: a. Attach the mounting screw to the hole in the shoulder mount. -
Page 46: Step 7: Attach Ares' Nibp Arm
CAEAres Setup c. Reinsert the IM/IO pad into the arm. IM/IO Pad Inserted Step 7: Attach Ares’ NIBP Arm The following tools and hardware are included: • One (1) #2 Phillips screwdriver • NIPB Arm To attach the NIBP arm: a. -
Page 47: Step 8: Modify A Blood Pressure Cuff
Setup Step 8: Modify a Blood Pressure Cuff Ares’ blood pressure can be taken using non-invasive monitoring techniques; however, modifications to a standard blood pressure cuff are required. The following tools and equipment are required: • One (1) Standard Adult Blood Pressure Cuff •... -
Page 48: Step 9: Place Ares' Wig
To place the wig on Ares’ head: a. Remove the wig from the packaging, and remove all packing materials. b. Place the wig on Ares’ head. If the wig needs to be adjusted, see the following steps in the Adjust the Fit of the Wig section. -
Page 49: Step10: Charge The Stethosym
USB end of the cable into the stethosym module. Plug the power supply adapter into a grounded power outlet. For additional information on setting up the StethoSym, refer to Using the StethoSym in the Using Ares section of this user guide. USB cable... -
Page 50: Step 11: Power On Ares
Plug the power supply into a grounded outlet. c. Press the ON/OFF button on Ares’ right side and hold it for three (3) seconds to initiate the boot-up process. When Ares is ready for operation, the simulator will say, “Hello”... - Page 51 Locate the network for the simulator. For Ares, the network name is ARE00XXXX (where XXXX is the last 4 digits of Ares’ serial number). ARE00XXXX WiFi Network Note: Ares' serial number is located on the right side of the torso by the power button. Ares serial...
- Page 52 CAEAres Setup The Connect to a Network dialog box appears. Enter caeadmin Connect to a Network Screen e. Enter caeadmin in the Security key field and click OK. The tablet is connected to the simulator’s network. To connect to the simulator’s network on the Windows Surface Go tablet: a.
- Page 53 Setup c. In the Network window, locate the simulator network from the list of available networks. For Ares, the network name is ARE00XXXX (where XXXX is the last 4 digits of Ares’ serial number). The simulator network The Network Window...
- Page 54 CAEAres Setup d. Tap the simulator network. The connection options appear. Tap the simulator network The Network Window e. Check the Connect automatically box. f. Tap Connect. The Simulator Network ©2021 CAE 905K640152 v1.2...
-
Page 55: Step 14: Set Up The Patient Monitor (Optional)
Step 14: Set Up the Patient Monitor (Optional) For instructions on setting up the Patient Monitor, see the Maestro for Ares User Guide. Step 15: Launch Maestro To launch Maestro, tap the CAE Maestro icon on the tablet desktop screen. - Page 56 CAEAres Setup THIS PAGE INTENTIONALLY LEFT BLANK ©2021 CAE 905K640152 v1.2...
-
Page 57: Ares Features
With the right blend of clinical training features, Ares is durable and reliable through repeated lifesaving team scenarios. Ares was created to fulfill requirements for advanced life support training (ACLS) and emergency care management. -
Page 58: Respiratory System
CAEAres Ares Features Respiratory System The simulator represents a realistic Respiratory System to achieve an extremely accurate simulation of respiration. This system is tightly integrated with the Cardiovascular System.See the Appendix A - Base Respiratory System Features Upper airway sounds allow for auscultation of normal and abnormal lung sounds on the anterior torso. -
Page 59: Cardiovascular System
Ares Features Cardiovascular System Similar to the Respiratory System, the Cardiovascular System accurately simulates a wide variety of hemodynamic conditions and responses. Base Cardiovascular System The simulated patient generates heart sounds, including a range of pathological ones that are synchronized to the QRS complex of the ECG and are audible with the standard stethoscope and StethoSym assembly over the left and right upper and left lower sternal border and apex. -
Page 60: Gastrointestinal System
Ares features auscultation of normal and abnormal bowel sounds using the StethoSym. Genitourinary System The manikin is provided with both male and female genitalia. Urinary catheterization (without fluids) may be performed on the manikin. For more information on changing genitalia, see the Using Ares section of this user guide. Reproductive System The Ares manikin features optional accessories for practicing clinical care skills. -
Page 61: Simulated Clinical Experiences
• Sepsis with Hypotension • Stroke In addition to the SCEs that are included with the Base Ares, five CAE EMS Learning Modules are available with 10 SCEs per module. Also available is an Advanced Cardiac Life Support (ACLS) learning module with 11 SCEs based on the AHA Guidelines and a Pathogens of High Consequence learning module with 4 SCEs (COVID-19, Pandemic Flu, Ebola and SARs). -
Page 62: Scenarios
Instructors may also modify events within a given scenario in real-time to increase or decrease event severity and shorten or prolong the duration of an event at any time during a simulation exercise. For instructions on modifying scenarios and creating new scenarios, refer to the Maestro for Ares User Guide. -
Page 63: Using Ares
Using Ares SING Once the simulator is assembled, the Ares manikin is ready for learners to practice and master new competencies, interventions, and skills during clinical scenarios. To create a fully immersive simulation experience with advanced intervention capabilities and realtime data feedback, all configurations of the Ares simulator utilize instructor-led software with scenario programming capabilities. -
Page 64: Eyes
Eyes Each pupil of the Ares Base manikin can be set manually to a fixed diameter of 3.5 or 8 mm ( normal or blown) by carefully rotating the eye from left to right or right to left until the proper size appears. - Page 65 For more information on how to control the SymEyes, see the Maestro for AresUser Guide. Performing an Eye Exam To examine Ares’ eyes when the eyes are closed, press on the brow above the eye to mimic the act of raising the eyelid.
-
Page 66: Respiratory System
CAEAres Using Ares Respiratory System The Ares manikin includes respiratory features that allow learners to practice basic assessment and life support skill sets. With the manikin, learners can: • Manage difficult airways • Perform cricothyrotomy • Maintain tracheostomy site Respiratory System Controls Ares uses both physical and mathematical models to achieve an extremely accurate simulation of respiration. -
Page 67: Nasal Packing
CONTROL: Left/ Right ON/OFF Nasal Packing Ares supports nasal packing. Nasal packing can be performed on both nares, utilizing ribbon, gauze, nasal packs, or tampons. To apply nasal packing: 1. Cut a length of ribbon gauze or use commercially available nasal pack or nasal tampon. -
Page 68: Airway Management
• Laryngopharynx Intubation The upper airway of the Ares manikin is designed to allow for intubation and laryngoscopy. Direct laryngoscopy as well as oral and nasal tracheal intubation can be performed using devices such as endotracheal tubes, nasopharyngeal airways, and oropharyngeal airways. -
Page 69: Laryngospasm
Using Ares Laryngospasm The Ares simulator comes with a manual laryngospasm feature to increase the difficulty of intubation and to indicate the need for a cricothyrotomy. The feature is activated by manually injecting air using the yellow tubing, stopcock, and syringe assembly. -
Page 70: Tracheostomy Tube Placement
CAEAres Using Ares Tracheostomy Tube Placement The following instructions provide steps for adequate tracheostomy tube placement. Learners can: • Clean the tracheostomy site. • Replace the tube. Note: The tracheostomy site is closed with a plug. To place a tracheostomy tube: 1. -
Page 71: Ventilation
Using Ares Ventilation Ares supports manual bag-valve-mask (BVM) ventilation via face mask, airway adjuncts, endotracheal tube, and tracheostomy tube. Proper ventilation will demonstrate chest rise and fall. Manual Bag-Valve-Mask (BVM) Ventilation Pneumothorax (Needle Decompression) By inserting a needle into the second intercostal space, mid-clavicular line, the sound of air being released can be heard and the intrapleural volume is reduced. -
Page 72: Cardiovascular System
CAEAres Using Ares Cardiovascular System The Ares manikin includes cardiovascular features that allow learners to practice basic assessment and advanced life support skill sets. With the Ares manikin, learners can: • Palpate pulses • Place IV lines and catheters • Administer IM and SQ injections •... -
Page 73: Pulses
StethoSym assembly. Pulses Ares comes with: • Bilateral carotid and femoral pulses • A right NIBP and pulse arm which has radial and brachial pulse locations The pulses are activated when pressure is applied to the correct location. The pulse deficits can be changed using the Maestro software. -
Page 74: Iv Cannulation
CAEAres Using Ares IV Cannulation Veins for the IV Cannulation feature are located in the dorsum of the hands, and antecubital fossa region of the arms. IV Arms To simulate realistic flashback, the system must be primed prior to use. Ensure all fluids have been removed from previous uses before each new use to prevent overfilling. -
Page 75: Iv Administration
IV Administration There are two IV sites on Ares’ left arm, dorsum of the hand, and antecubital fossa. Each IV site has an insert with a loop of tubing. The sites are filled and drained through tubing running from the IV site up to the left shoulder. - Page 76 CAEAres Using Ares To perform IV administration, learners will need: • An empty IV bag with IV tubing connected • Red food coloring (if you want to make simulated blood) • A 20 gauge IV catheter • Alcohol swab • IV Dressing •...
- Page 77 Using Ares 4. Hang the filled IV bag from an IV pole near the manikin’s shoulder. 5. Connect the IV tubing from the filled IV bag to the appropriate prime port. Connecting to Dorsum of the Hand IV Site 6. Infuse fluid until the fluid comes out of the drain tubing. This will prime that IV site for flashback and venipuncture.
-
Page 78: Intramuscular (Im) Subcutaneous (Sq) Injection
CAEAres Using Ares Intramuscular (IM) Subcutaneous (SQ) Injection Ares supports IM/SQ injection at four sites: • Bilateral deltoid • Bilateral vastus lateralis To perform an IM/SQ injection, learners will need: • IM/SQ injection pad • Standard IM/SQ injection device (see Recommended Clinical Supplies) •... -
Page 79: Intraosseous (Io) Cannulation And Infusion
Using Ares Intraosseous (IO) Cannulation and Infusion Ares also allows for humeral intraosseous (IO) cannulationand and tibial IO access and infusion. The designated IO sites are located on either deltoid side and upper tibia when using the IO leg on either the right or left side. -
Page 80: Ecg
CAEAres Using Ares On Ares, a 4-lead ECG is emitted from the appropriate positions for display on a standard monitor. To produce ECG signals on a monitor, connect the lead unit to the ECG contacts (or snaps) located on the manikin. -
Page 81: Defibrillation, Cardioversion, And Pacing
The manikin can receive simulated electrical therapy in two ways: by administering defibrillation through the software or by using the SymDefib device with a live defibrillator. Simulated Defibrillation For instructions on administering defibrillation through the software, refer to the Maestro for Ares User Guide. Commercial Defibrillation The manikin is designed to safely absorb the energy discharged from commercial defibrillators through the SymDefib. - Page 82 Coarse ventricular fibrillation and high-rate ventricular tachycardia cardiac rhythms are automatically recognized as “shockable” rhythms. • With each defibrillation, Ares automatically records the amount of energy discharged and the time defibrillation was performed. The simulated patient response to defibrillation is determined by the scenario script or instructor intervention.
- Page 83 Using Ares The following chest image identifies the location of the magnetic snaps. Magnetic snap Magnetic snap Ares Torso An AED can use the ECG signal to determine if a shock is necessary. You can deliver a shock to the manikin.
-
Page 84: Blood Pressure
10). For more information, see the Maestro forAresUser Guide. Blood Pressure Ares supports non-invasive blood pressure measurements, and systolic and diastolic readings can be obtained and manipulated through the software. Systolic and Diastolic Blood Pressure To manually adjust the systolic and/or diastolic blood pressure: 1. - Page 85 To get a blood pressure reading: 1. Connect the extension from the T-fitting on the blood pressure cuff adapter to either of the NIBP port on Ares’ right side. 2. Ensure the electronics tether from the NIBP arm is connected to the arm connector on Ares’...
-
Page 86: Gastrointestinal System
StethoSym utilizing the RFID tags. For further information, see Using the StethoSym in this guide. Genitourinary System Ares may be configured with either male or female genitalia, either of which allows for the insertion of a urinary catheter. Changing the Simulator’s Genitalia Ares comes with male and female genitalia. - Page 87 Using Ares Ares is shipped with the male chest skin in place and no genitalia . To change the genitalia: 1. Roll the manikin onto its side. 2. Detach the skin from the lower torso skin attachment pegs by gently pulling the skin tabs up and over the attachment pegs.
- Page 88 CAEAres Using Ares 6. Remove the abdominal plate and set it aside. 7. Gently pull the current genital insert upward to remove it. Removing the Genitalia 8. Place the new genital insert into position by flexing the bottom of the genitalia and directing it under the metal frame into the cut out area.
- Page 89 Using Ares To attach the alternate chest skin: 1. Position the new chest skin on the manikin and align the ECG holes. Aligning the ECG Holes 2. Attach the upper skin tabs to the upper skin anchors. Note: If converting from male to female, place and align the breast foam inserts on the female’s chest prior to placing the chest skin.
-
Page 90: Urinary Catheterization
Catheterize Ares using a 16-French urinary catheter lubricated with silicone spray. Both female and male genitalia can be catheterized. Note: Ares does not have a urinary fluid reservoir, so there will not be any fluid output. Reproductive System The Ares manikin allows for the learner to practice: •... -
Page 91: Wound Care
Using Ares To use the breast exam module: 1. Remove the female skin and breasts. 2. Place the nodules in the holes on the underside of the new breasts (movable). When placing the nodules, make sure to take the following size and hardness characteristics into account: Medium 15 mm soft is difficult to feel when placed inside any of the breast holes. - Page 92 The upper leg amputation wound provides an example of a below the knee leg amputation. To replace the standard right leg on Ares, use the tools that are provided in the wound kit: 1. Remove the right leg from the manikin.
-
Page 93: Post-Mastectomy Care
• Normal right breast Post-Mastectomy Wound Kit To use the Post-Mastectomy wound kit: 1. Remove the female skin from Ares. 2. Replace with the post-mastectomy skin. 3. Place the end of a drainage system through the hole and underneath the skin. -
Page 94: Medication Administration
Auscultated Sounds To auscultate sounds on the Ares manikin, be sure to locate a stethoscope and set up the StethoSym prior to beginning a simulation. -
Page 95: Using The Stethosym
Using Ares Using the StethoSym StethoSym can only be used on manikin configurations that include RFID tags. For more information on configurations, see the Simulator Configurations section of this user guide. Setting Up the StethoSym To set up the stethosym: 1. - Page 96 CAEAres Using Ares 2. Place the StethoSym speaker module over a sound tag on the manikin for approximately 10 seconds. This ensures that StethoSym connects to the proper mannequin. StethoSym displays a solid blue light when it is connected. When a patient is running in Maestro, you can listen to any available physiologic sounds by placing the StethoSym in the proper location.
-
Page 97: Speech
To connect the microphone headset with 3.5 mm cable, plug the cable into the headphone port on the tablet. For more information on adjusting the VoIP “Intercom” settings in the software, see the Using the Intercom section in the Maestro for Ares User Guide. ©2021 CAE 905K640152 v1.2... - Page 98 CAEAres Using Ares THIS PAGE INTENTIONALLY LEFT BLANK ©2021 CAE 905K640152 v1.2...
-
Page 99: Care And Maintenance
Care and Maintenance ARE AND AINTENANCE Maintaining the simulator requires careful treatment of electronic and mechanical components. Following the use of the simulator, make sure all components are properly handled and correctly removed or placed into storage. Note: Do not attempt to open or repair any simulator components with out authorization from CAE Customer Service or their representative. -
Page 100: Breakdown
Gently rub the soiled area with a soft cloth to remove most marks and stains. DO NOT use solvents or abrasive pads. Inspect the manikin for damage or puncture marks. If damage exists, contact CAE Healthcare Customer Service immediately for a repair. Prompt repair prevents expansion of the damaged area. -
Page 101: Step 3: Maintaining Im Injection Sites
Care and Maintenance e. Infuse until clear fluid flows from the IV drain tubing. Flushing the IV Fill/Drain Tubing f. Disconnect the syringe and fill the syringe with air. g. Flush the IV prime port with air until air flows from the IV drain tubing. h. - Page 102 CAEAres Care and Maintenance b. Remove the sponge from inside the pad. Remove the Sponge from the IM Pad c. Squeeze all the fluid from the sponge and let air dry. Squeezing Fluids from the Sponge d. When dry, replace sponge back inside pad. e.
-
Page 103: Step 4: Drain The Io Leg Reservoir
Care and Maintenance Step 4: Drain the IO Leg Reservoir If the simulation included use of the IO leg, perform the following steps prior to storing the manikin: a. Remove the outer skin wrap. b. Remove the IO tibia bone module with attached reservoir from the cavity. c. -
Page 104: Step 6: Power Off The Manikin
To power off the manikin: a. Press the button located on right side of the simulator and hold it for three seconds. b. Disconnect Ares’ power supply to the DC IN connection on Ares’ right side. c. Unplug the power supply from the outlet. -
Page 105: Storage
Care and Maintenance Storage IMPORTANT : Do not attempt to open or repair any simulator components. Doing so may void the warranty. If damage exists, contact CAE Customer Service immediately for a repair. Prompt repair prevents expansion of the damaged area. Prior to storing the product: •... -
Page 106: Long-Term Storage
CAEAres Care and Maintenance Long-Term Storage Follow these guidelines for long-term storage (more than two months): • Storing the battery discharged for months will likely destroy the battery. Since the simulator consumes a small amount of power even when turned off, it is best to charge the battery to 100% before storing the simulator for a month or two. -
Page 107: Appendix A - Recommended Clinical Supplies
Appendix A - Recommended Clinical Supplies A - R PPENDIX ECOMMENDED LINICAL UPPLIES These supplies are not provided with the simulator and need to be acquired by the facilitator for use when performing competencies during clinical scenarios. The sizes listed below are recommendations only. - Page 108 caehealthcare.com For more information about CAE products, contact your regional sales manager or the CAE distributor in your country, or visit caehealthcare.com. Tel +1 941-377-5562 or 866-233-6384 For customer service, please contact CAE. Customer Service Headquarters - United States Monday - Friday from 7:00 a.m. to 6:00 p.m. ET Phone 1-866-462-7920 Email: srqcustomerservice@cae.com Customer Service - Canada...
Need help?
Do you have a question about the Ares and is the answer not in the manual?
Questions and answers
My stethoscope is fully charged and has orange light indication. It does not turn on to green when I try to link it to the simulator and press the switch to start link