Advertisement
SEM-Honeywell/ADEMCO Vista Dual-Path (SEM300) - Installation
Guide
925-00002-001 Rev A
Alarm.com Dual-Path System Enhancement Module (SEM) is the most cost-effective and comprehensive solution to
migrate compatible Honeywell/ADEMCO VISTA-10P, VISTA-15P, and VISTA-20P panels to Alarm.com's award-winning
interactive services. The Dual-Path SEM supports the 4G LTE cellular network and optional Broadband Ethernet. This
ensures the longest life cycle with the most secure and reliable service.
Equipment
System Enhancement Module
Installation guide
https://answers.alarm.com/ADC/Partner/Installation_and_Troubleshooting/Panels/SEM_Honeywell_ADEMCO_Vista/SEM-Ho...
Updated: Thu, 27 May 2021 18:46:08 GMT
1
Advertisement
Table of Contents

Related Manuals for Alarm.Com ADC-SEM300


Summary of Contents for Alarm.Com ADC-SEM300
- Page 1 Guide 925-00002-001 Rev A Alarm.com Dual-Path System Enhancement Module (SEM) is the most cost-effective and comprehensive solution to migrate compatible Honeywell/ADEMCO VISTA-10P, VISTA-15P, and VISTA-20P panels to Alarm.com’s award-winning interactive services. The Dual-Path SEM supports the 4G LTE cellular network and optional Broadband Ethernet. This ensures the longest life cycle with the most secure and reliable service.
- Page 2 Wire Wall anchors and screws https://answers.alarm.com/ADC/Partner/Installation_and_Troubleshooting/Panels/SEM_Honeywell_ADEMCO_Vista/SEM-Ho… Updated: Thu, 27 May 2021 18:46:08 GMT...
-
Page 3: Recommended Tools And Supplies
• Ethernet cable • Alpha keypad (not required) ◦ Alarm.com strongly recommends installing an alpha keypad to ensure the failure to communicate (FTC) trouble condition is displayed to the user. See FAQs for more information. • Four-conductor, 22 AWG or larger stranded wire The following table shows the maximum wire length for each gauge. -
Page 4: Prepare The System
Prepare the system Before powering down the system: Verify panel compatibility Verify that the panel is compatible by checking the version and year printed on the PROM chip inside the panel enclosure. https://answers.alarm.com/ADC/Partner/Installation_and_Troubleshooting/Panels/SEM_Honeywell_ADEMCO_Vista/SEM-Ho… Updated: Thu, 27 May 2021 18:46:08 GMT... - Page 5 The default keypad address the SEM uses is Keypad 8 Device Address 23. If this keypad address is disabled, the SEM and panel will not communicate properly. However, at first power-up, the SEM will attempt to enable this address https://answers.alarm.com/ADC/Partner/Installation_and_Troubleshooting/Panels/SEM_Honeywell_ADEMCO_Vista/SEM-Ho… Updated: Thu, 27 May 2021 18:46:08 GMT...
- Page 6 3. Then remove AC power and disconnect the backup battery to completely power down the system. Create an Alarm.com account 1. Create a new Alarm.com customer account using Partner Portal or MobileTech. The IMEI located on the Alarm.com module will be needed to create this account.
- Page 7 2. During the account creation process, you are prompted to enter the current installer code on the panel. Alarm.com uses this code to access panel programming and read information stored on the panel. 3. At the end of the Create New Customer process, you are able to print or email a Welcome Letter for the customer, which includes login information for the Alarm.com Customer Website.
- Page 8 2. Inspect the wiring to verify there are no loose ends or intermittent connections between the device and system. The presence of peripheral device issues can often cause the SEM installation process to take longer than expected. Connect the SEM Mounting https://answers.alarm.com/ADC/Partner/Installation_and_Troubleshooting/Panels/SEM_Honeywell_ADEMCO_Vista/SEM-Ho… Updated: Thu, 27 May 2021 18:46:08 GMT...
- Page 9 SEM to the panel. 2. Remove the snap-off plastics. There are two routing options available: the side of the enclosure for side routing or the rear of the enclosure for wall routing. https://answers.alarm.com/ADC/Partner/Installation_and_Troubleshooting/Panels/SEM_Honeywell_ADEMCO_Vista/SEM-Ho… Updated: Thu, 27 May 2021 18:46:08 GMT...
- Page 10 Tighten the first two mounting screws fully to the unit and wall to complete the mounting process. Wiring Important: Alternate wiring is required when using this device for ETL installations. For more information, see requirements. https://answers.alarm.com/ADC/Partner/Installation_and_Troubleshooting/Panels/SEM_Honeywell_ADEMCO_Vista/SEM-Ho… Updated: Thu, 27 May 2021 18:46:08 GMT...
- Page 11 6. Then close the enclosure by sliding the cover into the mounting points at the top of the enclosure base and then swinging down the cover to snap the thumb tabs into place. https://answers.alarm.com/ADC/Partner/Installation_and_Troubleshooting/Panels/SEM_Honeywell_ADEMCO_Vista/SEM-Ho… Updated: Thu, 27 May 2021 18:46:08 GMT...
- Page 12 3. When the zone scan is complete, the keypad will display the home screen. The equipment list is now available on the Partner Portal equipment page and the MobileTech Remote Toolkit and all user codes are synced to the Customer Website. ◦ Zone scan complete: https://answers.alarm.com/ADC/Partner/Installation_and_Troubleshooting/Panels/SEM_Honeywell_ADEMCO_Vista/SEM-Ho… Updated: Thu, 27 May 2021 18:46:08 GMT...
-
Page 13: Additional Information
1. The correct devices are present on the account equipment list in Alarm.com MobileTech. 2. The customer can view all user codes in the Alarm.com mobile app or customer website, and the correct users are reported when arming or disarming at the panel. -
Page 14: Installation Settings
To use the bypass open sensors feature through Alarm.com, *23 Quick (Forced) Bypass must be enabled. This setting is not enabled automatically and must be enabled to use this feature on the Alarm.com Customer Website or mobile app. For more information about enabling bypass features, see Bypass a sensor on a SEM-Honeywell/ADEMCO Vista. - Page 15 Important: All monitoring station forwarding settings should be set up via Alarm.com Monitor Settings. ETL Requirements This device is certified to be used for fire and burglary monitoring in residential applications only. When using this device with ETL installations, the following requirements apply: •...
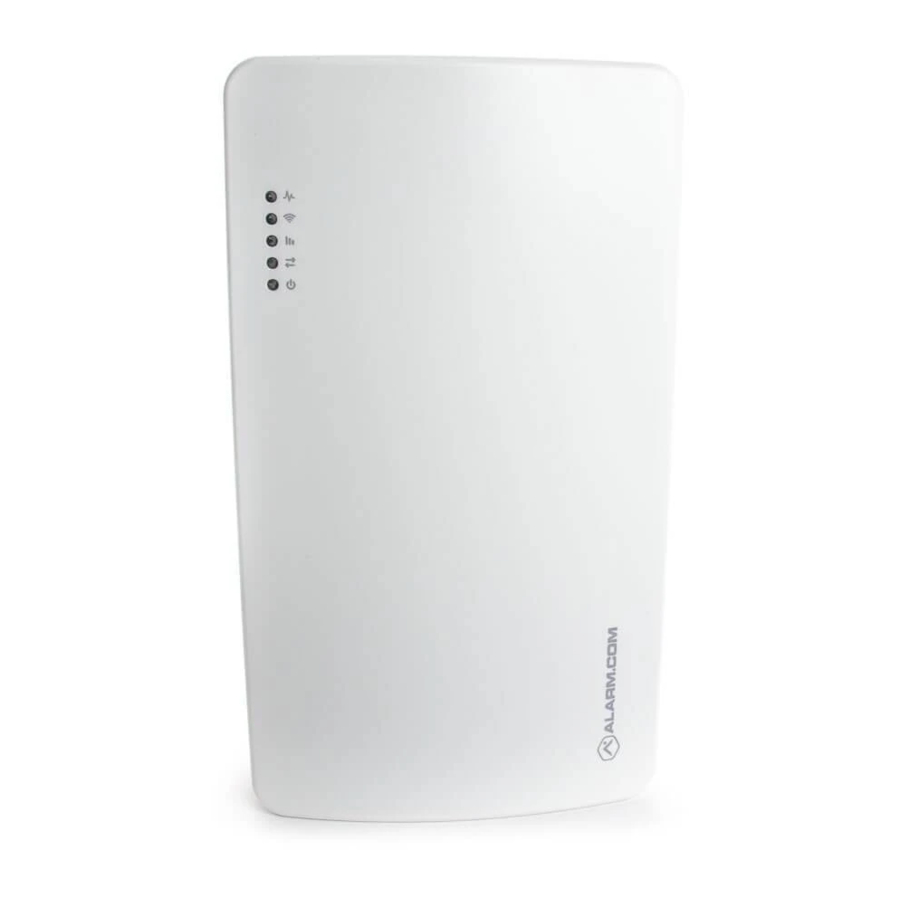
- Page 16 Note: For advanced troubleshooting, open the cover to look at the Alarm.com module LEDs. For more information about the module LEDs, see SEM-Honeywell/ADEMCO Vista - Module LED Troubleshooting. Trouble LED The Trouble LED flashes 1 to 8 times in a four-second interval to indicate specific error conditions.
- Page 17 If the serial numbers are the same, contact Alarm.com CORE Technical Support. Path LED The Path LED flashes to indicate the active communication path (cellular, broadband, or both) to Alarm.com. https://answers.alarm.com/ADC/Partner/Installation_and_Troubleshooting/Panels/SEM_Honeywell_ADEMCO_Vista/SEM-Ho… Updated: Thu, 27 May 2021 18:46:08 GMT...
-
Page 18: Troubleshooting
Communication to Alarm.com or monitoring station If there is no activity present in the event history or the account is not signaling to Alarm.com. 1. Initiate a communication test from the SEM by pressing [#] + [9] + [8] + [7] + [*] to initialize communication with Alarm.com or verify the module is communicating on the cellular network. - Page 19 Customer user codes If the panel does not support uploader/downloader, the customer user codes must be manually synced to Alarm.com. If user codes are not visible, The SEM may be having issues scanning the user codes programmed at the panel. To resolve: 1.
-
Page 20: Specifications
5. Power cycle the system and request the firmware version. Questions? If you are experiencing difficulties with your installation, please contact Alarm.com CORE Technical Support 866-834-0470 and we'll be happy to assist further. Specifications 13.6 V nominal, 125 mA nominal (continuous), 230 mA... -
Page 21: Regulatory Information
Contains FCC: YL6-143470L, Model: ADC-470L Changes or modifications not expressly approved by Alarm.com can void the user’s authority to operate the equipment. This equipment has been tested and found to comply with the limits for a Class B digital device, pursuant to part 15 of the FCC Rules. -
Page 22: Additional Resources
Certified to ULC STD S545 Additional resources Enroll in the System Enhancement Module (VISTA Dual-Path) 201 course today! For more information on accessing Academy Training, see How can I access Academy Training?. https://answers.alarm.com/ADC/Partner/Installation_and_Troubleshooting/Panels/SEM_Honeywell_ADEMCO_Vista/SEM-Ho… Updated: Thu, 27 May 2021 18:46:08 GMT...
Need help?
Do you have a question about the ADC-SEM300 and is the answer not in the manual?
Questions and answers