Bose 321 Series III Owner's Manual
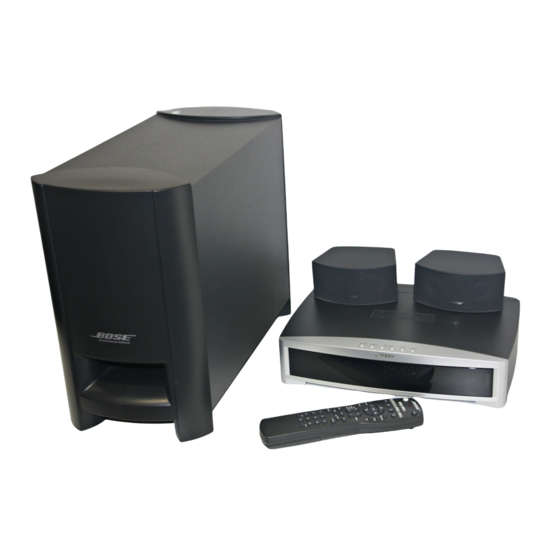
3-2-1 home entertainment system
Hide thumbs
Also See for 321 Series III:
- Owner's manual (107 pages) ,
- Manual (29 pages) ,
- Quick setup manual (2 pages)
Table of Contents
Advertisement
Advertisement
Table of Contents

Subscribe to Our Youtube Channel
Related Manuals for Bose 321 Series III


Summary of Contents for Bose 321 Series III
- Page 1 3•2•1 Home Entertainment System Owner’s Guide January 29, 2002 AM256950_02_V.pdf...
-
Page 2: Safety Information
Please take the time to follow this owner’s guide carefully. It will help you set up and operate your system properly, and enjoy all of its advanced features. Save your owner’s guide for future reference. ©2002 Bose Corporation. No part of this work may be reproduced, modified, distributed or otherwise used without prior written per- mission ®... -
Page 3: Table Of Contents
Where to find... Safety Information ............. . . Introduction . - Page 4 Contents Using the radio ............. . 30 Tuning .
-
Page 5: Introduction
Before you begin Thank you for purchasing the Bose sound, elegance, and simplicity in an advanced home audio setup. Using Bose proprietary signal processing technology, the 3•2•1 system provides improved spaciousness from stereo recordings, and bold movie effects from surround-encoded materials. Yet its few parts require little labor to set up, so you can enjoy your new system’s performance right away. - Page 6 Introduction Chapter – In DVD-Video, a division of a title. Technically called a part of title (PTT). Composite Video – A single video signal that contains luminance, color, and synchronization information. NTSC and PAL are examples of composite video systems. Dolby* –...
-
Page 7: For Your Records
Introduction S-video – A video interface standard that carries separate luminance and chrominance sig- nals, usually on a four-pin mini-DIN connector. Also called Y/C. The quality of S-video is sig- nificantly better than composite video since it does not require a comb filter to separate the signals. -
Page 8: System Setup
WARNING: To avoid danger of suffocation, keep the plastic bags out of the reach of children. If any part of the system appears damaged, do not attempt to use it. Notify Bose authorized Bose dealer immediately. For Bose contact information, refer to the address sheet included in the carton. -
Page 9: Selecting Locations For Your Model 3•2•1 Speakers And Media Center
You may obtain additional rubber feet (part number 178321) from Bose offices included in the product carton. ® Customer Service. To contact Bose, refer to the list of AM256950_02_V.pdf • January 29, 2002 System Setup ®... -
Page 10: Media Center Placement
The small speakers are designed to sit only on their bottom surface (Figure 4). In that position (with the Bose logo right side up), they can also be mounted on optional Bose brackets, table stands, or floor stands. For details and ordering information, refer to Accessories on page 40. -
Page 11: Placement Choices For The Acoustimass
Placement choices for the Acoustimass Consider the guidelines below when choosing a location for the module. Make sure to place it: • within reach of the cables to the music center and an AC (mains) power outlet • at the same end of the room as the TV and the speakers (Figure 5) •... -
Page 12: When The System Setup Is Completed
System Setup When the system setup is completed With the speakers and media center placed as directed, you can enjoy the freedom to sit, recline, or move about in the room without missing a note. Figure 7 System placement for ideal coverage CAUTION: Be sure to read the section on making connections before you plug in the system. -
Page 13: Making The Connections
Making the connections Labeled jacks on the rear of the media center (Figure 8) and the custom cables supplied with the Model 3•2•1 system make it easy to get everything hooked up right the first time. Figure 8 Connection panel on the rear of the media center Follow these basic steps 1. - Page 14 To make this alternate connection, insert the end of an S-video cable from the TV into the S- VIDEO OUTPUT on the media center. This cable may be purchased from your Bose a local electronics retailer.
-
Page 15: Connecting Other Sources
Connecting other sources You can connect both the audio and video outputs of a VCR or other video source to the media center. A video connection will pass signals through to the TV. A typical arrangement of components is shown in Figures 13 through 15. For additional examples of how these connections can be made, refer to “Other choices”... -
Page 16: Connecting Your Tv To The System
System Setup Connecting your TV to the system The type of video connection used with your TV (Figure 14) must match the type of connec- tion used with your VCR. If you connected your TV to the COMPOSITE VIDEO OUTPUT (using the cable with a yellow connector at each end), connect your VCR output to the COM- POSITE VIDEO INPUT. -
Page 17: Attaching The Supplied Antennas
Figure 15 Connecting audio output from a VCR to the VIDEO 2 input on the media center, and the video from the VCR to the composite video input on the media center Note: Do not connect the video output of your 3•2•1 system media center to a VCR; playing copy-protected DVDs may result in poor picture quality. -
Page 18: Connecting Cable Fm Radio
System Setup Connecting cable FM radio Some cable TV providers make FM radio signals available through the cable service to your home. This connection is made to the external FM jack on the back panel of the media center. To connect to this service, contact your cable TV provider for assistance. Note: Make sure that the cable radio installation includes a signal splitter so that only the FM radio band, not the cable TV band, is received by the media center. -
Page 19: Installing Remote Control Batteries
VCR. Audio from the VCR is connected to the media center, while the TV audio is not. Any non-cable/satellite TV sound comes directly from the TV, while you enjoy the benefits of Bose ® sound with any cable/satellite or VCR programs. -
Page 20: Connecting Recording Equipment
System Setup In Figure 20, the audio from both the cable or satellite box and the VCR is routed to the TV, and the TV audio is connected to the media center. This delivers all of the video source sound through one jack (for instance, VIDEO 1) on the media center. -
Page 21: Connecting Other Playback Equipment
Connecting other playback equipment Other playback components, such as an audio CD changer, can be connected to the AUX inputs on the rear panel of the media center (Figure 22). Figure 22 AUX input connections Connecting digital audio components Your other audio components may feature a digital audio output. If so, you can connect an optical output to the OPTICAL jack of the VIDEO 1 INPUT or a coaxial output to the coaxial jacks of VIDEO 1, VIDEO 2, or AUX on the rear panel of the media center. -
Page 22: Controls, Display, Menus
Note: Neither the Model 3•2•1 remote nor the media center can switch components, such as the TV or VCR, on or off. However, a universal remote (new enough to include codes for the Bose Model 3•2•1 system) or programmable “learning” remote can control this system. The remote control Buttons on the remote control are grouped according to function. -
Page 23: Source And Menu Controls
Displays the menu of the DVD disc currently loaded in the tray, as the particular DVD allows. Displays or exits the Bose 3•2•1 system on-screen menus. Skips to the next/previous DVD chapter, radio station preset, or CD track. -
Page 24: The Media Center
Controls, Displays, Menus The media center The media center has a control panel on the top, a display area on the front that indicates the current status of the system, and a DVD/CD tray that opens on the front of the console. Control panel and buttons The media center has eight buttons located on the top control panel. -
Page 25: Tv On-Screen Menus
TV on-screen menus With both the TV and the Model 3•2•1 system turned on, you can use menus that appear on the TV screen to choose among options for audio and video performance. To enter the Settings menu Press the Settings button on the remote. The displayed menu will contain items related to the currently selected source. - Page 26 Controls, Displays, Menus To change a setting Figure 25 Example of changing a setting DVD Play Options (1 of 2) Title: Chapter: Title Time: Time Display: Motion Control: Audio Track: Camera Angle: More… Chooses an audio track for the current DVD. To check the system status Figure 26 A DVD status example...
-
Page 27: Operation
Turning your system on and off You can turn your system on and off using the On/Off button ( the power button ( source that was played last is automatically selected. You can also press any source button on the remote to turn the system on and select the source at the same time. -
Page 28: Using The Parental Control Feature To Restrict Future Play
Operation Using the Parental Control feature to restrict future play You can restrict playback of DVD movies by setting the level of Parental Control. The levels match ratings on each DVD that are equivalent in many cases to standard movie ratings provided by the Motion Picture Association of America (MPAA). -
Page 29: Loading And Playing A Cd
Camera Angle: More... Previous... Subtitle: Subtitle Language: Lang1/ Lang2/ etc. AB Repeat Loading and playing a CD 1. On the remote, press the CD/DVD button. 2. At the media center, press the Stop/Eject 3. Place the audio CD in the open disc tray. 4. -
Page 30: Changing Cd Settings
Operation Changing CD settings While the system is in CD mode, press the Settings button on the remote control to gain access to the options shown here. For more details on changes you can make to the settings, refer to the Sound Adjustments and System Adjustments sections of this guide. Selection: CD setting options: Sleep Timer:... -
Page 31: Storing Preferred Stations As Preset Selections
Storing preferred stations as preset selections For radio stations that you listen to regularly, you can assign a preset number (1-25 in the AM band and 1-25 in FM) to tune to them quickly. To store a particular station: 1. Tune to that station using the Tune, Seek, or Scan buttons on the remote. 2. -
Page 32: Changing Am Settings
Operation Changing AM settings Selection: AM setting options: Sleep Timer: Station: Preset: Available only if presets include an AM station AM Status selection Audio Setup selection System Setup selection Playing other sources Turn on any component connected to the media center by using the remote for that compo- nent or controls on the component front panel. -
Page 33: Sound Adjustments
Range compression not active. 1 of n Not shown above. Indicates that a Dolby 1+1 audio track is playing. Automatically engages Bose Dolby Digital bitstream indicates that it contains a mono program. This feature can process a one-channel program in multi-speaker sound, directing the signals so that dialogue remains locked on- screen, while music and ambient effects fill the room. -
Page 34: Settings: Audio Setup
Sound Adjustments Treble Compensation: Bass Compensation: Figure 27 DVD audio status Settings: Audio Setup Movie EQ: Range Compression: Mono Decoding: Audio Status: Treble Compensation: 0 Bass Compensation: Displays information about volume and other adjustments. –15 to +15 Decreases(–) or increases (+) the treble sound. Rooms with too few sound-absorbing furnishings, especially those with bare floors and walls, may sound overly shrill or “bright.”... -
Page 35: System Adjustments
System Setup. 3. Press the Enter button and the System Setup will be displayed. If you forget your password, contact Bose Customer Service for assistance. Refer to the Bose address list enclosed with this system. button, scroll down the list and select (highlight) -
Page 36: System Setup Menu
System Adjustments System Setup menu The System Setup menu lists options for how to set up the entire system. Selection: Setting options: Display Language: English/French/ DVD Setup Video Format: Video Black Level: DVD Setup submenu The DVD Setup submenu lists options for how the DVD player should operate, including Parental Control. -
Page 37: Parental Control Submenu
Lists options for how to create a new password or to change a cur- rent password. Passwords cannot be deleted. If you forget your password, contact Bose Customer Service for assis- tance. Refer to the Bose address list enclosed with this system. -
Page 38: Reference
Reference Taking care of your 3•2•1 home entertainment system Caring for your system may include cleaning the system’s enclosures, cleaning your discs, and replacing the remote control batteries. Cleaning the media center • Use only a soft, dry cloth to clean the outside surfaces of the media center. •... -
Page 39: Troubleshooting
Troubleshooting Problem What to do System doesn’t do any- • Make sure the unit is turned on. thing • Make sure the power cord is inserted securely into the Acoustimass firmly into an operating AC wall outlet. • Be sure to select a source (CD/DVD, AM/FM, etc.). •... -
Page 40: Customer Service
Bose also offers cable adapters for use in running speaker cable through walls. For further information or to order mounting brackets, stands, or cable adapters, contact your Bose dealer. Or, to call Bose directly, refer to the address sheet included with the system. Technical information... - Page 41 Reference AM256950_02_V.pdf • January 29, 2002...
- Page 42 AM256950_02_V.pdf • January 29, 2002...
- Page 43 AM256950_02_V.pdf • January 29, 2002...
- Page 44 ' 2002 Bose Corporation, The Mountain Framingham, MA 01701-9168 USA 256950 AM Rev.02 JN20744 AM256950_02_V.pdf • January 29, 2002...
Need help?
Do you have a question about the 321 Series III and is the answer not in the manual?
Questions and answers