Table of Contents
Advertisement
Available languages
Available languages
Quick Links
MICROWAVE OVEN
Model: CVM721
Contents
Safety Information . . . . . . . . . . . . . . . . . . . . . . . . . . . . . . .3
Using the Microwave
Features . . . . . . . . . . . . . . . . . . . . . . . . . . . . . . . . . . . . . .6
About the Features . . . . . . . . . . . . . . . . . . . . . . . . . . . . .7
Other Features . . . . . . . . . . . . . . . . . . . . . . . . . . . . . . . .15
WiFi Connect . . . . . . . . . . . . . . . . . . . . . . . . . . . . . . . . .20
Remote Enabled Equipment . . . . . . . . . . . . . . . . . . . . .20
Owner's Manual
Write the model and serial numbers here:
Model # _______________________________
Serial # _______________________________
You can find them on a label on the inside cavity
wall of the microwave.
English • Français
TM
Care And Cleaning . . . . . . . . . . . . . . . . . . . . . . . . . . . . .21
Toubleshooting . . . . . . . . . . . . . . . . . . . . . . . . . . . . . . . .23
Limited Warranty . . . . . . . . . . . . . . . . . . . . . . . . . . . . . . .25
Consumer Support . . . . . . . . . . . . . . . . . . . . . . . . . . . . .26
49-2000646 02-19 GEA
Advertisement
Chapters
Table of Contents

Subscribe to Our Youtube Channel
Related Manuals for GE CAFÉ CVM721


Summary of Contents for GE CAFÉ CVM721
-
Page 1: Table Of Contents
Owner's Manual MICROWAVE OVEN Model: CVM721 Contents Safety Information .......3 Care And Cleaning . - Page 2 THANK YOU FOR MAKING CAFÉ A PART OF YOUR HOME. We take pride in the craftsmanship, innovation and design that goes into every Café product, and we think you will too. Among other things, registration of your appliance ensures that we can deliver important product information and warranty details when you need them.
- Page 3 IMPORTANT SAFETY INSTRUCTIONS READ ALL INSTRUCTIONS BEFORE USING THE APPLIANCE To reduce the risk of burns, electric shock, fire, injury to persons, or exposure to WARNING excessive microwave energy: When using electrical appliances, basic safety precautions should be followed, including the following: ■...
- Page 4 IMPORTANT SAFETY INSTRUCTIONS READ ALL INSTRUCTIONS BEFORE USING THE APPLIANCE WARNING OPERATING SUPER HEATED WATER ■ As with any appliance, close supervision is necessary ■ Liquids, such as water, coffee, or tea, are able to when used by children. be overheated beyond the boiling point without appearing to be boiling.
- Page 5 IMPORTANT SAFETY INSTRUCTIONS READ ALL INSTRUCTIONS BEFORE USING THE APPLIANCE PRECAUTIONS TO AVOID POSSIBLE EXPOSURE TO EXCESSIVE MICROWAVE ENERGY (a) Do Not Attempt to operate this oven with the (c) Do Not Operate the oven if it is damaged. door open since open-door operation can result It is particularly important that the oven door close in harmful exposure to microwave energy.
-
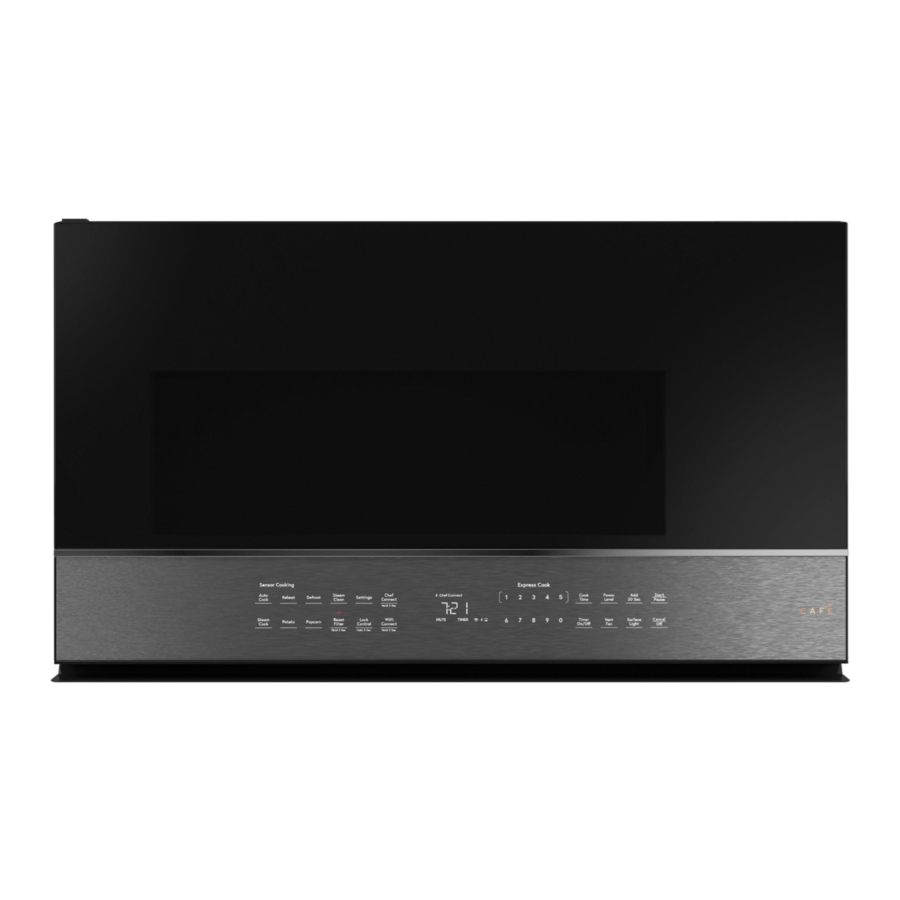
Page 6: Features
Features Throughout this manual, features and appearance may vary from your model. 1. Door Handle 5. Removable Turntable Support Do not operate the oven in the microwave mode 2. Door Latches without the turntable and turntable support seated and 3. Window with Metal Shield in place. -
Page 7: About The Features
About the features Cooking Controls Express Cook Cook Power Start Time Level 30 Sec Pause Vent Cancel Timer Surface On/Off Light Sensor Cooking Auto Steam Chef Reheat Defrost Settings Cook Clean Connect Hold 3 Sec Steam Reset Lock WiFi Potato Popcorn Cook Filter... - Page 8 About the features Cook Time Cook Time Allows you to microwave for any time up to 99 minutes and 99 seconds. Power level 10 (HIGH) is automatically set, but you may Express Cook change it for more flexibility. 1. Press Cook Time. 2.
- Page 9 About the features Time Defrost Allows you to defrost for a selected length of time. See Defrosting Tips the Defrosting Guide on page 10 for suggested times • Foods frozen in paper or plastic can be defrosted in the (Weight Defrost is explained on page 8). package.
- Page 10 About the features Defrosting Guide Food Time Comments Breads, Cakes Bread, buns or rolls (1 piece) 1/4 min. Sweet rolls (approx. 12 oz.) 2 to 4 min. Rearrange after half of time. Fish and Seafood Fillets, frozen (1 lb.) 6 to 9 min. Shellfish, small pieces (1 lb.) 3 to 7 min.
- Page 11 About the features The Sensor Features detect the increasing humidity released during cooking. The oven automatically adjust the cooking time to various types and amounts of food. Do not use the Sensor Features twice in succession on the same food portion - It may result in severely overcooked or burnt food.
- Page 12 About the features Popcorn To use the Popcorn feature: Popcorn 1. Place the package of popcorn in the center of the microwave. How to Change the Automatic Settings 2. Press POPCORN. The oven starts immediately. To reduce time by 10%: Your popcorn bag may get stuck and stop rotating, Press 1 after the feature pad.
- Page 13 About the features Microwave Terms Term Definition Arcing Arcing is the microwave term for sparks in the oven. Arcing is caused by: • metal or foil touching the side of the oven. • foil that is not molded to food (upturned edges act like antennas). •...
- Page 14 About the features Changing the Power Level The power level may be entered or changed before or Rest periods (when the microwave energy cycles off) during cooking. Power Level is set for Level 10 (High) give time for the food to “equalize” or transfer heat to unless it is changed.
-
Page 15: Other Features
Other Features Start/Pause Start In addition to starting many functions, START/PAUSE Pause allows you to stop cooking without opening the door or clearing the display and resume cooking later. Cancel/Off Cancel Press the CANCEL/OFF button to stop and cancel cooking at any time. Control Lock-Out You may lock the control panel to prevent the oven from Lock... - Page 16 Other Features Steam Clean 1. Press the Steam Clean button. Steam 2. Put steam bowl with 1/4 cup of water. Clean 3. Press the dial or Start/Pause to start. Once the cycle is terminated, wipe oven cavity with paper towel or cloth. Display If you have the Timer counting down and you are using If the display shows the time for the Cook Time and you...
- Page 17 Other Features Settings Settings allow to change the default settings of your OTR. TURN TABLE 1. Press the Settings pad. “SELECT SETTING ITEM DISPLAY SETTING CLOCK SETTING REMOTE ENABLE CLOCK MODE EXIT BEEPER VOLUME 2. Select the item to change the settings. See below tables for detail Guide LIGHT SYNC Settings...
- Page 18 Other Features Chef Connect 4. Select 1 to sync the vent fan to your GE Appliances range. This allows the microwave vent fan to turn on Use the Chef Connect feature for connecting your at LOW speed automatically when the paired range’s microwave to a GE Appliances range to sync your vent cooktop burner turns on.
- Page 19 Charcoal Filter To Install the Charcoal Filter The charcoal filter cannot be cleaned. It must be replaced. Order Part No. WB02X11550 from your GE To install a new charcoal filter, remove plastic and supplier. other outer wrapping from the new filter.
-
Page 20: Wifi Connect
WiFi Connect Connecting your WiFi Connect enabled microwave oven (on some models) Your Café Appliances microwave oven is designed to provide you with two-way communication between your appliance and smart device. Café By using the Appliances WiFi Connect features, you will be able to control essential operations such as turning on and off your microwave, convenience features, cook time, timers using your smartphone, tablet or voice control device. -
Page 21: Care And Cleaning
Care and Cleaning Helpful Hints An occasional thorough wiping with a solution of baking soda and water keeps the inside fresh. Be certain the oven control is turned off before cleaning any part of this oven. How to Clean the Inside Walls, Floor, Inside Window, Metal and Plastic Parts Removable Turntable and on the Door... - Page 22 Care and Cleaning Removing and Cleaning the Filters To remove, slide them to the rear using the tabs. Pull down and out. To clean the vent filters, soak them and then swish around in hot water and detergent. Don’t use ammonia or ammonia products because they will darken the metal.
- Page 23 Troubleshooting Tips Things That Are Normal With Your Microwave Oven ■ Steam or vapor escaping from around the door. ■ TV-radio interference might be noticed while using the microwave. Similar to the interference caused by other ■ Light reflection around door or outer case. small appliances, it does not indicate a problem with ■...
- Page 24 Troubleshooting Tips... Before you schedule service Save time and money! Review the charts on the following pages first and you may not need to schedule service. Problem Possible Causes What To Do Oven will not start A fuse in your home may be blown or Replace fuse or reset circuit breaker.
-
Page 25: Limited Warranty
In Canada: This warranty is extended to the original purchaser and any succeeding owner for products purchased in Canada for home use within Canada. If the product is located in an area where service by a GE Authorized Servicer is not available, you may be responsible for a trip charge or you may be required to bring the product to an Authorized GE Service location. -
Page 26: Consumer Support
(VISA, MasterCard and Discover cards are accepted). Order on-line today 24 hours every day. In the US: cafeappliances.com/parts. In Canada, contact your local authorized GE parts distributor. Instructions contained in this manual cover procedures to be performed by any user. Other servicing generally should be referred to qualified service personnel. - Page 27 Manuel de l'utilisateur FOUR À MICRO-ONDES Modèle : CVM721 Table des matières Sécurité ..........3 Entretien et nettoyage .
- Page 28 MERCI DE PERMETTRE À CAFÉ DE FAIRE PARTIE DE VOTRE FOYER. Nous sommes fiers du savoir-faire, de l'innovation et du design qui font partie intégrante de tous les produits Café que nous fabriquons, et nous pensons que vous le serez aussi. À cet égard, l'enregistrement de votre appareil nous assure que nous pourrons vous fournir des informations importantes sur votre appareil et des détails sur sa garantie si vous en avez besoin.
- Page 29 CONSIGNES DE SÉCURITÉ IMPORTANTES LISEZ TOUTES LES INSTRUCTIONS AVANT D'UTILISER L'APPAREIL Pour réduire le risque de brûlures, de décharges électriques, d'incendies, de blessures AVERTISSEMENT ou d'exposition excessive aux micro-ondes : Lors de l'utilisation d'appareils électriques, suivez les mesures de sécurité de base : ■ Lisez toutes les instructions avant d'utiliser cet appareil.
- Page 30 ■ Faites bien cuire la viande et la volaille. La température INTERNE de la viande doit atteindre au moins 160 °F (71 °C) et celle de la volaille au moins 180 °F (82 °C). La cuisson à ces températures protège habituellement contre les intoxications alimentaires. ■ Ce four n'est pas approuvé ni testé pour l'utilisation sur un bateau.
- Page 31 CONSIGNES DE SÉCURITÉ IMPORTANTES LISEZ TOUTES LES INSTRUCTIONS AVANT D'UTILISER L'APPAREIL PRÉCAUTIONS À OBSERVER POUR ÉVITER UNE ÉVENTUELLE EXPOSITION EXCESSIVE AUX MICRO-ONDES (a) N'essayez pas de faire fonctionner cet appareil lorsque (c) Ne faites pas fonctionner le four s'il est endommagé. la porte est ouverte.
-
Page 32: Caractéristiques
Caractéristiques Les caractéristiques et l'apparence de l'appareil présenté dans ce manuel peuvent varier selon le modèle. 1. Poignée de la porte 5. Support du plateau tournant amovible N'utilisez pas ce four en mode micro-ondes si le plateau 2. Loquets de la porte tournant et son support ne sont pas en place. -
Page 33: À Propos Des Fonctionnalités
À propos des fonctionnalités Commandes de cuisson Express Cook Cook Power Start Time Level 30 Sec Pause Vent Cancel Timer Surface On/Off Light Sensor Cooking Auto Steam Chef Reheat Defrost Settings Cook Clean Connect Hold 3 Sec Steam Reset Lock WiFi Potato Popcorn... - Page 34 À propos des fonctionnalités Cook Cook Time (cuisson minutée) Time Cette fonction permet de programmer une période de cuisson dont la durée peut atteindre 99 minutes et 99 secondes. Le niveau de puissance élevé 10 est automatiquement Express Cook sélectionné, mais vous pouvez en choisir un autre. 1.
- Page 35 À propos des fonctionnalités Décongélation minutée Cette fonction vous permet d'effectuer une décongélation Conseils pour la décongélation pendant une durée choisie. Consultez le Guide de • Vous pouvez décongeler les aliments contenus dans décongélation de la page 10 pour connaître les durées du papier ou du plastique sans avoir à...
- Page 36 À propos des fonctionnalités Guide de décongélation Aliment Durée Commentaires Fruits Sachet en plastique – 1 ou 2 1 à 5 min (paquet de 10 oz/283 g) Pains, gâteaux Brioches (environ 12 oz/340 g) 2 à 4 min Réarrangez à la moitié de la décongélation. Pains, petits pains divers (1) 1/4 min Poisson et fruits de mer...
- Page 37 À propos des fonctionnalités Le capteur détecte le niveau d'humidité tout au long de la cuisson. Le four ajuste automatiquement la durée de cuisson selon les types d'aliments et les quantités. N'utilisez pas les fonctions avec capteur deux fois de suite pour la même portion d'aliment, vous pourriez la faire trop cuire ou la faire brûler.
- Page 38 À propos des fonctionnalités Maïs soufflé Pour utiliser la fonction Popcorn (maïs soufflé) : Popcorn 1. Placez le sachet de maïs soufflé au centre du four à micro-ondes. Comment modifier les réglages automatiques 2. Appuyez sur POPCORN (maïs soufflé). Le four se met Pour réduire la durée de 10 % : en marche immédiatement.
- Page 39 À propos des fonctionnalités Terminologie de la cuisson au four à micro-ondes Terme Définition Aération Après avoir couvert un récipient avec une pellicule plastique, laissez une ouverture en soulevant un des coins pour permettre à la vapeur de s'échapper. Arc électrique La formation d'étincelles dans le four à micro‑ondes. Elle peut être provoquée par : •...
- Page 40 À propos des fonctionnalités Changement du niveau de puissance Vous pouvez entrer ou modifier le niveau de puissance avant Les temps de repos (après la période de cuisson aux ou pendant la cuisson.La fonction de niveau de puissance micro-ondes) favorisent une distribution uniforme de la chaleur (Power Level) est réglée à...
-
Page 41: Autres Fonctions
Autres fonctions Départ/Pause En plus d'actionner plusieurs fonctions, la touche Start START/PAUSE (départ/pause) vous permet d'arrêter la cuisson sans ouvrir la porte ni effacer l'affichage, Pause et de reprendre la cuisson plus tard. Annuler/Arrêt Cancel Appuyez sur la touche CANCEL/OFF (annuler/arrêt) pour arrêter et annuler la cuisson en tout temps. Verrouillage des commandes Il est possible de désactiver les fonctions du tableau de commande pour empêcher la mise en marche accidentelle Lock... - Page 42 à micro-ondes. pour arrêter le ventilateur. Vent Ventilateur automatique Un ventilateur automatique protège le four à micro-ondes contre un excès de chaleur provenant de la surface de cuisson placée sous le four. Le ventilateur se met en marche automatiquement s'il détecte une chaleur excessive.
- Page 43 Autres fonctions Réglages La fonction des réglages (Settings) permet de modifier les TURN TABLE (plateau tournant) réglages par défaut de votre appareil. DISPLAY SETTING (réglage de l'affichage) 1. Appuyez sur la touche Settings (réglages). « SELECT REMOTE ENABLE (activation de la commande SETTING ITEM »...
- Page 44 Utilisez la fonction Chef Connect pour connecter votre four micro-ondes de s'allumer automatiquement à FAIBLE à micro-ondes à une cuisinière GE afin de synchroniser le vitesse lorsqu'un brûleur de surface de la cuisinière ventilateur, les lampes de surface et l'horloge à l'aide de la jumelée est allumé.
- Page 45 Pour installer le filtre à charbon remplacé. Commandez la pièce nº WB02X11550 auprès Avant d'installer le nouveau filtre à charbon, enlevez de votre fournisseur GE. l'emballage (plastique ou autre) du nouveau filtre. Si l'appareil n'est pas ventilé vers l'extérieur, l'air est recyclé...
-
Page 46: Connexion Wifi
Connexion WiFi Connecter votre four à micro-ondes compatible WiFi (certains modèles) Votre four à micro-ondes Café est conçu pour vous fournir une communication bidirectionnelle entre votre four et un appareil intelligent. En utilisant les fonctionnalités de connexion WiFi de votre électroménager Café, vous serez en mesure de contrôler les opérations essentielles telles que la mise en marche et l'arrêt de votre micro‑ondes, des fonctionnalités pratiques, la cuisson minutée, les minuteries à... -
Page 47: Entretien Et Nettoyage
Entretien et nettoyage Conseils pratiques De temps à autre, essuyez l'intérieur du four avec un linge imbibé d'une solution d'eau et de bicarbonate de soude pour plus de fraîcheur. Assurez-vous que les commandes sont en position d'arrêt avant de nettoyer les pièces de ce four. Nettoyage de l'intérieur du four Parois verticales, sole, hublot interne, pièces en métal Plateau tournant et support amovibles... - Page 48 Entretien et nettoyage Retrait et nettoyage des filtres Pour retirer les filtres, faites-les glisser vers l'arrière en Pour remettre les filtres en place, faites-les glisser dans le utilisant les languettes. Tirez-les vers le bas et sortez-les. châssis par l'arrière. Poussez vers le haut et vers l'avant pour bloquer les filtres en place.
-
Page 49: Dépannage
Conseils de dépannage Il n'y a rien d'anormal lorsqu'on observe ce qui suit : ■ De la vapeur s'échappe autour de la porte. ■ Une interférence dans les ondes de radio ou de télévision lorsque le four à micro-ondes fonctionne. Ces interférences ■... - Page 50 Conseils de dépannage... Avant de faire une demande de service Économisez du temps et de l'argent! Reportez-vous au tableau suivant pour éviter tout appel de service qui ne serait pas nécessaire. Problème Causes possibles Solutions Le four ne se met pas Un fusible de votre domicile peut être Remplacez le fusible ou réinitialisez le disjoncteur.
-
Page 51: Garantie Limitée
Au Canada : Cette garantie est offerte à l'acheteur initial, ainsi qu'à tout propriétaire subséquent d'un produit acheté au Canada en vue d'une utilisation domestique au Canada. Si le produit se situe dans une zone où aucun réparateur agréé par GE n'est disponible, vous devrez peut‑être assumer les frais de déplacement de celui‑ci ou apporter le produit à un atelier de réparation... -
Page 52: Service À La Clientèle
24 heures sur 24. Aux États-Unis : cafeappliances.com/parts. Au Canada, communiquez avec votre distributeur de pièces GE autorisé. Les directives fournies dans le présent manuel comportent des procédures que n'importe quel utilisateur peut effectuer. Les autres types de réparation doivent généralement être confiés à un technicien qualifié. Faites preuve de prudence : une réparation ou un entretien mal effectué...
Need help?
Do you have a question about the CAFÉ CVM721 and is the answer not in the manual?
Questions and answers