Table of Contents
Advertisement
AIR CONDITIONER ASSEMBLY
INSTRUCTIONS POUR LE MONTAGE
MONTAGE DER KLIMAANLAGE
INSTRUCCIONES DE MONTAJE
COD. 12121543 (24V)
COD. 12121577 (24V)
ISTRUZIONI DI MONTAGGIO
Condensatore "BACK"
Condenseur "BACK"
Kondensator "BACK"
Condensador "BACK"
Condensatore "TOP"
Condenseur "TOP"
Kondensator "TOP"
Condensador "TOP"
Advertisement
Table of Contents

Related Manuals for Autoclima Fresco 3000


Summary of Contents for Autoclima Fresco 3000
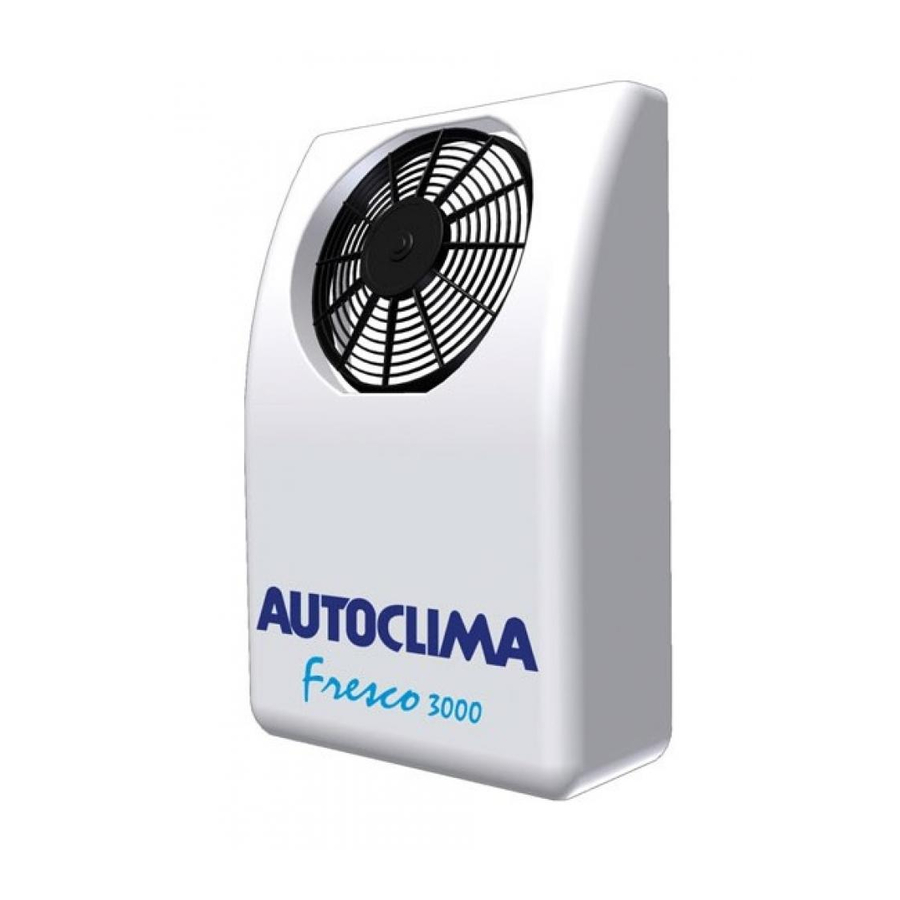
- Page 1 ISTRUZIONI DI MONTAGGIO AIR CONDITIONER ASSEMBLY INSTRUCTIONS POUR LE MONTAGE MONTAGE DER KLIMAANLAGE INSTRUCCIONES DE MONTAJE Condensatore “BACK” Condenser “BACK” COD. 12121543 (24V) Condenseur “BACK” Kondensator “BACK” Condensador “BACK” Condensatore “TOP” Condenser “TOP” COD. 12121577 (24V) Condenseur “TOP” Kondensator “TOP” Condensador “TOP”...
- Page 2 NOTE / NOTES / NOTAS Le indicazioni che si riferiscono alla DESTRA ed alla SINISTRA, sono relative al conducente del mezzo rivolto in direzione del senso di marcia. The indications which refer to the RIGHT and to the LEFT concern the driver of the vehicle on the drive way. Les indications qui se réferent à...
- Page 3 SOMMAIRE PAGE DIMENSIONS / DONNEES TECHNIQUES 3-4-5 EVAPORATEUR - CONDENSEUR “BACK” EVAPORATEUR - CONDENSEUR “BACK” (MONTAGE EN LIGNE) EVAPORATEUR - CONDENSEUR “TOP” SCHEMA ELECTRIQUE CABLAGE ELECTRIQUE AVEC CONDENSEUR “BACK” CABLAGE ELECTRIQUE AVEC CONDENSEUR “TOP” INCLINATION DU L’EVAPORATEUR MODALITE DE SERTISSAGE DES TUYAUX 13-14 GALERIE IMAGES 15-16-17...
- Page 4 Cod. 12121543 FRESCO 3000 “TOP” Cod. 12121577 FRESCO 3000 “BACK” CODICE DESCRIZIONE CODICE DESCRIZIONE CODE DESCRIPTION CODE DESCRIPTION CODE Q.TA’ NOMENCLATURE CODE Q.TA’ NOMENCLATURE KODE BEZEICHNUNG KODE BEZEICHNUNG CODIGO DENOMINACION CODIGO DENOMINACION EVAPORATORE EVAPORATORE EVAPORATOR EVAPORATOR EVAPORATEUR EVAPORATEUR 20205377 20205377...
- Page 5 CONDENSATORE “BACK” CONDENSER “BACK” CONDENSEUR “BACK” KONDENSATOR “BACK” CONDENSADOR “BACK” CONDENSATORE “TOP” CONDENSER “TOP” CONDENSEUR “TOP” KONDENSATOR “TOP” CONDENSADOR “TOP” 4/40...
- Page 6 CARATTERISTICHE TECNICHE / NOMINAL TECHNICAL DATA / DONNEES TECHNIQUES NOMINALES / TECHNISCHEN EIGENHEITEN / DATOS TECNICOS Potenza refrigerante fornita (STANDARD) Supplied cooling capacity (STANDARD) 650W (2220 BTU/h) Puissance frigorifique (STANDARD) Kälteleistung (STANDARD) Potencia frigorifica (STANDARD) Assorbimento elettrico Power consumption 7,5A (24V) Absorption éléctrique Stromverbrauch Intensidad absorbida...
- Page 7 BACK Parabordo Seal Bourrelet Köder Anillo de caucho Tubo in gomma Rubber hose Tuyau en caoutchouc Kautschukschlauch Tubo de caucho Isolante Insulating material Isolant thermique Wärmedämmung Aislante térmico Guaina protettiva Protective coating Revêtement de protection Schutzumhuellung Revestimiento de protección Tubo in rame Copper hose Tuyau de cuivre Kupferner Schlauch...
- Page 8 BACK Parabordo Seal Bourrelet Köder Anillo de caucho Tubo in gomma Rubber hose Tuyau en caoutchouc Kautschukschlauch Tubo de caucho Isolante Insulating material Isolant thermique Wärmedämmung Aislante térmico Tubo in rame Copper hose Tuyau de cuivre Kupferner Schlauch Manguera de cobre Tubo scarico acqua di condensa Condensate water exhaust pipe...
- Page 9 Parabordo Seal Bourrelet Köder Anillo de caucho Tubo in gomma Rubber hose Tuyau en caoutchouc Kautschukschlauch Tubo de caucho Isolante Insulating material Isolant thermique Wärmedämmung Aislante térmico Guaina protettiva Protective coating Revêtement de protection Schutzumhuellung Revestimiento de protección Tubo in rame Copper hose Tuyau de cuivre Kupferner Schlauch...
- Page 10 SCHEMA IMPIANTO ELETTRICO ELECTRIC DIAGRAM SCHEMA ELECTRIQUE SCHALTSCHEMA ESQUEMA ALAMBRICO ARANCIO AZZURRO BIANCO GIALLO GRIGIO MARRONE NERO ROSA ROSSO VERDE VIOLA ORANGE AZURE WHITE BLUE YELLOW GREY BROWN BLACK PINK GREEN VIOLET ORANGE BLEU CIEL BLANC BLEU JAUNE GRIS MARRON NOIR ROSE ROUGE...
- Page 11 Pannello di controllo Control Panel Panneau de contrôle Schalttafel Panel de mando Elettroventola evaporatore Evaporator fan Electroventilateur du l’évaporateur Verdampferslüfter Electroventilador del évaporador Elettroventola condensatore Condenser electric fan Ventilateur électrique condenseur Kondensator-Elektroflügelrad Electroventilador condesador - Batteria - Battery - Batterie - Batterie - Báteria + 24V Batteria...
- Page 12 Pannello di controllo Control Panel Panneau de contrôle Schalttafel Panel de mando Elettroventola evaporatore Evaporator fan Electroventilateur du l’évaporateur Verdampferslüfter Electroventilador del évaporador Elettroventola condensatore Condenser electric fan Ventilateur électrique condenseur Kondensator-Elektroflügelrad Electroventilador condesador - Batteria - Battery - Batterie - Batterie - Báteria CABLAGGIO ELETTRICO CON CONDENSATORE “TOP”...
- Page 13 INCLINAZIONE EVAPORATORE INCLINATION OF THE EVAPORATOR INCLINATION DU L’ÉVAPORATEUR NEIGUNGSWINKEL DES VERDAMPFERS INCLINACIÓN DEL EVAPORADOR SI / YES / OUI / JA SI / YES / OUI / JA SI / YES / OUI / JA NO / NEIN Livella (Bolla aria) / Level (Spirit level) / Niveau ( à bulle d’air) / Libelle (Wasserwaage) / Nivel de aire 12/40...
- Page 14 MODALITA’ DI AGGRAFFATURA TUBI HOSES CLAMPING MODE MODALITE DE SERTISSAGE DES TUYAUX LÄNGSNAHTART DER SCHLÄUCHE GRAPADO DE LAS TUBERIAS 13/40...
- Page 15 NB: Prima di aggraffare il 2° raccordo sul tubo rif.2 inserire rif. 5-3-4 (vedi pag. 6-8) NOTICE: Before to clamp the 2nd fitting on the hose ref. 2, the refs. 5-3-4 should be inserted (see pag. 6-8) ATTENTION: Avant de sertir le 2eme raccord sur le tuyaux réf. 2, inserer les réfs. 5-3-4 (voir pag.
- Page 16 Pannello di rivestimento SENZA CENTINE / WITHOUT RIBS / CON CENTINE / WITH RIBS / AVEC NERVURES MIT SPRIEGELN / CON CIMBRAS Panelling SANS NERVURES / OHNE SPRIEGEL / SIN Panneau de revêtement CIMBRAS Verkleidungsplatte Panel de revestimiento FIG.1 FIG.2 Ø6 Ø6 Ø6...
- Page 17 FIG.5 FIG.6 Ø60 Ø60 Parabordo Seal Bourrelet Köder Anillo de caucho Ø25 Ø25 FIG.8 Antiossidante Antioxidant Anti-oxydant Oxidationsschutz Antioxidante SIGILLARE ACCURATAMENTE SEAL ACCURATELY SCELLER TRÈS SOIGNEUSEMENT SEHR SORGFÄLTIG ABDICHTEN SELLAR CON SUMO CUIDADO FIG.7 TERMINALE 90° CON CONDENSATORE “BACK” 90° WALL TERMINAL WITH CONDENSER “BACK” TERMINAL SUR PAROI 90°...
- Page 18 Tappo Bouchon Stopfen Tapón Tappo Bouchon Stopfen Tapón Tappo Bouchon Stopfen Tapón EVAPORATORE EVAPORATOR EVAPORATEUR VERDAMPFER EVAPORADOR CONDENSATORE “BACK” CONDENSER “BACK” CONDENSEUR “BACK” KONDENSATOR “BACK” CONDENSADOR “BACK” M5 inox+rondella inox+rondella in gomma M5 inox+inox washer+rubber washer M5 inox+Inoxscheibe+Gummischeibe M5 inox+Inox arandela+ randela de caucho CONDENSATORE “TOP”...
- Page 19 AVVERTENZE GENERALI Per l'installazione, è importante attenersi scrupolosamente alle indicazioni riportate nel presente manuale. Il costruttore declina ogni responsabilità, in caso di danni a cose e persone provocati da installazioni o variazioni non conformi dell'impianto. Sulla dima evaporatore fornita con il set di montaggio sono segnati, oltre alle asole per il suo fissaggio, anche 2 fori Ø60 e Ø20 per il passaggio piastra raccordi e tubo scarico acqua di condensa.
- Page 20 Operando dall’esterno, distribuire antiossidante sul perimetro di tutti i fori passanti eseguiti ed inserire intorno al foro Ø60 ed al foro Ø25 le guarnizioni parabordo fornite (vedi fig.5-6 pag.16). Introdurre il tubo scarico acqua di condensa attraverso l’apertura eseguita sul pannello di rivestimento interno e farlo fuoriuscire attraverso il foro Ø25 con gommino, verificandone la corretta pendenza.
- Page 21 Prima di eseguire la carica di refrigerante, (attraverso il raccordo di carica presente sul blocco condensatore) effettuare 30 min. di vuoto. Immettere nel circuito circa 350 grammi di R134a. Accendere il Fresco 3000 per circa 10minuti prima di scollegare il tubo di carica. A carica refrigerante ultimata, verificare l’assenza di perdite ed il corretto funzionamento dell’impianto.
- Page 22 GENERAL WARNINGS When installing, be sure to follow carefully the instructions given in this manual. The manufacturer declines all responsibilities for damage to equipment or people caused by non-standard system installations or modifications. On the evaporator template supplied together with the assembly set, are indicated, besides the slotted holes for fastening the evaporator, 2 Ø60 and Ø20 holes for the connections plate and the draining of condensed water.
- Page 23 Operating from the outside, put antioxidant around all the feed-through holes previously made and insert the grommets supplied around the holes Ø60 and Ø25 (see fig.5-6 pag.16) . Introduce the condensation drain pipe through the opening made on the internal covering panel and poke it through the Ø25 hole with grommet insert, checking the correct slope.
- Page 24 Put into the circuit ca. 350 grams of R134a. Switch the Fresco 3000 on for ca. 10 minutes before to disconnect the charging hose. When the refrigerating charge cycle is over, the leakages and the correct operation of the system should be checked.
- Page 25 AVERTISSEMENTS GENERAUX Pour ce qui concerne l’installation, il est indispensable de respecter scrupuleusement les indications reportées dans le présent manuel. Le constructeur décline toute responsabilité quant aux dommages causés aux personnes et aux choses dérivants d’installations ou de transformations non conformes à l’installation d’origine Sur le gabarit evaporateur fourni avec le set de montage sont indiqués, outre les orifices fendues pour la fixation de l’évaporateur, également 2 trous Ø60 et Ø20 pour le passage de la plaque raccords et du tuyau d’évacuation de l’eau de condensation.
- Page 26 En opérant de l’extérieur, distribuer de l’anti-oxydant sur le périmètre de tous les trous passants exécutés et insérer les passe-fils fournis autour des trous Ø60 et Ø25 (voir fi.5-6 pag.16). Introduire le tuyau d’évacuation de l’eau de condensation à travers l’ouverture exécutée sur le panneau de revêtement interne et le faire sortir à travers le trou Ø25 avec passe-fil, en vérifiant la pente correcte.
- Page 27 Introduire dans le circuit a peu prés 350 grammes de R134a. Allumer le Fresco 3000 pour environ 10 minutes avant de débrancher le tuyau de charge. A la fin du chargement du refroidissant, vérifier les pertes et le correct fonctionnement du système.
- Page 28 ALLGEMEINE HINWEISE Bei der Installation muß man sich genauestens an die im vorliegenden Handbuch gegebenen Anweisungen halten. Im Fall von Sach- und Personenschäden, die auf unangemessenen Einbau oder Änderungen der Anlage zurückzuführen sind, ist der Hersteller nicht haftbar. Dass auf der Schablone im Montageset neben den Schlitzöffnungen für die Befestigung des Verdampfers auch 2 Löcher Ø60 und Ø20 für die Durchführung von Anschlussplatte und Kondenswasserabflussleitung markiert sind.
- Page 29 Von außen Oxidationsschutz um alle gebohrten durchgehenden Löcher herum auftragen. Einige der gelieferten Gummitüllen um die Löchern hinsetzen (Siehe Abb.5-6 Seite 16). Die Kondenswasserabflussleitung durch die hergestellte Öffnung an der inneren Verkleidungsplatte führen und durch das Loch Ø25 mit Gummistück herausführen, dabei die richtige Neigung prüfen. Abdeckung abnehmen und den Verdampfer gegen die Rückwand des Fahrzeugs lehnen, dabei die Anschlussplatte durch das vorher gebohrte Loch Ø60 hindurchführen.
- Page 30 Minuten erledigen. Die Leitung sollt mit ca. 350 Grammen von R134a befüllt werden. Einschalten der Fresco 3000 für ca. 10 Minuten bevor den Befüllschlauch abzuhängen. Nach dem Einfüllen des Kühlmittels prüfen, dass keine Undichtigkeit vorhanden sind und die Anlage richtig funktioniert.
- Page 31 ADVERTENCIAS GENERALES Para la instalación, es importante seguir escrupulosamente las indicaciones indicadas en este manual. Si dañaran cosas o hirieran personas por culpa de la instalación o por haber realizado variaciones no conformes en la misma, el fabricante declina toda responsabilidad. En el escantillón que se proporciona con el kit de montaje, están marcados, además de los orificios hendidos para la fijación del evaporador, también 2 orificios de Ø60 y Ø20 para el paso de la plancha de enlaces, cableado y tubo de desagüe de agua de condensación.
- Page 32 Operando desde la parte exterior, distribuir antioxidante en el perímetro de todos los orificios de enlace efectuados y inserir los pasamuros suministrados en los oyos ø60 y ø25 (ver fig.5-6 pag.16). Introducir el tubo de desagüe de agua de condensación mediante la abertura efectuada en el panel de revestimiento interno y hacerlo sobresalir mediante el orificio Ø25 con pasamuro, comprobando su correcta inclinación.
- Page 33 Cargar el circuito con mas o menos 350 gramos de R134a. Encender el Fresco 3000 por unos 10 minutos antes de desconectar la tuberia de carga. Al termin de la carga del refrigerante, controlar las fugas y el corecto funcionamento del sistema.
- Page 34 PARTI DI RICAMBIO SPARE PARTS PIECES DE RECHANGE ERSATZTEILENBUCH PIEZAS DE REPUESTO Codice DESCRIZIONE Code Q.TA’ DESCRIPTION Code Q.TY NOMENCLATURE Kode N° BEZEICHNUNG Codigo DENOMINACION EVAPORATORE COMPLETO COMPLETE EVAPORATOR ÉVAPORATEUR COMPLET 20205377 VOLLSTÄNDIGER VERDAMPFER EVAPORADOR COMPLETO BATTERIA EVAPORATRICE EVAPORATOR COIL BATTERIE ÉVAPORATEUR 20210167 VERDAMPFERBATTERIE...
- Page 35 Codice DESCRIZIONE Code Q.TA’ DESCRIPTION Code Q.TY NOMENCLATURE Kode N° BEZEICHNUNG Codigo DENOMINACION SONDA DISPOSITIVO SPEGNIMENTO IMPIANTO IN CASO DI RIBALTAMENTO PROBE FOR DEVICE TO SHUT DOWN SYSTEM IN THE EVENT OF TIPPING SONDE DISPOSITIF EXTINCTION AC EN CAS DE BASCULEMENT SONDE ABSCHALTVORRICHTUNG DER ANLAGE BEIM KIPPEN DES FAHRERHAUSES SONDA DISPOSITIVO DE CIERRE DE LA...
- Page 36 Codice DESCRIZIONE Code Q.TA’ DESCRIPTION Code Q.TY NOMENCLATURE Kode N° BEZEICHNUNG Codigo DENOMINACION TAPPO COPERTURA VITI SCREW COVER CAP BOUCHON COUVERTURE VIS 60664341 VERSCHLUSS SCHRAUBENABDECKUNG TAPÓN COBERTURA TORNILLOS CONDENSATORE COMPLETO “BACK” COMPLETE CONDENSER “BACK” 30305230 CONDENSEUR COMPLET “BACK” VOLLSTÄNDIGER KONDENSATOR “BACK” CONDENSADOR COMPLETO “BACK”...
- Page 37 Codice DESCRIZIONE Code Q.TA’ DESCRIPTION Code Q.TY NOMENCLATURE Kode N° BEZEICHNUNG Codigo DENOMINACION COPERTURA CONDENSATORE “TOP” CONDENSER COVER “TOP” 30330410.1R COUVERTURE CONDENSEUR “TOP” KONDENSATORABDECKUNG “TOP” COBERTURA CONDENSADOR “TOP” BATTERIA CONDENSATRICE CONDENSER COIL 30310183 BATTERIE CONDENSATRICE KONDESATORBATTERIE BATERÍA CONDENSADORA COMPRESSORE COMPRESSOR COMPRESSEUR 40465028 KOMPRESSOR...
- Page 38 Codice DESCRIZIONE Code Q.TA’ DESCRIPTION Code Q.TY NOMENCLATURE Kode N° BEZEICHNUNG Codigo DENOMINACION ELETTROVENTOLA CONDENSATORE CONDENSER FAN 30315185 VENTILATEUR ELECTRIQUE CONDENSEUR KONDENSATOR-ELEKTROFLUEGELRAD ELECTROVENTILADOR CONDENSADOR TAPPO INFERIORE COPERTURA VITE (solo per condensatore “BACK”) LOWER SCREW COVER CAP (only for condenser “BACK”) BOUCHON INFERIEUR COUVERTURE VIS (seulement pour condenseur “BACK”) 60664342...
- Page 39 Codice DESCRIZIONE Code Q.TA’ DESCRIPTION Code Q.TY NOMENCLATURE Kode N° BEZEICHNUNG Codigo DENOMINACION TUBO G8 G8 HOSE 60641092 TUBE G8 SCHLAUCH G8 TUBO G8 RACCORDO F90° O.R PER TUBO G8 ROTALOCK 90° O.R. UNION FOR THE G8 HOSE 60645206 RACCORD 90° POUR TUYAU G8 90°-ANSCHLUSS O.R.
- Page 40 Codice DESCRIZIONE Code Q.TA’ DESCRIPTION Code Q.TY NOMENCLATURE Kode N° BEZEICHNUNG Codigo DENOMINACION GUAINA CORRUGATA Ø40 CORRUGATED SHEATH Ø40 60670519 GAINE PLISSÉE Ø40 GERILLTE UMMANTELUNG Ø40 VAINA CORRUGADA Ø40 TUBO SCARICO ACQUA DI CONDENSA CONDENSATE WATER EXHAUST PIPE TUBE D’EVACUATION EAU DE CONDENSATION 500153365 KONDENSWASSERABLAßROHR TUBO DE DESCARGA DEL AGUA DE...
- Page 41 Codice DESCRIZIONE Code Q.TA’ DESCRIPTION Code Q.TY NOMENCLATURE Kode N° BEZEICHNUNG Codigo DENOMINACION OPTIONAL PROLUNGA TUBI EVAPORATORE EVAPORATOR TUBE EXTENSION RALLONGE DU TUYAU EVAPORATEUR 60674158 VERL ÄNGERUNG DES VERDAMPFERSSCHLAUCH PROLONGACI ÓN TUBERIA DEL EVAPORADOR PINZA PER CRIMPARE CRIMPING TOOL OUTIL DE SERTISSAGE 80807257.1 CRIMPWERKZEUG ÚTIL DE ENGASTE...
- Page 42 NOTE: 41/42...
- Page 43 NOTE: 42/42...
- Page 44 80817516 - Aprile 2007 12121543 - 12121577 AUTOCLIMA S.p.A. Via Cavalieri di Vittorio Veneto, 15 Tel. (011) 944.32.10 Telefax (011) 944.32.30 10020 CAMBIANO (TO) Italy Internet: http://www.autoclima.com e-mail: sales@autoclima.com...
Need help?
Do you have a question about the Fresco 3000 and is the answer not in the manual?
Questions and answers
I need radiator for freon
The Autoclima Fresco 3000 uses approximately 350 grams of R134a freon. Therefore, a radiator (condenser) compatible with the Fresco 3000 must support R134a refrigerant. The condenser block included in the Fresco 3000 kit is designed for this purpose and should be used as specified in the installation manual.
This answer is automatically generated