Table of Contents
Advertisement
Quick Links
Advertisement
Table of Contents

Subscribe to Our Youtube Channel
Related Manuals for Mikrona ORTHORA 200


Summary of Contents for Mikrona ORTHORA 200
- Page 1 ORTHORA 200 INSTRUCTION MANUAL 2103 320.8710.02 / 2103...
-
Page 2: Table Of Contents
Summary ORTHORA 200 ..................................... 9 Summary ORTHORACK ..................................... 10 Summary ORTHOCART ....................................10 Summary ORTHODESK ..................................... 10 Technical data ....................................11 Device description ORTHORA 200 ................................11 Dimensions ......................................... 12 Installation at customer ..................................13 Chair installation ......................................13 Connections ....................................... 13 Electrical connection .................................... - Page 3 Spittoon ........................................49 9.11 Drives / Other ......................................50 9.12 Dürr spittoon valve ...................................... 51 9.13 Dürr separation system ....................................51 Additional equipment ..................................51 10.1 ORTHORA 200 ......................................52 10.2 ORTHORACK ......................................53 10.3 ORTHOCART ......................................54 10.4 ORTHODESK ......................................55...
-
Page 4: Notes
The warranty and liability for defects shall be governed by the General Terms and Conditions of Mikrona Technologie AG as of January 2016 (GTC). The GTC can be downloaded on the website of Mikrona Tech- nologie AG (www.mikrona.com). It is essential that this instruction manual be read by every user / operator before initially operating the device in order to prevent faulty operation and other damages. -
Page 5: General Safety Instructions
Mikrona Technologie AG is only liable if mounting, readjustment and repairs are performed by Mikrona Technologie AG or an entity autho- rized for this purpose by Mikrona Technologie AG and if the product is used in accordance with the mounting and operating instructions. -
Page 6: Rating Plate
ORTHORA 200 Instruction Manual Rating plate A, B The rating plate of all ORTHORA 200 devices is placed at the indicated positions. Rating plate: Underneath the bed in the middle of the chair socket On the rear side of the bed’s upholstery with the supply compon-... -
Page 7: Notes On The Instruction Manual
Technical support for the treatment unit is provided by qualified ser- vice entities / specialized dealers. Service technicians instructed by Mikrona are continuously trained and are familiar with Mikrona’s whole range of products. You should regularly perform the recommended maintenance measures in order to preserve the long-time value of the device. -
Page 8: Product Information
Unintended use The device, its components and instruments are intended for orth- odontic treatment. Another use beyond that is considered unintended. Mikrona Technologie AG assumes no liability for damages caused by unintended use. The operator himself bears the risk. Safety advice... -
Page 9: Package Contents
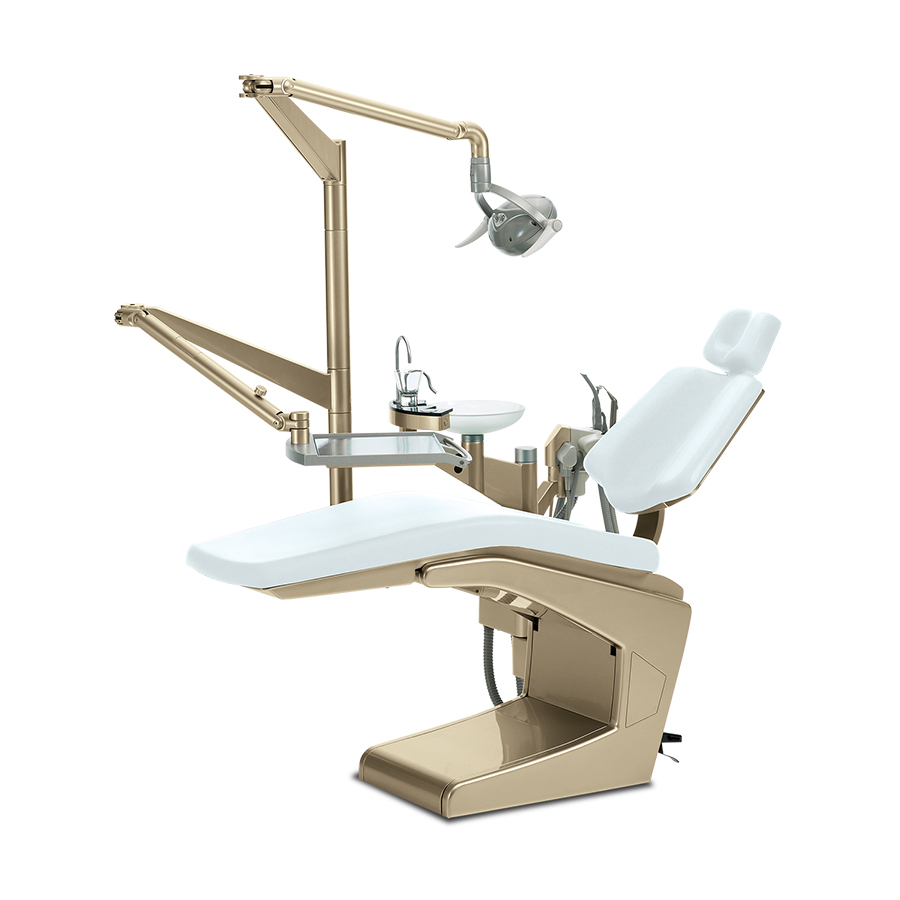
Summary ORTHORA 200 Description of orthodontic workspace – ORTHORA 200 Made in Switzerland, the ORTHORA 200 is a compact and comfortable orthodontic workspace. Space-saving as it is, it can be used even in smallest premises. Multiple positioning possibilities for orthodontist and assistant components support independent and team work. -
Page 10: Summary Orthorack
Optionally, there is the possibility to countersink the instrument rack under the working surface. The back-of-head solution of ORTHORACK in combination with the ORTHORA 200 treatment unit is the perfect system and the casing shape simplifies the integration into furnishing, enabling a mounting in furnishing gaps or underneath working sur- faces. -
Page 11: Technical Data
Instruction Manual Technical data Device description ORTHORA 200 1. Manufacturer Mikrona Technologie AG CH-8952 Schlieren 2. Distribution Specialized dealers 3. Product name ORTHORA 200 4. Especially for orthodontics 5. Modular system 6. Modules Chair, assistant’s chair, spittoon, instrument supply, equipment tray, swiveling table,... -
Page 12: Dimensions
ORTHORA 200 Instruction Manual Dimensions max. working height: 750 mm min. working height: 580 mm Treatment positions: 2 freely programmable positions Weight: 110 – 150 kg (depending on equipment) Footprint: 2600 cm Floor loading : 1.88 N/cm (0.19 kg/cm ) without patient... -
Page 13: Installation At Customer
Instruction Manual Installation at customer Chair installation Practice installation must be carried out in accordance with the re- quirements stated in the installation manual. Plan prints in scale 1:1 (320.8002.01) Connections Electrical connection Electrical supply line: 3x1.5 mm Free end above ground: 500 mm Input voltage: 100 V AC / 120 V AC / 230 V AC... -
Page 14: Operation
ORTHORA 200 Instruction Manual Operation For safety reasons the device must be switched off at the main control switch on the power terminal when leaving the practice. All power outlets of the supply unit become dead. Water supply of the instru- ments is interrupted by a corresponding magnet valve within the chair socket. -
Page 15: Operation 4-Function Pedal Dyn (Dynamic)
Instruction Manual 7.2.3 Operation 4-function pedal DYN (dynamic) With the operation over the 4-function pedal DYN the speed/intensity is emitted dynamically within the 4 selectable levels. The setting of the speed/intensity within the levels is adjusted in the programming mode (ST09). -
Page 16: 7.2.4 Instrument Operation 5-F
ORTHORA 200 Instruction Manual 7.2.4 Instrument operation 5-F With the operation over the 5-function pedal the speed/intensity is emitted constantly within the 4 selectable levels. The setting of the speed/intensity within the levels is adjusted in the electronics (ST01) or in the programming mode (ST09) -
Page 17: Setting The Treatment Positions
Instruction Manual 7.2.5 Setting the treatment positions Pull up and remove the bed upholstery. The bed’s setting can be adjusted by the buttons on the main compu- ter (H) in the foot end. Treatment position 1 Move backrest and bed manually into the desired position Press SETUP , OP is displayed Confirm with ENTER, O.P . -
Page 18: 7.2.7 Setting Of The Instrument Parameters
ORTHORA 200 Instruction Manual 7.2.7 Setting of the instrument parameters The instrument parameters can be set individually per instrument within the 4 levels. Electronic Setting of the instrument parameters With the control 01 (ST01) the four speed/intensity levels are adjusted with the potentiometers on the electronic boards. -
Page 19: Headrest
Instruction Manual Headrest Press the membrane (15) to swivel the headrest. The headrest can gradually be moved for- and backward by 7 x 10°. The headrest can be extended and retracted continuously. Height adjustments are made by pulling or pushing the headrest. It is secured by a self-locking brake. -
Page 20: 7.5.2 Automatic Rinsing Time
ORTHORA 200 Instruction Manual 7.5.2 Automatic rinsing time The default rinsing settings of the aspiration system is set to 3 minutes for dry aspiration and to 0 minutes for wet aspiration (no aspiration activated). Latter is only activated if the unit is equipped with an aspi-... - Page 21 Instruction Manual SETUP ENTER ! One step back always with SETUP ! ENTER OP-position O. P. i. O. ENTER >1,5 is saved ENTER ENTER U. P. i.O. UP-position >1,5 is saved IN-position I. N. i.O. ENTER ENTER >1,5 is saved Setup Setup Setup...
-
Page 22: Micromotor Mc3 Led, Lk, Ir Bien Air
Sterilizing the micromotor hand piece The micromotor hand piece (which is not included in the scope of de- livery of Mikrona Technologie AG) should be serviced and handled ac- cording to the manufacturer’s maintenance instructions. For informati- on on technical features please consider the specific instruction manu- als which come enclosed in the instrument and motor packaging. -
Page 23: Micromotor Mx & Mx2 Bien Air
Sterilizing the micromotor hand piece The micromotor hand piece (which is not included in the scope of de- livery of Mikrona Technologie AG) should be serviced and handled ac- cording to the manufacturer’s maintenance instructions. For informati- on on technical features please consider the specific instruction manu- als which come enclosed in the instrument and motor packaging. -
Page 24: Turbine Connection
Sterilizing the turbine hand piece The turbine hand piece (which is not included in the scope of delivery of Mikrona Technologie AG) should be serviced and handled accor- ding to the manufacturer’s maintenance instructions. For information on technical features please consider the specific instruction manuals which come enclosed in the instrument and motor packaging. -
Page 25: Ultrasound Piezon Ems
Instruction Manual 7.10 Ultrasound Piezon EMS General information For information on technical features as well as on operation and application of this ultrasound system please consider the specific in- struction manual which comes enclosed in the instrument packaging. Please service and handle the hand pieces and inserts as specified in the maintenance instructions of the specific manufacturer. -
Page 26: Ultrasound Suprasson / Newtron Satelec
ORTHORA 200 Instruction Manual 7.11 Ultrasound Suprasson / Newtron Satelec General information For information on technical features as well as on operation and application of this ultrasound system please consider the specific in- struction manual which comes enclosed in the instrument packaging. -
Page 27: 3-Function Syringe Luzzani
Instruction Manual 7.12 3-function syringe Luzzani General information For information on technical features as well as on operation and ap- plication of this syringe please consider the specific instruction manual which comes with the instrument. Please handle the hand piece as specified in the maintenance instructions of the specific manufacturer. -
Page 28: 6-Function Syringe Luzzani
ORTHORA 200 Instruction Manual 7.13 6-function syringe Luzzani General information For information on technical features as well as on operation and ap- plication of this syringe please consider the specific instruction manual which comes with the instrument. Please handle the hand piece as specified in the maintenance instructions of the specific manufacturer. -
Page 29: 3-Function Syringe M1600
Instruction Manual 7.14 3-function syringe M1600 General information For information on technical features as well as on operation and ap- plication of this syringe please consider the specific instruction manual which comes with the instrument. Please handle the hand piece as specified in the maintenance instructions of the specific manufacturer. -
Page 30: 3-Function Syringe Faro
ORTHORA 200 Instruction Manual 7.15 3-function syringe Faro General information For information on technical features as well as on operation and ap- plication of this syringe please consider the specific instruction manual which comes with the instrument. Please handle the hand piece as specified in the maintenance instructions of the specific manufacturer. -
Page 31: Polymerization Lamp Mini Led Ortho
Instruction Manual 7.16 Polymerization lamp General information MINI LED ORTHO For information on technical features as well as on operation and application of this polymerization lamp please consider the specific in- struction manual which comes with the instrument. Please handle the hand piece as specified in the maintenance instructions of the specific manufacturer. -
Page 32: Examination Lamp
ORTHORA 200 Instruction Manual 7.17 Examination lamp Examination lamp LED Mikrona Polaris Lateral handles On/Off switch on lamp head Lamp head RAL 9006 Color temperature 4200°K - 6000°K Light field 70 x 140 mm Light intensity 8'000 – 35'000 Lux... -
Page 33: Built-In Model
Description The built-in Mikrona examination lamp is activated by an On/Off switch integrated into lamp head or by a sensor. The lamp head can be rota- ted by 300° and its height is adjustable by a spring mounted arm. The lamp is fed from the treatment unit. -
Page 34: Ceiling Model
Description The ceiling-mounted Mikrona examination lamp is activated by an On/ Off switch integrated into lamp head or by a sensor. The lamp head can be rotated by 300° and its height is adjustable by a spring moun- ted arm. -
Page 35: 7.17.3 Ortholux 200
Instruction Manual 7.17.3 ORTHOLUX 200 General information For information on technical features as well as on operation and ap- plication of this examination lamp please consider the specific instruc- tion and maintenance manual which comes with the lamp. Description The ceiling-mounted ORTHOLUX 200 lamp head is activated by a 3-function pedal in the treatment unit (see 7.2.2 Special functions). -
Page 36: Suspended Table
(e.g. Dürr Surface Disinfection FD 322 / FD 350). Maintenance No specific maintenance procedures are intended for the suspended table. Any repairs such as making adjustments or changing settings are only to be carried out by qualified technicians or Mikrona’s custo- mer service. 7.19 Instrument tray General information The dimensions of the instrument tray’s chrome steel surface are... -
Page 37: Autonomous Water Supply
(e.g. Dürr Surface Disinfection FD 322 / FD 350). Maintenance No specific maintenance procedures are intended for the suspended table. Any repairs such as making adjustments or changing settings are only to be carried out by qualified technicians or Mikrona’s custo- mer service. 7.20 Autonomous water supply... -
Page 38: Re.formance Line Working Chair
Maintenance No specific maintenance procedures are intended for the work chair. Any repairs such as making adjustments or changing settings are only to be carried out by qualified technicians or Mikrona’s customer service. Instruction manual Instruction manual with details see document:... -
Page 39: Maintenance
Mikrona’s customer service and/or the fault is to be cleared. -
Page 40: Daily Maintenance Of The Rinsing Basin
ORTHORA 200 Instruction Manual 8.1.4 Daily maintenance Dry this premium material (glass or ceramic) using a soft lint-free tis- of the rinsing basin sue. Use a wash-leather for cleaning. Remove limestone with a warm vinegar-water mixture. Dry it with a clean and soft lint-free tissue. -
Page 41: Daily Maintenance Of The Hose Holder System
Instruction Manual 8.1.8 Daily maintenance After each treatment aspirate one glass of cold water. of the hose holder system For the cleaning and disinfection of the entire aspiration system, you are instructed to us a material-compatible, non-foaming disinfectant especially for aspiration systems (e.g. Orotol Plus). It is recommended to disinfect and clean the aspiration system with water twice a day. -
Page 42: Weekly Maintenance Of The Hose Holder System
ORTHORA 200 Instruction Manual 8.2.3 Weekly maintenance of the hose holder system In order to minimize the danger of infection, it is essential to wear im- permeable gloves when performing maintenance at the hose holder system. Change the disposable filter once a week. -
Page 43: Disinfecting The Upholstery
The device must be regularly inspected by the operator or a third par- ty. It is recommended that the annual maintenance work is carried out by an entity authorized for this purpose by Mikrona or Mikrona’s own customer service. Worn or defective parts relevant to security must be repaired with original parts or replaced. -
Page 44: Trouble Shooting
This part of the instruction is to provide assistance to technicians of specialized dealers in particular. If you cannot localize an error by troubleshooting, you need to commission a technician authorized by Mikrona or Mikrona’s customer service for resolution. Syringe Possible causes... -
Page 45: Micromotor
Possible causes Trouble shootimg Instruction Manual No spray from turbine Insufficiently pushed pedal 5-F Push pedal to maximum (operation) (Check with/without angle) Cable break at pedal 5-F Pedal in F4 Check cables (blue/red) Defective magnetic valve for spray air Replace magnetic valve (320.7056.01) Clogged / defective water throttle Open to maximum/replace throttle (320.3036.01) -
Page 46: Ultrasound
ORTHORA 200 Instruction Manual Ultrasound Possible causes Trouble shooting Water drips from instruments Loose screw coupling Retighten screw coupling hand-tight Soiled water Check water quality and replace water filter if necessary Inappropriately installed seal face Replace water valve and tappet (320.3069.01) -
Page 47: Control Electronics
Instruction Manual Control electronics Possible causes Trouble shooting Automatic return of bed to initial position Defective micro switch / soldered joint on pe- Replace micro switch, (904.0046.00) disabled dal 3/F1 check soldered joint Defective end switch for backrest drive Replace cable and end switch (3er: 320.4013.01) (2er: 320.4012.01) Manual lifting of bed disabled Defective micro switch / soldered joint on pe-... -
Page 48: Selective Hose Holder
ORTHORA 200 Instruction Manual Possible causes Trouble shooting Ortholux does not move forward Defective micro switch / soldered joint on Replace micro switch, (904.0046.00) pedal 2/F2 check soldered joint Ortholux does not move back Defective micro switch / soldered joint on pe- Replace micro switch, (904.0046.00) -
Page 49: Comfort Hose Holder
Instruction Manual Comfort hose holder Possible causes Trouble shooting Declining suction Full filter within hose Clean / replace filter (320.6508.01) Clogging within hose or hand piece Check location of clogging. Separate hose and hand piece form hose holder, disas- semble and clean them Broken hose Replace hose (small 320.3031.01) -
Page 50: Drives / Other
ORTHORA 200 Instruction Manual Possible causes Trouble shooting No or dripping water from flush pipe Defective magnetic valve Replace magnetic valve (906.0203.01) Defective pressure caliper Replace pressure caliper (320.6036.01) Blocked core within magnetic valve Disassemble magnetic valve / clean or replace it if necessary (320.3025.01) -
Page 51: Dürr Spittoon Valve
Technologie AG. Safety, reliability and function are only provided if mounting, readjustment and repairs are performed by Mikrona Tech- nologie AG or an entity authorized for this purpose by Mikrona Tech- nologie AG and if the product is used in accordance with the mounting... -
Page 52: Orthora 200
sensor switch Adaptation OP lamp arm extension Floating table LCD-Screen 22" Ceiling OP lamp LED MIKRONA (Polaris) without instrument bracket on mounting rod RAL 9002 RAL 9010 RAL 9016 with instrument bracket VARIO ... -
Page 53: Orthorack
Instruction Manual 10.2 ORTHORACK ORTHORACK Back-of-head instrument (BOH) Back wall BOH connected with OT200 unit Yes Rack with aspirator Air/water supply from OT200 unit Autonomous No Yes OP-suction Air/water supply from BOH water supply Saliva suction ... -
Page 54: Orthocart
ORTHORA 200 Instruction Manual 10.3 ORTHOCART Orthocart Instrument rack cart connected with the OT200 unit (max. 6 instruments) autonomous cart Micromotor MX2 LED control board with power supply Micromotor MC3 IR 4-function pedal DYN with display ... -
Page 55: Orthodesk
Instruction Manual 10.4 ORTHODESK Swivel table for ORTHODESK Yes No ORTHODESK Yes Media supply ORTHODESK Yes (only possible, if no instrument No is mounted on chair base) Table top No Dallas (black marbled) ... - Page 56 MIKRONA TECHNOLOGIE AG Wiesenstrasse 36 | 8952 Schlieren | Switzerland P +41 56 418 45 45 | swiss@mikrona.com | www.mikrona.com...
Need help?
Do you have a question about the ORTHORA 200 and is the answer not in the manual?
Questions and answers