Advertisement
Quick Links
Pour le français, voir la page 2.
Para el español, ver la página 3.
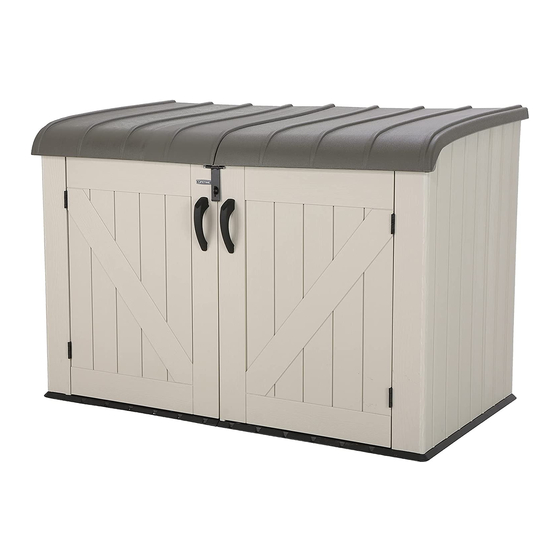
HORIZONTAL
STORAGE SHED
®
Lifetime
horizontal sheds are designed to be
strong and durable. We strive to make assembly as
easy as possible without compromising quality. If
you get stuck, we have tools to help:
• Watch Our Instructional Videos
Scan the code below to see how it all comes
together.
http://go.lifetime.com/60170playlist
• Assemble on a Level Surface
• Recruit Friends and Family
Assembly should take 3 people about 1–2
hours to complete.
For Customer Service in mainland Europe:
E-mail: cs@lifetimeproducts.eu
TOOLS REQUIRED
NEED HELP? TALK TO US!
Call: 1-800-225-3865
7:00 am–5:00 pm (Monday–Friday) MST
and 9:00 am–1:00 pm Saturday MST
Electric Drill
Hammer Drill
Lifetime's assembly experts offer quick responses and great customer service.
Web: www.lifetime.com/instructions
Live Chat: www.lifetime.com/instructions
Icon Legend................................4
Warnings & Notices.....................5
Parts Identifi er............................6
Floor & Wall Assembly..................8
Door Assembly..........................21
Lid Assembly............................33
Storage Box Anchoring..............43
Cleaning & Care........................47
Registration..........................48
5/16" (8 mm) Wood Drill Bit
Warranty.................................49
5/16" (8 mm) Masonry Drill Bit
MODEL# AND PRODUCT ID
Model Number:
60170
TABLE OF CONTENTS
(you will need both when contacting us)
Product ID:
Advertisement

Subscribe to Our Youtube Channel
Related Manuals for Lifetime 60170


Summary of Contents for Lifetime 60170
- Page 1 5/16” (8 mm) Wood Drill Bit Warranty.........49 5/16” (8 mm) Masonry Drill Bit Electric Drill Hammer Drill Lifetime’s assembly experts offer quick responses and great customer service. NEED HELP? TALK TO US! Call: 1-800-225-3865 MODEL# AND PRODUCT ID (you will need both when contacting us) Web: www.lifetime.com/instructions...
- Page 2 For English, see page 1. Para el español, ver la página 3. ABRI DE RANGEMENT ® Les abris de rangement Lifetime sont conçus pour être solides et durables. Nous nous efforçons de rendre l’assemblage aussi facile que possible sans compromettre la qualité. Si vous êtes coincé, nous avons les outils nécessaires pour vous aider :...
- Page 3 5/16” (8 mm) Broca para madera Garantía........51 5/16” (8 mm) Broca para albañilería Taladro eléctrico Martillo perforador Los expertos de ensemble Lifetime ofrecen respuestas rápidas y servicio valorado. ¿NECESITA AYUDA? ¡LLÁMENOS! ® MODELO E ID DEL PRODUCTO (necesitará los dos al contactarnos) Llame al 1.800.225.3865...
- Page 4 ICON LEGEND / LÉGENDE DES ICÔNES / LEYENDA DE ÍCONOS • Indicates special heed should be taken when reading. • Indique qu’une attention spéciale doit être prise lors de la lecture. • Indica que uno debe prestar atención al leer. •...
- Page 5 WARNINGS & NOTICES / AVERTISSEMENTS ET AVIS / ADVERTENCIAS Y AVISOS TOOLS & HARDWARE REQUIRED / OUTILS ET QUINCAILLERIE REQUIS INSTRUMENTAL Y HERRAJE REQUERIDOS English: • Failure to follow these warnings may result in serious injury or property damage and will void warranty. •...
- Page 6 PARTS IDENTIFIER / IDENTIFICATEUR DE PIÈCES / IDENTIFICADOR DE PIEZAS Plastic Parts / Pièces en plastique Piezas de plástico DRI (x1) DRH (x1) AGY (x1) AGL (x2) AGN (x1) AHD (x2) AGO (x1) AGZ (x1) DRK (x1) DRJ (x1) Metal Parts / Pièces en métal Piezas de metal DWK (x1)
- Page 7 PARTS IDENTIFIER / IDENTIFICATEUR DE PIÈCES / IDENTIFICADOR DE PIEZAS Metal Parts / Pièces en métal Piezas de metal DUM (x1) DUN (x1) DUP (x1) DUO (x1) Blister Packs / Blisters Blísteres Small Parts Bags / Sacs de petites pièces Bolsas de piezas pequeñas...
- Page 8 FLOOR & WALL ASSEMBLY / ASSEMBLAGE DU PLANCHER ET DES PORTES / ENSAMBLE DEL PISO Y LAS PUERTAS HARDWARE REQUIRED / QUINCAILLERIE REQUISE / HERRAJE REQUERIDO Blister Pack / Blister Blíster BHJ (x2) ADZ (x22) DUL (x2) AYR (x2) EEV (x1) ADV (x12) PARTS REQUIRED / PIÈCES REQUISES / PIEZAS REQUERIDAS Metal Parts /...
- Page 9 FLOOR & WALL ASSEMBLY / ASSEMBLAGE DU PLANCHER ET DES PORTES / ENSAMBLE DEL PISO Y LAS PUERTAS PARTS REQUIRED / PIÈCES REQUISES / PIEZAS REQUERIDAS Plastic Parts / Pièces en plastique Piezas de plástico DRI (x1) DRH (x1) AGN (x1) AGY (x1) AGL (x2) AHD (x2)
- Page 10 • Deslice las lengüetas en el panel de piso (DRH) entre ellas en el panel de piso (DRI) y debajo ese panel. Aplane el panel. http://go.lifetime.com/hsboxfloorandwall • Insert the Screws (AYR) into the divots in the Floor • Insert the tabs at the bottom of the panel (AHD) Panels to secure them together.
- Page 11 SECTION 1 (CONTINUED) / SECTION 1 (SUITE) SECCIÓN 1 (CONTINUACIÓN) TOOLS & HARDWARE REQUIRED / OUTILS ET QUINCAILLERIE REQUIS INSTRUMENTAL Y HERRAJE REQUERIDOS • Slide the panel to the left. • Glissez le panneau à gauche. • Deslice el panel a la izquierda. •...
- Page 12 SECTION 1 (CONTINUED) / SECTION 1 (SUITE) SECCIÓN 1 (CONTINUACIÓN) TOOLS & HARDWARE REQUIRED / OUTILS ET QUINCAILLERIE REQUIS INSTRUMENTAL Y HERRAJE REQUERIDOS ADZ (x4) • Slide the panel to the right. • Glissez le panneau à droite. • Deslice el panel a la derecha. •...
- Page 13 SECTION 1 (CONTINUED) / SECTION 1 (SUITE) SECCIÓN 1 (CONTINUACIÓN) TOOLS & HARDWARE REQUIRED / OUTILS ET QUINCAILLERIE REQUIS INSTRUMENTAL Y HERRAJE REQUERIDOS ADZ (x4) 1.10 • Slide the panel forward. • Tilt the panel as you bend it to get it in front of •...
- Page 14 SECTION 1 (CONTINUED) / SECTION 1 (SUITE) SECCIÓN 1 (CONTINUACIÓN) TOOLS & HARDWARE REQUIRED / OUTILS ET QUINCAILLERIE REQUIS INSTRUMENTAL Y HERRAJE REQUERIDOS ADZ (x12) 1.12 1.13 • Repeat steps 1.9–1.11 for the left side. • Insert the tabs at the bottom of the Corner panel •...
- Page 15 SECTION 1 (CONTINUED) / SECTION 1 (SUITE) SECCIÓN 1 (CONTINUACIÓN) TOOLS & HARDWARE REQUIRED / OUTILS ET QUINCAILLERIE REQUIS INSTRUMENTAL Y HERRAJE REQUERIDOS 1.17 1.16 • Attach the two Vertical Support Tubes (DUM & DUN). • Flip the Assembly on its back. •...
- Page 16 SECTION 1 (CONTINUED) / SECTION 1 (SUITE) SECCIÓN 1 (CONTINUACIÓN) TOOLS & HARDWARE REQUIRED / OUTILS ET QUINCAILLERIE REQUIS INSTRUMENTAL Y HERRAJE REQUERIDOS BHJ (x1) 1.19 • Slide the Tubes through the holes in the Floor Panels and into the Wall Panels until the Tubes hang out about 6" (15,24 cm).
- Page 17 SECTION 1 (CONTINUED) / SECTION 1 (SUITE) SECCIÓN 1 (CONTINUACIÓN) TOOLS & HARDWARE REQUIRED / OUTILS ET QUINCAILLERIE REQUIS INSTRUMENTAL Y HERRAJE REQUERIDOS ADV (x6) 1.20 • Attach the two Horizontal Support Tubes (DUO & DUP). • Attachez les deux tubes de support horizontaux (DUO & DUP). •...
- Page 18 SECTION 1 (CONTINUED) / SECTION 1 (SUITE) SECCIÓN 1 (CONTINUACIÓN) TOOLS & HARDWARE REQUIRED / OUTILS ET QUINCAILLERIE REQUIS INSTRUMENTAL Y HERRAJE REQUERIDOS ADV (x6) 1.22 • Align the holes in the Rear Wall Panels with those in the Tubes. Loosely insert six (6) Screws (ADV). Adjust rear Tubes so that the corners are at 90°.
- Page 19 SECTION 1 (CONTINUED) / SECTION 1 (SUITE) SECCIÓN 1 (CONTINUACIÓN) TOOLS & HARDWARE REQUIRED / OUTILS ET QUINCAILLERIE REQUIS INSTRUMENTAL Y HERRAJE REQUERIDOS BHJ (x1) DUL (x2) 1.23 • Insert a Self-Drilling Screw (BHJ) into the Tubes at the location shown. •...
- Page 20 SECTION 1 (CONTINUED) / SECTION 1 (SUITE) SECCIÓN 1 (CONTINUACIÓN) TOOLS & HARDWARE REQUIRED / OUTILS ET QUINCAILLERIE REQUIS INSTRUMENTAL Y HERRAJE REQUERIDOS ADZ (x2) EEV (x1) 1.25 • Set the Door Stop (EEV) onto the Floor at the location indicated and align the holes. Secure with two Screws (ADZ). •...
- Page 21 DOOR ASSEMBLY / ASSEMBLAGE DES PORTES / ENSAMBLE DE LAS PUERTAS HARDWARE REQUIRED / QUINCAILLERIE REQUISE / HERRAJE REQUERIDO Blister Pack / Blister Blíster DUL (x9) ADX (x14) ADW (x2) ADZ (x4) BYZ (x4) DXW (x8) AEE (x6) Small Parts Bag / Sac de petites pièces Bolsa de piezas pequeñas ENI (x1)
- Page 22 DOOR ASSEMBLY / ASSEMBLAGE DES PORTES / ENSAMBLE DE LAS PUERTAS PARTS REQUIRED / PIÈCES REQUISES / PIEZAS REQUERIDAS Plastic Parts / Pièces en plastique Piezas de plástico AGO (x1) AGZ (x1) TOOLS REQUIRED / OUTILS REQUIS / INSTRUMENTAL REQUERIDO...
- Page 23 • Si tiene problemas con esta sección, siga el código debajo para ver un video sobre el ensamble de esta sección. http://go.lifetime.com/hsboxdoor • Attach a Support Channel (DZA) to the back of the Left Door (AGO), and align the holes.
- Page 24 SECTION 2 (CONTINUED) / SECTION 2 (SUITE) SECCIÓN 2 (CONTINUACIÓN) TOOLS & HARDWARE REQUIRED / OUTILS ET QUINCAILLERIE REQUIS INSTRUMENTAL Y HERRAJE REQUERIDOS ADX (x4) • Secure the Channel using four (4) Screws (ADX). • Attachez le canal à l’aide de quatre (4) vis (ADX). •...
- Page 25 SECTION 2 (CONTINUED) / SECTION 2 (SUITE) SECCIÓN 2 (CONTINUACIÓN) TOOLS & HARDWARE REQUIRED / OUTILS ET QUINCAILLERIE REQUIS INSTRUMENTAL Y HERRAJE REQUERIDOS ADZ (x2) ENI (x1) • Attach the Locking Tab (ENI) to the Left Door using the hardware included. •...
- Page 26 SECTION 2 (CONTINUED) / SECTION 2 (SUITE) SECCIÓN 2 (CONTINUACIÓN) TOOLS & HARDWARE REQUIRED / OUTILS ET QUINCAILLERIE REQUIS INSTRUMENTAL Y HERRAJE REQUERIDOS BYZ (x2) ADX (x6) BYR (x1) ADW (x1) AEE (x3) BYS (x1) • Attach the Channel to the Left Door using six (6) Screws (ADX). •...
- Page 27 SECTION 2 (CONTINUED) / SECTION 2 (SUITE) SECCIÓN 2 (CONTINUACIÓN) TOOLS & HARDWARE REQUIRED / OUTILS ET QUINCAILLERIE REQUIS INSTRUMENTAL Y HERRAJE REQUERIDOS DXW (x4) DWJ (x2) • These Screws (DXW) go through the Hinge, Door, and through the holes in the Channel. •...
- Page 28 SECTION 2 (CONTINUED) / SECTION 2 (SUITE) SECCIÓN 2 (CONTINUACIÓN) TOOLS & HARDWARE REQUIRED / OUTILS ET QUINCAILLERIE REQUIS INSTRUMENTAL Y HERRAJE REQUERIDOS DUL (x1) AHS (x1) • Slide the Tube (DWK) into the Right Door (AGZ) until it hangs out about six inches. •...
- Page 29 SECTION 2 (CONTINUED) / SECTION 2 (SUITE) SECCIÓN 2 (CONTINUACIÓN) TOOLS & HARDWARE REQUIRED / OUTILS ET QUINCAILLERIE REQUIS INSTRUMENTAL Y HERRAJE REQUERIDOS ADX (x4) 2.10 • Align the four (4) holes in this Channel (DZA) with those in the Right Door. •...
- Page 30 SECTION 2 (CONTINUED) / SECTION 2 (SUITE) SECCIÓN 2 (CONTINUACIÓN) TOOLS & HARDWARE REQUIRED / OUTILS ET QUINCAILLERIE REQUIS INSTRUMENTAL Y HERRAJE REQUERIDOS BYR (x1) BYZ (x2) AEE (x3) ADW (x1) BYS (x1) EOO (x1) ADZ (x2) 2.12 • Attach the Handle (BYR & BYS) to the Right Door as shown. •...
- Page 31 SECTION 2 (CONTINUED) / SECTION 2 (SUITE) SECCIÓN 2 (CONTINUACIÓN) TOOLS & HARDWARE REQUIRED / OUTILS ET QUINCAILLERIE REQUIS INSTRUMENTAL Y HERRAJE REQUERIDOS DXW (x4) DWJ (x2) 2.14 • These Screws (DXW) go through the Hinge, Door, and through the holes in the Channel. •...
- Page 32 SECTION 2 (CONTINUED) / SECTION 2 (SUITE) SECCIÓN 2 (CONTINUACIÓN) TOOLS & HARDWARE REQUIRED / OUTILS ET QUINCAILLERIE REQUIS INSTRUMENTAL Y HERRAJE REQUERIDOS DUL (x8) 2.15 • Attach the Right Door to the Assembly using Self-Drilling Screws (DUL). Repeat this step for the Left Door. •...
- Page 33 LID ASSEMBLY / ASSEMBLAGE DU COUVERLE / ENSAMBLE DE LA TAPA HARDWARE REQUIRED / QUINCAILLERIE REQUISE / HERRAJE REQUERIDO Blister Pack / Blister Blíster BES (x6) ADJ (x4) BLB (x4) BER (x6) ADX (x15) DDL (x8) ADZ (x6) Small Parts Bag / Sac de petites pièces Bolsa de piezas pequeñas DWD (x1)
- Page 34 LID ASSEMBLY / ASSEMBLAGE DU COUVERLE / ENSAMBLE DE LA TAPA PARTS REQUIRED / PIÈCES REQUISES / PIEZAS REQUERIDAS Metal Parts / Pièces en métal Piezas de metal DWA (x2) Plastic Parts / Pièces en plastique Piezas de plástico DRK (x1) DRJ (x1) TOOLS REQUIRED / OUTILS REQUIS / INSTRUMENTAL REQUERIDO 7/16 in/po (11 mm)
- Page 35 • Si tiene problemas con esta sección, siga el código debajo del borde de la tapa izquierda (DRK). para ver un video sobre el ensamble de esta sección. http://go.lifetime.com/hsboxlid • Align the six holes and secure the Lid pieces together. • Alignez les six trous et attachez les couvercles.
- Page 36 SECTION 3 (CONTINUED) / SECTION 3 (SUITE) SECCIÓN 3 (CONTINUACIÓN) TOOLS & HARDWARE REQUIRED / OUTILS ET QUINCAILLERIE REQUIS INSTRUMENTAL Y HERRAJE REQUERIDOS 7/16 in/po (11 mm) ADJ (x4) BLB (x4) ENL (x1) ADX (x2) • Tighten the Keeper (ENL) to the Lid Supports (DWA). Then, insert the left end of the Lid Support into the slit in the Lid as shown.
- Page 37 SECTION 3 (CONTINUED) / SECTION 3 (SUITE) SECCIÓN 3 (CONTINUACIÓN) TOOLS & HARDWARE REQUIRED / OUTILS ET QUINCAILLERIE REQUIS INSTRUMENTAL Y HERRAJE REQUERIDOS 1/2 in/po (x2) (13 mm) (x2) BET (x2) ADX (x4) AAO (x2) DWB (x1) DWD (x1) • Attach the hardware to the Left Hinge (DWD), and tighten securely. •...
- Page 38 SECTION 3 (CONTINUED) / SECTION 3 (SUITE) SECCIÓN 3 (CONTINUACIÓN) TOOLS & HARDWARE REQUIRED / OUTILS ET QUINCAILLERIE REQUIS INSTRUMENTAL Y HERRAJE REQUERIDOS DDL (x4) • Insert the end of the left Hinge into the notch in the Lid, and rotate downward. •...
- Page 39 SECTION 3 (CONTINUED) / SECTION 3 (SUITE) SECCIÓN 3 (CONTINUACIÓN) TOOLS & HARDWARE REQUIRED / OUTILS ET QUINCAILLERIE REQUIS INSTRUMENTAL Y HERRAJE REQUERIDOS 1/2 in/po (x2) (13 mm) (x2) BET (x2) AAO (x2) DDL (x4) DWE (x1) 3.10 • Attach the hardware to the Right Hinge (DWE), and tighten securely. •...
- Page 40 SECTION 3 (CONTINUED) / SECTION 3 (SUITE) SECCIÓN 3 (CONTINUACIÓN) TOOLS & HARDWARE REQUIRED / OUTILS ET QUINCAILLERIE REQUIS INSTRUMENTAL Y HERRAJE REQUERIDOS 7/16 in/po (x2) (11 mm) (x2) BES (x6) ADX (x3) BER (x6) 3.12 • Place the Hinges down onto the rear Panels. Align the three holes, and secure with the hardware shown. Do not overtighten Nuts.
- Page 41 SECTION 3 (CONTINUED) / SECTION 3 (SUITE) SECCIÓN 3 (CONTINUACIÓN) TOOLS & HARDWARE REQUIRED / OUTILS ET QUINCAILLERIE REQUIS INSTRUMENTAL Y HERRAJE REQUERIDOS Bottom / Inférieur Inferior Top / Supérieur Superior AFK (x2) 3.14 • Orient the Gas Spring (AFK) as shown. The end of the Gas Spring can be rotated to align it with the Ball Stud. •...
- Page 42 SECTION 3 (CONTINUED) / SECTION 3 (SUITE) SECCIÓN 3 (CONTINUACIÓN) TOOLS & HARDWARE REQUIRED / OUTILS ET QUINCAILLERIE REQUIS INSTRUMENTAL Y HERRAJE REQUERIDOS ADX (x6) 3.15 • Open the Right Door Completely, and close the Lid. Close the Hasp over the Locking Tab. You may need to adjust the position of the Hasp in step 3.16.
- Page 43 STORAGE SHED ANCHORING / ANCRAGE DE L’ABRI DE RANGEMENT / ANCLAJE DEL CASETA/ COBERTIZO DE ALMACENAMIENTO HARDWARE REQUIRED / QUINCAILLERIE REQUISE / HERRAJE REQUERIDO Hardware / Quincaillerie Herraje NO HARDWARE OR PARTS INCLUDED FOR THIS SECTION AUCUNE QUINCAILLERIE OU PIÈCE INCLUSE POUR CETTE SECTION NINGÚN HERRAJE O PIEZA INCLUIDO PARA ESTA SECCIÓN 8 mm (5/16") Wood Drill Bit 1/2 in/po (13 mm)
- Page 44 SECTION 4 (CONTINUED) / SECTION 4 (SUITE) SECCIÓN 4 (CONTINUACIÓN) TOOLS & HARDWARE REQUIRED / OUTILS ET QUINCAILLERIE REQUIS INSTRUMENTAL Y HERRAJE REQUERIDOS • If you wish, you can anchor your storage shed to a concrete or wood platform. Tilt the box on its back and drill through the Floor at the points shown using a 8 mm (5/16") drill bit.
- Page 45 SECTION 4 (CONTINUED) / SECTION 4 (SUITE) SECCIÓN 4 (CONTINUACIÓN) TOOLS & HARDWARE REQUIRED / OUTILS ET QUINCAILLERIE REQUIS INSTRUMENTAL Y HERRAJE REQUERIDOS 14 mm (9/16 in/po) 8 mm (5/16 in/po) (x4) or / ou / o and / et / y (x4) (x4) 8 mm (5/16 in/po)
-
Page 46: Notes / Remarques / Notas
NOTES / REMARQUES / NOTAS... -
Page 47: Cleaning And Care
Congratulations on your Lifetime ® product purchase. By following the instructions below, your new Lifetime product should provide you with years of service and enjoyment. The polyethylene panels are stain- and solvent-resistant. Most stains can be removed using a mild soap and a soft-bristled brush. - Page 48 REGISTER today! ENREGISTREZ VOTRE PRODUIT EN LIGNE À WWW.LIFETIME.COM Chez Lifetime®, nous nous engageons à fournir des produits innovateurs de qualité. Lors de votre inscription, vous aurez l’occasion de nous faire parvenir vos commentaires. Votre opinion est importante pour nous.
- Page 49 All merchandise is sold on this condition, and no representative of the company may waive or change this policy. 5. This product is not intended for institutional or commercial use; Lifetime Products, Inc. does not assume any liability for such use. Institutional or commercial use will void the warranty.
-
Page 50: Garantie Limitée De 5 Ans
DISPONIBLES OU SONT OBSOLÈTES 1. L’abrí de rangement Lifetime est garanti à l’acheteur d’origine contre tous défauts de matériau ou de fabrication pendant une durée de cinq ans à partir de la date d’achat d’origine. Le mot « défauts » signifi e des défectuosités qui empêchent l’utilisation du produit. - Page 51 6. Esta garantía se otorga en reemplazo expreso de toda otra garantía, expresa o implícita, incluidas las garantías de comercialización o adaptación para el uso en la medida permitida por las leyes federales y estatales. Ni Lifetime Products, Inc., ni ninguno de sus representantes asume ninguna otra responsabilidad en conexión con este producto. Esta garantía le otorga derechos legales específi...
- Page 52 ® MEJORE SU COMPRA DE LIFETIME AGREGANDO ACCESORIOS U OTROS MARAVILLOSOS PRODUCTOS Para comprar accesorios u otros productos visítenos en: de Lifetime®, visítenos en: www.lifetime.com O llame al: 1-800-424-3865 De lunes hasta viernes 7:00 hr–17:00 hr Horario Éstandar de la Montaña (MST) y sábados 9:00 hr–13:00 hr (MST)
Need help?
Do you have a question about the 60170 and is the answer not in the manual?
Questions and answers